Advertisement
Quick Links
Advertisement

Related Manuals for ComNav SinoGNSS MarsLaser RTK


Summary of Contents for ComNav SinoGNSS MarsLaser RTK
- Page 1 Mars Laser RTK User Guide Mars Laser RTK User Guide...
- Page 2 Copyright Notice This is the V1.0 (August, 2022) revision of the Mars User Guide. It cannot be copied or translated into any language without the written permission of ComNav Technology Ltd. Technical Assistance If you have any question and can't find the answer in this manual, please contact your local dealer from which you purchased the Mars.
- Page 3 CAUTION- A Caution alerts you to a possible risk of damage to the equipment and/or data loss. Warranty Notice ComNav Technology does not warranty devices damage because of force majeure (lighting, high voltage or collision). ComNav Technology does not warranty the disassembled devices.
-
Page 4: Table Of Contents
Mars Laser User Guide Contents 1. Introduction ..........................1 1.1. About the receiver .......................1 1.2. Receiver features .........................1 1.3. Mars parts list ........................1 1.3.1 Basic Supply kit ......................2 1.3.2 Optional Datalink kit ......................4 1.3.3 Transport Cases ......................5 2. Setting up the receiver ......................6 2.1. - Page 5 Mars Laser User Guide 5.8 Internal GPRS Mode ......................42 5.8.1 Point to Point/Points mode (P to PS mode) ..............42 5.8.2 Internal 4G Ntrip client mode ..................43 6. Basic Survey Functions ......................44 6.1 Topo survey ........................44 6.1.1 Survey settings ......................
-
Page 6: Introduction
Mars Laser User Guide 1. Introduction The SinoGNSS Mars User Guide is aimed to help you get familiar with the Mars laser RTK and start your project effectively. We highly recommend you to read this manual before surveying, even you have used other GNSS receivers before. 1.1. -
Page 7: Basic Supply Kit
Mars Laser User Guide 1.3.1 Basic Supply kit SinoGNSS® Mars Basic Supply kit contains one receivers and related accessories Item Pictur 1*Kits Mars Receivers 1*GNSS Connector 1*7-pin Lemo to RS232 Cable 1* 7-pin Lemo to USB Cable External Power Cable 1* Whip Antenna (UHF) 1*2m-Range Pole with yellow bag... - Page 8 Mars Laser User Guide 2* Lithium-ion Battery 1* Battery Charger R550 Controller Controller Battery, Charger and Cable Controller Bracket Optional accessories: Double Bubbles Tribrach with High Adapter 1* 30cm Extension bar...
-
Page 9: Optional Datalink Kit
Mars Laser User Guide 1.3.2 Optional Datalink kit This kit is necessary for long distance radio communication, shown in the following figures: Item Picture External Radio CDL7 2-pin Lemo Power Cable 7-pin Lemo Data Cable N-Type to TNC Convertor N-type to N-type Antenna Cable N-Type Radio Antenna... -
Page 10: Transport Cases
Mars Laser User Guide 1.3.3 Transport Cases Standard transport case is designed for containing basic supply kit of one SinoGNSS○R Mars GNSS Receiver. Base Rover The optional choice is provided to have capacity of two kits of Mars receivers... -
Page 11: Setting Up The Receiver
Mars Laser User Guide 2. Setting up the receiver This chapter provides general information on environmental requirements, setup, power supply and connection of the Mars. 2.1. Environmental requirements To keep the receiver with a reliable performance, it is better to use the receiver in safe environmental conditions: •... -
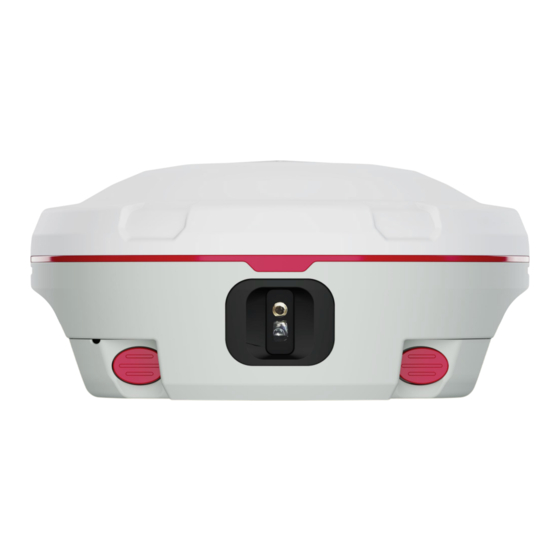
Page 12: Lower Housing
Mars Laser User Guide 2.4. Lower housing Receiver lower housing contains a serial port, UHF radio antenna connector, two removable battery compartments (the SIM card slot is located in compartment A), and a threaded insert. 2.5. Power supply Mars supports two internal batteries and external power input. 2.5.1 Internal batteries The receiver is equipped with two rechargeable Lithium-ion batteries, which can be removed for charging. -
Page 13: External Power Supply
Mars Laser User Guide Charging the Lithium-ion Battery Although a dual battery charge is provided, the lithium-ion battery is supplied partially charged. To charge the battery, first remove the battery from the receiver, and then place it in the battery charger, which is connected to AC power. Please obey the following instructions when charging your batteries: Charge the battery completely before using it for the first time. -
Page 14: Pole -Mounted Setup
Mars Laser User Guide • Receiver will charge the battery from Side B to Side A, the red power led will flashing during charging and will off when battery full. 2.6 Pole -mounted setup To mount the receiver on a range pole as the figure shown below: Thread the receiver onto the range pole ... -
Page 15: Led Behavior
Mars Laser User Guide • Power button: Press the power button for about 1 second to turn on the receiver; To turn off the receiver, long press the button for 3-4 seconds until all LEDs off. • Record button: Switch to static mode:Long press the record button for about 2 seconds, release immediately when hearing beep from receiver;... -
Page 16: Receiver Web Gui Interface
Mars Laser User Guide Power LED: Power supply: 1) Two power LEDs are on if using the external power supply; 2) Only power LED of working battery will be on if using the internal battery. Low battery: 1) Power LED will flash with beep only with one battery; 2) if with two batteries, the power LED of low battery will flash, and swapped to another battery when it is run off. -
Page 17: Checking The Receiver Status
Mars Laser User Guide 3.3.1 Checking the receiver status In the section, you can check System information, Status, 4G Network, Bluetooth, Wifi, Position info, satellite info. (1) System information, includes the basic information includes receiver type, serial number, system firmware version, board firmware version, radio firmware (radio type), front panel firmware (Mars doesn’t have front LCD panel), Web version. - Page 18 Mars Laser User Guide (4) Bluetooth information, shows Bluetooth name and Mac address, Bluetooth name cannot be changed; WIFI information, shows WIFI name, current Wifi password and Mac address. The Wifi password is 12345678, the client can change the password, click Save config to save configuration.
- Page 19 Mars Laser User Guide (6) Satellites Info, includes Tracking graph, Tracking skyplot.
-
Page 20: Configuration
Mars Laser User Guide 3.3.2 Configuration This section includes Satellite tracking, work mode, Antenna setup and Base station configuration. • Satellite tracking, includes Smooth Pseudorange, default is OFF; Elevation mask: default is 10 degrees; and every system status, supports to change by customers, click Enter to save settings, click Cancel to cancel the settings. - Page 21 Mars Laser User Guide • Base station configuration: Setup the station ID, Antenna height, measure method supports slant height and vertical height; then click Get position to set the current position or you can enter the coordinate yourself, click Start to start the base setup, click Stop to stop the base setup.
- Page 22 Mars Laser User Guide When setup the Ntrip Client, you can go to Device Info->Status to check current device status and datalink status. (2) Radio: The model is RX, set the frequency, minimum interval is 12.5 KHz; the protocol is Transparent; set the power, supports 0.5w, 1w and 2w; check on Use, click Enter to apply the internal radio;...
- Page 23 Mars Laser User Guide Base settings include Ntrip Server (Same with internal GSM in Survey Master) and Radio (Same with internal radio in Survey Master). (1) Ntrip Server: a) Start the base: if you have started the base setup in Base Station Configuration, then no need to setup again, just click Next;...
- Page 24 Mars Laser User Guide After you setup base using Ntrip server successfully, you can go to Device->Status to check current base settings, and the rover can get the mountpoint from the server you set. (2) Radio: a) You need to setup base station coordinate first, refer to the Ntrip Server settings. b) Setup the radio parameters: The model is TX, set the frequency, minimum interval is 12.5 KHz;...
-
Page 25: Receiver Management
Mars Laser User Guide 3.3.3 Receiver Management This section includes Data Transfer, Data record, Data Download and Receiver Utility. 3.3.3.1 Data Transfer Data transfer has five types: Com1, Com2(Bluetooth), TCP Server, TCP Client, Web Ntrip. • Com1: This is setup to transfer the data through com1 port of the OEM board inside. You can use serial port cable to check the data transmission (the lemo port is connected to Com1 of the OEM board inside). - Page 26 Mars Laser User Guide (3) NMEA data output frequency supports 1hz, 2hz, 5hz, 10hz, 15hz. • TCP Server: You can output data through TCP server, then use TCP client to get data. For example, connect your rover or computer and Mars receiver in the same LAN, setup Mars to output RTCM data via TCP server, and rover receives via TCP Client.
- Page 27 Mars Laser User Guide • WEBNTRIP: This function can be used to work with Drone via WIFI. (1) Base setup: setup base coordinate and antenna first. (2) WEB configuration: setup the IP 192.168.1.8, port 12345, mountpoint T31U02027, and choose RTCM3.2(MSM5), then check on Use, click Enter, it will transfer data through WIFI (3) Connect your drone remote with the receiver WIFI.
- Page 28 Mars Laser User Guide cable to connect PC and download static data. In recording setting interface, you can get following information: • Current internal memory capacity and free storage; you can click Format Disk to format the receiver internal memory; •...
- Page 29 Mars Laser User Guide • Auto recording: when you set automatically, it will record static data automatically when the receiver tracks satellites, and you can stop recording by pressing the static button on the receiver; • Manual recording: when you set manually, then it will not record data automatically when the receiver tracks satellites, need to press the static button on the receiver.
- Page 30 Mars Laser User Guide 3.3.3.4 Receiver Utility In this section, you can control Mars remotely, including: • Reboot: Restart the receiver • Factory Default: recover the receiver to factory default setting...
- Page 31 Mars Laser User Guide 3.3.3.5 Firmware update You can update the system firmware (OS), board firmware (GNSS), front panel firmware (LCD) and radio firmware (RADIO) in this menu. Select system, GNSS, RADIO firmware upgrade according to your demand, then click Browse to select the latest firmware version.
-
Page 32: Static Survey
Mars Laser User Guide 4. Static survey This chapter describes static survey through Mars receiver and CRU software. For static survey, you cannot change settings through front panel, you can configure it via Compass Receiver Utility (CRU): 1) Receiver configuration; 2) check receiver settings and status;... -
Page 33: Static Data Collection
Mars Laser User Guide 4.2 Static Data Collection Static survey is mainly used for the control survey. To reach millimeter accuracy, follow as below: • At least 3 GNSS receivers are required to form a stable triangulation network. • It is better to set Data Log Session as manual on the known point. •... - Page 34 2. Default memory for Mars receiver is 8GB, and 16GB, 32GB optional. 3. The receiver will stop recording raw data if the internal memory runs out. 4.4 RINEX Convert After copy raw observation data to PC, you can convert the data from ComNav binary format (*.cnb) to RINEX in CRU software.
- Page 35 Mars Laser User Guide type again. You can also add, edit and delete antenna types based on your requirement. • Click to change Convert Settings, mainly export format and export observation information. Tip: In some Post Processing software, the BeiDou observations cannot be processed, you can uncheck the BeiDou B1,B2,B3 observations.
-
Page 36: Real-Time Kinematic Survey (Rtk)
Mars Laser User Guide 5. Real-Time Kinematic Survey (RTK) This chapter introduces how to conduct RTK Survey with Survey Master Software, including software installation, start a new project, receiver connection and RTK working modes (CORS). 5.1 Installation of Survey Master Survey Master is available on Google play, you can download for free and install the software to SinoGNSS controller R60. -
Page 37: Start A New Project
Mars Laser User Guide 3. Work mode: Click Select to go into Quick Setup interface to start your receiver as Rover. For detailed information, you can refer from chapter 5.5. You start your receiver as Rover, then you can start work directly of topo survey or stakeout 5.3 Start a New Project Click Project, you can use the same Datum with last project, choose a datum in store and... - Page 38 Mars Laser User Guide ⚫ Select a Predefined datum: You can select datum directly from the list. Survey Master currently has 49 countries datum and will add more afterwards. ⚫ Create a User defined datum: If you cannot find datum you want in the list, follow instructions below to add one: select Ellipsoid, Projection for your datum, and even seven parameters, geoid model based on your request.
-
Page 39: Bluetooth Connection
Mars Laser User Guide ⚫ Share Datum via QR code. ⚫ After you build a project, press the project name, it will generate a QR code. Users can use the Scan function in the main interface to access the coordinate system. - Page 40 ⚫ Click Find device—select SN of your Mars —allow pair. After connect ComNav receiver, you can check the device version in Device Info. After connected successfully, the top will show the positioning status. Tip: If you are failed to connect with receiver through Survey Master, you can just follow prompt info to go into the device Bluetooth setting interface to make sure Bluetooth paired successfully.
-
Page 41: Internal Radio Mode
Mars Laser User Guide 5.5 Internal Radio Mode Mars GNSS receiver supports transmit & receive the correction data in internal radio mode. To conduct the RTK survey in internal radio mode, it requires: ①A controller with software installed ②An extension bar ③one base receiver and one Mars GNSS receiver ④Two whip antennas ⑤A range pole with bracket... - Page 42 Mars Laser User Guide ⚫ Protocol and channel: Set protocol and frequency for the ⚫ Start mode: Fix position means you have a known coordinate for base, or get a point from GNSS; ⚫ Differential mode: Support RTCM32, RTCM32(MSM5), RTD, CMR, CMR+(GPS only)
-
Page 43: Start Rover Station By Survey Master
Mars Laser User Guide ⚫ Library choose: Choose a known point from Element; ⚫ Receive: Receive a point from GNSS; When start Base succeed, it will show as below in Survey Master. 5.5.2 Start Rover Station by Survey Master ⚫ Connect Survey Master with Mars receiver via Bluetooth based on Chapter 5.4. -
Page 44: External Radio Mode
Mars Laser User Guide 5.6 External radio mode The external radio mode can extend RTK working distance, which is ideal for areas with high constructions or strong signal interference. To set up external radio mode, it requires: ⚫ Base station ①... - Page 45 Mars Laser User Guide ⚫ Rover station ① A Mars receiver ② A Whip antenna ③ A controller with software installed ④ A range pole with bracket ⚫ Click Device-> Base ->Add, select External radio. When start succeed, set up the frequency channel, and Rover frequency should be same.
-
Page 46: Pda Cors Mode
Mars Laser User Guide 5.7 PDA CORS Mode Without setting up your own base stations, the Mars GNSS receiver can receive correction data transmitted from continuously operating reference station via PDA ’ s GPRS or WIFI. To do RTK survey in PDA CORS mode, it requires: ①... -
Page 47: Internal Gprs Mode
Therefore, SIM cards are required both in the Base and Rover. Tip: ComNav technology provides a free static server address 211.144.120.104:8888, anyone can upload CORS data as long as abide by the agreement. -
Page 48: Internal 4G Ntrip Client Mode
Mars Laser User Guide After successfully starting the Base station, the differential LED (yellow) flashes once per second, which means the Base is broadcasting correction data; Configure the Rover as below: ⚫ Protocol: Select SINOGNSS directly; ⚫ BaseName: Enter the SN of the Base receiver. 5.8.2 Internal 4G Ntrip client mode For Ntrip client mode, Rover acquires correction data from Ntrip(CORS) server. -
Page 49: Basic Survey Functions
Mars Laser User Guide 6. Basic Survey Functions This section describes the basic survey functions of Survey Master, including point measurement, Topo survey, Auto survey, Area survey, Static, PPK, staking, site calibration, import and export measured points. 6.1 Topo survey Click Topo Survey->... - Page 50 Mars Laser User Guide : Click this to show the whole points on the interface. : If the arrow is out of sight on the interface, you can click this to locate the receiver position, then the arrow will be shown on the interface. ⚫...
-
Page 51: Survey Settings
Mars Laser User Guide 6.1.1 Survey settings ⚫ Fixed: only fixed result can be saved; ⚫ Duplicate name: allow point name same; ⚫ RMS: point accuracy need higher than the value; ⚫ Offset radius: point cannot offset bigger than the value during measure; ⚫... -
Page 52: Tilt Survey
6.1.2 Tilt survey Tilt survey option will appear when receiver supports for tilt survey, it is available for ComNav Technology Mars Laser RTK, use IMU sensor. According to the IMU sensor, can meets the requirement of high precision measurement. When the tilts within 60 ° , the built-in sensor based IMU precisely calculates the actual offset, which accuracy can up to 5.5 cm. - Page 53 Mars Laser User Guide ② Initialization If you want to use laser, you just need to start laser mode in survey inter face and follow the steps to initialize the IMU and laser. During operation, make receiver can search the satellites and get a fixed solution In survey interface, you can find the bubble and angle value shows the pole you tilt, also laser distance.
-
Page 54: Auto Survey/Area Survey
Mars Laser User Guide 6.2 Auto survey/Area survey For Auto survey, it supports automatic and continuous survey according to Time or Distance. For Area survey, it can compute area directly after getting points. Press , it will show the coordinate information, press , it will show the area result, press , it will show the shape on map. -
Page 55: Stake Points/Lines
Mars Laser User Guide 6.3 Stake points/lines Go into Stake point interface, click to choose a point and tap Stake. Survey Master provides a navigation map when staking points/lines. If you are close to the target point enough, it will alarm you based on the alarm range you set. Enter the point name and code based on your requirements, then click Various navigation info choices You can also Import points for staking, or add from Library choose. - Page 56 Mars Laser User Guide Tip: keep your receiver vertical to the ground. For staking lines, click -> add line (Two points or Point + Azimuth + Distance) -> click -> Choose one line and click Stake. The default method to stake is “To line”, press method to choose a method you want.
-
Page 57: Ppk
Mars Laser User Guide • To line: show shortest way to find a point on line; • To station ID: stake points on line by defined interval; • Distance of 2 points: show distance of current location to the line’s start point and end point;... - Page 58 Mars Laser User Guide 25 53...
-
Page 59: Site Calibration/Grid Shift
Mars Laser User Guide 6.5 Site calibration/Grid Shift 6.5.1 Site calibration Site calibration is commonly needed once in one project, and all the points will be collected based on calibrated datum system. 1. Choose manual pair or auto pair. 2. If you choose manual pair, you can directly enter at least three groups ’ point to compute. - Page 60 Mars Laser User Guide Click to add K1, K2, K3 Click to add A1, A2, A3 3. If you choose auto pair, it will auto compute according to the same name for known point and measured point. After click Compute to calculate, the software will calibrate automatically.
-
Page 61: Grid Shift
Mars Laser User Guide 6.5.2 Grid Shift Grid reset function is applied when you need to change the position of Base station in the same project. Click Grid Shift in Survey interface -> add current Base point and target Base point -> Click Compute ->... -
Page 62: Data Export/Import
Mars Laser User Guide • Angular transformation: Angular type transform; • Two points: Calculate two points distance; • Point to line: Distance from point to one line; • Offset point: Calculate point with azimuth and distance; • Deflection angle: Calculate angle of two lines; •... -
Page 63: Import
Mars Laser User Guide 7.1 Import Tap Import in project interface, there are some predefined data formats, click More formats to get more predefined formats. Besides, you can click Add to create a User- defined type. Long press the predefined data format that you don ’ t use often, you can move this format to the More formats page;... -
Page 64: Export
Mars Laser User Guide 7.2 Export Tap Export in Project interface to export simple data of survey points. Also, click More formats to export the survey points with detailed information or other formats like stake points/lines, DXF, SHP, KML, RAW, RW5, HTML, CASS feature result. Same with Import result, long press the predefined data format to select the interface you want to place. -
Page 65: Import Basemap
Mars Laser User Guide For the points, lines and polygons you surveyed in Topo survey and Feature survey, you can click Export DXF to export dxf file, then you can edit them in third party CAD software, or import to Basemap to check, or import to Stake CAD to stake. Choose the data that you want to export including survey point, input point, control point, stake point, base, line and polygon, and the layer properties includes name, code and height, the default text height is 0.5. -
Page 66: Export Result
Mars Laser User Guide Remember go survey settings to check on display basemap, click zoom button to auto show basemap. 8. Export Result 8.1 NMEA 0183 output With NMEA 0183 function, you can quickly set to output NMEA data from lemo port or Bluetooth. -
Page 67: Register Mars Via Survey Master
Mars Laser User Guide This option is same as the command “saveconfig”. Log com1 gpgga ontime 1 Data transfer: for transmit all the BT output to the address. 8.2 Register Mars via Survey Master Normally, the register code is like this: ID:03401012 $$:49-0B-79-23-00-00-00-95-85 FUNCTIONREG:2207453726-3851620954-0949162572-0697504466-0613618189-0027539229... -
Page 68: Firmware Upgrade
Mars Laser User Guide You need copy the whole code, include the word ‘FUNCTIONREG:’ FUNCTIONREG:2207453726-3851620954-0949162572-0697504466-0613618189-0027539229 Copy the whole code, and enter the cursor to next line, then send. Send command: LOG REGLIST To check receiver register status. 9. Firmware Upgrade Prepare a USB-TypeC cable. -
Page 69: Appendix A: 7-Pin Lemo Definition
Mars Laser User Guide 1. Copy the firmware software to your PC, connect Veuns to your PC via type-c cable and turn on the receiver. 2. Open the firmware program, select proper port to connect with receiver, click “Open”, only choose” OS” and “GNSS” and then click “Start”. Wait for a minute, it will be successful. -
Page 70: Appendix B: Physical Parameter Of Modules Inside Of Mars
Appendix B: Physical Parameter of Modules inside of Mars Radio: Radio parameter Specifications Frequency range 410.125-469.625MHz Protocol Transparent Airlink rate 9600 bps Bandwidth 12.5kbps Power 0.5, 1, Work distance 10-15km, depends on power supply and environment condition Modulation GMSK/4FSK Bluetooth: Frequency Range: 2.402Ghz-2.480Ghz... - Page 71 FCC Warning This device complies with part 15 of the FCC rules. Operation is subject to the following two conditions: (1) this device may not cause harmful interference, and (2) this device must accept any inte rference received, including interference that may cause undesired operation.
Need help?
Do you have a question about the SinoGNSS MarsLaser RTK and is the answer not in the manual?
Questions and answers