Table of Contents
Advertisement
Quick Links
Advertisement
Table of Contents

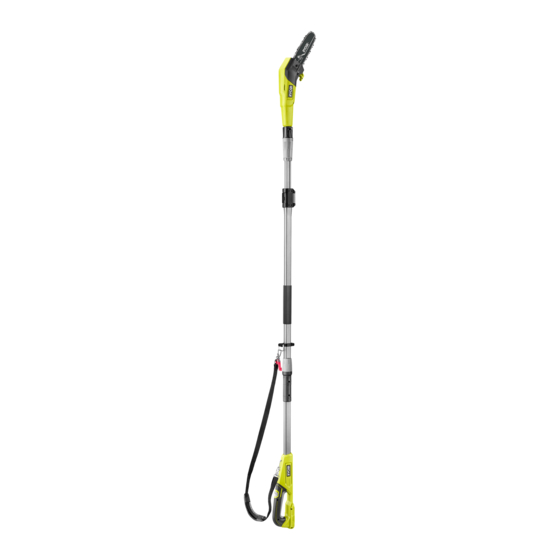
Summary of Contents for Ryobi R18PPS130
- Page 1 R18PPS130...
- Page 2 ■ Do not expose power tools to rain or wet conditions. IMPORTANT! Water entering a power tool will increase the risk of It is essential that you read the instructions in this manual electric shock. before assembling, operating, and maintaining the ■...
- Page 3 ■ Disconnect the plug from the power source and/ SERVICE or remove the battery pack, if detachable, from ■ Have your power tool serviced by a qualified repair the power tool before making any adjustments, person using only identical replacement parts. This changing accessories, or storing power tools.
- Page 4 ● before performing maintenance release mechanism may prevent serious injury in the case of an emergency. Never wear additional clothing ● whenever the product starts to vibrate abnormally or anything over the harness that restricts access to the (check immediately) quick-release mechanism.
-
Page 5: Maintenance
● Do not overreach. This helps prevent unintended tip MAINTENANCE contact and enables better control of the product in ■ Use only original manufacturer’s replacement parts, unexpected situations. accessories, and attachments. Failure to do so can cause ● Use only replacement bars and chains specified by possible injury, can contribute to poor performance, and the manufacturer. -
Page 6: Symbols In This Manual
Wear non-slip, heavy-duty protective gloves when handling the pole pruner and the blade. Wear non-slip safety footwear when using the product. Wear ear, eye, and head protection. Regulatory Compliance Mark (RCM). The product meets applicable regulatory requirements. Waste electrical products should not be disposed of with household waste. - Page 7 R18PPS130 Bar bolt Saw chain Guide bar Ribbed bumper Chain tensioning screw Sprocket cover Guide bar cover Coupler Telescopic release latch Telescopic pole Powerhead Trigger lock On/Off trigger Operator's manual Harness Battery pack Charger Extension pole Know your product...
- Page 8 Always wear eye, ear, and head Insert the pruner attachment into the telescopic pole coupler, and tighten the protection when operating the product. coupler. Install the telescopic pole into the powerhead coupler, and tighten the Wear non-slip, heavy-duty protective coupler. gloves.
- Page 9 Operating the Installing the Adjusting the p.10 p.12 p.13 product extension pole chain tension 3-4 mm Replacing the p.14 saw chain Cleaning the Storing the p.16 p.17 product product...
-
Page 10: Operating The Product
≤60˚ ≥15m (50') OPERATING THE PRODUCT WARNING: Risk of electrocution! Do not operate within 10 m of overhead electrical power lines. Position the product at an angle of 60° or less, depending on the specific situation. Keep bystanders at least 15 m away. - Page 11 3. Make sure to position the ribbed bumper to the main limb or trunk before making the cut. NOTE: Make a shallow first cut (1/4 of limb diameter) on the underside of the limb close to the main limb or trunk. Make a second cut from the top side of the limb outboard from the first cut.
- Page 12 INSTALLING EXTENSION POLE 1. Install the extension pole into the telescopic pole coupler, and tighten the coupler. 2. Connect the pruner attachment into the extension pole coupler, and tighten the coupler. WARNING: Do not use more than one extension pole at any time. 3.
-
Page 13: Adjusting The Chain Tension
3-4 mm ADJUSTING THE CHAIN TENSION 1. Press the latch, and remove the battery pack. 2. Using the wrench, loosen the bar bolt of the sprocket cover. 3. Adjust the chain tension using a flat- head screwdriver. increase chain tension, turn the chain tensioning screw clockwise. -
Page 14: Replacing The Saw Chain
REPLACING THE SAW CHAIN 1. Press the latch, and remove the battery pack. 2. Using the wrench, loosen the bar bolt of the sprocket cover. 3. Remove the sprocket cover and guide bar. 4. Dispose of the old saw chain and prepare the new one. - Page 15 6. Fit the saw chain over the sprocket and into the bar groove. The cutters on the top of the guide bar should face towards the bar tip, in the direction of the chain rotation. NOTE: Place the saw chain so that the cutters face the correct direction, the drive links are aligned and inside the bar groove, and there is a loop at the back of the guide...
-
Page 16: Cleaning The Product
10. Fully tighten the bar bolt and sprocket cover using the wrench. CLEANING THE PRODUCT 1. Press the latch, and remove the battery pack. 2. Remove all foreign materials from the product with a soft, dry brush. WARNING: Do not use water to clean the product. -
Page 17: Storing The Product
STORING THE PRODUCT 1. Press the latch, and remove the battery pack. 2. Fit the guide bar cover. 3. Loosen the shaft coupling to release the lower tube from the pruner attachment. 4. Store the product in a cool, dry, and well-ventilated place that is inaccessible to children and away from sources of ignition. -
Page 18: Product Specifications
Cordless pole saw standardised test and may be used to compare one tool with Model R18PPS130 another. They may be used for a preliminary assessment of exposure. Voltage 18 V d.c. - Page 20 Unit C, 70 Business Parade South, Highbrook, Auckland 2013, New Zealand RYOBI is a trade mark of Ryobi Limited, and is used under license. TRILINK is a registered trade mark of Trilink Saw Chain, LLC. POWERFIT is a trade mark of Techtronic Outdoor Products Technology Limited in ANZ.


Need help?
Do you have a question about the R18PPS130 and is the answer not in the manual?
Questions and answers