Table of Contents

Related Manuals for Eaton TRIPP LITE B005-DPUA2-K


Summary of Contents for Eaton TRIPP LITE B005-DPUA2-K
- Page 1 Owner’s Manual 2-Port DisplayPort 1.4 KVM Switch Model: B005-DPUA2-K 4K Video, Audio and Peripheral Sharing Purchased product may differ from image. Español 13 Français 25 Deutsch 37 Italiano 49...
-
Page 2: Package Contents
Package Contents • B005-DPUA2-K 2-Port DisplayPort 1.4 KVM Switch • IR Extender • IR Remote Control • (2) USB 3.2 Gen 1 A/B Device Cables (M/M) • External Power Supply (Input: 100–240V, 50/60 Hz, 0.5A; Output: 5V 3A) • Owner’s Manual Optional Accessories •... -
Page 3: Product Features
Product Features • Controls 2 DisplayPort computers from a single DisplayPort video console • Supports True 4K @ 60 Hz video resolutions, including 4:4:4 HDR and HDCP 2.2 • DisplayPort 1.4 compliant • Supports RGB 4:4:4/ YCbCr 4:4:4/ YCbCr 4:2:2/ YCbCr 4:2:0 •... -
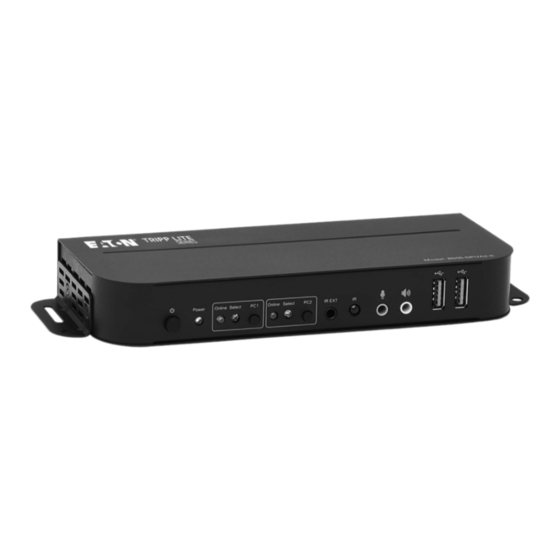
Page 4: Panel Descriptions
Panel Descriptions Front Panel 1 2 2 4 4 5 5 6 6 7 7 1 Power – Press to turn the unit on and off. 2 Power Indicator – Illuminates red to signal the DC power supply is connected to an outlet and the KVM switch is turned on. 3 Input Selector –... - Page 5 Panel Descriptions Rear Panel 9 Outputs a. Connect a mouse and keyboard to the USB 2.0 ports. b. Connect an amplifier to the 3.5 mm stereo port. c. Connect a microphone to the 3.5 mm microphone port. d. Connect a local HDMI monitor to the HDMI Out port. e.
- Page 6 Installation and Operation Refer to the following steps and diagram to set up your KVM switch installation. Note: Before making any connections, make sure power to all devices connected to the KVM switch is turned off. Unplug the power cords of any computers that have the Keyboard Power On function.
- Page 7 Installation and Operation 3. Connect the included DC power supply, and press the Power button. The Power LED will illuminate. When computers are connected to the PC1 and PC2 ports, the Online LEDs will illuminate. 4. Press the buttons on the front panel to select the desired computer. The Select LED will illuminate to indicate which computer is currently selected.
-
Page 8: Special Function Operation
Special Function Operation 1. Mouse Traversal Function – Place the mouse on the far right of the monitor, and continue to slide it to the right for 2 seconds. The KVM switch will automatically switch to the next port. Switching order is PC1>PC2>PC1>…... - Page 9 Special Function Operation Notes: 1) Hotkeys are not case-sensitive. 2) A noise sounds when switching between PC1 and PC2. ¹ “++” means to press [Scroll Lock] twice in rapid succession. For example: [Scroll Lock] ++ [Scroll Lock] + [1]” means to press the Scroll Lock button twice in rapid succession and then press the number 1 button.
-
Page 10: Specifications
Specifications Connectors KVM Connectors (Female) USB 3.2 Gen 1-B x2 (Rear) DisplayPort x2 (Rear) 3.5 mm Stereo x2 (Green, Rear) 3.5 mm Stereo x2 (Pink, Rear) Console Connectors (Female) USB 2.0-A x2 (Rear) DisplayPort x1 (Rear) HDMI x1 (Rear) 3.5mm Stereo x2 (Green, 1 Front, 1 Rear) 3.5mm Stereo x2 (Pink, 1 Front, 1 Rear) USB Hub Connectors (Female) USB 3.2 Gen 1-A x2 (Front) -
Page 11: Warranty
(3) years from the date of initial purchase. Our obligation under this warranty is limited to repairing or replacing (at its sole option) any such defective products. Visit Tripplite. Eaton.com/support/product-returns before sending any equipment back for repair. This warranty does not apply to equipment which has been damaged by accident, negligence or misapplication or has been altered or modified in any way. - Page 12 Eaton 1000 Eaton Boulevard Cleveland, OH 44122 United States Eaton.com © 2023 Eaton Eaton is a registered trademark. All Rights Reserved Publication No. 23-08-243 / 93-3C24_RevB All trademarks are property December 2023 of their respective owners.
- Page 13 Manual del Propietario KVM DisplayPort 1.4 de 2 Puertos Modelo: B005-DPUA2-K Video 4K, Audio y Compartido de Periféricos El producto comprado puede diferir de la imagen. English 1 Français 25 Deutsch 37 Italiano 49...
-
Page 14: Contenido Del Empaque
Contenido del Empaque • B005-DPUA2-K – KVM DisplayPort 1.4 de 2 Puertos • Extensor IR • Control Remoto IR • (2) Cables para dispositivos USB 3.2 Gen 1 A/B (M/M) • Fuente de Alimentación Externa (Entrada: 100V ~ 240V, 50Hz / 60Hz, 0.5A;... -
Page 15: Características Del Producto
Características del Producto • Controla 2 computadoras DisplayPort desde una sola consola de video DisplayPort • Soporta resoluciones de video 100% 4K @ 60 Hz, incluyendo HDR 4:4:4 y HDCP 2.2 • Cumple con DisplayPort 1.4 • Soporta RGB 4:4:4/ YCbCr 4:4:4/ YCbCr 4:2:2/ YCbCr 4:2:0 •... -
Page 16: Descripciones Del Panel
Descripciones del Panel Panel Frontal 1 2 2 4 4 5 5 6 6 7 7 1 Encendido – Presione para encender y apagar la unidad. 2 Indicador de Encendido – Se ilumina en rojo para indicar que la fuente de alimentación de CD está conectada a un tomacorriente y el KVM está... - Page 17 Descripciones del Panel Panel Posterior 9 Salidas a. Conecte un teclado y mouse a los puertos USB 2.0. b. Conecte un amplificador al puerto estéreo de 3.5 mm. c. Conecte un micrófono al puerto para micrófono de 3.5 mm. d. Conecte un monitor HDMI local al puerto de salida HDMI. e.
-
Page 18: Instalación Y Operación
Instalación y Operación Refiérase a los siguientes pasos y diagrama para configurar la instalación de su KVM. Nota: Antes de efectuar cualquier conexión, cerciórese que estén apagados todos los dispositivos conectados al KVM. Desconecte los cables de alimentación de cualquier computadora que tenga la función de encendido de teclado. Amplificador Micrófono Extensor IR Dispositivos USB (impresora, escáner,... - Page 19 Instalación y Operación 3. Conecte la fuente de alimentación de 12V CD incluida y presione el botón de encendido Se iluminará el LED de encendido. Cuando las computadoras estén conectadas a los puertos PC1 y PC2, se encenderán los LEDs en línea. 4.
- Page 20 Operación de Función Especial 1. Función Transversal del Mouse – Coloque el mouse en el extremo derecho del monitor y continúe deslizándolo a la derecha por 2 segundos. El KVM cambiará automáticamente al siguiente puerto. El orden de cambio de ciclo es PC1>PC2>PC1>… 2.
- Page 21 Operación de Función Especial Notas: 1) Las teclas rápidas no distinguen mayúsculas y minúsculas. 2) Suena un ruido al alternar entre PC1 y PC2. ¹ “++” significa presionar [Scroll Lock] dos veces en rápida sucesión. Por ejemplo: [Scroll Lock] ++ [Scroll Lock] + [1]” significa presionar dos veces en rápida sucesión el botón Scroll Lock y entonces presionar el botón número 1.
-
Page 22: Especificaciones
Especificaciones Conectores Conectores del KVM (Hembra) USB 3.2 Gen 1 B x2 (Posterior) DisplayPort x2 (Posterior) Estéreo de 3.5 mm x2 (Verde, Posterior) Estéreo de 3.5 mm x2 (Rosa, Posterior) Conectores de Consola (Hembra) USB 2.0 A x2 (Posterior) DisplayPort x1 (Posterior) HDMI x1 (Posterior) Estéreo de 3.5 mm x2 (Verde, 1 Frontal, 1 Posterior) - Page 23 Nuestra obligación bajo esta garantía está limitada a la reparación o reemplazo (a su entera discreción) de cualquier producto defectuoso. Antes de devolver cualquier equipo para reparación, visite Tripplite.Eaton.com/ support/product-returns. Esta garantía no se aplica a equipos que hayan sido dañados por accidente, negligencia o mal uso, o hayan sido alterados o modificados de alguna manera.
- Page 24 Eaton 1000 Eaton Boulevard Cleveland, OH 44122 Estados Unidos Eaton.com Eaton es una marca registrada. © 2023 Eaton Todos los derechos reservados Todas las marcas registradas son Publicación No. 23-08-243 / 93-3C24_RevB propiedad de sus respectivos Diciembre de 2023 propietarios.
- Page 25 Manuel d'utilisation Commutateur KVM 2 Ports Modèle : DisplayPort 1.4 B005-DPUA2-K Partage vidéo 4K, audio et périphérique Le produit acheté peut différer de l’image. English 1 Español 13 Deutsch 37 Italiano 49...
-
Page 26: Contenu Du Carton D'emballage
Contenu du carton d'emballage • B005-DPUA2-K Commutateur KVM 2 Ports DisplayPort 1.4 • Extension IR • Télécommande IR • (2) Câbles de périphérique USB 3.2 Gen 1 A/B (M/M) • Alimentation externe (Entrée : 100-240 V, 50/60 Hz, 0,5 A ; Sortie : 5 V 3 A) •... -
Page 27: Caractéristiques Du Produit
Caractéristiques du produit • Contrôle 2 ordinateurs DisplayPort à partir d'une seule console vidéo DisplayPort • Prend en charge les résolutions vidéo True 4K @ 60 Hz, y compris 4:4:4 HDR et HDCP 2.2 • Compatible DisplayPort 1.4 • Prend en charge RGB 4:4:4 / YCbCr 4:4:4 / YCbCr 4:2:2 / YCbCr 4:2:0 •... - Page 28 Descriptions des panneaux Panneau avant 1 2 2 4 4 5 5 6 6 7 7 1 Alimentation - Appuyez sur cette touche pour allumer et éteindre l'appareil. 2 Indicateur d'alimentation - S'allume en rouge pour signaler que l'alimentation CC est connectée à une prise et que le commutateur KVM est sous tension.
- Page 29 Descriptions des panneaux Face arrière 9 Sorties a. Connecter une souris et un clavier aux ports USB 2.0. b. Connecter un amplificateur au port stéréo 3,5 mm. c. Connecter un microphone au port microphone de 3,5 mm. d. Connecter un moniteur HDMI local au port HDMI Out. e.
-
Page 30: Installation Et Fonctionnement
Installation et fonctionnement Reportez-vous aux étapes et au diagramme suivants pour procéder à l'installation de votre commutateur KVM. Remarque : Avant d'effectuer toute connexion, assurez-vous que l'alimentation de tous les appareils connectés au commutateur KVM est coupée. Débranchez les cordons d'alimentation de tous les ordinateurs dotés de la fonction de mise sous tension sur clavier. - Page 31 Installation et fonctionnement 3. Connectez l'alimentation CC incluse et appuyez sur le bouton d'alimentation. Le voyant LED d'alimentation s'allumera. Lorsque des ordinateurs sont connectés aux ports PC1 et PC2, les voyants LED Online s'allument. 4. Appuyez sur les boutons du panneau avant pour sélectionner l'ordinateur souhaité.
- Page 32 Fonctionnement des fonctions spéciales 1. Fonction de traversée de la souris - Placez la souris totalement à droite du moniteur et continuez à la faire glisser vers la droite pendant 2 secondes. Le commutateur KVM passera automatiquement au port suivant. L'ordre de commutation est PC1>PC2>PC1>... 2.
- Page 33 Fonctionnement des fonctions spéciales Remarques : 1) Les touches de raccourci ne sont pas sensibles à la casse. 2) Un son retentit lors de la commutation entre PC1 et PC2. ¹ « ++ » signifie que vous appuyez sur [Verr. défil.] deux fois en succession rapide. Par exemple : [Verr.
-
Page 34: Caractéristiques
Caractéristiques Connecteurs Connecteurs KVM (femelle) USB 3.2 Gen 1-B x2 (arrière) DisplayPort x2 (arrière) : Stéréo 3,5 mm x2 (vert, arrière) Stéréo 3,5 mm x2 (rose, arrière) Connecteurs de console (femelle) USB 2.0-A x2 (arrière) DisplayPort x1 (arrière) HDMI x1 (arrière) Stéréo 3,5 mm x2 (vert, 1 avant, 1 arrière) Stéréo 3,5 mm x2 (rose, 1 avant, 1 arrière) Connecteurs Hub USB (femelle) USB 3.2 Gen 1-A x2 (avant) -
Page 35: Garantie
(3) ans à compter de la date d'achat initiale. Notre obligation au titre de cette garantie est limitée à la réparation ou au remplacement (à notre seule discrétion) de tout produit défectueux. Veuillez consulter Tripplite.Eaton.com/support/product- returns avant d'envoyer un produit pour le faire réparer. Cette garantie ne s'applique pas aux équipements qui ont été... - Page 36 Eaton 1000 Eaton Boulevard Cleveland, OH 44122 United States Eaton.com Eaton est une marque déposée. © 2023 Eaton Tous droits réservés. Toutes les marques commerciales Publication n° 23-08-243 / 93-3C24_RevB appartiennent Décembre 2023 à leurs propriétaires respectifs.
- Page 37 Benutzerhandbuch 2-Anschluss-DisplayPort 1.4 Modell: KVM Switch B005-DPUA2-Kl 4 K Video-, Audio- und Peripherie-Sharing Das gekaufte Produkt kann vom Bild abweichen. English 1 Español 13 Français 25 Italiano 49...
-
Page 38: Optionales Zubehör
Lieferumfang • B005-DPUA2-K 2-Anschluss-DisplayPort 1.4 KVM Switch • IR-Extender • IR-Fernbedienung • (2) USB 3.2 Gen 1 A/B-Gerätekabel (M/M) • Externes Netzteil (Eingang: 100 bis 240 V, 50/60 Hz, 0,5 A; Ausgang: 5 V 3 A) • Benutzerhandbuch Optionales Zubehör •... - Page 39 Produktmerkmale • Steuert 2 DisplayPort-Computer über eine einzige DisplayPort-Videokonsole • Unterstützt echte 4K-Videoauflösungen bei 60 Hz, einschließlich 4:4:4 HDR und HDCP 2.2 • DisplayPort 1.4 konform • Unterstützt RGB 4:4:4/ YCbCr 4:4:4/ YCbCr 4:2:2/ YCbCr 4:2:0 • DisplayPort-Ausgänge unterstützen eine Bandbreite von 16 Bits pro Kanal (48-Bit alle Kanäle) Dunkle Farbe und 8,1 GBit/s pro Kanal (32,4 GBit/s alle Kanäle) •...
- Page 40 Bedienfeld-Beschreibungen Frontblende 1 2 2 4 4 5 5 6 6 7 7 1 Einschalten – Taste drücken, um das Gerät ein- und auszuschalten. 2 Betriebsanzeige – Leuchtet rot, um anzuzeigen, dass das DC- Netzteil an eine Steckdose angeschlossen ist und dass der KVM Switch eingeschaltet ist.
- Page 41 Bedienfeld-Beschreibungen Rückwand 9 Ausgänge a. Eine Maus und eine Tastatur an die USB 2.0-Anschlüsse anschließen. b. Einen Verstärker an den 3,5-mm-Stereoanschluss anschließen. c. Ein Mikrofon mit dem 3,5-mm-Mikrofonanschluss verbinden. d. Einen lokalen HDMI-Monitor an den HDMI-Ausgangsanschluss anschließen. e. Einen lokalen DisplayPort-Monitor an den DisplayPort- Ausgangsanschluss anschließen. J PC1-Eingang – Mit Computer-DisplayPort-, USB-, Stereo-Audio- und Mikrofonanschlüssen verbinden. K PC2-Eingang – Mit einem DisplayPort eines zweiten Computers, USB-, Stereo-Audio- und Mikrofonanschlüssen verbinden.
-
Page 42: Installation Und Betrieb
Installation und Betrieb Befolgen Sie die folgenden Schritte und das Diagramm zur Einrichtung Ihrer KVM Switch-Installation. Hinweis: Stellen Sie vor dem Herstellen von Verbindungen sicher, dass die Stromversorgung aller an den KVM Switch angeschlossenen Geräte ausgeschaltet ist. Ziehen Sie die Netzkabel aller Computer ab, die über die Einschaltfunktion per Tastatur verfügen. - Page 43 Installation und Betrieb 3. Das mitgelieferte DC-Netzteil anschließen und die POWER-Taste drücken. Die Power-LED leuchtet auf. Wenn Computer an die PC1- und PC2- Anschlüsse angeschlossen sind, leuchten die Online-LEDs auf. 4. Die Taste auf der Frontblende drücken, um den gewünschten Computerauszuwählen. Die Auswahl-LED leuchtet, um anzuzeigen, welcher Computer gerade ausgewählt ist. Auf dem Monitor wird das entsprechende Bild angezeigt, und der ausgewählte Computer kann über Tastatur und Maus gesteuert werden.
- Page 44 Bedienung der Sonderfunktion 1. Maus-Traversalfunktion – Die Maus ganz rechts auf dem Monitor positionieren und 2 Sekunden lang nach rechts schieben. Der KVM Switch wechselt automatisch zum nächsten Anschluss. Die Reihenfolge der Umschaltung ist PC1>PC2>PC1>... 2. Erkennung der USB-B-Schaltfunktion: a. Wenn das Gerät erkennt, dass ein Computer an den USB-B-Anschluss angeschlossen ist, schaltet es sofort auf diesen Computer um, und die entsprechenden Online- und Auswahl- LEDs leuchten auf.
- Page 45 Bedienung der Sonderfunktion Hinweise: 1) Bei den Hotkeys wird nicht zwischen Groß- und Kleinschreibung unterschieden. 2) Beim Umschalten zwischen PC1 und PC2 ertönt ein Geräusch. ¹ "++" bedeutet, dass Sie zweimal schnell hintereinander auf [Bildlaufsperre] drücken. Zum Beispiel: [Bildlaufsperre] ++ [Bildlaufsperre] + [1]" bedeutet, dass Sie die Taste Bildlaufsperre zweimal schnell hintereinander drücken und dann die Taste 1 drücken.
-
Page 46: Technische Daten
Technische Daten Anschlüsse KVM-Anschlüsse (Buchse) USB 3.2 Gen 1-B x2 (Rückseite) DisplayPort x2 (Rückseite) 3,5 mm Stereo x2 (Grün, Rückseite) 3,5 mm Stereo x2 (Rosa, Rückseite) Konsolenanschlüsse (Buchse) USB 2.0-A x2 (Rückseite) DisplayPort x1 (Rückseite) HDMI x1 (Rückseite) 3,5 mm Stereo x2 (Grün, 1 Vorderseite, 1 Rückseite) 3,5 mm Stereo x2 (Rosa, 1 Vorderseite, 1 Rückseite) USB Hub-Anschlüsse (Buchse) USB 3.2 Gen 1-A x2 (Vorderseite) Videoauflösung... - Page 47 Rahmen dieser Garantie beschränkt sich auf die Reparatur oder den Ersatz (nach eigenem Ermessen) der fehlerhaften Produkte. Besuchen Sie Tripplite.Eaton.com/support/product- returns bevor Sie Geräte zur Reparatur zurücksenden. Diese Garantie gilt nicht für Geräte, die durch Unfall, Fahrlässigkeit oder falsche Anwendung beschädigt wurden oder in irgendeiner Weise geändert oder modifiziert wurden.
- Page 48 Eaton 1000 Eaton Boulevard Cleveland, OH 44122 United States Eaton.com Eaton ist eine eingetragene © 2023 Eaton Marke. Alle Rechte vorbehalten. Veröffentlichung Nr. 23-08-243 / 93-3C24_RevB Alle Marken sind Eigentum Dezember 2023 der jeweiligen Inhaber.
- Page 49 Manuale d'uso Switch KVM DisplayPort 1.4 Modello: a 2 porte B005-DPUA2-K Condivisione di video 4K, audio e periferiche Il prodotto acquistato potrebbe differire dall’immagine. English 1 Español 13 Français 25 Deutsch 37...
-
Page 50: Contenuto Della Confezione
Contenuto della confezione • Switch KVM B005-DPUA2-K 2-Port DisplayPort 1,4 switch • IR Extender • IR Remote Control • (2) Cavi per dispositivi USB 3.2 Gen 1 A/B (M/M) • Alimentazione esterna (Ingresso: 100-240V, 50/60 Hz, 0,5A; Uscita: 5 V 3 A) •... -
Page 51: Caratteristiche Del Prodotto
Caratteristiche del prodotto • Controlla 2 computer DisplayPort da un'unica console video DisplayPort • Supporta le risoluzioni video True 4 K a 60 Hz, incluso 4:4:4 HDR e HDCP 2.2 • DisplayPort conforme a 1.4 • Supporta RGB 4:4:4/ YCbCr 4:4:4/ YCbCr 4:2:2/ YCbCr 4:2:0 •... -
Page 52: Descrizioni Dei Pannelli
Descrizioni dei pannelli Pannello frontale 1 2 2 4 4 5 5 6 6 7 7 1 Alimentazione: premere per accendere e spegnere l'unità. 2 Indicatore di alimentazione: si accende in rosso per segnalare che l'alimentatore CC è collegato a un'uscita e che lo switch KVM è acceso. 3 Selettore di ingresso: si accende in blu per indicare se è... - Page 53 Descrizioni dei pannelli Pannello posteriore 9 Uscite a. Collegare un mouse e una tastiera alle porte USB 2.0. b. Collegare un amplificatore alla porta stereo 3,5 mm. c. Collegare un microfono alla porta microfono di 3,5 mm. d. Collegare un monitor HDMI locale alla porta d'uscita HDMI. e.
-
Page 54: Installazione E Funzionamento
Installazione e funzionamento Si faccia riferimento ai passi e al diagramma seguenti per configurare l'installazione dello switch KVM. Nota: prima di effettuare qualsiasi collegamento, occorre assicurarsi che tutti i dispositivi collegati allo switch KVM siano spenti. Scollegare i cavi di alimentazione di tutti i computer che dispongono della funzione di accensione tastiera. Microfono Amplificatore IR Extender... - Page 55 Installazione e funzionamento 3. Collegare l'alimentatore CC in dotazione e premere il pulsante POWER. Il LED di alimentazione si accende. Quando i computer sono collegati alle porte PC1 e PC2, i LED online si accendono. 4. Premere i pulsanti sul pannello frontale per selezionare il computer desiderato.
- Page 56 Funzionamento della funzione speciale 1. Funzione di traslazione del mouse: posizionare il mouse all'estrema destra del monitor e continuare a farlo scorrere verso destra per 2 secondi; Lo switch KVM passerà automaticamente alla porta successiva. L'ordine di commutazione è PC1>PC2>PC1>... 2.
- Page 57 Funzionamento della funzione speciale Note: 1) I tasti di scelta rapida non differenziano tra minuscole e maiuscole; 2) Quando si passa da PC1 a PC2 si sente un suono. ¹ "++" significa premere due volte [Blocco scorrimento] in rapida successione. Ad esempio: [Blocco Scorrimento] ++ [Blocco Scorrimento] + [1]"...
- Page 58 Specifiche Connettori Connettori KVM (femmina) USB 3.2 Gen 1-B x2 (posteriore) DisplayPort x2 (posteriore) Stereo x2 da 3,5 mm (verde, posteriore) Stereo x2 da 3,5 mm (rosa, posteriore) Connettori console (femmina) USB 2.0-A x2 (posteriore) DisplayPort x1 (posteriore) HDMI x1 (posteriore) Stereo x2 da 3,5 mm (verde, 1 anteriore, 1 posteriore) Stereo x2 da 3,5 mm (rosa, 1 anteriore, 1 posteriore) Connettori hub USB (femmina)
-
Page 59: Garanzia
è limitato alla riparazione o alla sostituzione (a nostra esclusiva discrezione) di qualsiasi prodotto che presenti tali difetti. Prima di inviare un prodotto in riparazione, visitare Tripplite.Eaton.com/support/product-returns. La presente garanzia non si applica alle apparecchiature che sono state danneggiate da incidenti, negligenza o applicazione errata o che sono state alterate o modificate in qualsiasi modo. - Page 60 Eaton 1000 Eaton Boulevard Cleveland, OH 44122 United States Eaton.com ©2023 Eaton Eaton è un marchio registrato. Tutti i diritti riservati Pubblicazione n. 23-08-243 / 93-3C24_RevB Tutti i marchi sono di proprietà Dicembre 2023 dei rispettivi titolari.
Need help?
Do you have a question about the TRIPP LITE B005-DPUA2-K and is the answer not in the manual?
Questions and answers