Table of Contents
Advertisement
Advertisement
Table of Contents

Subscribe to Our Youtube Channel
Related Manuals for Russell Hobbs RHTSCH600B1 SS/B


Summary of Contents for Russell Hobbs RHTSCH600B1 SS/B
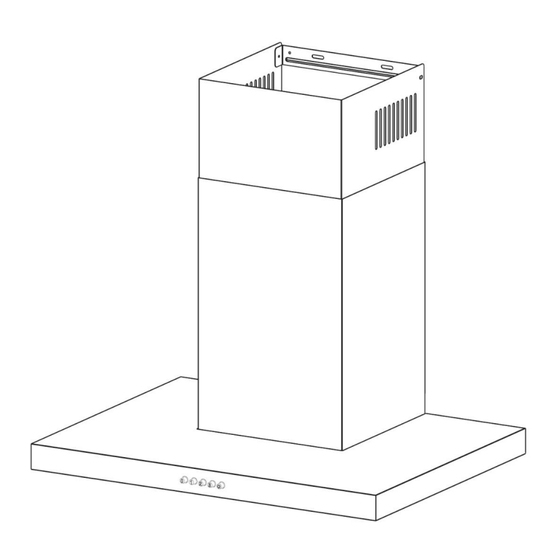
- Page 1 RHTSCH600B1 SS/B Operating Manual RHTSCH900B1 SS/B COOKER HOOD REGISTER YOUR WASH MESH FILTER Remove & wash the mesh filter with FREE 1 YEAR hot water and liquid detergent at least every 3 months GUARANTEE REPLACE FILTERS TODAY MONTHS If recirculating air, replace...
-
Page 2: Guarantee
P a g e GUARANTEE At Russell Hobbs, we take all our customer feedback seriously. 0345 208 8750 Feel free to contact our Product Care Team, on who will be more than happy to assist you. This product is guaranteed for 12 months from the date of the original purchase. -
Page 3: Table Of Contents
P a g e CONTENTS Page Section Guarantee Safety Instructions Parts List Dimensions Installation Location Installation Location & Fitting Installation – Fitting Installation – Ventilation/Recirculation Installation – Chimney Cover Usage Instructions Cleaning Instructions Charcoal Filter Installation/Replacement LED Module Replacement Problem Solving Technical Specification T Series Cooker Hoods Revision 2.1... -
Page 4: Safety Instructions
P a g e IMPORTANT SAFETY INSTRUCTIONS • It is hazardous for anyone other than a competent person to carry out any service or repair operation that involves the removal of a cover which gives protection against exposure to electrical parts. •... - Page 5 P a g e IMPORTANT SAFETY INSTRUCTIONS DO NOT use appliance if it has been dropped, • damaged, left outdoors or dropped into water. Do not operate this appliance for anything other than its intended use • If unit is wet, do not plug unit into wall socket or turn unit on.
-
Page 6: Parts List
P a g e PARTS LIST 1) Cooker Hood Main Unit Screws M4x20 (4 Pieces) Screws ST4.2x9.5 (6 Pieces) 2) Lower Chimney Cover 3) Upper Chimney Cover Screws M4x8-F-H (10 Pieces) [not used 4) Exhaust Pipe with this model] 5) Screws 5x50 (7 pieces) Hood fixing bracket Chimney Fixing Bracket (2 Pieces) 6) Wall Plugs* 10x43 (7 pieces) -
Page 7: Dimensions
P a g e DIMENSIONS 250mm Min 650mm Clearance WARNING – we recommend a minimum of 2 people are required when moving, lifting or fitting the appliance. WARNING – Ensure minimum clearance levels are maintained as outlined in the diagrams above. We recommend the use of a spirit level and square to gauge the surface before installing, to ensure a flush fit. -
Page 8: Installation Location
P a g e INSTALLATION – LOCATION Chimney 400+390 305-650 T Series Cooker Hoods Revision 2.1... -
Page 9: Installation Location & Fitting
P a g e INSTALLATION – LOCATION & FITTING As a first step, proceed with the following drawings: • A vertical line up to the ceiling or up to the upper limit, at the centre of the area in which the hood is to be fitted. •... -
Page 10: Installation - Fitting
P a g e | 10 INSTALLATION - FITTING \\\\\\ 3x Screws (ST5*50) • Hook the hood body to the bracket [11]. • Check the Hood is level • Fix the exhaust pipe on the hood body (see next page). •... -
Page 11: Installation - Ventilation/Recirculation
P a g e | 11 INSTALLATION – VENTILATION/RECIRCULATION EXTERNAL VENTILATION When installing for external ventilation, connect the hood to the chimney using either a flexible or rigid pipe ɸ 150 or ɸ 120 mm, the choice of which is left to the installer. •... -
Page 12: Installation - Chimney Cover
P a g e | 12 INSTALLATION – CHIMNEY COVER Lower Chimney • Fix a Chimney fixing bracket [11] onto the Lower Decorative Chimney [2] with 2 screws [8] (4.2 x 9.5) supplied with the hood. Upper Chimney • Slightly widen the two sides of the upper chimney and hook them between the wall and the bracket [11] which is fixed on the Lower Decorative Chimney [2]. -
Page 13: Usage Instructions
P a g e | 13 USAGE INSTRUCTIONS OFF SWITCH: Press this switch to stop the appliance LOW SPEED: Press to run the appliance at low speed MEDIUM SPEED: Press to run the appliance at medium speed HIGH SPEED: Press to run the appliance at high speed. LIGHT: Press this switch to toggle the LED lights between On and Off Regularly cleaning the filter prolongs the life of your appliance and prevents grease from building up and damaging the appliance... -
Page 14: Cleaning And Maintenance
P a g e | 14 CLEANING & MAINTENANCE Grease Filter • The filter must be cleaned every 3 months of operation, or more frequently for particularly heavy usage, and can be washed in a dishwasher. • Pull the switch to open them. •... -
Page 15: Charcoal Filters (Not Supplied)
P a g e | 15 CHARCOAL FILTERS (NOT SUPPLIED) • Remove the metal grease filters. • Remove the saturated activated charcoal (if fitted) filter by twisting anti-clockwise, and pulling. • Fit the new filters (purchased seperately) by pushing and twisting clockwise. -
Page 16: Led Module Replacement
P a g e | 16 LED REPLACEMENT You cannot change just the bulb, the entire module must be replaced. We recommend an engineer replaces the bulb in all instances. When changing the light modules, the contacts are live. Before changing the light module(s), unplug the appliance from the mains or switch off the circuit breaker in the fuse box. -
Page 17: Problem Solving
P a g e | 17 PROBLEM SOLVING Appliance does • Check appliance is plugged in not operate • Check alternative appliance in the plug socket • Ensure other appliances in the house are operating • If fault persists, contact customer services Light on but no •... -
Page 18: Technical Specification
P a g e | 18 TECHNICAL SPECIFICATION RHTSCH600B1 Dimensions (H) x (W) x (D) cm 440 - 820mm x 600mm x 450mm Wattage 117W Operating Voltage / Frequency AC220-240V, 50Hz Current 0.8A Max. Extraction Rate 400m3/h Energy Usage 41kWh/a Energy Efficiency Rating Noise level 68dB... - Page 19 P a g e | 19 IMPORTANT! WASH MESH FILTER Remove & wash the mesh filter with hot water and liquid detergent at least every 3 months REPLACE FILTERS MONTHS If recirculating air, replace charcoal filters every 6 months This product is guaranteed for 12 months from the date of the original purchase.
- Page 20 Made by Product Care Trading Limited under license from Spectrum Brands (UK) Limited. Product Care Trading Limited, Wigan, WN2 4AY/ PCT (NI) Ltd, Belfast, BT5 5AD. Russell Hobbs is the registered trademark of Spectrum Brands (UK) Ltd. Russell Hobbs Support: call 0345 208 8750 or visit mda.russellhobbs.com...
Need help?
Do you have a question about the RHTSCH600B1 SS/B and is the answer not in the manual?
Questions and answers