Advertisement
Table of Contents
- 1 Table of Contents
- 2 Safety Instructions
- 3 Product Overview
- 4 Positioning
- 5 Operating Modes
- 6 Installation
- 7 Usage
- 8 Cleaning and Maintenance
- 9 Aluminium & Carbon Grease Filters
- 10 Replacing the Light Modules
- 11 Trouble Shooting
- 12 Connection to the Mains Supply
- 13 Guarantee
- 14 Technical Specification
- Download this manual
Advertisement
Table of Contents

Related Manuals for Russell Hobbs RHGCH902B


Summary of Contents for Russell Hobbs RHGCH902B
- Page 1 Cooker Hood Instruction Manual Model number(s): RHGCH902B For Customer Services & Spare Parts please call 0345 208 8750 or visit us at https://mda.russellhobbs.com IMPORTANT: RETAIN FOR FUTURE REFERENCE...
-
Page 2: Table Of Contents
Contents Safety Instructions ………………………………………. Product Overview ………………………………………. Positioning ………………………………………. Operating modes ………………………………………. Installation ………………………………………. 10-15 Usage ………………………………………. Cleaning and Maintenance ………………………………………. 17-23 Aluminium & carbon grease filters ………………………………………. 19-21 Replacing the light module(s) ………………………………………. 22-23 Trouble shooting ………………………………………. Connection to the mains supply ………………………………………. -
Page 3: Safety Instructions
Safety Instructions Important note: Please read this booklet before installing and switching on this appliance. The manufacturer assumes no responsibility for incorrect installation and usage as described in this booklet. This appliance can be used by children aged from 8 years and above and persons with reduced physical, sensory or mental capabilities or lack of experience and knowledge if they have been given supervision or instruction concerning use of the appliance in a safe way and understand... - Page 4 Safety Instructions • Packaging material is dangerous to children. Never allow children to play with packaging material. • Risk of Death - Always ensure adequate fresh air in the room if the appliance is being operated in extraction-air mode at the same time as room air-dependent heat-producing appliance(s) are being operated.
- Page 5 Safety Instructions • Risk of Fire - Grease deposits in the grease filter may catch fire. Clean the grease filter at least every 2 months. • Never operate the appliance without the grease filter. • Grease deposits in the grease filter may catch fire. Never work with naked flames close to the appliance (e.g.
- Page 6 Safety Instructions • A defective appliance may cause electric shock. Never switch on a defective appliance. Unplug the appliance from the mains or switch off the circuit breaker in the fuse box. Contact the after-sales service. • Incorrect repairs are dangerous. Repairs may only be carried out and damaged power cables replaced by one of our trained after-sales technicians.
-
Page 7: Product Overview
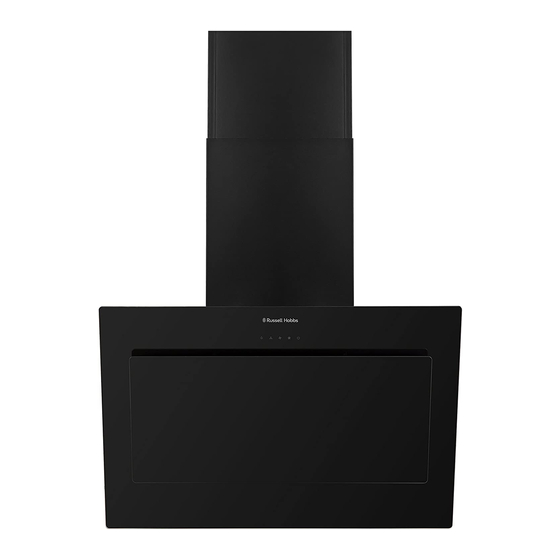
Product overview 7 x wall plugs 7 x large screws 6 x small screws 1 x hood fixing bracket 2 x flue duct fixing bracket 1. Hood 4. Upper flue duct 2. Glass panel 5. Hose 3. Lower flue duct 6. -
Page 8: Positioning
Positioning • This appliance is installed on the wall. • Avoid damaging the product during installation • The appliance can only be used safely if it is correctly installed according to the safety instructions. The installer is responsible for ensuring that the appliance works correct when installed. -
Page 9: Operating Modes
Operating modes This appliance can be used in exhaust-air mode or circulating air mode. Extraction-air mode The air which is drawn in is cleaned by the grease filters and extracted outside by a hose. Important Notes: • The extracted air must not be extracted into a functioning smoke, exhaust gas flue or into a shaft which is used to ventilate installation rooms which contain heat-producing appliances. -
Page 10: Installation
Installation Preparation Ensure that there are no electric wires, gas or water pipes in the area where holes are to be made. 1. Ensure that there is an electrical plug socket within adequate distance of the hood after it has been installed. 2. - Page 11 Installation All measurements in the below diagram are in millimetres (mm) Wall mounted flue duct fixing bracket Hood fixing bracket...
- Page 12 Installation Constructing and aligning the appliance. 1. Loosen and remove the locking shaft and screw from the left hinge bracket on the unit. 2. Carefully hook the right hinge bracket that is on the glass panel on to the left hinge bracket on the unit.
- Page 13 Installation 5. Partially remove the protective film from the back of the appliance. 6. Hook the appliance on to the hood fixing bracket (ensure the hood is fully hooked onto the hood fixing bracket, as the hooks on the bracket are stepped) and check that it is level with a spirit level.
- Page 14 Installation 9. Attach the lower (bigger) flue duct to the appliance by hooking/pushing the holes on the bottom of the flue duct in to the hooks on the top of the cooker hood. You must ensure the flue ducts is securely attached to the main body of the cooker hood.
- Page 15 Installation Attaching the appliance Components inside the appliance may have sharp edges. Wear protective gloves. 1. Slide the upper (smaller) flue duct into the lower (bigger) flue duct. 2. Carefully mount the appliance onto the hood fixing bracket (ensure the hood is fully hooked onto the hood fixing bracket, as the hooks on the bracket are stepped) 3.
-
Page 16: Usage
Usage Note: Switch on the extractor hood when you start cooking and switch it off again several minutes after you have finished cooking. This is the most effective way of removing the kitchen fumes. Control panel Icon Explanation Light on and off Fan speed 1 (low) Fan speed 2 (medium) Fan speed 3 (high) -
Page 17: Cleaning And Maintenance
Cleaning and Maintenance: Important notes: • The appliance will become hot during operation, especially near the bulbs. Allow the appliance to cool down before cleaning. • Penetrating moisture may result in an electric shock. Clean the appliance using a damp cloth only. Before cleaning, pull out the mains plug or switch off the circuit breaker in the fuse box. - Page 18 Cleaning and Maintenance: Surface type How to clean Stainless Steel Hot soapy water: Clean with a dish cloth and dry with a soft cloth. Clean stainless steel surfaces in the direction of the grain only. Special stainless steel cleaning products are from specialist retailers.
-
Page 19: Aluminium & Carbon Grease Filters
Cleaning and Maintenance: Aluminium grease filters: Note: Switch off your hood at the plug socket and unplug it Removing and installing the Aluminium grease filters: Removing 1. Push the panel first and then pull it to open. 2. Press the lock in and pull down the aluminium grease filter. 3. - Page 20 Cleaning and Maintenance: Installing 1. Insert the aluminium grease filter by aligning the 2 metal tabs into the filter holder. 2. Press the lock in and push the filter into place, the let go of the lock to set the filter in place.
- Page 21 Cleaning and Maintenance: Important notes • Grease deposits in the grease filter may catch fire. • Clean the grease filter at least every 2 months. • Never operate the appliance without the grease filter. • Do not use any aggressive, acidic or alkaline cleaning agents. •...
-
Page 22: Replacing The Light Modules
Cleaning and Maintenance: Replacing the light modules • You cannot replaced the light bulbs, the entire light module has to be replaced. • When changing the light modules, the contacts are live. • Before changing the light module(s), unplug the appliance from the mains or switch off the circuit breaker in the fuse box. - Page 23 Cleaning and Maintenance: 3. Remove the light from its fitting (this may require pressure or force to be applied). 4. Put the replacement light module into the fitting (ensuring the terminal is threaded through the fitting) and connect it to the terminal. 5.
-
Page 24: Trouble Shooting
Trouble Shooting: Problem Solution The plug is not plugged in. Connect the appliance to the electricity supply. Power cut Check whether other kitchen appliances are working. The appliance Faulty fuse does not work Check in the fuse box to make sure that the fuse for the appliance is working The fan is faulty. -
Page 25: Connection To The Mains Supply
Connection to the mains supply WARNING- THIS APPLIANCE MUST BE EARTHED This appliance is designed to operate from a mains supply of AC220V ~ 50Hz. Check that the voltage marked on the product corresponds with your supply voltage. For UK use only – Plug fitting details (where applicable): As the colours of the wires in the mains lead of this appliance may not correspond with the coloured markings identifying the terminals in your plug, proceed as follows: The GREEN/YELLOW wire is the EARTH and must be connected to the terminal which... -
Page 26: Guarantee
Guarantee This product is guaranteed for 12 months from the date of the original purchase. If any defect arises due to faulty materials or workmanship you must contact Product Care with the original proof of purchase so a replacement or refund can be arranged. Refund or replacement is at the discretion of Product Care. -
Page 27: Technical Specification
Technical Specification Model number RHGCH902B Rated Voltage 220V – 240V ~ 50Hz Rated input 218W External Dimensions(HxWxD) 535 - 1250mm x 900mm x 420mm Extraction rate 630m³/h Light power 2 x 1.5W LED bulbs... - Page 28 For Customer Services & Spare Parts please call 0345 208 8750 or visit us at https://mda.russellhobbs.com This symbol is known as the 'Crossed-out wheelie bin Symbol'. When this symbol is marked on a product/batteries, it means that the product/batteries should not be disposed of with your general household waste. Only discard electrical/electronic/battery items in separate collection schemes, which cater for the recovery and recycling of materials contained within.
Need help?
Do you have a question about the RHGCH902B and is the answer not in the manual?
Questions and answers