
Subscribe to Our Youtube Channel
Related Manuals for Mitel Unify OpenScape R6


Summary of Contents for Mitel Unify OpenScape R6
- Page 1 A MITEL PRODUCT GUIDE Unify OpenScape DECT Phone Unify OpenScape DECT Phone R6 on Cordless IP User Guide 08/2024 A31003-D1000-U116-02-7619...
- Page 2 Notices The information contained in this document is believed to be accurate in all respects but is not warranted by Mitel Europe Limited. The information is subject to change without notice and should not be construed in any way as a commitment by Mitel or any of its affiliates or subsidiaries.
-
Page 3: Table Of Contents
Contents Overview ......... . 5 Handset. - Page 4 Accessories..............43 Display icons .
-
Page 5: Overview
Overview 1 Torch (spot LED) / Visual call signal Handset 2 Display 3 Status bar ( p. 44) Icons display current settings and operating status of the phone 4 Volume keys ( p. 12) for receiver/headset, ringtone, handsfree mode and appointment reminders 5 Display keys ( p. -
Page 6: Base
Base Base Your handset is registered with a OpenScape Cord- less IP V2 multicell system, that can comprise many base stations. When you move around with your handset within range of the multi-cell system, the handset automatically connects to the base station having the best connection (roaming). -
Page 7: Illustration In The User Guide
Illustration in the user guide Illustration in the user guide Warnings, which if not heeded, can result in injury to persons or damage to devices. Important information regarding function and appropriate handling or functions that could generate costs. Prerequisite for being able to carry out the following action. Additional helpful information. -
Page 8: Safety Precautions
Safety precautions Read the safety precautions and the user guide before use. The device cannot be used in the event of a power failure. In case of a power failure it is also not possible to make emergency calls. Emergency numbers cannot be dialled if the keypad/display lock is activated! Use only rechargeable batteries that correspond to the specification (see list of permitted batteries www.wiki.unify.com /wiki/DECT_Mobilteile). -
Page 9: Getting Started
Contents of the package Getting started Contents of the package • One handset • One battery cover (rear cover for the handset) • One battery • One belt clip • One rubber cover for the headset socket • One rubber cover for the USB connection •... -
Page 10: Charging The Batteries
Handset Covering the headset socket ¤ Plug the lug of the rubber cover for the handset socket into the opening on the left of the handset. ¤ Press down the cap of the rubber cover. Charging the batteries ¤ Charge the batteries fully prior to first use in the charging cradle or using a standard USB mains adapter. -
Page 11: Attaching The Belt Clip
Handset Attaching the belt clip The handset has notches on each side for attaching the belt clip. • Attaching the belt clip: Press the belt clip onto the back of the handset so that the tabs on the belt clip click into place in the notches. •... -
Page 12: Using The Telephone
Getting to know your telephone Using the telephone Getting to know your telephone Switching the handset on/off ¤ Switch on: Press and hold the End call key on the handset when switched off ¤ Switch off: When the telephone is in idle status, press and hold the End call key Locking/unlocking the keypad The keypad lock prevents any accidental use of the telephone. -
Page 13: Functions Key
Getting to know your telephone Functions key The Functions key can be assigned a function of your choice (QuickDial / Send Key). ¤ Press the key . . . The function assigned is performed Assign Functions key p. 36 Display keys The display keys perform a range of functions depending on the operating situation. -
Page 14: Entering Text
Getting to know your telephone Submenus The functions in the submenus are displayed as lists. Example To access a function: . . . use the control key to select a function Settings Date/Time Return to the previous menu level: ¤ Audio Settings Press the display key Back Display &... -
Page 15: Making Calls
Making calls Making calls The base stations of the OpenScape Cordless IP V2 together form the DECT wireless network of the phone system. You can initiate or answer calls on a handset across the whole wireless network and change base station during a call (handover). -
Page 16: Incoming Calls
Making calls Dialling in extension systems (Delayed Extension Dialling) When dialling into a large corporate network (PBX systems), it might be possible to dial an extension number directly after dialling the dial-up number. The phone number can be saved in the directory as follows: Dial-in number, 2 stars, extension number (e.g. -
Page 17: Consultation Calls
Making calls Accepting/rejecting a waiting call during a call During an external call, the call waiting tone signals that another party is trying to call you. The number or name of the caller is displayed if the phone number is sent. ¤... -
Page 18: During A Conversation
Making calls During a conversation Handsfree mode Activating/deactivating handsfree mode during a call and when establishing a connection: ¤ Press the handsfree key Placing the handset in the charging cradle during a call: ¤ Press and hold down the handsfree key . -
Page 19: Call Waiting
Making calls Call waiting During a call, a call waiting tone indicates another caller. If the number is being transferred, you you see the number or the name of the caller on the display. ¤ Reject waiting caller: Reject . . . The waiting caller hears the busy tone ¤... -
Page 20: Call Lists
Call lists Call lists The telephone saves different types of calls (missed, accepted and outgoing calls) in lists. To display the numbers of missed and received calls in the call lists, the relevant option must be enabled on the OpenScape Cordless IP V2. List entry The following information is displayed in the list entries:: Example... -
Page 21: Message Lists
Message lists Message lists Notifications about missed calls, messages on the network mailbox and missed alarms are saved in the messages list and can be shown on the handset display. Which messages are shown on the handset are defined in the configuration of the handset on the Open- Scape Cordless IP V2. -
Page 22: Directories
Directories Directories The following directories are available: • The (local) directory on the handset • Company directories provided over a server The local directory is always available. Which other directories are available is defined by OpenScape Cord- less IP V2. Open directories Open directories with the Directory key ¤... - Page 23 Directories Creating an entry ¤ <New Entry> . . . use to switch between the Example entry fields New Entry Name: ¤ First Name : . . . use to enter the first and/or last name Robert Numbers: ¤ Surname : Tel.1 - Type .
- Page 24 Directories Displaying the number of entries available in the directory ¤ Options Available Memory Copying number to the directory Copy numbers to the directory: • From a list e.g. the call list or the redial listWhen dialling a number The number is displayed or highlighted. ¤...
-
Page 25: Search Directory
Directories Directory entries The following description is an example company directory display on a handset. The menu shows all the directories that have been set up on the OpenScape Directories Cordless IP V2 and activated with the name assigned in each case. In the example on the right, the directory is displayed as Our directory. -
Page 26: Answering Machine
Answering machine Answering machine The answering machine takes incoming calls for the handset. Requirements The following settings are required so that you can receive and listen to voice messages: On the phone system ¤ A network mailbox is set up for the connection assigned to the handset. On the OpenScape Cordless IP V2 ¤... -
Page 27: Additional Functions
Sound profiles Additional functions Sound profiles The telephone has sound profiles for adapting the handset to the environmental conditions: Profile Loud, Profile Silent, Profile Personal. ¤ Press the Profile key . . . The profile currently set is shown ¤ Switch between profiles using key ¤... - Page 28 Calendar Saving appointments to the calendar Date and time have been set. ¤ . . . use to select Organizer Calendar to select desired day OK . . . then ¤ Switch on/off: Activation: use to select On or Off ¤...
-
Page 29: Timer
Timer Timer Setting the timer (countdown) ¤ . . . use to select Organizer Timer . . . then ¤ Enable/disable: Activation: . . . use to select On or Off ¤ Set the duration: Duration . . . use to enter the hours and minutes for the timer Min.: 00:01 (one minute);... -
Page 30: Protection Against Unwanted Calls
Protection against unwanted calls Protection against unwanted calls Time control for external calls Date and time have been set. Enter a time period during which the handset should suspend ringing to Example indicate external calls e.g. during the night. ¤ Time Control . -
Page 31: Resource Directory
Resource Directory Resource Directory Sounds for ringtones and images that can be used as caller pictures (CLIP pictures) or as a screensaver are saved in the handset's resource directory. A range of monophonic and polyphonic sounds and pictures have been pre-set but further images and sounds can be downloaded using a PC ( Gigaset QuickSync). -
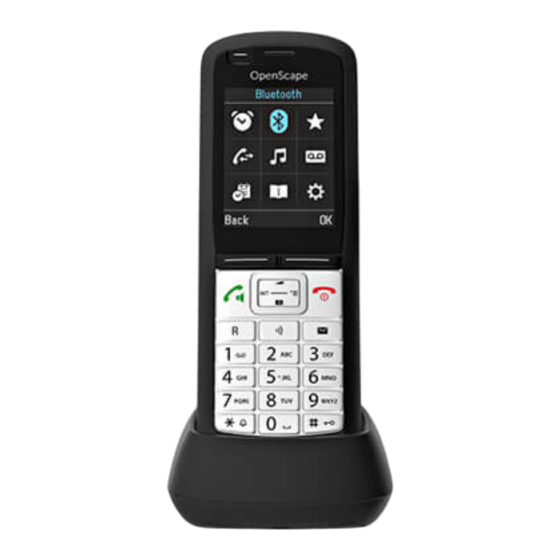
Page 32: Bluetooth
Bluetooth Bluetooth The handset is able to use Bluetooth™ to communicate wirelessly with other devices that also use this tech- nology, e.g. to connect a Bluetooth headset or hearing aid. Bluetooth is activated and the devices have been registered to the handset. The following devices can be connected: •... -
Page 33: Rejecting/Accepting A Non-Registered Bluetooth Device
Bluetooth Edit an entry ¤ . . . use to select Bluetooth Known Devices . . . use to select entry . . . possible options: ¤ View an entry: View . . . the device name and device address are displayed Press OK to go back De-registering a device: ¤... -
Page 34: Additional Functions Using The Pc Interface
Additional functions using the PC interface Additional functions using the PC interface The Gigaset QuickSync program has been installed on the computer. QuickSync functions: • Sync the handset's directory with Microsoft® Outlook® • Upload CLIP-pictures (.bmp) from the computer to the handset •... -
Page 35: Adjusting The Telephone Settings
Handset Adjusting the telephone settings Handset Changing the language ¤ . . . use to select Settings Language . . . use select language Select ( = selected) If the handset has been set to an incomprehensible language: ¤ Press the keys slowly one after the other . -
Page 36: Tones And Signals
Handset Display backlight The display backlight always illuminates when the handset is taken out of the base station/charging cradle or when a key is pressed. Any digit keys that are pressed appear on the display for pre-dialling. Switch the display backlight on/off when in idle status: ¤... -
Page 37: Automatic Volume Control
Handset Automatic volume control Crescendo is not set for the ringtone volume ( p. 37). The phone is able to automatically adjust the volume of the receiver and ringtone to the ambient volume. Here you can set the sensitivity with which the phone reacts to changes in noise level (Very High, High, Medium, Low, Very Low). -
Page 38: Switching Advisory Tones On/Off
Handset Switching the ringtone on/off Switching the ringtone off permanently ¤ Using the Star key: Press and hold the Star ¤ Using the Profile key: Use the Profile key to set Profile Silent . . . When the ringtone is disabled, the following is shown in the status bar: Reactivating the ring tone ¤... -
Page 39: Fast Access To Numbers And Functions
Handset Fast access to numbers and functions Assigning a number to digit keys (quick dial) It is possible to assign a number from the directory to the keys A number has not been assigned to the digit key. ¤ Press and hold the digit key ¤... -
Page 40: Handset Update
Handset Handset update The handset supports firmware updating via the DECT radio link to the base/router (SUOTA = Software Update Over The Air). The phone checks whether new firmware is available for the handset. If it is, a message is displayed. ¤... -
Page 41: Appendix
Manufacturer’s advice Appendix Manufacturer’s advice Care Wipe the device with a damp cloth or an antistatic cloth. Do not use solvents or microfibre cloths. Never use a dry cloth; this can cause static. In rare cases, contact with chemical substances can cause changes to the device’s exterior. Due to the wide variety of chemical products available on the market, it was not possible to test all substances. -
Page 42: Technical Data
Technical data Technical data Battery Technology: 2 x AAA NiMH Voltage: 1.2 V Capacity: 750 mAh Handset operating times/charging times The operating time of your handset depends on the capacity and age of the battery and the way they are used. (All times are maximum possible times.) Standby time (hours) Talktime (hours) -
Page 43: Accessories
Accessories Output current 0.15 A Output power 0.6 W Average active efficiency > 46% Efficiency at low load (10%) not relevant – only at output power > 10 W No-load power consumption < 0.10 W Character charts Standard characters Press the relevant key the number of times indicated. 9x 10x ä... -
Page 44: Display Icons
Display icons Display icons The following icons are displayed depending on the settings and the operating status of your telephone. Icons in the status bar Icon Meaning Icon Meaning Signal strength (No Radiation off ) Headset / hearing aid connected via Bluetooth 1% -100% white, if Maximum Range on;... -
Page 45: Menu Overview
Menu overview Menu overview Not all functions described in the user guide are available in all countries or from all network providers. Open the main menu: when handset is in idle status press Select Services Next Call Anonym............p. - Page 46 Menu overview Registration Register Handset ......p. 10 Select Base ......p.
-
Page 47: Index
Index dialling ............... 15 entry ..............20 opening .............. 20 Call lists ..............20 Call Manager ............16 Call swapping, two external calls ......17 Advisory tones ............38 Call transfer ............. 17 Alarm ................ 29 Call waiting .............. 19 Alarm clock .............. - Page 48 from the call list ..........15 Functions key ............. 5 from the redial list ..........15 using quick dial ..........39 Dialling pause ............16 Directories Getting started ............9 using them ............22 Gigaset QuickSync ..........24 Directory ..............22 Group accept ............
- Page 49 play on network mailbox ........26 Microphone ..............5 Key 1 (fast access) ............ 5 adjust sensitivity .......... 18 Key, assigning ............39 switch on/off ............18 Keypad illumination ..........36 volume ............... 37 Keypad lock, automatic ..........36 Missed anniversaries/appointments ......28 Keys Missed calls control key .............
- Page 50 SUOTA ..............40 Switch on/off alarm (timer) ........29 QuickSync ............24 Symbols, see Icons ..........44 Recall key ..............5 Talk key ..............5 Redial list ............15 Technical data ............42 Registering (handset) ..........10 Telephone Registering device (Bluetooth) ......... 32 operating ............
- Page 51 © 2024 Mitel Networks Corporation. All Rights Reserved. Mitel and the Mitel logo are trademark(s) of Mitel Networks Corporation. Unify and associated marks are trademarks of Unify Software and Solutions GmbH & Co. KG. All other trademarks herein are the property of their respective owners.
Need help?
Do you have a question about the Unify OpenScape R6 and is the answer not in the manual?
Questions and answers