Table of Contents
Advertisement
Quick Links
合格证
Wechat
Offi cial Account
神牛微信公众号
深圳市神牛摄影器材有限公司
地址:深圳市宝安区福海街道塘尾社区耀川工业园厂房 2 栋
电话:0755-29609320(8062) 传真:0755-25723423 邮箱:godox@godox. com
GODOX Photo Equipment Co., Ltd.
Add.: Building 2, Yaochuan Industrial ZoneTangwei Community, Fuhai Street, Bao'an District, Shenzhen
518103, China
Tel: +86-755-29609320(8062)
www.godox.com
Made in China | 705-AD20P2-03
Fax: +86-755-25723423
E-mail: godox@godox.com
Advertisement
Chapters
Table of Contents

Subscribe to Our Youtube Channel
Related Manuals for Godox AD200 Pro II


Summary of Contents for Godox AD200 Pro II
- Page 1 合格证 Wechat Offi cial Account 神牛微信公众号 深圳市神牛摄影器材有限公司 地址:深圳市宝安区福海街道塘尾社区耀川工业园厂房 2 栋 电话:0755-29609320(8062) 传真:0755-25723423 邮箱:godox@godox. com GODOX Photo Equipment Co., Ltd. Add.: Building 2, Yaochuan Industrial ZoneTangwei Community, Fuhai Street, Bao'an District, Shenzhen 518103, China Tel: +86-755-29609320(8062) Fax: +86-755-25723423 E-mail: godox@godox.com www.godox.com...
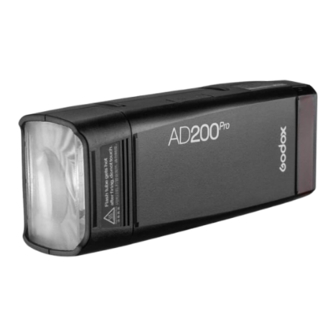
- Page 2 口袋灯 Pocket Flash 使用手册 Instruction Manual...
- Page 3 说明书安全提示 重要安全提示 本产品属于专业摄影设备, 需要专业人员操作使用。 使用时必须遵守以下基本安全预防措施: 使用前必须拆除产品上的所有运输保护材料和包装。 使用本产品前, 请仔细阅读并完全理解产品说明书, 严格按照说明书中的安全提示操作。 否则, 可能导致死亡、 严重伤害、 产品损坏或其他财产损失的安全隐患。 闪光灯工作时存在高电压, 关机后设备内部电容仍将持续带电一段时间。 本产品为专业灯具, 儿童禁止使用。 儿童接近时, 成人必须密切监督, 防止儿童碰撞灯具 或私自使用灯具, 造成人身伤害。 本灯具并非普通灯具, 不可用于普通照明, 任何有过眼部损伤或眼部敏感的人群均应避 免使用本灯具或直视本灯具。 使用时必须小心, 严禁接触如闪光管等高温部件, 以避免烫伤。 任何情况下均禁止将闪光灯直接对准人眼 (特别是婴儿眼睛) , 否则短时间内可能导致视 力损伤。 如感到眼睛不适, 应立即关闭灯具, 停止使用并及时就医。 闪光管损坏时, 应立即停止使用, 及时联系制造商、 服务代理商或合格维修人员更换, 以 防发生事故。...
- Page 4 清洁设备时, 请用干燥软布轻轻擦拭, 不可使用湿布, 否则可能会损坏设备。 部分产品配备保护罩, 使用前必须取下。 本使用说明基于严格测试制定, 设计和规格变更恕不另行通知。 您可登录我们官方网站 查看最新电子版使用说明, 了解产品最新资讯。 部分产品内置锂电池, 必须使用专用充电器充电, 并按正确操作说明, 在规定电压和温度 范围内使用。 部分产品使用锂电池供电。 这类锂离子电池使用寿命有限, 会逐渐失去储电能力, 这种能 力下降不可逆。 电池老化时, 产品续航时间会减少。 锂离子电池使用寿命预计 2-3 年。 请 定期检查电池情况, 如果充电时间明显增加或续航时间明显减少, 请考虑更换新电池。 部分产品配备锂电池, 其储存建议如下: 储存前, 将电池充放电至约 50% 电量; 至少每 6 个月充电一次, 至约 50% 电量; 可拆卸电池应单独存放; 储存温度在 0° C 至 40° C 范围内。 部分产品使用锂电池供电,...
-
Page 5: Table Of Contents
目录 前言 产品特性 警告 部件名称 物料清单 可另购附件 装卸灯管 / 灯头 / 电池 开关机 显示屏 电池说明 高速同步 M: 手动闪光 Multi: 频闪闪光 TTL: 自动闪光 无线电 (2.4G) 传输 神牛 2.4G 无线漏闪原因及解决办法 闪光模式 造型灯 自定义功能 同步插孔触发 快充口 保护功能 规格参数 固件升级 维护保养... -
Page 6: 产品特性
前言 感谢您购买神牛产品! AD200ProII 是一款无线 TTL 闪光灯, 采用内置神牛 2.4G 无线 X 系统, 配合神牛 XPro、 XProII、 X2T、 X3 系列引闪器可远程控制 TTL/M/Multi 模式触发 AD200ProII 闪光; 同时它 还可以跟神牛机顶闪光灯、 外拍闪光灯、 影室闪光灯利用主从属功能组合使用。 产品特性 全面兼容无线 TTL 系统:内置神牛 2.4G 无线 X 系统,与佳能、尼康、富士、索尼、奥 林巴斯、松下等多种相机的 TTL/M/Multi 模式兼容,实现无线多灯闪光系统从属单元, 简化拍摄流程。 功率与便携性兼备:200Ws 高功率,做到体积小巧便于携带, 0.01 至 1.8s 的极速回电 能力,电池容量大,支持全程高速。... - Page 7 警告 请保持干燥。 请勿私自拆卸产品,如产品出现故障须由本公司或授权的维修人员进行检查维修。 禁止拆卸、撞击、挤压或投入火中,若出现严重鼓胀,请勿继续使用。 请勿将闪光灯头正对人眼闪光 ( 特别是婴儿的眼睛 ),否则可能会在短时间内造成视力障碍。 请勿在化学品、可燃性气体或其他特殊物质附近使用闪光灯,这些物质在特殊情况下可能 对闪光灯发出的瞬间强光敏感,有可能导致火灾或电磁干扰。在这些场合下,请注意相关 警告标识。 本产品不能防水,在雨天及潮湿环境下请注意防水。 若发生任何故障,请立即关闭闪光灯电源。 本产品最高工作环境温度为 45℃,使用时请注意高温,请勿超出该范围。 本产品可能会发出有害的光辐射。切勿凝视操作灯,可能对眼睛有害。 不要向突然出现的人 / 物体、任何操作重型设备的人或执行任何其他活动的人 触发闪光,因为意外闪光可能会导致伤害或导致受伤。 请注意,闪光灯可以从很远的距离远程触发。...
-
Page 8: 部件名称
部件名称 直管灯头 H200II 1.LED 造型灯 2. 闪光灯管 3. 光学镜片 4. 灯头扣件 5. 灯头卡口公座 裸管灯头 H200JII 1. 灯管 2. 灯管触脚 3. 灯管插座 4.LED 造型灯 5. 卡口固定旋钮 6. 灯头扣件 7. 灯头卡口公座... - Page 9 机身 1. 灯头扣件孔 7. 电池 2. 灯头卡口母座 8. 组别指示灯 *2 3. 灯头装卸推制 9. 光控接收器 4. 3.5mm 同步插孔 10.1/4″安装孔 5. 外接电源盒接口 11.USB-C 固件升级口 6. 电池装卸推制 12. 彩屏 16.SET 按键 13.MENU 按键 17. 开关 / 试闪按键 14.MODE 按键 18. 造型灯按键 15. 调节拨盘...
-
Page 10: 物料清单
物料清单 电池保护盖 × 1 充电座 × 1 电池 × 1 灯体 × 1 PD 充电器 × 1 数据线 × 1 直管灯头 H200II × 1 裸管灯头 H200JII × 1 灯管 × 1 支架 AD-E2 × 1 便携包 × 1 说明书 × 1 可另购附件... -
Page 11: 装卸灯管 / 灯头 / 电池
装卸灯管 / 灯头 / 电池 安装灯管: 将卡口固定旋钮顺着( )方向旋转,直至旋钮拧到解锁的终点;将灯管触脚 对准插座平行插入,再将卡口固定旋钮顺着( )方向旋转,直至旋钮拧到锁紧的终点。 注: 灯管触脚有三粗一细, 对应的插座孔也有三大一小, 细触脚务必对准小孔插座, 灯管才可正确并顺利插入。 拆卸灯管: 将卡口固定旋钮顺着( )方向旋转,直至旋钮拧到解锁的终点,握住灯管平 行拔出。 注: 装卸闪光灯管时, 请务必佩戴手套以确保安全。 示意图中为灯头与灯管分离式设计的裸管灯头 H200JII, 此 装卸方法仅适用于装配裸管灯头 H200JII 时参照, 闪光过后请等待闪光灯冷却再进行拆卸。... - Page 12 安装灯头: 灯头卡口公座与机身上的灯头卡口母座相贴合,扣件与扣件孔对准,向上推动灯 头,灯头装卸推制将自动锁紧,即安装完成。 拆卸灯头: 按住灯头装卸推制的同时握住灯头向下推动,灯头脱离机身,即拆卸完成。 注: 装卸灯头示意图以裸管灯头 H200JII 为例子, 装卸方法同样适用于直管灯头 H200II。...
- Page 13 安装电池: 按住电池装卸推制,电池与电池槽中的金属触点对齐装入,往前拨动电池装卸推 制,听到“咔”一声即安装完毕。 拆卸电池 : 往后拨动电池装卸推制,听到“咔”一声电池将自动弹出,此时可从电池槽中取出电池。...
-
Page 14: 开关机
开关机 1. 长按开关按键,屏幕出现解锁图标( )紧接着顺时针旋转调节拨盘即可开机。 2. 长按开关按键,屏幕熄灭即关机完毕。 注: 长时间不使用时请关闭电源, 本产品设有电源自动休眠功能, 可在菜单栏处找到自动关机功能进行设置。 显示屏 (1) M 手动闪光 S1/S2 M 手动闪光 手动闪光输出 闪光持续时间 (2) Multi 频闪闪光 Multi 频闪闪光 闪光频率 闪光次数 (3) TTL 自动闪光 频道 TTL 自动闪光 闪光组... -
Page 15: 电池说明
电池说明 特性 1. 本品采用锂电池 , 支持反复充放电 500 次 , 使用寿命长。 2. 安全可靠 , 内置电路有过充保护、过放保护、过流保护、短路保护。 3. 使用标配电池充电器,从低电量到满电的充电时长只需 1 个小时左右。 注意事项 避免正负极短路。 电池没有防水功能 , 不要把电池浸泡在雾、水中。 放置于儿童不易接触的地方。 电池充电不要放置超过 24 小时。 电池应放置于凉爽、干燥及通风的地方存储。 电池不要靠近和放置于火中。 电池使用报废后请按当地的规定处理。 如果电池超过 3 个月不使用 , 请对电池进行满电充电。 高速同步 使用高速同步(FP 闪光),您可以在所有的快门速度下同步使用闪光灯。高速同步模式下, 使用光圈优先对人像进行填充闪光时特别方便。 1. 短按 MENU 按键进入菜单,旋转拨盘选中高 速同步,短按... -
Page 16: M: 手动闪光
M: 手动闪光 您可以在 1/512 功率至 1/1 全功率间以 0.1 档为 增量设置闪光输出。为获得正确的闪光曝光 , 请 使用手持的闪光测光表确定所需的闪光输出。 短按 MODE 按键令屏幕显示 < >,旋转拨盘 设置闪光输出功率。 显示闪光输出 拍摄过程中更改闪光输出时 , 下表将清楚地显示光圈值是如何更改的 , 您可以在增加或减少 闪光输出时查看光圈值的更改规律。 顺时针旋转拨盘递增闪光输出,逆时针旋转拨盘递减闪光输出。 1/512 1/512 (0.1 至 0.9) 1/256 1/256 (0.1 至 0.9) 1/128 1/128 (0.1 至 0.9) 1/64 1/64 (0.1 至... - Page 17 S2 光控单元设置 短按 MENU 按键进入菜单,旋转拨盘选中光控引闪,短按 SET 按键并旋转拨盘可选关闭 / S1/S2,设置 S2 后短按 MENU 按键返回主界面。 此时闪光灯可作为副灯使用,适用于 TTL 闪光环境。具有防预闪功能 , 使用带一次预闪功能 的相机能用光控实现同步拍摄。它会与主闪光灯的第二次闪光同步触发闪光,即 2 次光控 引闪。 注:只有在 M 模式下才支持 S1/S2 光控引闪模式。 显示闪光持续时间 闪光持续时间是指闪光灯从开始发光到达发光半峰值的时间长度。半峰值的表示为 t=0.5。 为了给摄影师提供更详细的拍摄数值 , 本产品采用 t=0.1。如下图:t=0.5 与 t=0.1 区别。 t=0.5 t=0.1 注: 只有在 M 模式并关闭高速同步时 , 才会显示闪光持续 时间。...
-
Page 18: Multi: 频闪闪光
Multi: 频闪闪光 使用频闪闪光, 可以发出一系列快速的闪光, 它可以在一张照片上拍摄移动物体的多个图像。 以下三个步骤依次设置闪光输出、闪光次数和闪光频率 ( 每秒的闪光次数 , 以 Hz 表示 )。 1. 短按 MODE 按键令屏幕显示 < >,旋转拨 盘设置闪光输出功率。 2. 短按 SET 按键,旋转拨盘设置闪光次数。 3. 短按 SET 按键,旋转拨盘设置闪光频率。 计算快门速度 在频闪闪光过程中 , 到闪光停止为止快门应保持开启状态。使用下面的公式计算快门速度 , 然后用相机进行设置。 闪光次数 / 闪光频率 = 快门速度 例如 , 如果闪光次数是 10, 闪光频率是 5Hz, 快门速度则至少为 2 秒。 注:... -
Page 19: Ttl:自动闪光
最大频闪闪光次数 12-14 15-19 20-50 60-99 闪光输出 1/16 1/32 1/64 1/128 1/256 1/512 TTL:自动闪光 在 TTL 模式下,相机的测光系统会侦查从主体反 射回来的闪光照明,从而自动调节闪光输出量, 使主体和背景得到均衡曝光。 通过短按 MENU 按键进入菜单开启无线功能,将 组别设置为 A 至 E 中的任意一个,设置完毕短按 两次 MENU 按键回到主界面。 短按 MODE 按键令屏幕显示 <TTL>,可以使闪光 灯进入 TTL 模式。... -
Page 20: 无线电(2.4G)传输
无线电(2.4G)传输 AD200ProII 使用 2.4G 无线 X 系统,可以与本厂其他型号完美结合使用。作为从属单元可兼 容的相机有佳能、尼康、索尼、奥林巴斯、松下、富士、宾得、莱卡等,根据主控单元自动 切换,无需手动设置。 AD200ProII 作为从属单元,可受控带无线发射功能的主控单元,型号如:XPROII 系列 /X3 系列 /X1T 系列 /X2T 系列 /V1Pro 系列 /V1 系列 /V860III 系列等。 无线设置 短按 MENU 按键进入菜单,旋转拨盘选中无线, 短按 SET 按键并旋转拨盘可选无线开关 / 频道 / 组 别 / 识别号 / 无线同步,短按 SET 按键并旋转拨 盘可对其中一项进行设置,设置完毕短按... - Page 21 设置通讯频道 如果在拍摄现场不止一个无线闪光系统 , 您可以通过更改通讯频道或设置识别号来防止信号 干扰,保证主控单元和从属单元设置为相同的频道编号即可。 无线 开 / 关 频道 1-32 组别 0-9、A-F 识别号 关闭、1-99 无线同步 短按 SET 按键进行无线同步 使用方法以 X3 引闪器为例: 关闭相机电源,将引闪器放置于相机热靴插座上,打开引闪器电源开关和相机电源。 设置引闪器 X3:从顶端往下滑动屏幕,令屏幕显示 < 设置 >,点击 < 设置 > 进入自定 义菜单,点击无线设置进入频道、识别号设置。从左侧往右滑动屏幕可回到主界面,在 主界面可设置组别的闪光模式或闪光功率档位。 设置闪光灯 AD200ProII : 短按 MENU 按键选中无线, 进入无线设置开启此功能, 将频道、 识别号设置成同引闪器一致。...
- Page 22 无线闪光拍摄 定位和操作范围 ( 无线闪光拍摄的示例 ) 使用一个从属单元进行自动闪光拍摄 ● Transmitter ( 主控 ) 注: 1. 使用带无线发射功能的主控单元作为发射端。 Receiver 2. 开始拍摄前请进行测试闪光和试拍。 3. 受位置、 周围环境、 天气状况等影响 , 传输距离可 ( 从属 ) 能更短。 传输距离约 100 米 无线多重闪光拍摄 可以将从属单元分割为两个或三个组并在改变闪光光比 ( 倍率 ) 的同时进行 TTL 自动闪光 拍摄。此外 , 可以为各闪光组设定并用不同的闪光模式拍摄。 用两个从属组进行自动闪光拍摄。...
-
Page 23: 神牛 2.4G 无线漏闪原因及解决办法
神牛 2.4G 无线漏闪原因及解决办法 1. 外部环境 2.4G 信号干扰 ( 如无线基站、 2.4Gwifi 路由、 蓝牙设备等 ) →请调节引闪器的频道 CH 设置 ( 建议 +10) 找到无干扰的频道,或者在工作时关闭其他 2.4G 设备。 2. 请确认闪光灯是否已经回电或回电速度是否跟上连拍速度, 并且没有处于过热保护或者 其他异常状态中。 →请下调闪光灯档位,如是 TTL 模式请尝试改为 M 模式 (TTL 模式下需要预闪一次 )。 3. 是否引闪器和闪光灯距离太近 (距离 <0.5m) →请在引闪器上打开“近距离无线模式” X1 系列:按住引闪按钮不放,然后开机,直至指示灯闪 2 次。 Xpro、X2T 系列:设置... -
Page 24: 闪光模式
闪光模式 短按 MENU 按键进入菜单,旋转拨盘选中闪光模式,短按 SET 按键并旋转拨盘可选标准 / 色温。 选择 闪光模式 说明 标准 标准闪光 主界面无指示 色温 色温恒定 主界面出现图标( ) 色温恒定开启后主界面出现图标 ( ) , 组别指示灯会闪烁, 蜂鸣器开启状态下会响一分钟, 此时请按试闪按键放电,即可正常使用。色温恒定仅在 M 模式并关闭高速同步时支持开启, 开启此功能后色温全程档位波动在 ±100K 左右。 造型灯 AD200ProII 配置双色温 LED 造型灯,短按造型灯按键进入设置,旋转拨盘可选关闭 / 打开 / 跟随, 短按 SET 按键并旋转拨盘可对其中一项进行设置, 设置完毕短按造型灯按键返回主界面。 注:长按造型灯按键可打开... -
Page 25: 自定义功能
自定义功能 短按 MENU 按键进入菜单界面,通过旋转拨盘选中菜单中的某一项,短按 SET 按键并旋转 拨盘进行该项设置,设置完毕短按 MENU 按键返回。 图标 功能 选项 说明 无线 关 关闭无线设置 开 设置通讯频道 闪光模式 标准 标准闪光 色温 M 非高速模式下支持开启 光控引闪 关 关闭光控引闪 M 模式下支持开启 高速同步 关 关闭高速同步 开 M 模式下支持开启 造型灯 闪灭 闪光灯回电灭 持续 常亮 蜂鸣器... -
Page 26: 同步插孔触发
语言 中文 界面中字体显示简体中文 English 界面中字体显示 English 恢复出厂设置 是 恢复出厂设置 否 取消恢复出厂设置 设备信息 无选项 查看当前机器型号及版本号 同步插孔触发 同步插孔规格为 Φ3.5mm,此处可插入同步线或者触发器触发插头对闪光灯进行同步引闪。 外接电源盒接口 在外接电源盒接口接入另购的 PB960 电源盒,将大幅度提高回电速度,但无法给电池充电。 注: 外接电源盒 (PB960) 使用时无法使用色温模式。 保护功能 1. 热保护 为防止闪光灯头过热并损坏 , 请勿在 1/1 功率时进行超过 100 次的快速连续闪光。100 ● 次连续闪光后 , 要让闪光灯至少冷却 10 分钟。 如您在进行超过... - Page 27 激活热保护功能的连续闪光次数: 功率 次数(直管灯头 H200II) 次数(裸管灯头 H200JII) 1/2(+0.7 ~ +0.9) 1/2(+0.3 ~ +0.6) 1/2(+0.0 ~ +0.2) 1/4(+0.0 ~ +0.9) 1/8(+0.0 ~ +0.9) 1/16(+0.0 ~ +0.9) 1/32(+0.0 ~ +0.9) 1/64(+0.0 ~ +0.9) 1250 1500 1/128(+0.0 ~ +0.9) 2500 3000 1/256(+0.0 ~ +0.9) 3750 6000 1/512(+0.0 ~...
-
Page 28: 规格参数
规格参数 型号 AD200ProII 无线从属单元模式 无线电模式 ( 兼容佳能 E-TTL II、尼康 i-TTL、索尼、奥林巴斯、松下、富士等 ) 闪光模式 无线关闭:M/Multi 无线电从属模式:TTL/M/Multi 闪光指数(1/1 档位) 直管灯头 H200II:GN52(m ISO 100,@35mm) 裸管灯头 H200JII:GN60(m ISO 100,使用 AD-S2 标准反光罩, @28mm) 闪光持续时间 t0.1( 约 ) 直管灯头 H200II:1/272 秒~ 1/23500 秒 裸管灯头 H200JII:1/252 秒~ 1/16200 秒 功率(1/1 档位)... -
Page 29: 固件升级
本机通过 USB-C 固件升级接口可进行固件升级,软件最新公告及说明将会发布在官方网 站上。 本 品 出 厂 不 配 USB 升 级 线, 请 另 行 购 买。 本 产 品 USB 接 口 为 USB-C 接 口, 请 使 用 USB-C 线。 产品升级固件需要 Godox G3 程序软件支持,升级固件前请先到神牛官网下载安装“Godox G3 固件升级软件”再选择相应的固件文件。 由于产品进行固件升级,说明书请以最新电子版为准。 维护保养... -
Page 30: Important Safety Instructions
Important Safety Instructions This product is a professional photographic equipment, to be operated by professional personnel only. The following basic safety precautions must be followed when using this product: All transport protective materials and packaging on the product must be removed before use. Carefully read and fully understand the instruction manual before use and strictly follow the safety instructions. - Page 31 Do not use or store this device in potentially explosive environments. During and after operation, the distance between the flash head and the user and other personnel, as well as between thermal or combustible materials, must be maintained at least 1 meter.
- Page 32 High-Speed Sync M: Manual Flash Multi: Stroboscopic Flash TTL Auto Flash Wireless (2.4G) Transmission Wireless Settings The Reason & Solution of Not Triggering in Godox 2.4G Wireless Flash Mode Modeling Lamp C.Fn: Setting Custom Functions Sync Triggering Quick Charging Port...
-
Page 33: Foreword
Foreword Thank you for purchasing With built-in Godox 2.4G wireless X system, this TTL flash AD200ProII can be triggered by XPro/ XProII/X2T/X3 series flash triggers in TTL /M/Multi mode. With transmitter & receiver functions, AD200ProII can also use in combination with Godox camera flashes, outdoor flashes, studio flashes, etc. -
Page 34: Warning
Warning Always keep this product dry. Do not disassemble. Should repairs become necessary, this product must be sent to an authorized maintenance center. Stop using this product if it breaks open due to extrusion, falling or strong hit. Otherwise, electric shock may occur if you touch the electronic parts inside it. -
Page 35: Name Of Parts
Name of Parts Speedlite Flash Head H200II 1. LED Modeling Lamp 2. Flash Tube 3. Lens 4. Flash Head Mounting Shoe 5. Flash Head Male Socket Bare Bulb Flash Head H200JII 1. Flash Tube 2. Flash Tube Mounting Shoe 3. Flash Tube Socket 4. - Page 36 Flash Body 1. Flash Head Mounting Hole 7. Battery 2. Flash Head Female Socket 8. Group Indicator *2 3. Flash Head Locking Pusher 9. Photocell Receiver 4. 3.5mm Sync Port 10. 1/4″ Hole 5. External Power Box Port 11. USB-C Port 6.
-
Page 37: What's Inside
What’s Inside Flash Body ×1 Battery ×1 Battery Protection Charging Case × 1 Cover × 1 PD Adapter ×1 Data Cable ×1 Speedlite Flash Bare Bulb Flash Head H200II ×1 Head H200JII ×1 Flash Tube ×1 Holder AD-E2 ×1 Carry Bag ×1 Instruction Manual ×... -
Page 38: Installing And Disassembling Flash Head/Flash Tube/Battery
Installing and Disassembling Flash Tube/Flash Head/Battery Installing Flash Tube: Rotate the fixing knob towards the < > until it stops to unlock, align the flash tube mounting shoe at the flash tube socket and insert in, then rotate fixing knob towards the <... - Page 39 Installing Flash Head : Align the flash head male socket at the flash head female socket, flash head mounting hole at the flash head mounting shoe, then push the flash head in and the flash head locking pusher will automatically lock up. Disassembling Flash Head : Press and hold the flash head locking pusher, then pull out the flash head.
- Page 40 Installing Battery : Press and hold the battery locking pusher, align the contacts on the battery at the contacts inside the compartment and insert in, a “click” sound means the battery is properly installed. Disassembling Battery : Press and hold the battery locking pusher, the battery will eject automatically.
-
Page 41: Power Switch
Power Switch 1. Long press the power switch button until the unlock icon < > is displayed on the screen, then rotate the select dial clockwise to turn on the device. 2. Long press the power switch button until the screen blacks out to turn off the device. Note: Turn off the device if it will not be used for an extended period. -
Page 42: Battery
Battery Features This flash unit uses lithium battery which has long runtime. The available charge-and-discharge times are 500. It is reliably safe. The inner circuit is against overcharge, overdischarge, overcurrent, and short circuit. It takes only 1 hour to fully charge the battery by using the standard battery charger. Cautions Do not short circuit. -
Page 43: High-Speed Sync
High-Speed Sync High speed sync (FP flash) enables the flash to synchronize with all camera shutter speeds. This is convenient when you want to use aperture priority for fi ll-flash portraits. 1. Press the MENU button to enter menu interface, turn the select dial and press the SET button to enter high speed sync and turn on it. - Page 44 Flash Output Range The following table makes it easier to see how the step changes in terms of aperture value when you increase or decrease the flash output. Turn the select dial clockwise to increase the flash output, while turn it anticlockwise to decrease the flash output.
- Page 45 Display Flash Duration Flash duration refers to the length of time that from flash’s fi ring to reach the half peak at maximum. The half peak at maximum is usually expressed as t=0.5. In order to provide the photographer with more concrete data, this product adopts t=0.1.
-
Page 46: Multi: Stroboscopic Flash
Multi: Stroboscopic Flash With stroboscopic flash, a rapid series of flashes is fi red. It can be used to capture multiple images of a moving subject in a single photograph. You can set the flash output, number of flashes, and flash frequency (number of flashes per sec. -
Page 47: Ttl Auto Flash
Note: Stroboscopic flash is most effective with a highly reflective subject against a dark backgbare ● bulb. Using a tripod and a TTL flash trigger is recommended. ● A flash output of 1/1 and 1/2 cannot be set for stroboscopic flash. ●... -
Page 48: Wireless (2.4G) Transmission
Wireless (2.4G) Transmission AD200ProII adopts 2.4G wireless X system, which has good compatibility with other Godox products. It can automatically switch to receiver unit according to the transmitter unit instead of setting manually. The compatible cameras include Canon, Nikon, Sony, Olympus, Panasonic, Fujifi lm, Pentax, Leica, etc. - Page 49 Setting the Communication Channel If there are other wireless flash systems nearby, you can change the channel to prevent signal interference. The channels of the transmitter unit and the receiver unit(s) must be set to the same. Wireless On/Off Channel 1-32 Group 0-9, A-F...
- Page 50 Wireless Flash Shooting Positioning and Operation Range (Example of wireless flash shooting) Auto flash shooting with one receiver unit ● Transmitter Transmission distance is about 100m Receiver Note: 1. Please use the transmitter unit with wireless transmission function. 2. Before shooting, perform a test flash and test shooting.
-
Page 51: The Reason & Solution Of Not Triggering In Godox 2.4G Wireless
The Reason & Solution of Not Triggering in Godox 2.4G Wireless 1. Disturbed by the 2.4G signal in outer environment (e.g. wireless base station, 2.4G wifi router, Bluetooth, etc.) → To adjust the channel CH setting on the flash trigger (add 10+ channels) and use the channel which is not disturbed. -
Page 52: Flash Mode
Flash Mode Press the MENU button to enter menu interface, turn the select dial and press the SET button to enter flash mode, in which you can choose between normal and color. Option Flash Mode Note Normal Normal flash mode No indication on the main interface Color Stable color temperature mode... -
Page 53: C.fn: Setting Custom Functions
C.Fn: Setting Custom Functions Press the MENU button to enter menu interface, turn the select dial and press the SET button to choose among the following functions, then turn the select dial and press the SET button to adjust its parameters. Press the MENU button to return to the previous interface, press again to return to the main interface. -
Page 54: Sync Triggering
Language Chinese Simplifi ed Chinese operating system English English operating system Reset Factory reset Cancel factory reset Device Info Display the current model and version Sync Triggering The sync cord jack is a Φ3.5mm plug. Insert a trigger plug in and the flash will be fired synchronously with the camera shutter. - Page 55 Number of flashes that will activate over-temperature protection: Power Output Level Number of Flashes Number of Flashes (Speedlite Flash Head H200II) (Bare bulb Flash Head H200JII) 1/2(+0.7 ~ +0.9) 1/2(+0.3 ~ +0.6) 1/2(+0.0 ~ +0.2) 1/4(+0.0 ~ +0.9) 1/8(+0.0 ~ +0.9) 1/16(+0.0 ~...
-
Page 56: Technical Data
Technical Data Model AD200ProII Wireless Receiver Unit Mode Wireless Mode(compatible with Canon E-TTL II, Nikon i-TTL, Sony, Olympus, Panasonic, Fujifi lm, etc) Flash Mode Wireless off:M/Multi Wireless receiver mode:TTL/M/Multi Guide No. (1/1 step) Speedlite Flash Head H200II:GN52(m ISO 100,@35mm) Bare Bulb Flash Head H200JII:GN60(m ISO 100,with reflector AD-S2,@28mm) Flash Duration t0.1 (approx.) Speedlite Flash Head H200II:1/272s~1/23500s Bare Bulb Flash Head H200JII:1/252s~1/16200s... -
Page 57: Firmware Upgrade
Please use an USB-C cable (sold separately) for fi rmware upgrade. As the fi rmware upgrade needs the support of Godox G3 software, please download and install the "Godox G3 fi rmware upgrade software" from Godox offi cial website before upgrading. Then, choose the related fi... -
Page 58: Fcc Statement
Operating frequency:2412.99MHz – 2464.49MHz (only receive) Declaration of Conformity GODOX Photo Equipment Co.,Ltd. hereby declares that this equipment are in compliance with the essential requirements and other relevant provisions of Directive 2014/53/EU. In accordance with Article 10(2) and Article 10(10), this product is allowed to be used in all EU member states.For more information of DoC, Please click this web link: https://www.godox.com/eu-declaration-of-conformity/... - Page 59 产品保修 尊敬的用户,本保修卡是申请保修服务的重要凭证,请您配合销售商填写并妥善保管,谢谢! 产品信息 型号 产品条码 用户信息 姓名 联系电话 通信地址 销售商信息 名称 联系电话 通信地址 销售日期 备注 注:此表应由销售商盖章确认。 适用产品 本文件适用于相关《产品保修信息》( 见后面说明 ) 所列产品,其他非属此范围的产品或部件 ( 如促 销品、赠品及其他出厂后附加的部件等 ) 不在此保修承诺内。 保修期 产品及部件的相应保修期按相关的《产品保修信息》执行。保修期自产品首次购买日起算, 购 买 日以购买产品时保修卡登记日期为准。 如何获得保修服务 您可直接与产品销售商或授权服务机构联系,也可拨打神牛产品售后服务电话,与我们联 系,由我 们的服务人员为您安排服务。申请保修时, 您应提供有效的保修卡作为保修凭证, 方 可获得保修。 如您不能提供有效的保修卡, 则在我们确认产品或部件属于保修范围的情况 下, 也可以为您提供保修 , 但这不作为我们的义务。...
- Page 60 不适用保修情況 如产品存在下列情况,本文件项下的保证和服务将不适用 ①产品或部件超过相应保修期; ②错误或 不适当使用、维护或 保管导致的故障或损坏, 如:不当搬运;非按产品合理预期用 途使用;不当 插拨外接设备;跌落或外力挤压;接触或暴露于不适当温度、溶剂、酸碱、水 浸或潮湿环境; ③由 非神牛授权机构或人员安装、修理、更改、添加或拆卸造成的故障或损 坏;④产品或部件原有识别 信息被修改变更或除去;⑤无有效保修卡;⑥使用非合法授权、 非标准或非公开发行的软件造成的 故障或损坏;⑦因不可抗力或意外事件造成的故障或损 坏;⑧其他非因产品本身质量问题导致的故 障或损坏。遇上述情况,您应向相关责任方寻求 解决, 神牛对此不承担任何责任。因非在保修期 或保修范围内的部件、附件或软件导致产品 不能正常使用的, 不是保修范围内的故障。产品使用过 程中正常的脱色, 磨损和消耗, 不是保 修范围内的故障。 产品保修和服务支持信息 产品的保修期和服务类型按以下《产品保修信息》执行: 产品类别 选件名称 保修期 (月) 保修服务类型 部件 电路板 客户送修 电池 客户送修 充电器等带电性能的部件。 客户送修...
-
Page 61: Applicable Products
If maintenance service is needed, you can directly contact the product distributor or authorized service institutions. You can also contact the Godox after-sale service call and we will offer you service. When applying for maintenance service, you should provide valid warranty card. If you cannot provide valid warranty card, we may offer you maintenance service once confi... - Page 62 Once met these situations above, you should seek solutions from the related responsible parties and Godox assumes no responsibility. The damage caused by parts, accessories and software that beyond the warranty period or scope is not included in our maintenance scope.
Need help?
Do you have a question about the AD200 Pro II and is the answer not in the manual?
Questions and answers