
Related Manuals for GENWEC GW01 21 04 01


Summary of Contents for GENWEC GW01 21 04 01
- Page 1 Ref.: GW01 21 04 01 / GW01 21 04 03 ® GW01 21 04 01-03.indd 1 GW01 21 04 01-03.indd 1 6/9/24 13:30 6/9/24 13:30...
- Page 2 GW01 21 04 01-03.indd 2 GW01 21 04 01-03.indd 2 6/9/24 13:30 6/9/24 13:30...
-
Page 3: Instrucciones De Seguridad
Normativa legal vigente. • Todos los modelos con referencia “GW01 21 04 01 y GW01 21 04 03” son dispositivos eléctricos pertenecientes al tipo Clase I según su aislamiento eléctrico, en consecuencia requieren ser conectados al terminal de tierra. - Page 4 Tiempo máximo de uso continuado limitado a Tsh= 30 s • Desconexión automática del elemento calefactor para temperatura ambiente T > 25ºC • Materiales plásticos robustos y de alta calidad • Carcasa y base metálicos GW01 21 04 01-03.indd 4 GW01 21 04 01-03.indd 4 6/9/24 13:30 6/9/24 13:30...
-
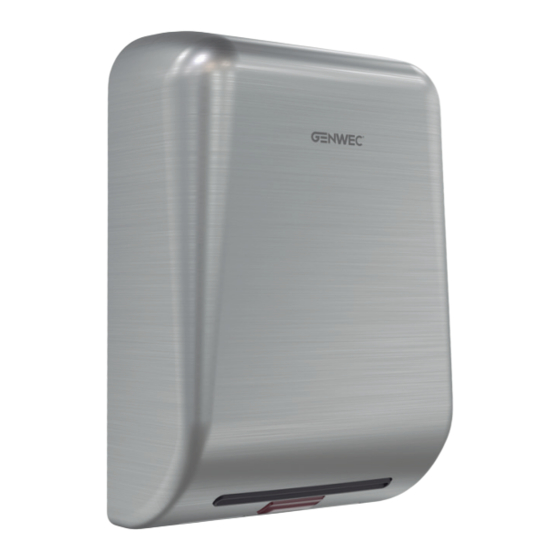
Page 5: Componentes Principales
Carcasa Regleta alimentación Salida de aire Circuito electrónico de control Visor led IR Eje de regulación del motor Entradas de aire Resistencia calefactora Tornillos sujeción carcasa GW01 21 04 01-03.indd 5 GW01 21 04 01-03.indd 5 6/9/24 13:30 6/9/24 13:30... -
Page 6: Modo De Uso
Utilizar la plantilla suministrada para posicionar la ubicación del equipo y la de los taladros a realizar. • Marcar la posición de los agujeros. • Realizar los 4 taladros, limpiar el polvo e introducir los 4 tacos de nylon suministrados. GW01 21 04 01-03.indd 6 GW01 21 04 01-03.indd 6 6/9/24 13:30 6/9/24 13:30... - Page 7 Fijar la base metálica a la pared con los tornillos del orificio en la base (22 mm diámetro) y suministrados. conectarlos a las vías de la regleta, respetando su polaridad (N, L, GND). GW01 21 04 01-03.indd 7 GW01 21 04 01-03.indd 7 6/9/24 13:30 6/9/24 13:30...
-
Page 8: Mantenimiento
Se recomienda el cambio del filtro cada 3 meses. Para dicha operación, debe seguirse la secuencia siguiente, según puede observarse en la ilustración adjunta. GW01 21 04 01-03.indd 8 GW01 21 04 01-03.indd 8 6/9/24 13:30 6/9/24 13:30... - Page 9 El filtro de aire debe cambiarse regularmente según se indica en el apartado correspondiente de este manual. Debe evitarse la entrada de agua al interior del equipo secamanos. GW01 21 04 01-03.indd 9 GW01 21 04 01-03.indd 9 6/9/24 13:30...
-
Page 10: Solución De Problemas
A la hora de sustituir dispositivos antiguos por equipos nuevos, el vendedor está obligado por ley a recoger sus viejos equipos y encargarse de su eliminación sin ningún tipo de coste. GW01 21 04 01-03.indd 10 GW01 21 04 01-03.indd 10... -
Page 11: Safety Instructions
• The appliances typed GW01 21 04 01 and GW01 21 04 03 are Class I insulation electrical devices, so they need to be earthed. CAUTION: In order to avoid a hazard due to inadvertent resetting of the thermal cut-out, this appliance must not be supplied through an external switching device, such as a timer, or connected to a circuit that is regularly switched on and off by the utility. - Page 12 Maximum continuous running time Tsh = 30 s • Automatic disconnection of heating element in case of room temperature Troom > 25ºC • Strong and high quality metal parts (cover and base plate) GW01 21 04 01-03.indd 12 GW01 21 04 01-03.indd 12 6/9/24 13:30 6/9/24 13:30...
-
Page 13: Main Technical Characteristics
Power wiring rear hole (22 mm) Metal cover Main terminal block Air output Electronic control board Sensor screen Motor adjustment Air inlet Heating element Fixing cover screws GW01 21 04 01-03.indd 13 GW01 21 04 01-03.indd 13 6/9/24 13:30 6/9/24 13:30... -
Page 14: Installation
• Mark the mounting holes for intalling the unit. Make the holes in the wall, remove and clean the residual dust and introduce the nylon plugs (supplied). GW01 21 04 01-03.indd 14 GW01 21 04 01-03.indd 14 6/9/24 13:30 6/9/24 13:30... - Page 15 Mount the base plate to the wall by fixing the diam hole and connect them to the 3-way screws which are supplied. terminal block. Make sure the polarity is the right one (N, L, GND). GW01 21 04 01-03.indd 15 GW01 21 04 01-03.indd 15 6/9/24 13:30 6/9/24 13:30...
-
Page 16: Maintenance
The HEPA filter must be replaced at loast every 3 months. The replacement of HEPA air filter must be done as indicated in the figures as follows. GW01 21 04 01-03.indd 16 GW01 21 04 01-03.indd 16 6/9/24 13:30 6/9/24 13:30... - Page 17 The air filter should be replaced regularly, as indicated in the corresponding section of this manual. Prevent the water from flowing or spilling into the interior of the appliance. GW01 21 04 01-03.indd 17 GW01 21 04 01-03.indd 17 6/9/24 13:30...
-
Page 18: Troubleshooting
When replacing old devices with new equipment, the seller is required by law to pick up the equipment to be replaced and dispose of it free of charge. GW01 21 04 01-03.indd 18 GW01 21 04 01-03.indd 18 6/9/24 13:30... - Page 19 GW01 21 04 01-03.indd 19 GW01 21 04 01-03.indd 19 6/9/24 13:30 6/9/24 13:30...
- Page 20 ® WASHROOM EQUIPMENT & COMP . Av. Joan Carles I, 46-48 08908 L´Hospitalet de Llobregat - Barcelona - (SPAIN) www.genwec.com GW01 21 04 01-03.indd 20 GW01 21 04 01-03.indd 20 6/9/24 13:30 6/9/24 13:30...
Need help?
Do you have a question about the GW01 21 04 01 and is the answer not in the manual?
Questions and answers