
Related Manuals for Kicker KMTCXL65


Summary of Contents for Kicker KMTCXL65
- Page 1 Owner’s Manual Manual del Propietario Manuel d’utilisatio Benutzerhandbuch KMTCXL Towers Altavoz KMTCXL KMTCXL-System Haut-parleurs KMTCXL select language seleccione el idioma choisir la langue sprache auswählen...
- Page 2 Contents Overview ......3 Specifications ......4 Installation ......5 Warranty ......13 English...
-
Page 3: Overview
VENTILATION. SUBWOOFERS SHOULD BE MOUNTED WITH AT LEAST 1 INCH (2.5CM) CLEARANCE BETWEEN THE FRONT OF THE SPEAKER AND ANY SURFACE. KICKER PRODUCTS ARE CAPABLE OF PRODUCING SOUND LEVELS THAT CAN PERMANENTLY DAMAGE YOUR HEARING! TURNING UP A SYSTEM TO A LEVEL THAT HAS AUDIBLE DISTORTION IS MORE DAMAGING TO YOUR EARS THAN LISTENING TO AN UNDISTORTED SYSTEM AT THE SAME VOLUME LEVEL. -
Page 4: Specifications
Note: All specifications and performance figures are subject to change. Please visit www.kicker.com for the most current information. To get the best performance from your new KICKER speakers, we recommend using genuine KICKER accessories and wiring. Please allow two weeks of break-in time for the speakers to reach optimum performance. -
Page 5: Installation
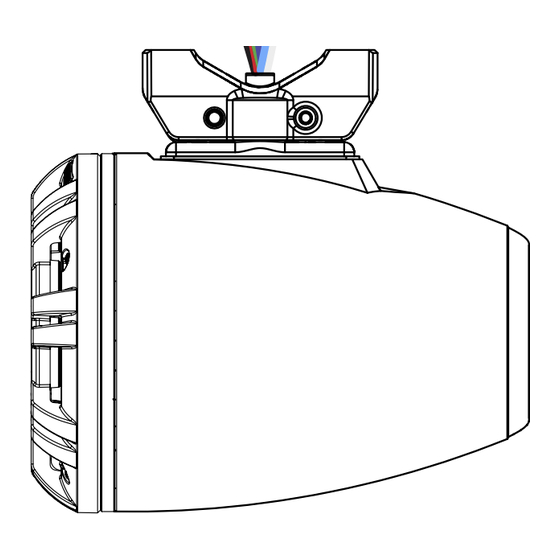
Installation Step 1: Determine the location and placement of the KMTC cans onto the pipe or tube to which you are mounting. Spreading the KMTC Loaded Marine Cans apart will provide better stereo performance, and is usually preferable. When determining the best locations for mounting, be careful to look for obstacles or obstructions that could complicate mounting the KMTC. - Page 6 Step 2: Thread the speaker and LED wires through the bottom of the lower mounting bracket and out of the plastic liner hole in the center. lower mounting bracket swivel base English...
- Page 7 IMPORTANT: You must apply a thin layer of the included anti-seize compound to ALL threaded fasteners before installation. Step 3: The mounting hardware design provides versatility in angular positioning to direct the speaker’s output to the ideal listening position using the quick adjust swivel lever.
- Page 8 Step 4: Partially install the swivel lever, adjusting it to be loose (open) when the lever is parallel to the tube, then finish tightly securing the swivel lever to the enclosure using the included thumbscrew. When the swivel lever is locked in place, or closed, the bracket rotation assembly will be clamped tight.
- Page 9 Step 5: Extend the speaker and LED wiring through the hole you have drilled and connect them to your source unit or amplifier. KICKER recommends you solder the connections and secure them with heat shrink. Black : +12V Red : Ground...
- Page 10 Splice and combine the ground wires to yield a different color. There are seven colors available, depending on your wiring configuration. KICKER recommends using the KMLC lighting controller (sold separately) for more colors, patterns, and special effects.
- Page 11 Step 6: Secure the enclosure to the tower tube with the upper and lower mounting brackets. With the wiring clearance hole you drilled and the wiring shroud on the lower mounting bracket lined up, position the enclosure assembly so that it is tightly against the tower tube.
-
Page 12: Warranty
Should service be necessary under this warranty for any reason due to manufacturing defect or malfunction during the warranty period, KICKER will repair or replace (at its discretion) the defective merchandise with equivalent merchandise. Warranty replacements may have cosmetic scratches and blemishes. - Page 13 Service performed by anyone other than KICKER HOW LONG WILL IT TAKE? KICKER strives to maintain a goal of one-week service for all acoustics (subwoofers, midrange drivers, tweeters, crossovers, etc) returns. Delays may be incurred if lack of replacement inventory or parts is encountered.
- Page 14 (“a todo volumen”) en todo sentido. La línea de altavoces y amplificadores KICKER es la mejor del mercado de audio de automóviles y por lo tanto representa el “combustible” para vivir a todo volumen en el área de “estéreos de automóvil” de la vida de nuestros clientes.
Need help?
Do you have a question about the KMTCXL65 and is the answer not in the manual?
Questions and answers