
Related Manuals for Opticon MDI-40 0 Series


Summary of Contents for Opticon MDI-40 0 Series
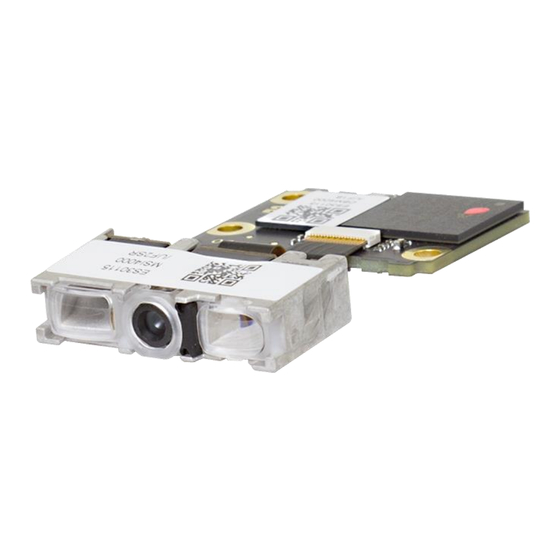
- Page 1 MDI-4xx0 Integration Guide – Rev 3.0 MDI-40x0/MDI-41x0 2D Imager MDI-40x0 MDI-41x0 Integration Guide – Rev 3.0...
- Page 2 Please read this manual carefully before installing or using the product. Serial Number A serial number appears on all Opticon products. This official registration number is directly related to the device purchased. Do not remove the serial number from your Opticon device. Removing the serial number voids the warranty.
- Page 3 MDI-4xx0 Integration Guide – Rev 3.0 Revision History Document Name : MDI-4xx0 Integration guide Edition Date Page Section Description of Changes 2016/10/05 Initial release Added the MDI-4x50 2018/06/11 2.2.2 Added Installing exit window at far range 2024/08/28 Updated to new layout...
-
Page 4: Table Of Contents
MDI-4xx0 Integration Guide – Rev 3.0 Contents Abstract ......................... 6 Exit Window Material ........................ 7 Exit Window Material and Placement ................8 Exit Window Material ........................ 8 Exit Window Placement ......................9 2.2.1 Installing exit window at short range ................. 9 2.2.2 Installing exit window at far range ................... - Page 5 MDI-4xx0 Integration Guide – Rev 3.0 Table of Figures Figure 1: Exit Window Placement of the MDI-4x00 ................. 9 Figure 2: Exit Window and Angle of the MDI-4xx0 ................10 Figure 3: Window Size and Optical path Clearance ................11 Figure 4: MDI-4100 Optical Path ......................
-
Page 6: Abstract
These tools are available from the Opticon website. Caution: The circuit board height of MDI-4x50 series is 0.3 mm smaller than MDI-4x00 series. -
Page 7: Exit Window Material
It is highly recommended to check some actual pictures made by the scan engine in order to verify that there is no reflection from the LED after the engine has been installed. The software tools for image capture can be found on the Opticon website. -
Page 8: Exit Window Material And Placement
MDI-4xx0 Integration Guide – Rev 3.0 2 Exit Window Material and Placement 2.1 Exit Window Material Below is a list of recommendations for constructing the exit window. These recommendations help to prevent reflection from the LED illumination off the exit window and help to prevent degradation of the image by scratches and dirt. -
Page 9: Exit Window Placement
MDI-4xx0 Integration Guide – Rev 3.0 2.2 Exit Window Placement Reflection from the LED light off the exit window can cause large overexposed areas in the images captured by the scan engine. Therefore, it is important to position the exit window in such a way that the reflection is minimal and not directed into the camera. -
Page 10: Installing Exit Window At Far Range
MDI-4xx0 Integration Guide – Rev 3.0 2.2.2 Installing exit window at far range When installing the scan engine at a far range from the exit window, LED illumination will appears to the exit window if the scan engine is placed vertically to the exit window as following drawing. To avoid the reflection of LED, tilt the scan engine and exit window for about 18 degrees in vertically. -
Page 11: Exit Window Size
MDI-4xx0 Integration Guide – Rev 3.0 3 Exit Window Size Vignetting (radial brightness or saturation fall-off) in the LED illumination and the captured image can occur depending on the size and position of the exit window. Additionally, specular (mirror like) reflection can occur in the target barcode depending on how it is presented to the scanner. -
Page 12: Optical Path
MDI-4xx0 Integration Guide – Rev 3.0 3.2 Optical Path Install the Exit Window with sufficient clearance for the field of view, LED illumination and LED aiming. Provide the Exit Window with sufficient clearance with respect to the optical path, as depicted below. Field of View Aiming (LED) Exit Window... -
Page 13: Field Of View And Aiming
MDI-4xx0 Integration Guide – Rev 3.0 3.3 Field of View and Aiming Install a frame with sufficient clearance for the field of view. Figure 5: MDI-4xx0 Field of View and Aiming L Distance from front edge of the scan engine H Horizontal FOV V Vertical FOV Field of View... -
Page 14: Scanned Media And Placement
MDI-4xx0 Integration Guide – Rev 3.0 3.4 Scanned Media and Placement When an object is being scanned, there are conditions where specular reflection of the LED illumination and intense ambient light can occur easily. Problem: Glossy label Specular reflection of the LED illumination from the scan engine can occur when the target label is on a highly reflective surface. -
Page 15: Installation
MDI-4xx0 Integration Guide – Rev 3.0 4 Installation This chapter describes practical guidelines for the mechanical installation. This chapter is divided in two parts, one for the MDI-4000 (camera module and separate decoder board) and one for the MDI- 4100(internal decoder). 4.1 Installation recommendations for the MDI-40x0 The installation recommendations are listed below. -
Page 16: Dbm-40X0 Installation
MDI-4xx0 Integration Guide – Rev 3.0 4.1.2 DBM-40x0 Installation • Do not screw the decoder board directly on a PCB. Use spacers or screw pillars instead. • The decoder board may become hot, especially when the auto trigger is used. Make sure that there are not heat sensitive parts close to the decoder board. -
Page 17: Camera Fpc
• The connector of the decoder side is not the same as the camera side. Camera side 17pin Decoder side 19pin • It is recommended to use the Opticon supplied FPC cable. Connected to JST 17FXVL-RSM1-GAN-TF(HF) (17pin) Shield area Connected to... -
Page 18: Ffc And Fpc Installation
MDI-4xx0 Integration Guide – Rev 3.0 4.1.4 FFC and FPC installation There are two types of FFC cables that can be used to connect the decoder board to a target PCB. One with contacts and the same side (Type A) and one with contacts on opposite sides (Type B). Below are the specs and a description on how to assemble the camera module to the decoder board and how to connect the decoder board to a target PCB. -
Page 19: Installation Recommendation For The Mdi-41X0
MDI-4xx0 Integration Guide – Rev 3.0 4.2 Installation Recommendation for the MDI-41x0 The installation recommendations for the scan engine are listed below. • Mount the scan engine to a material with high thermal conductivity, such as metal, especially when the auto-trigger is used. •... -
Page 20: Ffc Cable And Connector
MDI-4xx0 Integration Guide – Rev 3.0 4.2.2 FFC Cable and Connector There are two types of FFC cables that can be used to connect the MDI-4100 to a target PCB. One with contacts and the same side (Type A) and one with contacts on opposite sides (Type B). Below are the specs and a description on how to connect the decoder board to a target PCB. -
Page 21: Handling Requirements
MDI-4xx0 Integration Guide – Rev 3.0 4.3 Handling Requirements The recommended handling conditions for incorporating the scan engine into your device are shown below. • Use anti-static measures such as wearing a grounded hand strap before handling the scan engine in order to avoid damage to the electronic components from electrostatic discharge. -
Page 22: Mechanical Drawings
MDI-4xx0 Integration Guide – Rev 3.0 5 Mechanical Drawings This chapter describes mechanical drawing for the scan engine. 5.1 Drawing of the MDI-4000 and the MDI-4050 5.1.1 Camera (MSI-4000) Interface Connector(17pin) JST 17FXVL-RSM1-GAN-TF Product Label Camera Lens 24.6 Aiming LED lens Illumination LED Lens 21.6 Camera Case... -
Page 23: Decoder Board (Dbm-4000 And Dbm-4050)
MDI-4xx0 Integration Guide – Rev 3.0 5.1.2 Decoder Board (DBM-4000 and DBM-4050) DBM-4000 and DBM-4050 has different circuit board thicknesses. DBM-4000 25.1 ( 4.5 ) 21.4 IRISO(12pin) 9681-12 φ 2.3 Hole (1.7 ) MOLEX(19pin) 504281-1900 21.6 Figure 16: Drawing of the MDI-4000 Decoder Board DBM-4050 25.1 ( 4.5 ) -
Page 24: Fpc
MDI-4xx0 Integration Guide – Rev 3.0 5.1.3 FPC Connected to JST 17FXVL-RSM1-GAN-TF(HF) (17pin) Shield area Connected to MOLEX 5042811900 (19pin) Figure 18: Drawing of the MDI-40x0 FPC... -
Page 25: Drawing Of The Mdi-4100 And Mdi-4150
MDI-4xx0 Integration Guide – Rev 3.0 5.2 Drawing of the MDI-4100 and MDI-4150 MDI-4100 and MDI-4150 has different circuit board thicknesses. 5.2.1 MDI-4100 Product Label 25.3 Camera Lens Aiming LED lens Illumination LED Lens 21.6 Machine Screw M2 Depth 2.5 Pitch 0.4 ( 4.5 ) Host Interface connector(12pin) -
Page 26: Mdi-4100
MDI-4xx0 Integration Guide – Rev 3.0 5.2.2 MDI-4100 Product Label 25.3 Camera Lens Aiming LED lens Illumination LED Lens 21.6 Machine Screw M2 Depth 2.5 Pitch 0.4 ( 4.5 ) Host Interface connector(12pin) IRISO 9681-12 Figure 20: Drawing of the MDI-4150...
Need help?
Do you have a question about the MDI-40 0 Series and is the answer not in the manual?
Questions and answers