Table of Contents
Advertisement
Quick Links
Advertisement
Table of Contents

Related Manuals for BenQ MW516


Summary of Contents for BenQ MW516
- Page 1 MS513/MX514/MW516 Digital Projector User Manual...
-
Page 2: Table Of Contents
Table of contents Important safety Personalizing the projector menu display ..............45 instructions ....3 Select the lamp saver mode ....45 Introduction....7 Shutting down the projector ....46 Menu operation ........47 Projector features........7 Maintenance ....59 Shipping contents ........8 Projector exterior view......9... -
Page 3: Important Safety Instructions
Important safety instructions Your projector is designed and tested to meet the latest standards for safety of information technology equipment. However, to ensure safe use of this product, it is important that you follow the instructions mentioned in this manual and marked on the product. - Page 4 Safety Instructions (Continued) The lamp becomes extremely hot Do not place this product on an during operation. Allow the unstable cart, stand, or table. The projector to cool for approximately product may fall, sustaining serious 45 minutes prior to removing the damage.
- Page 5 Always place the projector on a level, horizontal surface during operation. - Do not use if tilted at an angle of more than 10 degrees left to right, nor at angle of more than 15 degrees front to back.
- Page 6 Safety Instructions (Continued) Do not stand the projector on end Do not place liquids near or on the vertically. Doing so may cause the projector. Liquids spilled into the projector to fall over, causing injury or projector may cause it to fail. If the resulting in damage to the projector.
-
Page 7: Introduction
30% to 100% dynamically by detecting the content brightness level when Smart Eco mode is selected. • Instant restart - Turn on the power to have the image back immediately within a short time after turning it off . •... -
Page 8: Shipping Contents
Shipping contents Carefully unpack and verify that you have all of the items shown below. If any of these items are missing, please contact your place of purchase. Standard accessories The supplied accessories will be suitable for your region, and may differ from those illustrated. -
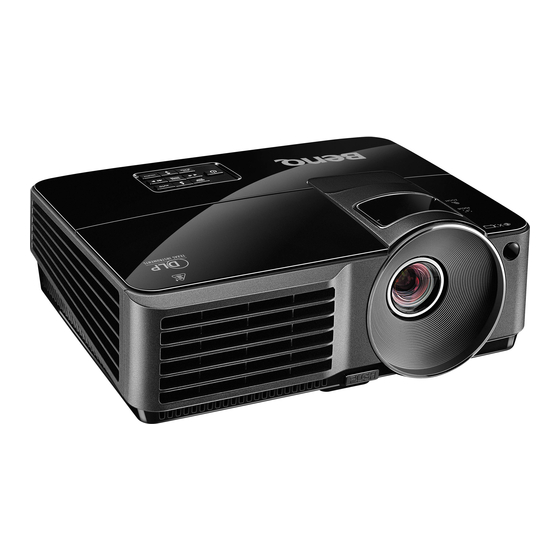
Page 9: Projector Exterior View
Projection lens Quick-release button USB input jack HDMI input jack S-Video input jack RGB (PC)/Component video (YPbPr/ YCbCr) signal input jack RS-232 control port Audio input jack Kensington anti-theft lock slot Rear/lower side AC power cord inlet Video input jack... -
Page 10: Controls And Functions
Volume /Arrow keys ( Left, Right) Adjusts the sound level. When the On-Screen Display (OSD) menu is activated, the #7 and #9 keys are used as directional arrows to select the desired menu items and to make adjustments. See "Using the menus" on page 29 for details. - Page 11 If you intend to mount your projector on the ceiling, we strongly recommend that you use a proper fitting BenQ projector ceiling mount kit and that you ensure it is securely and safely installed. If you use a non-BenQ brand projector ceiling mount kit, there is a safety risk that the projector may fall from the ceiling due to an improper attachment through the use of the wrong gauge or length screws.
-
Page 12: Remote Control
Remote control Eco Blank Press the Eco Blank button to turn off the image for a period of time with up to 70% lamp power saving. Press again to restore the image. See "Hiding the image" on page 42 for details. - Page 13 The distance between the remote control and the sensor should not exceed 8 meters (~ 26 feet). Make sure that there are no obstacles between the remote control and the IR sensor on the projector that might obstruct the infra-red beam.
-
Page 14: Replacing The Remote Control Battery
Never throw a battery into a fire. There may be danger of an explosion. • If the battery is dead or if you will not be using the remote control for a long time, remove the battery to prevent damage to the remote control from possible battery leakage. -
Page 15: Positioning Your Projector
Your room layout or personal preference will dictate which installation location you select. Take into consideration the size and position of your screen, the location of a suitable power outlet, as well as the location and distance between the projector and the rest of your equipment. -
Page 16: Obtaining A Preferred Projected Image Size
If the projector is mounted on a ceiling, it must be mounted upside-down so that it projects at a slightly downward angle. You can see from the diagram on page 18, that this type of projection causes the bottom edge of the projected image to be vertically offset from the horizontal plane of the projector. - Page 17 For example, if you are using the MX514/MS513 and a 120-inch screen, the average projection distance is 5040 mm and with a vertical offset of 274 mm. if you are using the MW516 and a 120-inch screen, the average projection distance is 3894 mm and with a vertical offset of 251 mm.
-
Page 18: Projection Dimensions
This will help you determine the exact mounting position so that it best suits your installation location. -
Page 19: Connection
Use the correct signal cables for each source. Ensure the cables are firmly inserted. • In the connections shown below, some cables may not be included with the projector (see "Shipping contents" on page 8). They are commercially available from electronics stores. -
Page 20: Connecting A Computer Or Monitor
Many notebooks do not turn on their external video ports when connected to a projector. Usually a key combo like FN + F3 or CRT/LCD key turns the external display on/off. Locate a function key labeled CRT/LCD or a function key with a monitor symbol on the notebook. Press FN and the labeled function key simultaneously. -
Page 21: Connecting Video Source Devices
Connecting Video source devices You need only connect the projector to a Video source device using just one of the above connecting methods, however each provides a different level of video quality. The method you choose will most likely depend upon the availability of matching terminals on both the... -
Page 22: Connecting An Hdmi Source Device
If so, you can continue with this procedure. • If not, you will need to reassess which method you can use to connect to the device. To connect the projector to an HDMI source device: Take an HDMI cable and connect one end to the HDMI output jack of the HDMI source device. -
Page 23: Connecting A Component Video Source Device
Take a Component Video to VGA (D-Sub) adaptor cable and connect the end with 3 RCA type connectors to the Component Video output jacks of the Video source device. Match the color of the plugs to the color of the jacks; green to green, blue to blue, and red to red. -
Page 24: Connecting An S-Video/Composite Source Device
If it has either of the output jack, you can also continue with this procedure. • If not, you will need to reassess which method you can use to connect to the device. To connect the projector to an S-Video/Video source device: Take an S-Video/Video cable and connect one end to the S-Video/Video output jack of the Video source device. -
Page 25: Operation
(If necessary) Rotate the focus ring to adjust the image clearness. If the projector is still hot from previous activity, it will run the cooling fan for approximately 90 seconds before energizing the lamp. If the projector is activated for the first time, select your OSD language following the on- screen instructions. -
Page 26: Adjusting The Projected Image
"Magnifying and searching for details" on page 34 for details. • Do not look into the lens while the lamp is on. The strong light from the lamp may cause damage to your eyes. • Be careful when you press the adjuster button as it is close to the exhaust vent where hot air comes from. -
Page 27: Fine-Tuning The Image Size And Clarity
OSD manual from OSD or remote control for better observe the shape changed. Open the OSD menu and go to the SYSTEM SETUP: Advanced > Test Pattern > On. Press MODE/ENTER. The Test Pattern displays. -
Page 28: Correcting Keystone
Keystoning refers to the situation where the projected image is noticeably wider at either the top or bottom. It occurs when the projector is not perpendicular to the screen. To correct this, besides adjusting the height of the projector, you will need to manually correct it following one of these steps. -
Page 29: Using The Menus
Using the menus The projector is equipped with On-Screen Display (OSD) menus for making various adjustments and settings. Below is the overview of the OSD menu. Main menu icon Main menu Highlight Status Sub-menu Press MENU/ EXIT to the previous page or to exit. -
Page 30: Securing The Projector
IMPORTANT: The digits being input will display as asterisks on-screen. Write your selected password down here in this manual in advance or right after the password is entered so that it is available to you should you ever forget it. -
Page 31: If You Forget The Password
IMPORTANT: The digits being input will display as asterisks on-screen. Write your selected password down here in this manual in advance or right after the password is entered so that it is available to you should you ever forget it. -
Page 32: Disabling The Password Function
• If the password is correct, the OSD menu returns to the Security Settings page with 'Off' shown in the row of Power on lock. You will not have to enter the password next time you turn on the projector. -
Page 33: Switching Input Signal
36 for details. For best display picture results, you should select and use an input signal which outputs at this resolution. Any other resolutions will be scaled by the projector depending upon the 'aspect ratio' setting, which may cause some image distortion or loss of picture clarity. See "Selecting... -
Page 34: Magnifying And Searching For Details
Selecting the aspect ratio The 'aspect ratio' is the ratio of the image width to the image height. Most analog TV and computers are in 4:3 ratio,and digital TV and DVDs are usually in 16:9 or 16:10 ratio. - Page 35 4:3: Scales an image so that it is displayed in the center of the screen with a 4:3 aspect ratio. This is most suitable for 4:3 images like computer monitors, standard definition TV and 4:3 aspect DVD movies, as it displays them without aspect alteration.
-
Page 36: Optimizing The Image
User 1 to User 2. Press to highlight Reference Mode. This function is only available when User 1 or User 2 mode is selected up in the Picture Mode sub-menu item. Press to select a picture mode that is closest to your need. -
Page 37: Using Wall Color
Using Wall Color In the situation where you are projecting onto a colored surface such as a painted wall which may not be white, the Wall Color feature can help correct the projected picture’s color to prevent possible color difference between the source and projected pictures. -
Page 38: Selecting A Color Temperature
Proper color management can only be achieved under controlled and reproducible viewing conditions. You will need to use a colorimeter (color light meter), and provide a set of suitable source images to measure color reproduction. These tools are not provided with the projector, however, your projector supplier should be able to provide you with suitable guidance, or even an experienced professional installer. -
Page 39: Creating Your Own Startup Screen
Creating your own startup screen In addition to selecting the projector preset startup screen from among BenQ logo, Black or Blue screen, you can make your own startup screen that is an image projected from your computer or video source. -
Page 40: Setting The Presentation Timer
Highlight Timer period and decide the timer period by pressing . The length of time can be set from 1 to 5 minutes in 1- minute increments and 5 to 240 minutes in 5-minute increments. Press to highlight Timer display and choose if you want the timer to show up... -
Page 41: Remote Paging Operations
> Presentation Timer menu and highlight Off. Press MODE/ENTER. A confirmation message displays. Highlight Yes and press MODE/ENTER to confirm. You will see the message “Timer is Off!” displaying on the screen. How to use the Timer On key? Timer On is a multi-functional key. -
Page 42: Hiding The Image
Eco Blank Timer menu to let the projector return the image automatically after a period of time when there is no action taken on the blank screen. The length of time can be set from 5 to 30 minutes in 5-minute increments. -
Page 43: Operating In A High Altitude Environment
1500 m –3000 m above sea level, and ambient temperature is between 0°C–35°C. Do not use the High Altitude Mode if your altitude is between 0 m and 1500 m and ambient temperature is between 0°C and 35°C. The projector will be over cooled, if you turn the mode on under such a condition. -
Page 44: Use Teaching Template
Use Teaching Template Making writing on the board easier for teachers, you can use build-in template by OSD or remote control. Open the OSD menu and go to the DISPLAY > Teaching Template . Choice Blackboard/ Whiteboard. > Off/ Letter Formation/ Musical Staff/ Worksheet/ Coordinate Chart. -
Page 45: Personalizing The Projector Menu Display
Menu display time in the SYSTEM SETUP: Advanced > Menu Settings menu sets the length of time the OSD will remain active after your last key press. The time length ranges from 5 to 30 seconds in 5-second increments. Use to select a suitable time frame. -
Page 46: Shutting Down The Projector
If the projector is not properly shut down, to protect the lamp, when you attempt to re-start the projector, the fans will run for a few minutes to cool down. Press Power again to start the projector after the fans stop and the POWER indicator light turns orange. -
Page 47: Menu Operation
Menu operation Menu system Please note that the on-screen display (OSD) menus vary according to the signal type selected. Main menu Sub-menu Options Off/Light Yellow/Pink/Light Wall Color Green/Blue/Blackboard Aspect Ratio Auto/Real/4:3/16:9/16:10 Keystone Position Phase H. Size Digital Zoom DISPLAY 3D Sync... - Page 48 Timer period 1~240 minutes Always/Last 1 min/Last 2 min/ Timer display Last 3 min/Never Top-Left/Bottom-Left/Top- Timer position Presentation Right/Bottom-Right Timer Timer counting Count Down/Count Up direction Sound reminder On/Off On/Off Yes/No Language Front Table/Rear Table/Rear Projector Position Ceiling/Front Ceiling 5 sec/10 sec/15 sec/20 sec/25...
- Page 49 • Equivalent Lamp Hour • Firmware Version Note that the menu items are available when the projector detects at least one valid signal. If there is no equipment connected to the projector or no signal detected, limited menu items are accessible.
-
Page 50: Description Of Each Menu
Description of each menu • The default values listed in this manual, especially on pages 50-58, are for reference only. They may vary between the projectors due to the continuous improvement to the products. FUNCTION DESCRIPTION Corrects the projected picture’s color when the projection surface is Wall Color not white. - Page 51 This projector features a 3D function which enables you to enjoy the 3D movies, videos, and sporting events in a more realistic way by presenting the depth of the images. You need to wear a pair of 3D glasses to view the 3D images.
- Page 52 "Selecting a picture mode" on page 36 for details. Selects a picture mode that best suits your need for the image quality and further fine-tune the image based on the selections listed on the same page below. See "Setting the User 1/User 2 mode" on page 36 Reference for details.
- Page 53 3D Color This function is only available when User 1/2 is Management selected. Saves the settings made for User 1 or User 2 mode. Save Settings This function is only available when User 1/2 is selected. Quick Auto "Switching input signal" on page 33 for details.
- Page 54 Sets the language for the On-Screen Display (OSD) menus. See Language "Using the menus" on page 29 for details. The projector can be installed on a ceiling or behind a screen, or with Projector one or more mirrors. See "Choosing a location" on page 15 Position details.
- Page 55 "Starting up the projector" on page 25 for details. Auto Power Off Allows the projector to turn off automatically if no input signal is detected after a set period of time. See "Setting Auto Power Off" on page 60 for details.
- Page 56 "Getting to know the lamp hour" on page 60 for details on how the total lamp hour is calculated. Change password You will be asked to enter the current password before changing to a new one. Change Security Settings Security...
-
Page 57: Monitor Out
Monitor Out Selecting On enables the function. The projector can output a VGA signal when it is in standby mode and the COMPUTER 1 and MONITOR-OUT jacks are correctly connected to devices. See Standby "Connecting a monitor" on page 20 for how to make the connection. - Page 58 Shows the native resolution of the input signal. System Color System Status Shows input system format, NTSC, PAL, SECAM, or RGB. Equivalent Lamp Hour Displays the number of hours the lamp has been used. Firmware Version Shows firmware version. Operation...
-
Page 59: Maintenance
Maintenance Care of the projector Your projector needs little maintenance. The only thing you need to do on a regular basis is to keep the lens and case clean. Never remove any parts of the projector except the lamp. Contact your dealer if other parts need replacing. -
Page 60: Lamp Information
Economic mode. The lamp hour in Economic mode is calculated as 3/4 of that in Normal mode. That is, using the projector in Economic mode helps to extend the lamp hour by 1/3. To obtain the lamp hour information:... -
Page 61: Timing Of Replacing The Lamp
When the Lamp indicator lights up red or a message appears suggesting it is time to replace the lamp, please install a new lamp or consult your dealer. An old lamp may cause a malfunction in the projector and in some instances the lamp may explode. -
Page 62: Replacing The Lamp
To reduce the risk of electrical shock, always turn the projector off and disconnect the power cord before changing the lamp. • To reduce the risk of severe burns, allow the projector to cool for at least 45 minutes before replacing the lamp. •... - Page 63 Remove the lamp cover by (a) sliding the cover toward the side of the projector and (b) lifting it off. • Do not turn the power on with the lamp cover removed. • Do not insert your fingers between the lamp and the projector.
-
Page 64: Resetting The Lamp Timer
A warning message displays asking if you want to reset the lamp timer. Highlight Reset and press Mode/Enter. The lamp time will be reset to '0'. Do not reset if the lamp is not new or replaced as this could cause damage. Maintenance... - Page 65 Green Powering up Flashing Normal operation Green The projector needs 90 seconds to cool down as it was abnormally shut down without the normal cooling down process. Or The projector needs to cool for 90 seconds after the Orange Flashing power is turned off.
-
Page 66: Troubleshooting
The projector does not turn on. Cause Remedy Plug the power cord into the AC inlet on the projector, and plug the power cord into the There is no power from the power cable. power outlet. If the power outlet has a switch, make sure that it is switched on. -
Page 67: Specifications
265 W (Max); < 1 W (Standby) Operating altitude Mechanical 0-1499 m at 0°C-35°C Weight 1500-3000 m at 0°C-30°C (with High 2.45 Kg (5.4 lbs) Altitude Mode on) Lamp life results will vary depending on environmental conditions and usage Specifications 67... -
Page 68: Dimensions
Dimensions 301.7 mm (W) x 123.4 mm (H) x 232.5 mm (D) 301.7 232.5 123.4 71.2 68.3 Ceiling mount installation Ceiling mount screws: M4 x 8 (Max. L = 8 mm) 228.0 Unit: mm 242.1 82.4 115.8 117.0 301.7 Specifications... -
Page 69: Timing Chart
Timing chart Supported timing for PC input Resolution Horizontal Vertical Pixel Mode Frequency Frequency Frequency (kHz) (Hz) (MHz) 720 x 400 31.469 70.087 28.322 720 x 400_70 640 x 480 31.469 59.940 25.175 VGA_60 37.861 72.809 31.500 VGA_72 37.500 75.000 31.500... -
Page 70: Supported Timing For Hdmi Input
100.000 MAC21 @75Hz VIDEO 31.47 480p 31.25 576p (HDCP) 45.00 74.25 720p_60 37.50 74.25 720_50 33.75 74.25 1080i_60 28.13 74.25 1080i_50 67.5 148.5 1080p 56.25 148.5 1080p Displaying a 1080i(1125i)@60Hz or 1080i(1125i)@50Hz signal may result in slight image vibration. Specifications... - Page 71 1080i(1125i)@50Hz 28.13 50.00 1080p@60Hz 67.5 60.00 1080p@50Hz 56.25 50.00 Displaying a 1080i@60Hz or 1080i@50Hz signal may result in slight image vibration. Supported timing for Video and S-Video inputs Video mode Horizontal Vertical Color sub-carrier Frequency (kHz) Frequency (Hz) Frequency (MHz) NTSC* 15.73...
-
Page 72: Warranty And Copyright Information
Further, BenQ Corporation reserves the right to revise this publication and to make changes from time to time in the contents hereof without obligation to notify any person of such revision or changes.
Need help?
Do you have a question about the MW516 and is the answer not in the manual?
Questions and answers