Table of Contents
Advertisement
Installation
Operation
Co
Maintenance
CGWF SE – CGWF HE – CXWF
Indoor water-cooled chillers and water/water heat pumps with scroll
compressors, Symbio™ 800 controller and R410A refrigerant
CGWF SE - Cooling capacity 50-700 kW
CGWF HE - Cooling capacity 55-373 kW
CXWF
- Heating capacity 60-835 kW (reversible on water side)
October 2023
CG-SVX049F-GB
Original instructions
Advertisement
Table of Contents

Related Manuals for Trane Technologies CGWF SE


Summary of Contents for Trane Technologies CGWF SE
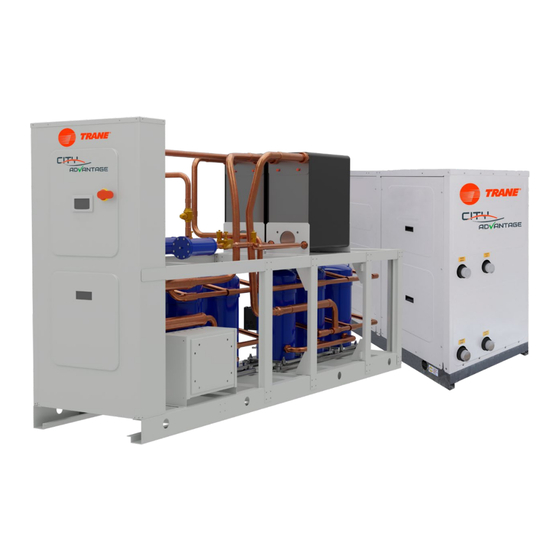
- Page 1 Installation Operation Maintenance CGWF SE – CGWF HE – CXWF Indoor water-cooled chillers and water/water heat pumps with scroll compressors, Symbio™ 800 controller and R410A refrigerant CGWF SE - Cooling capacity 50-700 kW CGWF HE - Cooling capacity 55-373 kW...
-
Page 2: Table Of Contents
Contents OVERVIEW SAFETY OPERATING LIMITS INSTALLATION ACOUSTIC PROTECTION ELECTRICAL POWER SUPPLY WATER CONNECTIONS REFRIGERANT SCHEME ELECTRICAL PANEL AND ELECTRICAL DATA OPERATOR RESPONSIBILITIES START-UP PRELIMINARY PROCEDURES CHECK LIST – MANDATORY OPERATION CONTROL BEFORE START-UP START-UP MAINTENANCE RECOMMENDED SPARE PARTS TROUBLESHOOTING IMPROPER USE Page 3... -
Page 3: Overview
OVERVIEW FOREWORD The instructions are given as a guide to good practice in the installation, start-up, operation, and maintenance by the contractor or end-user of a CGWF chiller or CXWF heat pump unit. It does not contain full service procedures necessary for the continued successful operation of this equipment. - Page 4 The legal representative of the company appointed by the owner to position and hydraulically, electrically etc. connect the Trane unit to the plant: he or she is responsible for moving and the correct installation of the unit in accordance with the indications in this manual and with the national regulations in force.
- Page 5 Conditions to avoid Use in presence of exposed flames, and of high levels of humidity. Possibility of violent reactions with the sodium, the potassium, the barium and with other alkaline substances, Dangerous reactions incompatible materials and all the alloys containing more than 2% of magnesium. Wear protection apparel and self-rescuer respirators.
- Page 6 2.9 PRECAUTIONS TO BE OBSERVED DURING MAINTENANCE OPERATIONS Only authorized technicians may carry out maintenance operations. Before carrying out any maintenance the following must be performed: • isolate the unit from the mains electricity by using the external knife switch. •...
- Page 7 DO NOT PULL OUT THE HIGH PRESSURE SWITCHES (ONE PER REFRIGERANT CIRCUIT) IF THE UNIT IS NOT COMPLETELY VOID OF REFRIGERANT. FAILURE TO FOLLOW THIS INSTRUCTION COULD RESULT IN DEATH OR SERIOUS INJURY 2.10 MANUAL ALARM RESET If there is an alarm the unit must not be manually reset before having located and eliminated the root cause of the fault. Repeated manual resets may cause the warranty to become void.
-
Page 8: Operating Limits
CAUTION: The storage in a very high humidity space (condensation) can damage electronic components. CAUTION: The CGWF SE / CGWF HE / CXWF units are intended only for indoor usage and storage. If they are installed in a machinery room they must be installed within the meaning of the EN 378-3 Standard. - Page 9 ETHYLENE GLYCOL CORRECTION TABLE % Ethylene glycol weight Lowest outlet water temperature °C -2,8 °C Suggested security limit Cooling 0,99 0,985 0,981 0,977 0,974 0,971 capacity coefficient 0,993 0,99 0,988 0,986 0,984 0,982 Power input coefficient 1,04 1,05 1,07 1,08 1,09 1,11 Flow rate coefficient...
-
Page 10: Installation
Use retractor bars to keep the lifting wires or chains away from the unit. Figure 2 - Correct lifting procedure for platform 1 units (CGWF SE, and CXWF/CGWF HE sizes from 013 to 025) Figure 3 - Correct lifting procedure for platform 2 units... - Page 11 Correct lifting procedure for platform 3 units (sizes with two refrigerant Figure 4 circuits - CGWF SE sizes from 042 to 096, CXWF/CGWF HE sizes from 042 to 128) Figure 5 - Correct lifting procedure for platform 4 units (sizes with two refrigerant circuits –...
- Page 12 Lifting procedures provided with the unit have to be respected. CAUTION Do not use forklift trucks to lift the unit from below. If equipment for lifting from above is not available, using rollers may move the unit. The surface on which the unit is placed must be flat and strong enough to withstand the weight of the unit while running. In order to reduce the transmission of vibrations to the supporting structures, fit shock absorbers in every fastening point.
- Page 13 MINIMUM SPACE REQUIREMENTS Dimensional drawing shall be respected to avoid difficult maintenance or inaccessibility to components The following drawings are views from under the units: Figure 6 - minimum space requirements [mm] for platform 1 Figure 6 - minimum space requirements [mm] for platform units 1 units Figure 8 - minimum space requirements [mm] for platform...
- Page 14 Figure 9 - minimum space requirements [mm] for platform 4 units Side of the unit that can be placed next to the wall. This means that with the unit at a distance less than the optimal one of 700 mm the accessibility to some components is worse but in any case is ensured even if the unit is leaning against the wall.
-
Page 15: Acoustic Protection
ACOUSTIC PROTECTION maximum isolation effect, water lines and electrical conduit should also be isolated. Wall sleeves and rubber isolated piping hangers can be used to reduce the sound transmitted through water piping. To reduce the sound transmitted through electrical conduit, use flexible electrical conduit. EU and Local codes on sound emissions should always be considered. - Page 16 MAIN SWITCHES FEATURES UNIT SIZES CGWF SE CGWF HE CXWF Poli Ampere Type 80 A OT80F3 80 A OT80F3 80 A OT80F3 100 A OT100F3 100 A OT100F3 100 A OT100F3 100 A OT100F3 125 A OT125F3 125 A OT125F3...
-
Page 17: Water Connections
WATER CONNECTIONS EVAPORATOR The connections schemes relating to evaporator are featured in the paragraph 7.5 HYDRAULIC VERSIONS. The connection tubes have to be supported adequately in order that their weight does not damage the plant. It is necessary that the water flow rate to the unit is compatible with the evaporator one. It is also necessary that the water flow rate is kept uniform while the unit is running: it is suggested to use always a pump system dedicated to the unit and independent from the remaining part of the plant. - Page 18 7.1.1 Calculation of total minimum water content, total optimal water content and flow rates Plant side chilled water heat exchanger Vopt Vmin Q min Q max CGWF SE [m3] [m3] [m3/h] [m3/h] 0,45 0,26 365,3 14,9 0,51 0,29 358,0 16,9...
- Page 19 Plant side chilled water heat exchanger Vopt Vmin Q min Q max CGWF HE [m3] [m3] [m3/h] [m3/h] 0,46 0,26 196,1 15,3 0,53 0,30 191,3 17,5 0,59 0,34 187,3 19,7 0,72 0,41 79,0 24,1 0,82 0,47 77,3 10,2 27,3 0,96 0,55 41,3 12,0...
- Page 20 Plant side chilled water heat exchanger Plant side hot water hot exchanger CXWF Vopt Vmin Q min Q max Vopt Vmin Q min Q max [m3] [m3] [m3/h] [m3/h] [m3] [m3] [m3/h] [m3/h] 0,46 0,26 196,1 15,3 1,49 0,52 94,1 17,4 0,53 0,30...
- Page 21 CAUTION: The unit water pipes are not protected against the risk of water freeze-up when the unit is not electrically powered and when the power and control of the external water pump is not managed by the CGWF SE/CGWF HE/CXWF unit controller. The owner or local maintenance personnel must provide appropriate solutions to prevent freezing.
- Page 22 HYDRAULIC VERSIONS CGWF SE / CGWF HE / CXWF units are available in combination with various external hydraulic kits which are supplied separately from the unit and supplied directly by manufacturer. The available modules are the following ones: Single pump hydraulic...
- Page 23 Example of a possible configuration: SOURCE SIDE Double pump hydraulic kit with inverter IMPORTANT: Hydraulic and electrical connections between hydraulic kit(s) and the unit are at customer care. Please consult the electrical drawing of the unit and the electrical drawing of the hydraulic kit to implement the electrical connections between them.
- Page 24 (**) A Victaulic kit must be provided for every side of the unit (user and or source one) to be connected. In case of selection of external hydraulic kit, it is necessary to provide 1 kit for the unit and 1 kit for the external hydraulic kit module.
- Page 25 7.5.2 Hydraulic diagram for CGWF (SE and HE) - CXWF units and hydraulic modules with no pump no tank on user side and 1 pump without tank on source side, with low or high head. Temperature Remote Connections at Probe drafted customer care Relief Valve Expansion...
- Page 26 7.5.3 Hydraulic diagram for CGWF (SE and HE) - CXWF units and hydraulic modules with 1 pump without tank on user side with low or high head; no pump no tank on source side. Single pump Temperature hydraulic kit Probe drafted Remote Connections at customer care Relief Valve...
- Page 27 7.5.4 Hydraulic diagram for CGWF (SE and HE) - CXWF units and hydraulic modules with 1 pump with low or high head and tank on user side; no pump no tank on source side. Temperature Single pump Probe drafted hydraulic kit Remote Connections at Relief Valve customer care...
- Page 28 7.5.5 Hydraulic diagram for CGWF (SE and HE) - CXWF units and hydraulic modules with 1 pump without tank on user side and 1 pump on source side. Temperature Remote Connections at Probe drafted customer care Relief Valve Expansion Vessel Gauges Safety Valve (6 bar)
- Page 29 7.5.6 Hydraulic diagram for CGWF (SE and HE) - CXWF units and hydraulic modules with 1 pump and tank on user side and 1 pump without tank on source side. Temperature Remote Connections at Probe drafted customer care Relief Valve Remote Connections Expansion by the Installer...
- Page 30 7.5.7 Hydraulic diagram for CGWF (SE and HE) - CXWF units and hydraulic modules with 1 pump without tank on user side and 2 pumps without tank on source side Temperature Remote Connections at Probe drafted Single pump customer care hydraulic kit Relief Valve Expansion...
- Page 31 7.5.8 Hydraulic diagram for CGWF (SE and HE) - CXWF units and hydraulic modules with pump and tank on user side and 2 pumps without tank on source side. Temperature Remote Connections at Single pump hydraulic kit Probe drafted customer care Relief Valve Expansion Vessel...
- Page 32 7.5.9 Hydraulic diagram for CGWF (SE and HE) - CXWF units and hydraulic modules with 2 pumps without tank on user side and no pump no tank on source side. Temperature Probe drafted Remote Connections at customer care Relief Valve Dual pump hydraulic kit Expansion Vessel...
- Page 33 7.5.10 Hydraulic diagram for CGWF (SE and HE) - CXWF units and hydraulic modules with 2 pumps and tank on user side and no pump no tank on source side. Temperature Probe drafted Remote Connections at Relief Valve Dual pump hydraulic kit customer care Expansion Vessel...
- Page 34 7.5.11 Hydraulic diagram for CGWF (SE and HE) - CXWF units and hydraulic modules with 2 pumps without tank on user side and 1 pump without tank on source side . Temperature Remote Connections at Probe drafted Remote Connections Single pump hydraulic kit customer care by the Installer Relief Valve...
- Page 35 7.5.12 Hydraulic diagram for CGWF (SE and HE) - CXWF units and hydraulic modules with 2 pumps and tank on user side and 1 pump without tank on source side . Dual pump hydraulic kit Temperature Remote Connections at Probe drafted customer care Relief Valve Expansion...
- Page 36 7.5.13 Hydraulic diagram for CGWF (SE and HE) - CXWF units and hydraulic modules with 2 pumps without tank on user side and 2 pumps without tank on source side. Temperature Remote Connections Probe drafted Remote Connections at Dual pump hydraulic kit by the Installer customer care Relief Valve...
- Page 37 7.5.14 Hydraulic diagram for CGWF (SE and HE) - CXWF units and hydraulic modules with 2 pumps and tank on user side and 2 pumps without tank on source side. Dual pump hydraulic kit Temperature Remote Connections at Probe drafted customer care Relief Valve Expansion...
- Page 38 7.6 CUSTOMER PLANT SKETCHES 7.6.1 Customer plant sketch on the condenser side of CGWF SE / CGWF HE / CXWF units with no on board unit pump MODULATING 3 WAY VALVE IMPORTANT The installation of the MODULATING (OPTIONAL) modulating valve is at customer care...
- Page 39 7.6.2 Customer plant sketch without primary pump on the condenser side of CGWF SE / CGWF HE / CXWF units MODULATING 3 WAY VALVE MODULATING (OPTIONAL) 2 WAY VALVE (OPTIONAL) IMPORTANT The installation of the 3-ways modulating valve is at customer care...
- Page 40 7.6.3 Customer plant sketch on the condenser side of CGWF SE / CGWF HE / CXWF units with no on board unit pump CUSTOMER PLANT AIR CONDITIONING WATER PUMP Primary Pump Secondary Pump Temperature Probe Flow Switch HOT WATER Drainage...
- Page 41 7.6.4 Customer plant sketch without primary pump on the condenser side of CGWF SE / CGWF HE / CXWF units CUSTOMER PLANT AIR CONDITIONING WATER PUMP Primary Pump Secondary Pump FANCOIL Temperature Probe HOT WATER TANK Flow Switch Drainage Vent Valve...
- Page 42 7.6.5 Flow switch installation To ensure adequate water flow through the evaporator, install a flow switch on the water circuit. The flow switch must be installed according to the relevant hydraulic diagram among those reported in 7.5 HYDRAULIC VERSIONS . The purpose of the flow switch is to stop the unit in case of an interruption of the water flow while protecting the evaporator from freezing.
- Page 43 PUMPS CHARACTERISTICS 7.7.1 CGWF SE low head pressure pumps characteristics USER SIDE Ref. Curve F.L.I. F.L.A. Mod. [kW] [kPa] [kW] [kPa] [kPa] 1,72 1,72 1,72 2,55 2,55 2,55 2,55 2,55 2,55 4,52 4,52 4,52 4,52 6,09 10,6 6,09 10,6 6,09...
- Page 44 = pressure drop (kPa) F.L.I. = full load electrical power F.L.A. = full load operating current Hp = water pump head pressure Hu = water pump available pressure CGWF SE LOW HEAD PRESSURE PUMPS CURVES USER-SOURCE SIDE Page 45...
- Page 45 7.7.2 CGWF SE high head pressure pumps characteristics USER SIDE Ref. Curve F.L.I. F.L.A. Mod. [kW] [kPa] [kW] [kPa] [kPa] 2,55 2,55 2,55 3,44 3,44 4,52 4,52 4,52 4,52 8,26 13,6 8,26 13,6 8,26 13,6 8,26 13,6 8,26 13,6 8,26...
- Page 46 Pf = cooling capacity (kW) F.L.A. = full load operating current qw = water flow (m3/h) Hp = water pump head pressure dpw = pressure drop (kPa) Hu = water pump available pressure CGWF SE LOW HEAD PRESSURE PUMPS CURVES USER-SOURCE SIDE Page 47...
- Page 47 7.7.3 CGWF HE low head pressure pumps characteristics CGWF HE USER SIDE (CXWF SOURCE SIDE) Mod. Ref. Curve F.L.I. F.L.A. [kW] [kPa] [kW] [kPa] [kPa] CGWF CXWF 52,7 1,72 60,4 1,72 69,8 1,72 83,7 2,55 94,2 2,55 111,3 2,55 130,0 2,55 143,2 2,55...
- Page 48 CGWF HE SOURCE SIDE (CXWF USER SIDE) Mod. Ref. Curve F.L.I. F.L.A. CGWF CXWF [kW] [kPa] [kW] [kPa] [kPa] 1,72 1,72 1,72 2,55 2,55 2,55 2,55 2,55 3,44 3,44 3,44 6,09 10,6 6,09 10,6 6,09 10,6 6,09 10,6 6,09 10,6 6,09 10,6 8,26...
- Page 49 CGWF HE-CXWF LOW HEAD PRESSURE PUMPS USER-SOURCE SIDE CURVES Page 50...
- Page 50 7.7.4 CGWF HE high head pressure pumps characteristics CGWF HE USER SIDE (CXWF SOURCE SIDE) Mod. Ref. Curve F.L.I. F.L.A. [kW] [kPa] [kW] [kPa] [kPa] CGWF CXWF 2,55 2,55 2,55 3,44 3,44 4,52 4,52 4,52 4,52 8,26 13,6 8,26 13,6 8,26 13,6 8,26...
- Page 51 CGWF HE SOURCE SIDE (CXWF USER SIDE) Mod. Ref. Curve F.L.I. F.L.A. CGWF CXWF [kW] [kPa] [kW] [kPa] [kPa] 2,55 2,55 2,55 3,44 3,44 4,52 4,52 4,52 4,52 4,52 8,26 13,6 8,26 13,6 8,26 13,6 8,26 13,6 8,26 13,6 10,12 17,2 10,12 17,2...
-
Page 52: Refrigerant Scheme
8 REFRIGERANT SCHEME The following drawing is valid for CGWF SE, CGWF HE and CXWF. No cycle reversing valve is shown since the switch from chiller mode to heat pump mode for CXWF is made by modifying the customer plant... - Page 53 CXWF reversing on water cycle In order to activate the CXWF heat pump mode must be set the winter mode on the display of the unit Symbio controller. The electrovalves installed on the customer plant and providing the customer water plant reversing action over the chiller-heat pump switch (these electrovalves are the ones featured in the diagram below and labeled by the letter B will not be commanded (energyzed) by the CXWF electrcial cabinet but their activation will be managed externally.
-
Page 54: Electrical Panel And Electrical Data
9 ELECTRICAL PANEL AND ELECTRICAL DATA • All field-installed wiring must be in accordance with local regulations, CE directives and guidelines. Be sure to satisfy proper equipment grounding requirements according CE • The standardized values - Maximum Amps –Maximum kilo Watts are displayed on the unit nameplate. •... - Page 55 Electrical data NOMINAL VALUES MAXIMUM VALUES condenser water temperature in/out 30/35°C, evaporator water temperature in/out 12/7°C Compressors TOTAL TOTAL L.R.A. CGWF SE S.A. with with S.A. with F.L.I. F.L.A. L.R.A. F.L.I. F.L.A. S.A. softstarter F.L.I. F.L.A. S.A. softstarter softstarter 11,0...
- Page 56 NOMINAL VALUES MAXIMUM VALUES condenser water temperature in/out 30/35°C, evaporator water temperature in/out 12/7°C Compressors TOTAL TOTAL CGWF S.A. with L.R.A. with S.A. with CXWF softstarter softstarter softstarter F.L.I. F.L.A. L.R.A. F.L.I. F.L.A. S.A. F.L.I. F.L.A. S.A. 10,5 18,3 142,0 10,5 18,3 151,1...
-
Page 57: Operator Responsibilities
10 OPERATOR RESPONSIBILITIES It is important that the operator is properly trained and familiar with the equipment before working on the unit. In addition to reading this manual, the operator must study the manual operation of the microprocessor and the wiring diagram to understand the sequence of start- up, operation, shutdown sequences, and the criterion of operation of all safety devices. -
Page 58: Check List - Mandatory Operation Control Before Start-Up
ADDRESS: POSTCODE: COUNTRY: THE INTENDED PURPOSE OF CGWF SE / CGWF HE / CXWF UNITS IS NOT FOR INDUSTRIAL PROCESS APPLICATION WHICH REQUIRE CHILLED WATER BELOW -7° CELSIUS. PLEASE CONTACT TRANE TECHNICAL DEPARTMENT IN CASE OF INDUSTRIAL PROCESS APPLICATION GENERAL COMPLIANCE THE HYDRAULIC CIRCUIT IS COMPLETE AND READY TO BE USED AND THE THERMAL LOAD IS AVAILABLE. - Page 59 ELECTRIC AND ELECTRONIC COMPLIANCE THE UNIT IS ELECTRICALLY POWERED AND ALL THE RELEVANT ELECTRICAL WIRES ARE PROPERLY CONNECTED. ELECTRICAL SUPPLY HAS BEEN INSTALLED IN ACCORDANCE WITH THE INSTRUCTIONS PROVIDED IN THE NAME PLATE AND IN THE TECHNICAL DOCUMENTATION. (ELECTRICAL POWER SUPPLY: 230V/400V +/- 10% - MAXIMUM “%” OF PHASE IMBALANCE: +/- 2%).
- Page 60 WATER CIRCUIT COMPLIANCE THE FILTER IS INSTALLED ON THE HEAT EXCHANGER PIPES (INLET PIPES FOR THE EVAPORATOR OUTLET PIPES FOR THE RECOVERY) AT A MAXIMUM DISTANCE OF 2 METERS FROM THE UNIT. PLEASE NOTE THAT THE FILTER INSTALLATION IS MANDATORY. FOR FURTHER TECHNICAL INFORMATION RELATING THE FILTER REFER TO THE TECHNICAL DOCUMENTATION.
- Page 61 FOR FURTHER INFORMATION REFER TO DOCUMENTATION PROVIDED. ANTIFREEZE PROTECTIONS ARE MANDATORY FOR OUTDOOR AIR TEMPERATURE LOWER THAN 3°C. THE WATER CIRCUIT IS FILLED WITH ETHYLENE GLYCOL. ETHYLENE GLYCOL “%” SHALL CONFORM TO THE DATA PROVIDED IN THE DOCUMENTATION. ALL WATER PIPES ARE GROUND CONNECTED (IN ORDER TO AVOID ABNORMAL VOLTAGES THAT CAN CAUSE DANGEROUS CORROSIONS).
- Page 62 12.1 REFRIGERANT CHARGE 12.1.1 Refrigerant replacement procedure with unit stopped and in vacuum (refrigerant charge in the liquid phase) Open the shut off valve as far as possible so that it closes the service coupling. Connect the refrigerant cylinder to the service coupling without tightening the coupling.
- Page 63 12.1.2 Refrigerant replacement procedure with unit running (refrigerant charge in the vapour phase) Caution: charge vapour only. Do not charge liquid because it may damage the compressor. Connect the refrigerant cylinder to the service valve without tightening the coupling. Drain the connection piping and tighten the coupling.
-
Page 64: Start-Up
START-UP 13.1 PRELIMINARY CONTROLS Before starting up the equipment, check that all the operations described in the paragraph “CHECK LIST – MANDATORY OPERATION CONTROL BEFORE START UP” have been carried out correctly. Check that all the mechanical and electrical equipment has been tightened perfectly. Particular attention should be paid to the main components (compressor, exchangers, ventilators, electrical motors, and pump) if loose fastenings are found, tighten them well before starting up the unit. - Page 65 8) Turn off the power (into standby mode) and make sure the pumps stop after about 2 minutes. Verify that the local temperature setpoint is set to the required value by pressing the Set button. 9) Turn the main switch to “OFF”. Open the cabinet. Reactivate the compressors. Close the cabinet. Turn the main switch to “ON”...
-
Page 66: Maintenance
14 MAINTENANCE Maintenance operations are fundamental in order to keep the units running properly, from both a purely functional and an energetic points of view. Every Trane unit comes with a logbook, in which the user or the person delegated to unit maintenance can keep all the required notes, in order to keep a historical log of the Trane unit. - Page 67 14.2 STANDARD CHECKS Recommended Operations description basis Compressors oil level check monthly Inlet temperature check (overheating) monthly Water circuits filling check monthly Compressors motors electrical input check monthly Power supply and auxiliary power voltage check monthly Refrigerant charge check through sight glass monthly Compressors carter heaters operation check monthly...
- Page 68 14.3 ORDINARY MAINTENANCE Activities list Week Month (1) Year (2) General: Data collection operation (3) Visually inspect the unit for any damage and / or looseness Verifying the integrity of the thermal insulation Clean and paint where needed Water Analysis (4) Electric: Check the correct operation of the equipment on the unit Check the wear of contactors - Replace if necessary...
-
Page 69: Recommended Spare Parts
RECOMMENDED SPARE PARTS Here below is shown a list of the recommended spare parts for units with several years of operation. Your local Trane Sales & Service office is at your disposal to recommend a customized list of spare parts and accessories according to the commissioned order and based on the installed unit with its specific serial number 1 YEAR... -
Page 70: Troubleshooting
TROUBLESHOOTING Who can take corrective action U Symptom Cooling Heating = User Probable cause Possible remedy S = specialised personnel Probe faulty service Check and replace if necessary. A The unit does Lack of consent of the high or low See points D-E not start pressure... - Page 71 Who can take corrective action U Symptom Cooling Heating = User Probable cause Possible remedy S = specialised personnel Pressure switch out of order Check and replace. Unit completely void of refrigerant See point G. Water circulation pump blocked Unlock the pump E The compressor does not start Water circulation pump blocked and...
-
Page 72: Improper Use
Cutoff voltage Trane – by Trane Technologies ( NYSE: TT), a global climate innovator – creates comfortable, energy efficient indoor environments through a broad portfolio of heating, ventilating and air conditioning systems and controls, services, parts and supply. For more information, please visit trane.eu or tranetechnologies.com.
Need help?
Do you have a question about the CGWF SE and is the answer not in the manual?
Questions and answers