
Related Manuals for Trane Technologies RTAG 225


Summary of Contents for Trane Technologies RTAG 225
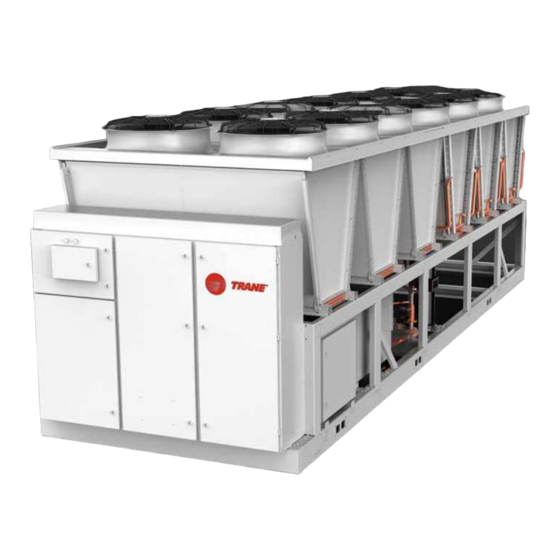
- Page 1 Installation, Operation and Maintenance RTAG Air-Cooled Helical Rotary Liquid Chillers Models: RTAG 225-500 ton units (60Hz) 572598690001 SAFETY WARNING RTAG-SVX001H-EN Feb. 2022 Confidential and proprietary Trane information...
- Page 2 Note that warnings, cautions and notices appear at appropriate intervals Trane believes that responsible refrigerant practices are throughout this manual. Warnings are provide to alert important to the environment, our customers, and the installing contractors to potential hazards that could re- air conditioning industry.
- Page 3 1. RTAG-SVX001H-EN (March 2022 New manual. Unchanging refrigerant before welding, filled with nitro- gen for protection, and use cooling method to protect- ing the electron component. TRANE is not responsible for the equipment damage due to improper welding. RTAG-SVX001H-EN...
- Page 4 Figure 2. Dimension - RTAG 190/205/225 Ex- Figure 23. Water flow- pressure drop curve .. 34 tra/ Premium efficiency unit ......17 Figure 3. Dimension - RTAG 225 Extra effi- Water Treatment ...........36 ciency unit ............18 Table 11. Water quality requirements ... 36 Figure 4.
- Page 5 Contents Power Supply Wiring ........38 Table 21. Analog Input ........51 Figure 18. Power Entrance of fixed panel ..39 Table 22. Multistate Output ......51 Figure 19. Power Entrance of AFD panel ..39 Table 23. Multistate Input ......52 Table 24.
- Page 6 Contents Viewing the Settings Screen ......62 Figure 52. Sequence of events: stopped to starting ............72 Figure 33. Setting screen ......... 62 Running (Lead Compressor/Circuit Start and Viewing and Changing Equipment Settings Run) ..............73 ................ 62 Figure 53. Sequence of operation: running (lead Figure 34.
- Page 7 Contents Compressor Oil ..........111 Figure 69. Compressor with Auxiliary Inlet Port ............97 Oil Separator Oil Level Check ....111 Condenser and Fan ........97 Figure 71. Oil Level Measure of Oil Separator ............111 Evaporator ........... 97 Compressor Oil Charging ......111 Expansion Valve ..........
- Page 8 Contents Troubleshooting ..........127 Symptoms and Diagnostics .......131 Maintenance ..........132 Function code ..........133 RTAG-SVX001H-EN...
- Page 9 An example of a typical unit model number is: RTAG 190 X F N 2 S T X X X X 0 X F R V 0 1 N N I X N 5~7 8 9 10 11 12 13 14 15 16 17 18 19 20 21 22 23 24 25 26 27 28 29 30 31 32 33 34 35 36 37 38 39 40 41 42 Model number digits are selected and assigned in accordance with the following definitions using the model number example shown above.
- Page 10 Unit Model Number use tube sound wrap, N6E2 use compressor sound box. this option is only for unit nominal tonnage >225. = Without Low noise option of Sound Treatment use sound wrap to reduce the compressor, suction and discharge line, = None oil separator noise;...
- Page 11 Unit Model Number CHHP = GP2 compressor series CHHW = GP2.5 Compressor Family = 120 TON = All compressors = 100 TON 0M2 = 85 TON = N Frame = 70 TON = 60 TON = 50 TON = GP2.5 Smaller capacity (minor) = 40 TON = GP2.5 Larger capacity (major) = 35 TON...
- Page 12 The shell-and-tube type evaporator is manufactured in accordance with ASME standards. Each evaporator is fully insulated and is equipped with water drain and This manual includes RTAG air cooled screw chiller vent connections. Packaged units have heat tape and installation, operation and maintenance.Related services plug-in heater protection to -20ºC as standard.
- Page 13 Overview RTAG nameplates: unit nameplate, compressor name- plate, evaporator nameplate and oil separator name- plate. RTAG nameplate stick on the outer surface of the control panel, compressor nameplate stick on the compressor housing, evaporator nameplate stick on the heat ex- changer shell, where its insulation has been open to look at it, oil separator nameplate stick on oil separator shell.
- Page 14 Overview General Data Table 1. General data — 225 - 460 Ton 380 Volt -60Hz premium seasonal efficiency (variable speed fan) Model RTAG Refrigerant R134a Compressor Model CHHW CHHW CHHW CHHW CHHW CHHW CHHW CHHW CHHW (N6E2, (N6E2, (N5+N5, (N6+N5, (N6E2+ (N5+N5, (N6+N5,...
- Page 15 Table 2. General data — 225 - 460 Ton 460 Volt -60Hz premium seasonal efficiency (variable speed fan) Model RTAG Refrigerant R134a Compressor Model CHHW CHHW CHHW CHHW CHHW CHHW CHHW CHHW CHHW (N6E2, (N6E2, (N5+N5, (N6+N5, (N6E2+ (N5+N5, (N6+N5, (N6E2+ (N6E2+ N6E2;...
- Page 16 Overview Table 3. General data — 400 - 500 Ton 380 Volt -60Hz high efficiency (fixed speed fan) Model RTAG Refrigerant R134a R134a R134a Compressor Model CHHW CHHW (N5+N5, N5+N5) (N6E+N6E;N6E+N6E) Type Horizontal semienclosed screw compressor Starter YDEL YDEL Circuits Min load 7,50% 7,50%...
- Page 17 Table 4. General data — 400 - 500 Ton 400 Volt -60Hz high efficiency (fixed speed fan) Model RTAG Refrigerant R134a R134a R134a Compressor Model CHHW CHHW (N5+N5, N5+N5) (N6E+N6E;N6E+N6E) Type Horizontal semienclosed screw compressor Starter YDEL YDEL Circuits Min load 7,50% 7,50% Must hold current(1A/1B)
- Page 18 Overview Table 5. General data — 400 - 500 Ton 460 Volt -60Hz high efficiency (fixed speed fan) Model RTAG Refrigerant R134a R134a R134a Compressor Model CHHW CHHW (N5+N5, N5+N5) (N6E+N6E;N6E+N6E) Type Horizontal semienclosed screw compressor Starter YDEL YDEL Circuits Min load 7,50% 7,50%...
- Page 19 Installation Point Lifting Point Water (High eff) Unit Water pipe (Premium Seasonal eff) (mm) (mm) (mm) (mm) (mm) (mm) (Extra eff) (mm) (mm) RTAG225P 6" 150psi 1275 3938 3938 7380 7510 Figure 2. Dimension - RTAG 225 Premium efficiency unit RTAG-SVX001H-EN...
- Page 20 Dimension Water Unit Water pipe (mm) (mm) (mm) (mm) (mm) (mm) (mm) RTAG 230P 150psi 1275 5118 5118 8732 6“ Figure 3. Dimension - RTAG 230 Premium efficiency unit RTAG-SVX001H-EN...
- Page 21 Dimension Water Unit Water pipe (High eff) (Premium Seasonal eff) (mm) (mm) (mm) (mm) (mm) (mm) 285P 150psi 1120 2698 1593 6“ 9246 Figure 4. Dimension - RTAG 285 Premium efficiency unit RTAG-SVX001H-EN...
- Page 22 Dimension Water (High eff) Unit Water pipe (Premium Seasonal eff) (mm) (mm) (mm) (mm) (Extra eff) (mm) (mm) 310P 150psi 1120 3877 1593 6“ 10418 340P 150psi 1120 3877 1593 6“ 10418 Figure 5. Dimension - RTAG 310/340 Premium efficiency unit RTAG-SVX001H-EN...
- Page 23 Dimension Inlet Outlet Compressor2A Compressor1B Compressor2B Compressor1A 11224 Locate Customer Power Top View (With fan/coil removed) ISO View Control Panel Master panel with Lifting Point 1280 3227 3001 2742 2165 Installation 1126 1200 1050 1100 3350 1300 1100 2245 11606 Back View ▲...
- Page 24 Dimension Water (High eff) Unit Water pipe (Premium Seasonal eff) (mm) (mm) (mm) (mm) (Extra eff) (mm) (mm) 440P 150psi 1120 3582 3582 8“ 11875 500H Figure 7. Dimension - RTAG 440/500 High/ Premium efficiency unit RTAG-SVX001H-EN...
- Page 25 Table 6. Type Trane Provide Trane Provide Field Provide Trane install Field install Base Meet the requirements of installation base Lifting Safety chain,u -joint adapter,hanging beam Isolator Rubber isolator(option) Electrical Terminal block connec- The circuit breaker or fuse way switch (option) tion,mech disconnect Electric line to connect the unit starter switch and circuit break-...
- Page 26 Installation - Mechanical Provide enough space around the outdoor unit to allow the installation and maintenance personnel unrestricted access to all service points. Refer to submittal drawings for the unit dimensions. A minimum of 4 feet (1.2 m) is recommended for compressor service. Provide sufficient clearance for the opening of control panel doors.
- Page 27 Installation - Mechanical 1219mm TD7 side 1219mm Note: 1. Tube removal clearance area (recommend the side far from operation interface), please keep enough space for tube removal: NTON<=225ton tech tube length is 2200mm, NTON> 225ton tech tube length is 4000mm, and need remove the control panel at this side. 2.
- Page 28 Installation - Mechanical G, H (H at opposite) C, D (D at opposite) E, F (F at opposite) C, D (D at opposite) A, B (B at opposite) A, B (B at opposite) Figura 10. Unit lifting schematic (4 points) Figura 12.
- Page 29 Installation - Mechanical Table 7. Shipping Tonnage (kg) (kg) (kg) (kg) (kg) (kg) (kg) (kg) weight (kg) (mm) (mm) (mm) High 1178 1449 1344 1018 1205 1255 9362 5885 -1126 High 1205 1530 1330 1140 1159 1306 1507 1219 10397 5893 -1120 Premium...
- Page 30 Installation - Mechanical The most effective form of isolation is to locate the unit away from any sound sensitive area. Structurally trans mitted sound can be reduced by elastomeric vibration eliminators. Spring isolators are not recommended. Con- sult an acoustical engineer in critical sound applications. For maximum isolation effect, isolate water lines and electrical conduit.Wall sleeves and rubber isolated piping hangers can be used to reduce the sound transmitted...
- Page 31 Installation - Mechanical Not for 6 fans 6 fans & 8 fans isolator location 10 fans isolator location 12 fans isolator location 14 fans isolator location 16 fans isolator location 18 fans isolator location 20 fans & 24 fans isolator location Figura 13.
- Page 32 Installation - Mechanical Part number Color (mm) (mm) (mm) (mm) (mm) (mm) (mm) (mm) (mm) X10140305630 76.2 12.7 127.0 14.2 69.9 158.8 40.6±6.35 117.6 Lime X10140305620 76.2 12.7 127.0 14.2 69.9 158.8 40.6±6.35 117.6 Brick Red X10140305610 76.2 12.7 127.0 14.2 69.9 158.8...
- Page 33 Installation - Mechanical Table 9. Isolator color at each location Unit Isolator Type Quantity Brick Brick Brick Brick 225P Brown Brown Brown Brown Brown Brown Brick Brick Brick Brick Brick 230P Brown Brown Brown Brown Brown Brick Brick Brick Brick Brick Brick Brick...
- Page 34 Installation - Mechanical opening and closing to select pressure measure points. Note: For multiple units installation,please install pres- Thoroughly flush all water piping to the unit before mak- sure gauge for each units inlet/outlet pipe. ing the final piping connections to the unit. 2.
- Page 35 Installation - Mechanical Air vents (to bleed air from system). To protect the unit, water loop must be installed flow switch and interlocked with water pump. To interlock the Water pressure gauges with shutoff valves. water pump, please refer to Field Wiring Diagram (line Vibration eliminators.
- Page 36 Installation - Mechanical Table 10. Water Slice length A UNIT pipe (mm) 225; 230 6” 6” 310; 340 8” EVAP WATER SIDE PRESSURE DROP -- (2 PASS) ,225P 230P 1 0 0 2 0 0 3 0 0 4 0 0 5 0 0 6 0 0 7 0 0...
- Page 37 Installation - Mechanical water box and shell surface are factory-installed heaters and insulated on the packaged unit evapora- tor and will help protect it from freezing in ambient temperatures down to -20°F (-29°C). control panel does not check the electric heater op- eration status, which need to be made by qualified technical.
- Page 38 All wiring must comply with local codes. Typical field wiring diagrams are included at the end of the manual. Minimum current ampacities and other unit electrical data are on the unit nameplate and Table 12 & Table . See the unit order specifications for actual electri- cal data.
- Page 39 Installation - Electrical Table 13. Electrical data –PSE at all ambient operation Motor Data Compressor(Each) Fan(Each) XLRA Comp1A,Com- Qty. Unit Rated Unit Power Comp1A,Comp1B/ p1B/ Comp2A,Com- YLRA Comp1A,Com- Ckt1/ Size Voltage Conns Qty. Comp2A,Comp2B p1B/ Comp2A,Comp2B Ckt2 225 380/60/3 203/203 1306/1306 424/424 225 460/60/3...
- Page 40 Installation - Electrical All wiring must comply with local codes. The installing (or electrical) contractor must provide and install the sys- tem interconnecting wiring, as well as the power supply Customer wiring interface connections are shown in wiring. It must be properly sized and equipped with the the electrical schematics and connection diagrams that appropriate fused disconnect switches.
- Page 41 Installation - Electrical POWER WIRING 115/230 VAC FIELD WIRING Figure 18. Power Entrance of fixed panel Lorem ipsum 115/230 VAC FIELD WIRING POWER WIRING Figure 19. Power Entrance of AFD panel RTAG-SVX001H-EN...
- Page 42 Installation - Electrical AUTO mode, regardless of where the auto command is coming from, the normally open relay is energized. When the chiller exits the AUTO mode, the relay is timed The unit is equipped with a control power transformer, open for an adjustable (using Tracer TU) 0 to 30 minutes.
- Page 43 Installation - Electrical relay’s contacts are isolated Form C (SPDT), suitable for Table 16. use with 120 VAC circuits drawing up to 2.8 amps induc- Relay tive, 7.2 amps resistive, or 1/3 HP and for 240 VAC circuits Relay 1 Terminals J2 -12,11,10: Alarm drawing up to 0.5 amp resistive.
- Page 44 Installation - Electrical cycle off. Unit operation will be inhibited. Closure of the Voltage Signal Current Signal contacts will permit the unit to return to normal opera- As generated from VDC+0.133*(%)-6.0 mA=0.266*(%)-12.0 external source tion. Field-supplied contacts for all low voltage connections As processed by %=7.5*(VDC)+45.0 %=3.75*(mA)+45.0...
- Page 45 Installation - Electrical CWS' is the new chilled water set point or the "reset UC800 resets the chilled water temperature setpoint CWS" based on return water temperature. Return Reset is stan- CWS is the active chilled water set point before any reset dard.
- Page 46 Installation - Electrical UC800 provides an optional LonTalk Communication Interface (LCI-C) between the chiller and a Building Automation System (BAS). An LCI-C LLID shall be used to provide "gateway" functionality between a LonTalk This option allows the Tracer UC800 controller to ex- compatible device and the Chiller.
- Page 47 Installation - Electrical Table 18. LonTalk Communications Interface Inputs Variable type SNVT_Type Chiller Enable/Disable binary start(1)/stop(0) SNVT_switch Chilled Water Setpoint analog temperature SNVT_temp_p Current Limit Setpoint analog % current SNVT_lev_percent Chiller Mode SNVT_hvac_mode Outputs Variable type SNVT_Type Chiller On/Off binary on(1)/off(0) SNVT_switch Active Chilled Water Setpoint...
- Page 48 Installation - Electrical Data Sharing Description Supported BIBB Data Sharing-COV-B (DS-COV-B) Data Sharing-ReadProperty-A (DS-RP-A) Data Sharing-ReadProperty-B (DS-RP-B) Data Sharing-ReadPropertyMultiple-B (DS-RPM-B) Data Sharing-WriteProperty-A (DS-WP-A) Data Sharing-WriteProperty-B (DS-WP-B) Data Sharing-WritePropertyMultiple-B (DS-WPM-B) Alarm and Event Management Description Supported BIBB Alarm and Event-ACKI-B (AE-ACK-B) Alarm and Event-Alarm Summary-B (AE-ASUM-B) Alarm and Event-Enrollment Summary-B (AE-ES- UM-B)
- Page 49 Installation - Electrical Table 19. Ability to Ability to Object Type Required Properties Read Properties Written Optional Properties Read Create Delete Analog Object_Name Description Yes, only user Input Object_Name Description Reliability created objects Object_Type Out_Of_Service Min_Pres_Value Present_Value Present_Value Max_Pres_Value Status_Flags Reliability COV_Increment Event_State...
- Page 50 Installation - Electrical Ability to Ability to Object Type Required Properties Read Properties Written Optional Properties Read Create Delete Binary Object_Name Description Yes, only user Output Object_Name Description Inactive_Text created objects Object_Type Out_Of_Service Active_Text Present_Value Inactive_Text Change_Of_State_Time Status_Flags Active_Text Change_Of_State_Count Event_State Present_Value Time_Of_State_Count_Re-...
- Page 51 Installation - Electrical Ability to Ability to Object Type Required Properties Read Properties Written Optional Properties Read Create Delete Event Enroll- Object_Name None Yes, only user ment Object Object_Name Notify_Type created objects Object_Type Event_Parameters Event_Type Object_Property_Reference Notify_Type Event_Enable Event_Parameters Object_Property_Reference Event_State Event_Enable Acked_Transitions...
- Page 52 Installation - Electrical Data Link Layer Description Option Supported Option ANSI/ATA 878.1, 2.5 Mb ARCNET (Clause 8) ANSI/ATA 878.1, RS-485 ARCNET (Clause 8), Baud Rate(s) BACnet IP, (Annex J) BACnet IP, (Annex J), Foreign Device ISO 8802-3, Ethernet (Clause 7)(10Base2, 10Base5, 10BaseT, Fiber) LonTalk, (Clause 11), Medium MS/TP Master (Clause 9), Baud Rate(s): 9600, 19200, 38400, 76800, and 115200 @1.5% Nominal Baud Rate MS/TP Slave (Clause 9), Baud Rate(s)
- Page 53 Installation - Electrical Table 21. Object Name Description Units Analog Input 1 Active Cool Setpoint Temperature Active chiller water setpoint °F Analog Input 2 Active Current Limit Active capacity current limit setpoint. Setpoint Analog Input 5 Actual Running Capacity Level of capacity that the chiller is currently running at Analog Input 7 Suction Pressure- Ckt 1 Circuit 1 suction pressure.
- Page 54 Installation - Electrical Table 23. BCI-C Object Object Name Description Object States Multi-State Input 1 Running Mode Indicates the primary running 1=Chiller Off mode of the chiller 2=Chiller in Start Mode 3=Chiller in Run Mode 4=Chiller in Pre-shutdown Mode 5=Chiller in Service Mode Multi-State Input 2 Operation Mode Indicates the primary operation...
- Page 55 Installation - Electrical Table 24. Object Name Description Relinquish Object States Default Binary Output 1 Chiller Auto Stop Command Allows the chiller to run if conditions True Inactive = Stop for running are met. Active = Auto Binary Output 2 Remote Diagnostic Reset Resets remotely diagnostics that can False...
- Page 56 This section covers information pertaining to the UC800 RTAG chillers utilize the following control/ interface com- controller hardware. ponents: Wiring and Port Descriptions Tracer™ UC800 Controller Figure 21 illustrates the UC800 controller ports, LEDs, Tracer AdaptiView™ TD7 Operator Interface rotary switches, and wiring terminals. The numbered list following Figure 21 corresponds to the numbered call-...
- Page 57 Controls Table 26. UC800 Status There are four connections on the UC800 that support Marquee LED Powered. If the Marquee LED is green solid, the communication interfaces listed. See Figure 17 for the UC800 is powered and no problems exist. the locations of each of these ports.
- Page 58 Controls Figure 23. TD7 screens The home screen (Figure 24) provides the most frequent- On the Reports screen, touch Operating Modes to view ly needed chiller status information on "touch targets" the current operating status of the chiller in terms of the (the entire white rectangular areas) for each chiller top- level operating mode and submodes.
- Page 59 Controls Table 28. Chiller Modes Description MP Resetting The main processor is going through reset No chiller sub-modes. The chiller is not running either circuit and cannot run without intervention. Fur- Stopped ther information is provided by the sub-mode: Local Stop Chiller is stopped by TD7 Stop button command- cannot be remotely overridden.
- Page 60 Controls Chiller Modes Description The chiller is still running but shutdown is imminent. The chiller is going through a Shutting Down compressor run-unload or extended operational pumpdown of the lag circuit/com- pressor (or all circuits simultaneously). Evaporator Water Pump Off Delay The evaporator water pump is continuing to run past the shutdown of the compressors, executing min:sec the pump off delay timer.
- Page 61 Controls Table 30. Compressor Level Modes Description Stopped The compressor is not running, and cannot run without intervention. Diagnostic Shutdown - Manual Reset The compressor has been shut down on a latching diagnostic that requires manual intervention to reset. Front Panel Compressor Lockout Compressor is manually locked out by the compressor lockout setting - the nonvolatile lockout setting is accessible through either the Operator Display or Service Tool.
- Page 62 You can use the display to view alarms and to reset Touch the Reports button in the main menu area (Figure them. Alarms are communicated to the display immedi- 23) to view the Reports screen. The Reports screen con- ately upon detection. tains the following buttons: Custom Report1 Custom Report2...
- Page 63 Controls the box on the left side of the screen. c. To re-order items in the custom report, touch it. It responds by changing to blue. Use the arrows to change the order of a highlighted item. 3. To save and view your edited custom report, touch Save.
- Page 64 Table 33. Description Resolution Units You can use the TD7 display to monitor and change a Running Status On/Off Average Line Current % RLA Starter XXX.X variety of equipment settings. Average Motor Current % RLA AFD XX XXX.X Frequency Command CprsrXX XX.X Starts CprsrXX XXXX...
- Page 65 Controls Figure 35. Chilled water reset type screen Figure 34. Equipment setting screen (Chiller setting shown) To change an equipment setting, follow this procedure: 1. Touch one of the button in the Equipment Settings column on the Settings screen, such as Chiller Set- tings.
- Page 66 Table 35. Description Setpoints on the Service Settings screen are only intend- Chiller Settings ed for use by experienced service personnel. Setpoints Setpoint Source include security, if enabled. Front Panel Chilled Water Setpoint Auxiliary Chilled Water Setpoint The Service Settings screen is found through Chiller Set- Front Panel Demand Limit Setpoint tings, and includes a warning message for the user.
- Page 67 Controls MMDDYYYY (default) YYYYMMDD DDMMYYYY On the Settings screen, touch Display Preferences to view a screen containing these buttons (see Figure 39): Date Format Use the Date Separator screen to choose from the fol- Date Separator lowing date formats: Time Format None Unit System Slash (default)
- Page 68 The language that is currently in use on the display is expressed as the current value on the Language screen. The button that displays the current value is shaded (see On the Settings screen, touch Clean Display to disable the "English" button in Figure 411 as an example).
- Page 69 Controls 3. Touch Save. The Settings screen appears with a Log by asterisks. out button, in addition to the Security button. Note: If you enter an invalid PIN, an error message ap- pears on the Log in screen. 3. Touch Save. a.
- Page 70 The AdaptiView™ TD7 operator interface allows for daily operational tasks and setpoint changes. However, to ad- ® equately service RTAG chillers, Tracer TU service tool is required. (Non-Trane personnel, contact your local Trane office for software purchase information.) Tracer TU adds a level of sophistication that improves service technician effectiveness and minimizes chiller downtime.
- Page 71 Controls RTAG Sequence of Operation: Chiller State Chart Figure 49. Software operation overview RTAG-SVX001H-EN...
- Page 72 Text outside a box or cylinder indicates time based functions. The time line indicates the upper level operating Solid double arrows indicate fixed timers. mode, as it would be viewed on the Tracer AdaptiV- Dashed double arrows indicate variable timers. iew.
- Page 73 Controls Figure 51, diagram shows the timing from a power up event to energizing the first compressor. The shortest allowable time would be under the following conditions: No motor restart inhibit time left from subsequent starts Evaporator Water flow occurs quickly with pump on command Power up Start Delay set to 0 minutes Need to cool (differential to start) already exists Oil level is detected immediately...
- Page 74 Figure 52 shows the timing from a stopped mode to energizing the first compressor. The shortest allowable time would be under the following conditions: No motor restart inhibit time left from subsequent starts Evaporator Water flow occurs quickly with pump on command Need to cool (differential to start) already exists The above conditions would allow a compressor to start in about 20 seconds.
- Page 75 Controls Figure 53 shows a typical start and run sequence for the lead compressor and its circuit. Figure 53. Sequence of operation: running (lead compressor/circuit start and run) RTAG-SVX001H-EN...
- Page 76 Figure 54 shows a typical start and run sequence for the lag compressor and its circuit. All Compressors Running Chiller and Both Circuit Enter Exit At or Near Max Capacity Modes are “Running” Limit Mode Limit Mode (Unable to Achieve CWSP) Running Running Running...
- Page 77 Controls Figure 55 shows the normal transition from Running to shutting down due to the Evap Leaving water temp falling be- low the differential to stop setpoint. Normal Pumpdown Termination Differential to Stop is Met Criteria is Met for Last Circuit Running Shutting Down Running...
- Page 78 Figure 56 shows the normal transition from full load to minimum load while the chiller is running. Figure 56. Sequence of events: Unloading unstaging RTAG-SVX001H-EN...
- Page 79 Controls Figure 57 shows the transition from Running through a Normal (friendly) shutdown. The dashed lines on the top at- tempt to show the final mode if you enter the stop via various inputs. Figure 57. Sequence of events: normal shutdown to stopped or run inhibit RTAG-SVX001H-EN...
- Page 80 Figure 58 shows the transition from Running through an immediate shutdown. The dashed lines on the top attempt to show the final mode if you enter the stop via various inputs. Figure 58. Sequence of events: immediate shutdown to stopped or run inhibit RTAG-SVX001H-EN...
- Page 81 Controls tic reset command which can clear the diagnostic. The manual diagnostic reset levels in order of priority are: Local or Remote. For example, a diagnostic that has a reset level of Remote, can be reset by either a remote diagnostic reset command or by a local diagnostic reset Diagnostics may be shown in command.
- Page 82 Table 36. Diagnostic Name Affects Severity Persistence Active Modes Criteria Reset and Source Target [Inactive Modes] Level AFD Fault - xA Cprsr Immediate NonLatch AFD Fault. Numerous drive faults can Local cause this general fault including High Pressure Cutout for AFD compressors. See Service Literature xxxx for a list of fault codes and description.
- Page 83 Controls Diagnostic Name Affects Severity Persistence Active Modes Criteria Reset and Source Target [Inactive Modes] Level Power Loss - xy Cprsr Immediate NonLatch All compressor run- The compressor had previously estab- Remote ning modes lished currents while running and then [all compres- all three phases of current were lost.
- Page 84 Diagnostic Name Affects Severity Persistence Active Modes Criteria Reset and Source Target [Inactive Modes] Level Motor Current Over- Circuit Immediate Latch Cprsr Energized Compressor current exceeded overload Local load - xy time vs. trip characteristic. Must trip = 140% RLA, Must hold=125%, nominal trip 132.5% in 30 seconds Starter Contactor Chiller...
- Page 85 Controls Diagnostic Name Affects Severity Persistence Active Modes Criteria Reset Target [Inactive Modes] Level High Motor Winding Cprsr Immediate Latch The respective compressor’s motor Local Temperature – xA winding thermostat is detected to be open. The compressor shall stop within 5 seconds of this diagnostic.
- Page 86 Diagnostic Name Affects Severity Persistence Active Modes Criteria Reset Target [Inactive Modes] Level High Refrigerant Cprsr Immediate Latch Cprsr Energized The pressure ratio for the respective Remote Pressure Ratio - xy circuit exceeded 12.3 for 1 contiguous minute while any compressor is running or in service pumpdown.
- Page 87 Controls Diagnostic Name Affects Severity Persistence Active Modes Criteria Reset Target [Inactive Modes] Level External Chilled Chiller Warning Latch a. Function Not "Enabled": no diagnos- Remote Water Setpoint tics. b. "Enabled ": Out-Of-Range Low or Hi or bad LLID, set diagnostic, default CWS to next level of priority (e.g.
- Page 88 Diagnostic Name Affects Severity Persistence Active Modes Criteria Reset Target [Inactive Modes] Level Liquid Line Tem- Circuit Normal Latch Bad Sensor or LLID. Note: This is the Remote perature Sensor subcooled liquid line temp sensor. Liquid Line Pressure Circuit Normal Latch Bad Sensor or LLID.
- Page 89 Controls Diagnostic Name Affects Severity Persistence Active Modes Criteria Reset Target [Inactive Modes] Level Low Evaporator Rfgt Chiller Special Ac- NonLatch Unit in Stop Mode, The respective circuit’s LERTC Integral Remote Temp Circuit 1: Unit tion or in Auto Mode and was seen to be >...
- Page 90 Diagnostic Name Affects Severity Persistence Active Modes Criteria Reset Target [Inactive Modes] Level Evaporator Water Chiller Warning NonLatch Local Flow Lost – Pump 2 and Special only. Evaporator Water Flow Lost diag- Action nostic occurred while Pump 2 was the selected pump.
- Page 91 Controls Diagnostic Name Affects Severity Persistence Active Modes Criteria Reset Target [Inactive Modes] Level High Evaporator Chiller Warning NonLatch Only effective if Either the leaving or the entering water Remote Water Temperature and Special either temperature exceeded the high evap Action 1) Evap Wtr Flow water temp limit (TU service menu...
- Page 92 Diagnostic Name Affects Severity Persistence Active Modes Criteria Reset Target [Inactive Modes] Level LCI-C Software Chiller Warning NonLatch The neuron software in the LCI-C Remote Mismatch: Use BAS module does not match the chiller type. Tool Download the proper software into the LCI-C neuron.
- Page 93 Controls Table 39. Diagnostic Name Affects Severity Persistence Active Modes Criteria Reset Target [Inactive Modes] Level Comm Loss: Exter- Chiller Normal Latch Continual loss of communication be- Remote nal Auto/Stop tween the MP and the Functional ID has occurred for a 30 second period. Comm Loss: Emer- Chiller Normal...
- Page 94 Diagnostic Name Affects Severity Persistence Active Modes Criteria Reset Target [Inactive Modes] Level Comm Loss: Slide Cprsr Normal Latch Continual loss of communication be- Remote Valve Load - xy tween the MP and the Functional ID has occurred for a 30 second period. Comm Loss: Slide Cprsr Normal...
- Page 95 Controls Diagnostic Name Affects Severity Persistence Active Modes Criteria Reset Target [Inactive Modes] Level Comm Loss: Con- Circuit Normal Latch Continual loss of communication be- Remote denser Fan Enable tween the MP and the Functional ID has occurred for a 30 second period. Comm Loss: Fan Circuit Normal...
- Page 96 Diagnostic Name Affects Severity Persistence Active Modes Criteria Reset Target [Inactive Modes] Level Comm Loss: Evap- Chiller Normal Latch Continual loss of communication be- Remote orator Water Pump tween the MP and the Functional ID has Inverter Frequency occurred for a 30 second period. Input Comm Loss: Evapo- Chiller...
- Page 97 This chapter describes the overall operating principles single circuit , two circuits duplex system. RTAG085 and of the RTAG design. The detail information of a specific RTAG100 are single circuit, with one rotary screw com- unit see the attached documents of unit. pressor;...
- Page 98 Operating Principles Figure 61 show the refrigerant cycle of pressure enthal- py diagram of RTAG with economizer unit. Comparing to figure57, the leaving condenser refrigerant (states 5) The compressor is a semi-hermetic, direct-drive rotary don’t enter EXV, which is separated into two parts. The type compressor.
- Page 99 Operating Principies motor terminal Discharge check valve Female rotor screen Step load valve motor rotor Oil check valve (internal) Male rotor unload piston Male rotor Interior oil filter Figure 62. Compressor inner configuration Auxiliary Inlet Port Figure 63. Compressor with Auxiliary Inlet Port cooler, some fans are shut off.
- Page 100 Operating Principles oil pasts the oil separator, and flows through the con- per tubes, mechanically expanded into the tube sheets. denser, subcooler and expansion valve into the evapora- Tubes are cleanable with dismountable water boxes. tor. This part of oil is collected with refrigerant at rich oil Tubes exterior diameter is 19mm.
- Page 101 6. Fill the evaporator chilled-water circuit. Vent the sys- tem while it is being filled. Open the vents on the top of the evaporator water box while filling and close Complete this checklist as the unit is installed, and verify when filling is completed.
- Page 102 Pre-Start Chekout It is important that proper rotation of the compressors be established before the unit is started. Proper motor rotation requires confirmation of the electrical phase sequence of the power supply. The motor is internally connected for clockwise rotation with the incoming pow- er supply phases A-B-C.
- Page 103 Pre-Start Checkout Establish a balanced chilled water flow through the evap- orator. The flow rates should fall in the range of Table 1 Evaporator Flow Rate(fall between the minimum and maximum values given on the pressure drop curves). Chilled water flow rates below the minimum values will result in laminar flow, which reduces heat transfer and causes either loss of EXV control or repeated nuisance, low temperature, cutouts.
- Page 104 If the present checkout, as discussed above chapter, has been completed, the unit is ready to start. 1. Make sure the STOP key display on the TD7. 2. Adjust the set point values as necessary on the TD7 menus using Tracer TU, and fill in the Table 3.
- Page 105 Pre-Start Chekout necessary repairs before starting the unit. from the evaporator. 6. While the water is circulating, adjust the water flow At least every three months (quarterly), check the re- and check the water pressure drops through the frigerant pressure in the unit to verify the refrigerant evaporator.
- Page 106 Perform all maintenance procedures and inspections at sion. the recommended intervals. This will prolong the life of 7. Clean coils at least once a year. If the unit is in a dirty the chiller and minimize the possibility of costly failures. environment, increasing cleaning frequency.
- Page 107 Periodic Maintenance Table 41. RTAG Start-up Test Log Job Name Job Location Model # CRC # Serial # Sales Order # Ship Date Job Elevation (ft. above sea level) Starter Data: Start-up Only Manufacturer Chiller Appearance on arrival: Type: (wye-delta or x-line) Machine gauge pressure: ckt1/ckt2 Vendor ID #/ Model #:...
- Page 108 Periodic Maintenance Table 42. RTAG Unit Configuration Job Name Job Location Model # Serial # CRC# Sales Order # Ship Date Job Elevation (ft. above sea level) Setpoint View * Front Panel Degree Units (circle one) F or C Front Panel Chilled Water Setpoint Front Panel Current Limit Differential to Stop Differential to Start...
- Page 109 Periodic Maintenance Table 43. RTAG Chiller Log Job Name Job Location Model # Serial # Status View: * 15 min 30 min 45 min 15 min 30 min 45 min Chiller Tab: Operating Mode Outdoor Air Temperature F or C Active Chill Water Setpoint F or C Active Current Limit Setpoint...
- Page 110 Periodic Maintenance Compressor 2A Tab Compressor 2B Tab Operating Mode Hours Hrs/mins Hrs/mins Starts 15 min 30 min 45 min 15 min 30 min 45 min Phase A - B Voltage volts Average Line Current %RLA Line 1 current amps Line 2 current amps Line 3 current...
- Page 111 Be certain that the electrical power to the unit is discon- nected before performing this procedure. Proper oil and refrigerant charge is essential for proper WARNING unit operation, unit performance, and environmental protection. Only trained and licensed service personal should service the chiller. Low subcooling Higher than normal discharge superheat Bubbles in EXV sight glass...
- Page 112 Maintenance Procedures 3. Charge unit through the filter housing port per name- plate. A dirty filter is indicated by a temperature gradient 4. When charging is complete, shut off service valve across the filter, corresponding to a pressure drop. If the and disconnect charging hoses.
- Page 113 Maintenance Procedures 4. Open both valves, move the sight glass up and down along the oil separator to confirm the height of oil level. The height of oil level (indicated as “h” in the figure) should be between 50mm and 150mm from the bottom.
- Page 114 oil has emptied the air in the hose, tighten the con- 2. Open the valve to discharge and weight the oil. nector of hose. 3. Close the valve after draining a certain amount of oil 3. Open the angle valve of compressor oil line to charge the required amount of oil.
- Page 115 Maintenance Procedures Under normal operating conditions, compressor internal filter element should be replaced after the first year of operation and as needed thereafter. The filter must be Outdoor coils should be cleaned at least annually. If the replaced if the operating pressure meets the replace- unit presents in a relatively dirty environment, the clean- ment condition shown in “Figure 60.
- Page 116 Maintenance Procedures shall be performed after completing the chemical clean- ing. From outlet of heat exchanger If the tubes of water-side heat exchanger requires re- placement, following these steps: To the inlet of heat exchanger 1. With the unit off, disconnect and lock unit power sup- plies.
- Page 117 Maintenance Procedures sor, steadily remove the compressor from the base frame with a forklift which should support the weight of the compressor. Coil replacement should follow the procedures: 6. Take samples of the collected oil for analyses. If the 1. Disconnect and lock power supplies. oil has deteriorated, completely drain and weight the 2.
- Page 118 Maintenance Procedures For water side heat exchanger replacement, please fol- low the following steps: 1. Follow steps 1~6 of the “Coil Assembly or Single Coil Replacement” , remove the coil group smoothly. 2. Close the cut-off valve in water loop, drain the water out of the heat exchanger, and dismantle the water loop connection from inlet and outlet flange of water port on heat exchanger.
- Page 119 Drive Nameplate MODEL: CA���-�T���-TL Certificates Model INPUT: �PH AC ���‒��� V ���.� A �� Hz/�� Hz Rated input OUTPUT : �PH AC �‒��� V ���.� A �‒��� Hz ��� kW Rated output S/N: XXXXXXXXXXXXXXXX Serial No . CA��� ‒ �T ��� ‒ TL Code Product Series Code...
- Page 120 Control board Top hanging ring Main circuit terminal Power indicator Grounding terminal Grounding screw of safety capacitor and VDR Bottom hanging ring Installation rack Figure 75. AC drive components (132/160 kW) Figure 76. RTAG-SVX001H-EN...
- Page 121 Table 48. Model Power Capacity Input Current Output Current Motor (kVA) (kW) CA300-4T132-TL CA300-4T160-TL CA300-4T200-TL Table 49. Item Description Output frequency 0 Hz to 500 Hz Carrier frequency 2 kHz to 8 kHz, automatically adjusted with the load Digital setting: 0.01 Hz Input frequency resolution Analog setting: Maximum frequency x 0.025% Control mode...
- Page 122 Item Description Supports up to 10 frequency reference setting channels and allows different methods of switching between frequency reference setting channels: Digital setting Main frequency reference Analog voltage reference Analog current reference Pulse reference Communication reference Auxiliary frequency reference the auxiliary frequency and main & auxiliary calculation. Running Seven DI terminals with 100 Hz maximum input frequency Input terminals...
- Page 123 Figure 77. Figure 78. Mounting Hole Dimensions Mounting Weight (mm) (mm) Model Diameter d (kg) (mm) CA300-4T160-TL CA300-4T200-TL RTAG-SVX001H-EN...
- Page 124 DC reactor (+)� (+ )� Three-phase AC current CA��� J � J �� +� �V External keypad J � +� �V interface DI � DI� J � AO� AO� DI � DI� J � AO� � to �� V/� to �� mA J �...
- Page 125 Control board board Main circuit (+�) (+�) terminal Type Mark Name Function R, S, and T Three-phase power input Connected to the mains supply U, V, and W AC drive output Connected to the motor Main circuit (+1) and (+2) AC reactor connection Connected to the DC reactor Grounding terminal...
- Page 126 Using the operating panel, you can set and modify parameters, monitor working status, and perform running control (start/stop) of the AC drive. You can also equip an external panel using the option LED operating panel (MD32NKE1) or LCD operating panel (MDKE9). Command source Running direction indicator indicator...
- Page 127 Key Name Function Multifunction Used to switch over between functions. Menu mode selection individualized parameter display). By default, one menu mode is set. indicates the light turns on, indicates the light turns off, and indicates the light flashes. Table 50. Indicator Status Description Off: STOP status...
- Page 128 Faults are handled prior to alarms. 1. Example of fault code displayed: “E02.00” 2. Example of alarm code displayed: “A16.13” When a fault occurs during running, the AC drive stops output immediately, the fault indicator flashes, and contact of the faulty relay acts. The following table lists faults and solutions for reference. Perform troubleshooting ac- cording to the descriptions and do not repair or modify the AC drive randomly.
- Page 129 Fault Code Fault Name Cause Possible Solution Check whether the main circuit is powered on. The AC drive is abnormal in current E01.01 Check whether the hall sensor or current sampling circuit is sampling. damaged. If yes, contact us or the agent. Hardware fault E01.02 The contactor is faulty.
- Page 130 Fault Code Fault Name Cause Possible Solution Ensure that the voltage limit function is enabled (F3-23 = 1). The setting of F3-22 (V/F voltage limit) is too large. Adjust The overvoltage stall prevention param- it between 700 V and 770 V. The setting of F3-24 (Frequency eters are set improperly.
- Page 131 Fault Code Fault Name Cause Possible Solution Check whether the RS485 cable is correctly connected. Communication E16.01 Modbus communication timeout Check whether the settings of Fd-04 (Modbus communica- fault tion timeout) and PLC communication cycle are proper. E19.02 Auto-tuning of pole position angle of the The motor may be disconnected, or output phase loss may synchronous motor is faulty.
- Page 132 Fault Code Fault Name Cause Possible Solution Motor auto-tuning is not performed. Perform motor auto-tuning. Excessive speed F9-69 (Detection level of speed error) E42.00 deviation and F9-70 (Detection time of speed Set F9-69 and F9-70 properly based on actual conditions. error) are set improperly.
- Page 133 Check the following items daily to ensure normal running and prevent damage to the AC drive. Copy this checklist and sign the “Checked” column after each inspection. Inspection Item Inspection Points Solutions Checked Motor Inspect whether the abnormal sounds Check whether the mechanical connection is normal. and vibration occur on the motor.
- Page 134 Unit 1 Unit 2 Para. No. Para. Value Description Para. No. Para. Value Description F0-01 V/F control F0-01 V/F control F0-02 Serial comms. F0-02 Serial comms. F0-03 Communication setting F0-03 Communication setting F0-10 Max. frequency F0-10 Max. frequency F0-12 Frequency upper limit F0-12 Frequency upper limit F0-14...
- Page 135 Trane - by Trane Technologies (NYSE: TT), a global climate innovator - creates comfortable, energy efficient indoor environments for commercial and residential applications. For more information, please visit trane.com or tranetechnologies.com. Trane has a policy of continuous product and product data improvement and reserves the right to change design and specifications without notice.
Need help?
Do you have a question about the RTAG 225 and is the answer not in the manual?
Questions and answers
What's the weight of Model 225 j
The shipping weight of the Trane Technologies RTAG 225 model is 12,642 lb, and the operating weight is 12,904 lb.
This answer is automatically generated