Table of Contents
Advertisement
Quick Links
Operation and Maintenance
Mini-Split System Inverter – 23 SEER
High-Wall Indoor Unit
9,000 to 36,000 Btu/hr – 220V & 115V – 50/60Hz
Cooling coil
Indoor Units
4MYW2309CF
4MYW2312CG
4MYW2312CF
4MYW2318CF
4MYW2324CF
4MYW2336CF
Only qualified personnel should install and service the equipment. The installation, starting up, and servicing of
heating, ventilating, and air-conditioning equipment can be hazardous and requires specific knowledge and training.
Improperly installed, adjusted or altered equipment by an unqualified person could result in death or serious injury.
When working on the equipment, observe all precautions in the literature and on the tags, stickers, and labels that are
attached to the equipment.
October de 2023
Outdoor Units
4TYK2309CF
4TYK2312CG
4TYK2312CF
4TYK2318CF
4TYK2324CF
4TYK2336CF
SAFETY WARNING
MS-SVX084A-EN
Advertisement
Table of Contents

Subscribe to Our Youtube Channel
Related Manuals for Trane 4MYW2309CF


Summary of Contents for Trane 4MYW2309CF
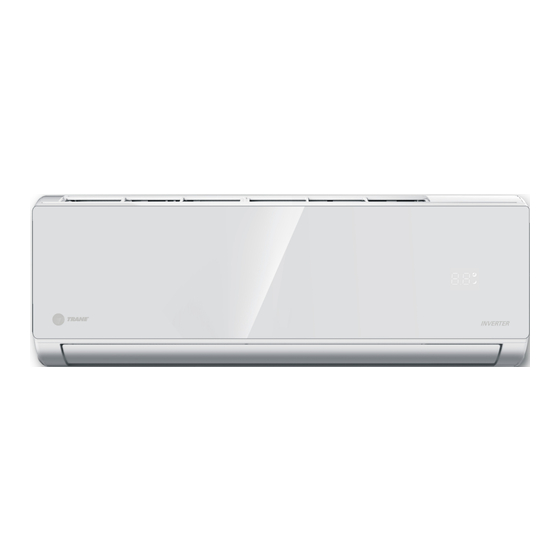
- Page 1 Operation and Maintenance Mini-Split System Inverter – 23 SEER High-Wall Indoor Unit 9,000 to 36,000 Btu/hr – 220V & 115V – 50/60Hz Cooling coil Indoor Units Outdoor Units 4MYW2309CF 4TYK2309CF 4MYW2312CG 4TYK2312CG 4MYW2312CF 4TYK2312CF 4MYW2318CF 4TYK2318CF 4MYW2324CF 4TYK2324CF 4MYW2336CF 4TYK2336CF SAFETY WARNING Only qualified personnel should install and service the equipment.
-
Page 2: Table Of Contents
Índice Índice Safety Precautions ........... 3 Safety rules and recommendations for the installer ..3 Safety rules and prohibitions ......4 Outdoor Unit Nomenclature - ......5 Inverter High Wall Systems Indoor Unit Nomenclature - ......6 Inverter High Wall Systems Name of parts ........... -
Page 3: Safety Precautions
Safety Precautions Safety Precautions useful life to a special waste collection center for disposal. Safety rules and recommendations 14. Only use the air conditioner as instructed in this booklet. These instructions are not intended to for the Installer cover every possible condition and situation. As with any electrical household appliance, 1. -
Page 4: Safety Rules And Prohibitions
Safety rules and prohibitions 25. The user is responsible for having the appliance Safety rules and prohibitions installed by a qualified technician, who must check that it is earth in accordance with current 1. Do not bend, tug or compress the power cord legislation and insert a thermos magnetic circuit since this could damage it. -
Page 5: Outdoor Unit Nomenclature - Inverter High Wall Systems
Outdoor Unit Nomenclature - Inverter High Wall Systems Digit #1 Refrigerant Digit #9 Major Development Sequence R-410a Third Development Sequence Digit #2 Brand Trane Electric Power Supply Digit #10 Characteristics Digit #3 Functional Type 220-240/50/60/1 115/50/60/1 Cooling Only Inverter Configuration... -
Page 6: Indoor Unit Nomenclature - Inverter High Wall Systems
Indoor Unit Nomenclature - Inverter High Wall Systems Major Development Digit #1 Refrigerant Digit #9 Sequence R-410a Third Development Sequence Digit #2 Brand Electric Trane Mini-Split Digit #10 Power Supply High Wall Unit Characteristics 220-240/50/60/1 Digit #3 Functional Type Cooling Only 115/50/60/1 Inverter... - Page 7 Name of parts Name of parts Indoor Unit Note This figure shown may be different from the actual object. Please take the latter as the standard. MS-SVX084A-EN...
-
Page 8: Name Of Parts
Name of parts Name of parts Indoor Display Function Indicator for Timer, temperature and Error codes. Lights up during Timer operation. SLEEP mode The symbol appears when the unit is turned on, and disappear when the unit is turned off. The symbol appears when power on. -
Page 9: Remote Control
Remote control Remote control Remote control Display Symbols Meaning Battery indicator Auto Mode Cooling Mode Dry Mode Fan only Mode Heating Mode ECO Mode Timer Temperature indicator Fan speed: Auto/ low/ low-mid/ mid/ mid-high/ high Mute function TURBO function Up-down auto swing Left-right auto swing SLEEP function Health function... - Page 10 Remote control Remote control Botón Function To turn on/off the air conditioner. To decrease temperature, or Timer setting hours. To increase temperature, or Timer setting hours. MODE To select the mode of operation (AUTO, COOL, DRY, FAN, HEAT). To activate/deactivate the ECO function. Long press to activate/deactivate the 8°C heating function (depending on models).
-
Page 11: Replacement Of Batteries
Remote control Replacement of Batteries Remove the battery cover plate from the rear of the remote control, by sliding it in direction as the arrow. Install the batteries according the direction (+ and - Jshown on the Remote Control. Reinstall the battery cover by sliding it into place. Warning Use 2 pieces LR03 AAA (1.5V) batteries. - Page 12 Remote control Cooling Mode (For North American market) The cooling function allows the air conditioner to cool If necessary, you can press ECO button 10 times within the room and reduce Air humidity at the same time. 8 seconds under heating mode to start the forced defrosting.
- Page 13 Remote control Timer function - Timer Off Turbo function To automaticswitch off the appliance. When the unit is switch-on, you can set the TIMER OFF . To activate turbo function, press the button, and will appear on the display. Press again to cancel this To set the time of automatic switch-off, as below: function.
- Page 14 Remote control Note Warning The ECO function is available in both COOLING and It's normal if there is some noise during this function HEATING modes. process, as plastic materials expand with heat and contract with cold. We suggest operating this function at the following Display function (Indoor display) ambient conditions to avoid certain safety protection features.
- Page 15 Operation Instructions Gen function (Optional) 1. Turn on the indoor unit at first, and long press button 3 seconds to active, and do it again to deactivate this function. 2. Under this function, short press button to select the General type L3 - L2 - LI - OF . 3.
-
Page 16: Pipe Length And Additional Refrigerant
Precauciones de Instalación Current status Operation Respond Enter mode Standby Press the emergency button once It beeps briefly once. Cooling mode Standby (Only for Heat Press the emergency button twice in 3 It beeps briefly twice. Heating mode pump models) seconds Running Press the emergency button once... -
Page 17: Torque Parameters
Precauciones de Instalación Torque Parameters PIPE Size Newton meter[N x m] Pound-force foot (Ibf-ft) Kilogram-force meter (kgf-m) 1/4 " ( 6.35) 15 - 20 11.1 - 14.8 1.5 - 2.0 3/8 " ( 9.52) 31 - 35 22.9 - 25.8 3.2 - 3.6 1/2 "... -
Page 18: Step 1: Select Installation Location
Indoor Unit Installation Indoor Unit Installation Step 1: Select Installation location 1. Ensure the installation complies with the installation minimum dimensions (defined below) and meets the minimum and maximum connecting piping length and maximum change in elevation as defined in the System Requirements section. -
Page 19: Step 2: Install Mounting Plate
Indoor Unit Installation Step 2: Install Mounting Plate 1. Take the mounting plate from the back of indoor unit. 2. Ensure to meet the minimum installation dimension requirements as step 1, according to the size of mounting plate, determine the position and stick the mounting plate close to the wall. 3. -
Page 20: Step 4: Connecting Refrigerant Pipe
Indoor Unit Installation Step 4: Connecting Refrigerant Pipe 1. According to the wall hole position, select the appropriate piping mode. There are three optional piping modes for indoor units as shown in the figure below: In Piping Mode 1 or Piping Mode 3, a notch should be made by using scissors to cut the plastic sheet of piping outlet and cable outlet on the corresponding side of the indoor unit. -
Page 21: Step 6: Connect Wiring
Indoor Unit Installation 2. Connect the drainage hose to the drainage port, ensure the joint is firm and the sealing effect is good. 3. Wrap the joint firmly with teflon tape to ensure no leaks. Note Make sure there is no twists or dents, and the pipes should be placed obliquely downward to avoid blockage, to ensure proper drainage. -
Page 22: Step 8: Mount Indoor Unit
Outdoor Unit Installation Outdoor Unit Installation 2. Using the insulating tape wrap the refrigerant pipes, connecting wires and drainage hose together tightly. Step 1: Select Installation Location Select a site that allows for the following: 1. Do not install the outdoor unit near sources of Step 8: Mount Indoor Unit heat, steam or flammable gas. -
Page 23: Step 3: Fix Outdoor Unit
Outdoor Unit Installation Step 3: Fix Outdoor Unit Note 1. According to the outdoor unit installation When connecting the wires of indoor and outdoor units, dimensions to mark the installation position for the power should be cut off. expansion bolts. 2. -
Page 24: Step 6: Vacuum Pumping
Outdoor Unit Installation Step 6: Vacuum Pumping 1. Use a spanner to take down the protective caps from the service port, low pressure valve and high pressure valve of the outdoor unit. 2. Connect the pressure hose of manifold gauge to the service port on the outdoor unit low pressure valve. 3. -
Page 25: Test Operation
Test Operation Test Operation Test Run Instruction 1. Turn on the power supply. Inspections Before Test Run 2. Press the ON/OFF button on the remote Do the following checks before test run. controller to turn on the air conditioner. 3. Press the Mode button to switch the mode COOL Description Inspection method and HEAT. -
Page 26: Mantenance
Maintenance Maintenance • When cleaning, you must shut down the machine and cut off the power supply for more than 5 minutes. • Under no circumstances should the air conditioner be flushed with water. • Volatile liquid (e.g. thinner or gasoline) will damage the air conditioner, so only use soft dry cloth or wet Warning cloth dipped with neutral detergent to clean the air conditioner. -
Page 27: Troubleshooting
Troubleshooting Troubleshooting MALFUNCTION POSSIBLE CAUSES Power failure/plug pulled out. Damaged indoor/outdoor unit fan motor. Faulty compressor thermomagnetic circuit breaker. Faulty protective device or fuses. The appliance does not operate Loose connections or plug pulled out. It sometimes stops operating to protect the appliance. Voltage higher or lower than the voltage range. -
Page 28: Error Code On The Display
Troubleshooting Troubleshooting Error Code on the Display In case of error, the display on the indoor unit shown the following error codes: Display Description of the trouble Indoor room temperature sensor fault Indoor pipe temperature sensor fault Outdoor pipe temperature sensor fault Refrigerant system leakage or fault Malfunction of indoor fan motor Outdoor ambient temperature sensor fault... -
Page 29: Specifications
Specifications Specifications MS-SVX084A-EN... - Page 30 For more information, please visittrane.com or tranetechnologies.com.). Trane has a policy of continuous product and product data improvement and reserves the right to change design and specifications without notice. We are committed to using environmentally conscious print practices.
Need help?
Do you have a question about the 4MYW2309CF and is the answer not in the manual?
Questions and answers