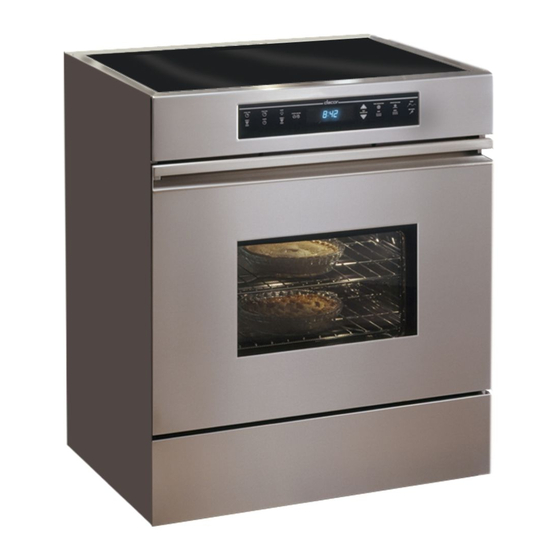
Dacor Preference and Millennia RSE30 Installation Instructions Manual
Dacor ranges installation instructions
Hide thumbs
Also See for Preference and Millennia RSE30:
- Manual (56 pages) ,
- Installation instructions manual (9 pages)
Table of Contents
Advertisement
Quick Links
- 1 Step 3 Electrical Power Supply Requirements
- 2 Step 4 Gas and Electrical Rough-In Locations
- 3 Step 2 Gas Supply Requirements
- 4 Step 5 Cabinet and Countertop Preparation
- 5 Step 6 Overall Dimensions
- 6 Step 11 Electrical Connection
- 7 Step 14 Installing the Burner Components
- 8 Troubleshooting Steps
- Download this manual
See also:
Manual
SAVE ANd REAd ThESE INSTRUCTIONS
TESTEd IN ACCORdANCE wITh ThE LATEST EdITION OF ANSI Z21.1 STANdARd FOR hOUSEhOLd GAS
COOkING APPLIANCES.
CONVENTIONS USEd IN ThESE INSTRUCTIONS
wARNINGS:
Must be followed carefully to avoid personal injury or damage.
NOTES:
Contain helpful hints and tips to facilitate the installation.
IMPORTANT
1.
Before beginning installation, please thoroughly read and become familiar with these instructions.
2.
Installation and service must be completed by a qualified installer or service agency.
3.
Installer: Please leave these Installation Instructions with the owner.
4.
Owner: Please keep these instructions for local electrical inspector's use and for future reference.
5.
Read the accompanying Use & Care Manual prior to operating this appliance.
TABLE OF CONTENTS
STEP 1
STEP 9
Part No. 65166 Rev. J
Preference
Installation Instructions
and Millennia
®
For use with models: MRES30, RSD30, RSE30
Ranges
™
Page 2
Page 2
Page 2
Page 2
Page 2-3
Page 3-4
Page 4
Page 4
Page 4
Page 4-5
Page 5
Page 5
Page 5
Page 5
Page 6
Advertisement
Table of Contents

Summary of Contents for Dacor Preference and Millennia RSE30
-
Page 1: Table Of Contents
STEP 9 Removing the kick panel STEP 11 Electrical connection STEP 12 Gas connection STEP 13 Installing the range STEP 14 Installing the burner components STEP 15 Re-installing the oven door STEP 16 Verifying proper operation Part No. 65166 Rev. J... -
Page 2: Important Safety Instructions
This appliance must not be used in combination with surface (countertop) ventilation systems. The use of an overhead hood, or dacor Raised Vent is recommended for ventilation. This appliance must be installed with the gas pressure regulator supplied with it. -
Page 3: Verifying Package Contents
120/240VAC, 4-wire, 60Hz, 50A MRES30 10.3kW (43.7A) Gas and Electrical Requirements The above electrical specifications are for reference only. See the range data plate for exact specifications. See page 1 for location. NOTES: The power supply must be properly polarized. -
Page 4: Step 6 Overall Dimensions
Utilities may be located: In the lower left corner of the adjacent right cabinet. (Recommended) Alternate location, in the lower right corner behind the range. (Note: Some building departments do not permit concealing gas valves behind appliances.) 36" (914mm) Recommended 30"... -
Page 5: Step 7 Installing The Anti-Tip Bracket
The bracket location shown here will position the rear edge of the range top frame flush to the rear wall. From this position, the bracket allows for up to 5/8” (16mm) of forward movement of the range. -
Page 6: Step 12 Gas Connection
(The left rear leveling leg should engage the anti-tip bracket.) When the range is to be installed as a “slide-in, self rimming” (with the range top overhanging the countertop cutout), measure from the floor to the countertop. -
Page 7: Troubleshooting Steps
Turn on the gas supply at the shut-off valve. Turn on the power supply to the range. Set the time of day by pressing the “CLOCK” key and then pressing either of the “TIME•TEMP” keys (“+”... - Page 8 Appliances Inc. Neither this book nor any information or images contained herein may be copied or used in whole or in part without the express written permission of distinctive Appliances Inc. Copyright © 2006 dacor, all rights reserved.


Need help?
Do you have a question about the Preference and Millennia RSE30 and is the answer not in the manual?
Questions and answers