Table of Contents
Advertisement
Available languages
Available languages
Quick Links
Advertisement
Chapters
Table of Contents

Related Manuals for Chefman RJ02-180-R-CA Series


Summary of Contents for Chefman RJ02-180-R-CA Series
- Page 1 3-in-1 Panini PRESS GRILL USER GUIDE • Safety Instructions • Features • Operating Instructions • Cooking Tips • Cleaning and Maintenance • Notes • Terms and Conditions • Warranty Registration RJ02-180-R-CA-SERIES...
- Page 2 COOKING FORWARD™ Welcome! Whether this is your first Chefman® appliance or you’re already part of our family, we’re happy to be in the kitchen with you. With your new 3-in-1 Panini Press Grill, you can toast golden panini between the two ridged grill plates of the unit. Or, open the grill up to create one large cooking surface and cook burgers, chicken breasts, kebabs, and more.
-
Page 3: Table Of Contents
CONTENTS Safety Instructions Features Operating Instructions Cooking Tips Cleaning and Maintenance Notes Terms and Conditions Warranty Registration... -
Page 4: Safety Instructions
6. Do not operate any appliance with a damaged cord or plug or after the appliance malfunctions or has been damaged in any manner. Contact Chefman® Customer Support for examination, repair, or adjustment. - Page 5 SAFETY INSTRUCTIONS IMPORTANT SAFEGUARDS 8. Do not use outdoors. 9. Do not let cord hang over edge of table or counter, or touch hot surfaces. 10. Do not place on or near a hot gas or electric burner, or in a heated oven. 11.
- Page 6 SAFETY INSTRUCTIONS IMPORTANT SAFEGUARDS WARNING: Improper use of the grounding plug can result in electric shock. GROUNDING INSTRUCTIONS This appliance must be grounded. In the event of an electrical short circuit, grounding reduces the risk of electric shock by providing an escape wire for the electric current. To protect against electrical shock, this appliance is equipped with a cord having a 3-prong grounding-type plug for insertion into a proper grounding-type electrical outlet.
- Page 7 To disconnect the appliance, grasp the plug and remove it from the outlet. Never use the product if the power cord shows signs of abrasion or excessive wear. Contact Chefman® Customer Support for additional guidance and support. Never wrap the cord tightly around the appliance, as this could place undue stress on the cord where it enters the appliance and cause it to fray and break.
-
Page 8: Features
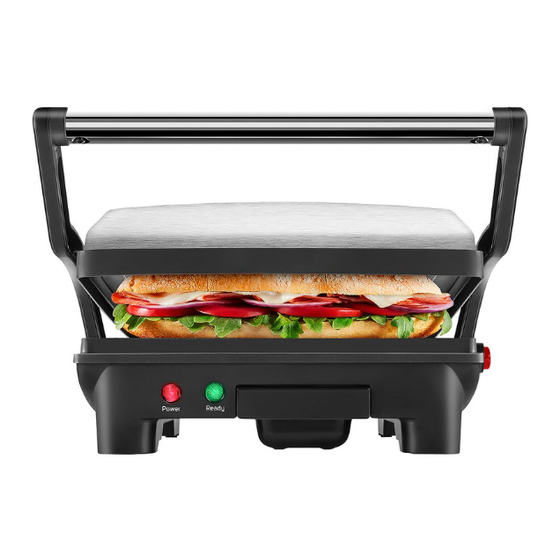
FEATURES Cool-Touch Handle Removable Drip Tray Drip Tray Channel Green READY Light Lay-Flat Hinge Release Button Red POWER Light Retractable Feet Nonstick Grill Plates... -
Page 9: Operating Instructions
OPERATING INSTRUCTIONS BEFORE FIRST USE Read and remove all packing materials and stickers from the inside and outside of the panini grill except for the rating label, which should remain on the unit. Be sure that all accessories are accounted for before throwing away any packaging. Gently wipe down the exterior and the cooking plates with a damp cloth or paper towel to remove any packaging residue. - Page 10 OPERATING INSTRUCTIONS HOW TO COOK WITH CLOSED PLATES The unit can be used as a grill press to cook food between the top and bottom cooking plates simultaneously, resulting in faster, more even cooking. This method is perfect for making panini, grilled cheese, and other hot sandwiches, or for grilling smaller quantities of burgers, boneless and thin cut meats, and vegetables.
- Page 11 OPERATING INSTRUCTIONS Close the lid. Gently press the handle down to ensure the lid rests evenly on top of the food. Do NOT press the handle down too much, as this can crush foods or cause sandwich fillings to leak out. Cook until the food is cooked to your liking.
- Page 12 OPERATING INSTRUCTIONS When the unit is heated (about 3 minutes when preheating in the open position), the green READY light will illuminate. If you like, use a nonaerosol cooking spray, or brush the plates with a small amount of cooking oil if desired. NOTE: Never use aerosol spray on the cooking plates.
-
Page 13: Cooking Tips
COOKING TIPS • Preheat the panini grill closed when cooking with closed plates and open when cooking with open plates. (Heat dissipates when preheating the unit open, so preheating will take 1-2 minutes longer.) • To make crispier, more flavorful panini and hot sandwiches, brush the outside of your bread with oil or butter before grilling. -
Page 14: Cleaning And Maintenance
CLEANING AND MAINTENANCE With its nonstick cooking plates and removable drip tray, the panini grill is super easy to clean. Unplug the unit when finished cooking. Let it cool completely before cleaning. Use a paper towel to remove any leftover food from the cooking plates or to push any excess grease from the plates into the drip tray, if necessary. -
Page 15: Notes
NOTES... -
Page 16: Terms And Conditions
Chefman®. Any changes to the Terms and Conditions of this Warranty must be in writing, signed by a representative of Chefman®. No other party has the right or ability to alter or change the Terms and Conditions of this Warranty. - Page 17 • Altered Products – Damage that occurs from alterations or modifications by any entity other than Chefman® such as the removal of the rating label affixed to the product; • Catastrophic Events – Damage that occurs from fire, floods, or natural disasters; or...
-
Page 18: Warranty Registration
NOTE: Label depicted here is an example. How do I register my product? All you need to do is fill out a simple Chefman® registration form. You can easily access the form in one of the two ways listed below: Visit Chefman.com/register. - Page 19 PERFORM THIS WARRANTY OBLIGATION. THE REMEDIES PROVIDED HEREIN ARE THE EXCLUSIVE REMEDIES UNDER THIS WARRANTY, WHETHER BASED ON CONTRACT, TORT OR OTHERWISE. Chefman® is a registered trademark of RJ Brands, LLC. Cooking Forward™ is a trademark of RJ Brands, LLC.
- Page 21 3-en-1 Gril-PresSE A Panini GUIDE D’UTILISATION • Consignes de sécurité • Caractéristiques • Instructions d’utilisation • Conseils de cuisson • Nettoyage et entretien • Remarques • Conditions • Enregistrement de la garantie SÉRIE RJ02-180-R-CA...
- Page 22 COOKING FORWARD Bienvenue! Que cet appareil Chefman soit votre premier ou que vous fassiez déjà partie de notre famille, nous sommes heureux d’être dans votre cuisine. Avec votre nouveau 3-en-1 Gril-Presse a Panini, vous pouvez dorer votre panini entre deux plaques-gril striées.
- Page 23 TABLE DES MATIÈRES Consignes de sécurité Caractéristiques Instructions d’utilisation Conseils de cuisson Nettoyage et entretien Remarques Conditions Enregistrement de la garantie...
-
Page 24: Consignes De Sécurité
6. N’utilisez pas d’appareil dont la fiche ou le cordon est endommagé ou après un dysfonctionnement ou suite à des dommages quels qu’ils soient. Communiquez avec le service à la clientèle de Chefman pour un contrôle, une réparation ou un ajustement. - Page 25 CONSIGNES DE SÉCURITÉ MESURES DE PROTECTION IMPORTANTES 9. Ne laissez pas le cordon suspendu au bord d’une table ou d’un plan de travail ni en contact avec des surfaces chaudes. 10. Ne placez pas l’appareil sur un brûleur (électrique ou à gaz chaud) ou à proximité ou dans un four chauffé.
- Page 26 CONSIGNES DE SÉCURITÉ MESURES DE PROTECTION IMPORTANTES AVERTISSEMENT : une utilisation inappropriée de la fiche de mise à la terre peut entraîner des décharges électriques. INSTRUCTIONS DE MISE À LA TERRE Cet appareil doit être mis à la terre. Dans l’éventualité d’un court-circuit, la mise à la terre réduit le risque de décharges électriques, et ce par un conducteur de mise à...
- Page 27 3. Pour débrancher l’appareil, saisissez la fiche et retirez-la de la prise. 4. N’utilisez jamais ce produit si le cordon comporte des indices d’abrasion ou d’usure excessive. Communiquez avec le service à la clientèle de Chefman pour d’autres directives et un soutien.
-
Page 28: Caractéristiques
CARACTÉRISTIQUES Poignée froide Ramasse-gouttes amovible Gouttière ramasse-gouttes PRÊT Témoin vert Bouton de déblocage de l’articulation Témoin d’ALIMENTATION rouge pour mise à plat Plaques de gril antiadhésives Pieds escamotables... -
Page 29: Instructions D'utilisation
INSTRUCTIONS D’UTILISATION AVANT L’EMPLOI INITIAL Lisez les instructions et retirez tous les matériaux de conditionnement et les étiquettes de l’intérieur et de l’extérieur du gril-presse à panini, sauf celle de régime nominal qui doit rester sur l’appareil. Assurez-vous qu’il ne manque pas d’accessoire avant de jeter le conditionnement. - Page 30 INSTRUCTIONS D’UTILISATION COMMENT CUIRE AVEC LES PLAQUES FERMÉES Cet appareil peut être utilisé comme gril et presse pour cuire plus rapidement et uniformément un aliment entre deux plaques de cuisson fonctionnant simultanément. Cette méthode est parfaite pour les paninis, sandwichs au fromage fondant et autres sandwichs chauds, ou pour griller des petites quantités de hamburgers, des tranches de viande minces sans os ainsi que des légumes.
- Page 31 INSTRUCTIONS D’UTILISATION Fermez le couvercle. Appuyez en douceur sur la poignée pour que la plaque supérieure repose de façon uniforme sur l’aliment. N’appuyez PAS trop sur la poignée, car cela peut écraser l’aliment ou faire ressortir la garniture sur les côtés du sandwich. Faites cuire l’aliment comme vous le souhaitez.
- Page 32 INSTRUCTIONS D’UTILISATION Lorsque l’appareil chauffe (environ 3 minutes lors du préchauffage en position ouverte), le témoin vert PRÊT s’allume. Si vous le souhaitez, utilisez un brumisateur non aérosol ou enduisez les plaques d’une petite quantité d’huile de cuisson avec un pinceau. REMARQUE : n’utilisez jamais un aérosol de cuisson sur les plaques de cuisson.
-
Page 33: Conseils De Cuisson
CONSEILS DE CUISSON • Préchauffez le gril-presse fermé, lors de cuisson avec plaques fermées et ouvert lors de la cuisson sur les deux plaques déployées. (La chaleur se dissipe lors du préchauffage lorsque l’appareil est ouvert, il faut alors 1 à 2 minutes de plus.) •... -
Page 34: Nettoyage Et Entretien
NETTOYAGE ET ENTRETIEN Grâce à ses plaques de cuisson antiadhésives et son ramasse-gouttes amovible, il est très facile de nettoyer le gril-presse. Débranchez l’appareil une fois la cuisson terminée. Avant de nettoyer l’appareil, laissez- le refroidir complètement. Avec un essuie-tout, enlevez les restes de l’aliment sur les plaques de cuisson ou si besoin, poussez tout excès de graisse vers le ramasse-gouttes. -
Page 35: Remarques
REMARQUES... -
Page 36: Conditions
CONDITIONS Garantie limitée RJ Brands, LLC, faisant affaire sous le nom de Chefman , offre une garantie limitée d’1 an (la « Garantie ») disponible sur les ventes par l’intermédiaire des distributeurs et magasins de détail uniquement. Veuillez noter que cette Garantie devient valide à compter de la date de l’achat initial au détail et que cette Garantie est non cessible et ne s’applique qu’à... - Page 37 1 an à compter de la date d’achat contre les vices de matière et de fabrication, lors d’un usage domestique normal, conforme aux directives présentées dans le Guide de l’utilisateur de Chefman . Si votre produit ne fonctionne pas comme il est prévu, veuillez communiquer avec le service à la clientèle à...
-
Page 38: Enregistrement De La Garantie
AC ONLY/ AC SEULEMENT REMARQUE : l’étiquette présentée ci-contre est un exemple. Que dois-je faire pour enregistrer mon produit? Il vous suffit de remplir un simple formulaire d’enregistrement Chefman . Vous pouvez accéder facilement et de deux manières au formulaire : Consultez Chefman.com/register. - Page 39 ENREGISTREMENT DE LA GARANTIE CHEFMAN Pour plus d’informations sur le produit, consultez Chefman.com. SAUF DANS LE CAS OÙ UNE TELLE RESPONSABILITÉ EST REQUISE PAR LA LOI, CETTE GARANTIE NE COUVRE PAS, ET CHEFMAN NE SERA PAS TENUE RESPONSABLE, DE DOMMAGES DIRECTS OU INDIRECTS, OU SPÉCIAUX, INCLUANT ET SANS LIMITATION, DOMMAGES, OU PERTE DE...
- Page 40 ©CHEFMAN 2023 RJ02-180-R-CA_UG_FINAL_OTP_060623...
Need help?
Do you have a question about the RJ02-180-R-CA Series and is the answer not in the manual?
Questions and answers