Advertisement
Quick Links
Owner's Manual & Safety Instructions
Save This Manual
operating, inspection, maintenance and cleaning procedures. Write the product's serial number in the
back of the manual near the assembly diagram (or month and year of purchase if product has no number).
Keep this manual and the receipt in a safe and dry place for future reference.
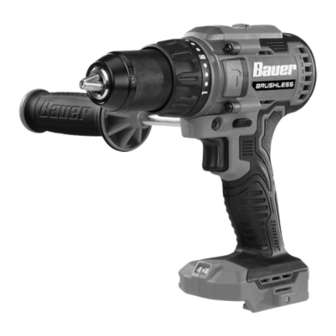
For Best results,
use 3.0 amp Hour Battery
or Greater
(Sold Separately)
1/2" COMPACT
HAMMER DRILL
email our technical support at: productsupport@harborfreight.com
When unpacking, make sure that the product is intact
and undamaged. If any parts are missing or broken,
please call 1‑888‑866‑5797 as soon as possible.
©
Copyright
2022 by Harbor Freight Tools
No portion of this manual or any artwork contained herein may be reproduced in
any shape or form without the express written consent of Harbor Freight Tools.
Diagrams within this manual may not be drawn proportionally. Due to continuing
improvements, actual product may differ slightly from the product described herein.
Tools required for assembly and service may not be included.
Keep this manual for the safety warnings and precautions, assembly,
Visit our website at: http://www.harborfreight.com
®
. All rights reserved.
2092CR-B
Read this material before using this product.
Failure to do so can result in serious injury.
SAVE THIS MANUAL.
23c
59368
Advertisement

Subscribe to Our Youtube Channel
Related Manuals for Bauer 2092CR-B


Summary of Contents for Bauer 2092CR-B
- Page 1 (or month and year of purchase if product has no number). Keep this manual and the receipt in a safe and dry place for future reference. 2092CR-B For Best results, use 3.0 amp Hour Battery...
-
Page 2: Important Safety Information
table of contents Safety ..............2 Operation ..............7 Specifications ............6 Maintenance ............11 Setup ..............7 Warranty ..............12 WarninG SyMBOLS anD DeFinitiOnS This is the safety alert symbol. It is used to alert you to potential personal injury hazards. Obey all safety messages that follow this symbol to avoid possible injury or death. - Page 3 c. Do not expose power tools to rain or wet h. Do not let familiarity gained from frequent conditions. Water entering a power tool use of tools allow you to become complacent and ignore tool safety will increase the risk of electric shock. principles.
- Page 4 e. Maintain power tools and accessories. e. When battery pack is not in use, keep check for misalignment or binding of it away from other metal objects, like moving parts, breakage of parts and any paper clips, coins, keys, nails, screws other condition that may affect the power or other small metal objects, that can tool’s operation.
- Page 5 7. Lithium Battery Safety Warnings b. always start drilling at low speed and with the bit tip in contact with the workpiece. At higher speeds, the bit is likely to bend if allowed to rotate freely without contacting the workpiece, resulting in personal injury. c.
-
Page 6: Extension Cords
Read the manual before WARNING marking concerning set‑up and/or use. Risk of Hearing Loss. Wear hearing protection. Specifications Bauer 20 V Li‑Ion 57007 Battery Type (sold separately) Bauer 20V Li‑ion 57006 Charger Type (sold separately) No Load Speed :0‑450/0‑1,800/min... - Page 7 Setup - Before use: read the entire iMpOrtant SaFety inFOrMatiOn section at the beginning of this manual including all text under subheadings therein before set up or use of this product. Functions Speed Selector torque Selector chuck Jaws Direction Switch Side Handle trigger Work...
- Page 8 attaching Belt clip Attach Belt Clip to either side of the Handle using supplied Screw. Belt clip Side Handle 1. Side Handle may be positioned on either side. 2. Thread Side Handle clockwise into Threaded Hole on Drill until tightly secured. Side Handle threaded Hole Bit installation...
- Page 9 Driving Driving screws, bolts and installing nuts. • If a pilot hole has been drilled into the material, a lower torque setting will be required. 1. Set torque by rotating Torque Selector. • Adjust the torque setting low enough to allow 2.
- Page 10 General instructions for use 1. Lock Trigger, then insert a fully 3. Press Trigger to start the tool. The Work charged Battery Pack, making sure Light will turn on when Trigger is pressed that it clicks into place securely. and turn off when Trigger is released. 2.
-
Page 11: Troubleshooting
Maintenance and Servicing instructions procedures not specifically explained in this manual must be performed only by a qualified technician. tO preVent SeriOuS inJury FrOM acciDentaL OperatiOn: Make sure that the trigger is in the off-position and remove its Battery pack before performing any procedure in this section. tO preVent SeriOuS inJury FrOM tOOL FaiLure: Do not use damaged equipment. - Page 12 Limited 90 Day Warranty Harbor Freight Tools Co. makes every effort to assure that its products meet high quality and durability standards, and warrants to the original purchaser that this product is free from defects in materials and workmanship for the period of 90 days from the date of purchase. This warranty does not apply to damage due directly or indirectly, to misuse, abuse, negligence or accidents, repairs or alterations outside our facilities, criminal activity, improper installation, normal wear and tear, or to lack of maintenance.
Need help?
Do you have a question about the 2092CR-B and is the answer not in the manual?
Questions and answers