Table of Contents
Advertisement
Quick Links
Advertisement
Table of Contents
Troubleshooting

Subscribe to Our Youtube Channel
Related Manuals for ECR Dunkirk D248 Series


Summary of Contents for ECR Dunkirk D248 Series
- Page 1 D248 Series Cast Iron Commercial Hot Water or Steam Boiler INSTALLATION, OPERATION & MAINTENANCE MANUAL DUNKIRK BOILERS 2201 Dwyer Avenue, Utica NY 13501 An ISO 9001-2008 Certified Company web site: www.ecrinternational.com P/N# 240006636D, Rev. A [08/2011]...
-
Page 2: Table Of Contents
CAST IRON HOT WATER OR STEAM BOILER INSTALLATION MANUAL AND OPERATING INSTRUCTIONS SAFETY SYMBOLS TABLE OF CONTENTS Safety Symbols ..........2 Boiler Ratings & Capacities ........3 DANGER Rules For Safe Installation & Operation ....4 Indicates a hazardous situation which, if Locating The Boiler .......... -
Page 3: Boiler Ratings & Capacities
RATINGS AND CAPACITIES Ratings and Capacities – Chart #1 Pressure Flue Outlet No. Chimney Input (1) Output (1) NET I=B=R Ratings (2) Drop Thru Flue & Size Size (6) Boiler Horsepower Water Boiler Collector Model Gross Steam Size to Steam Water Output (4) Btu Mbh... -
Page 4: Rules For Safe Installation & Operation
SAFETY INFORMATION When Your Boiler Arrives Safety Information When your boiler arrives be sure to save and refer to 1. Read the User’s Information Manual and Rules for the instructions. Safe Operation carefully. Failure to follow rules for safe operation and instructions could cause First, inspect each item received for visible damage. -
Page 5: Locating The Boiler
BEFORE INSTALLING Minimum Vent Pipe Clearance Locating The Boiler If the vent pipe must go through a crawl space, double Locate the boiler on a level, non-combustible foundation wall vent pipe should be used. Where vent passes through as near to chimney or fl ue as possible. Allow 24 inches a combustible wall or partition, use a ventilated metal at front and sides of boiler for servicing and cleaning. -
Page 6: Ventilation And Combustion Air
VENTILATION AND COMBUSTION AIR WARNING WARNING Enough air ensures proper combustion and Air openings to combustion area must not assures that no hazard will develop due to the be obstructed. Follow Chart 2 to insure that lack of oxygen. adequate combustion air can be maintained. COMBUSTION AIR REQUIREMENTS –... - Page 7 VENTILATION AND COMBUSTION AIR Figure 1 Figure 2 Combustion Air Combustion Openings with Motorized Dampers Openings Vent-Piping Vent-Piping Combustion Air supplied from Combustion Air supplied from inside the building outside the building Important Vent-Piping Note: Sloped vent pipe at least 1/4” for every 1’ to the vent terminal. buildings, confi...
-
Page 8: Vent Installation
VENTILATION AND COMBUSTION AIR means of vertical ducts, each opening shall In calculating free area using louvers, grilles or have minimum free area 1 square inch per screens for above, consideration shall be given to 4,000 Btu per hour of total input rating of all their blocking effect. - Page 9 VENT INSTALLATION Flue Connection And Venting Continued Figure 3 Simple vent system consists of 6-foot minimum vertical rise immediately off draft-hood, as shown in Figure 3. Terminate this vertical fl ue above building roof with suitable rain cap at least 2 feet above surrounding obstructions, i.e., parapets, adjacent buildings, penthouses, etc.
- Page 10 VENT INSTALLATION Removing Existing Boiler From Common Venting Figure 6 System When existing boiler is removed from common venting system, common venting system is likely to be too large for proper venting of appliances remaining connected to it. At time of removal of existing boiler, following steps shall be followed with each appliance remaining connected to common venting system placed in operation, while other appliances remaining connected to common venting system...
- Page 11 BOILER DIMENSIONS Left Side View Front View Supply Supply Water Line 38” 29” Floor Line Top View Flue Nutlets Return Return ALL SUPPLY AND RETURN CONNECTIONS ARE 4 INCH Supply Supply Chart 3 Water Content Boiler Shipping A Jacket in Gallons Base &...
-
Page 12: Assembly Of Bases, Starting Section Assembly
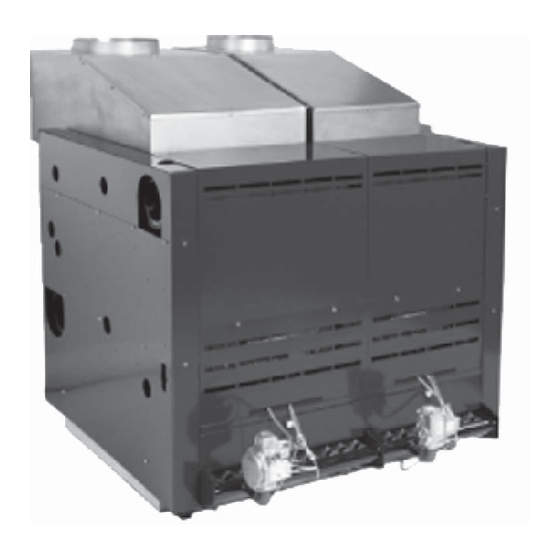
INSTALLATION – ASSEMBLY Base Assembly Section Assembly The 300, 400 and 500 boilers are the basic models. The 300 The sections may be started from either the left or right end model has (6) burners, the 400 model has (8) burners and of the base. -
Page 13: Attaching Draft Hoods
INSTALLATION – ASSEMBLY Place nipples in ports taking care to seat them squarely to Attaching Draft Hoods prevent cocking. Figure 10. Attach the draft hoods to the boiler sections after applying boiler putty to the top of the boiler sections When pulling sections together with tie rods, always insert where the hoods and sections meet. -
Page 14: Installing Boiler Jacket Panels
INSTALLATION – ASSEMBLY Installing Boiler Jacket Panels Position top/front intermediate panel so back edge of top hangs on adjustable clips on front of draft hood(s); left NOTE: Jacket assembly must start at the left side of boiler. edge hangs on bracket on left upper jacket end panel; Attach lower jacket end panel (left) to two Z-bars on and right edge with integral bracket hangs on tie rod(s). - Page 15 INSTALLATION – ASSEMBLY Attach lower jacket end panel (right) to middle jacket Installing Boiler Jacket Panels - Continued end panel with lower behind middle and lining up holes. Attach upper jacket end panel (right) so left edge hangs Use (5) #10 x ½” screws. Attach lower jacket end on bracket on top/front intermediate panel.
- Page 16 INSTALLATION – ASSEMBLY Lighting Instruction Plates are provided with each Installing Boiler Jacket Panels - Continued boiler base. Each boiler base also includes data plate Attach burner door knobs with #8-32 x ¼” screws and indicating required gas type, fi ring rate, and gas #8-32 hex nuts.
-
Page 17: Control Mounting And Installation
INSTALLATION – ASSEMBLY Control Mounting And Installation Orient harness of control panel assembly so correct (female) plug is toward j-box and will connect to NOTE: Electrical controls (j-box, transformer, etc. can j-box harness. Figure 27A. Secure harness to control be mounted on either left or right jacket end panel. panel with zip-ties and #10 x ½”... - Page 18 INSTALLATION – ASSEMBLY Control Mounting And Installation Figure 27A Figure 29A Figure #27A Figure 27B Figure 29B Figure 28...
-
Page 19: Tappings
TAPPINGS Illustration shows the end section and the various tap- Figure 29 pings provided. Tappings are the same in both right and left end sections. OPENING SIZE STEAM WATER Supply and 4” Supply and Return Return P r i m a r y LW C O a n d ½”... -
Page 20: Boiler Piping
BOILER PIPING PIPE SIZING BOILERS USED WITH REFRIGERATION SYSTEM Piping connection sizes are important to control proper When the boiler is installed in connection with a water velocity at the inlet and outlet connections to refrigeration system, it must be piped so that the the water boiler. -
Page 21: Piping Diagrams
BOILER PIPING Figure 33 STEAM BOILERS - SERIES S BOILER TAPPINGS ARE AVAILABLE FOR ALL CONNECTIONS SHOWN NOTE: Mount electrical supply on opposite side. CITY WATER SUPPLY CITY WATER SUPPLY WATER WATER WATER LINE LINE LINE 1.1/2 TO RETURN TO RETURN NO. - Page 22 BOILER PIPING Figure 35 STEAM BOILER PIPING SAFETY VALVE SHOULD BE FIELD INSTALLED AS CLOSE AS POSSIBLE TO BOILER STEAM BOILER PIPING Figure 35 Full size steam header is recommended on all steam WARNING systems as shown above. On Boiler Models 300, 400 and 500 full header may be eliminated and single steam header Never install shut-off or steam valve between taken off either side of boiler provided system is clean and...
-
Page 23: Connecting Gas Service
CONNECTING GAS SERVICE • Connect gas service from meter to control assembly(s) in accordance with ANSI Z223.1 and local codes or Chart 4 utility. On multiple base boilers, connect gas service Minimum Gas Supply Pressure with branch lines from common main. Individual branch 5.0 inches w.c. -
Page 24: Electrical Wiring
ELECTRICAL WIRING Adjust thermostat Heat Anticipator Electrical Wiring Suggested heat anticipator setting is .90 amps (set The boiler, when installed, must be wired and electrically accordingly). Then follow instructions packaged with bonded to ground in accordance with the requirements of thermostat for fi... -
Page 25: Wiring Diagrams
WIRING DIAGRAMS Commercial Boiler, 1, 2 & 3 Base LOW VOLTAGE WIRING... - Page 26 WIRING DIAGRAMS Commercial Boiler, 4, 5 & 6 Base LOW VOLTAGE WIRING...
-
Page 27: Operation And Service
OPERATION AND SERVICE Control Functions And Operation System Troubleshooting The control module performs the following basic functions: Start system by setting thermostat or controller above room temperature and observe system response. Opens and closes the fi rst (pilot) operator of the gas valve. -
Page 28: Startup & Checkout, Start System
OPERATION AND SERVICE Ignition Cable Check WARNING Cable must not run in continuous contact with a metal DO NOT OMIT THIS TEST surface or spark voltage will be greatly reduced. Connections to the stud terminal on the control and on the With main burners in operation, paint pipe igniter-sensor must be clean and tight. -
Page 29: Pilot System Troubleshooting Table
PILOT SYSTEM TROUBLESHOOTING TABLE NOTE: Before troubleshooting, familiarize yourself with the startup and check procedure. Turn gas supply OFF. Turn thermostat (controller) to call for heat. Check line voltage power, low voltage transformer, limit controller, thermostat (controller) and wiring. Also, check air proving switch on combustion air Power to module (24V module) blower system (if used) and that vent damper (if used) is open and end switch is made. -
Page 30: Checking & Adjusting
CHECKING AND ADJUSTING This valve should be tested every month during periods Check Burner Input of boiler operation, and at the beginning and end of any Check boiler for proper Btu input rate. extended non-service period. Prior to testing, make cer- tain discharge pipe is properly connected to valve outlet CAUTION and arranged so as to contain and safely dispose of boiler... -
Page 31: Cleaning And Maintenance
CHECKING AND ADJUSTING VENTING SYSTEM AT LEAST ONCE A MONTH DURING HEATING SEASON Vent system is very important part of heating system. check to see that sections of vent pipe are secure at all No boiler, however effi cient its design, can perform joints and fi... - Page 32 DUNKIRK BOILERS 2201 Dwyer Avenue, Utica NY 13501 web site: www.ecrinternational.com...
Need help?
Do you have a question about the Dunkirk D248 Series and is the answer not in the manual?
Questions and answers