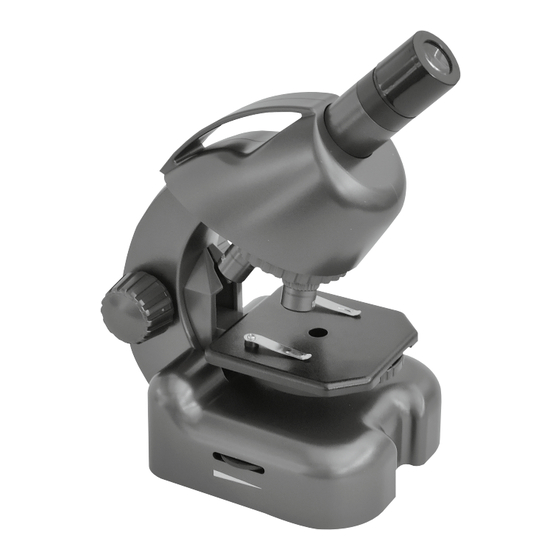
Summary of Contents for Bresser 14951
- Page 1 SCHÜLERMIKROSKOP STUDENT MICROSCOPE 100X-900X Art. No. 14951 BEDIENUNGSANLEITUNG INSTRUCTION MANUAL...
-
Page 2: Manual Download
(NL) Bezoek onze internetpagina via de volgende QR- code of weblink, voor meer informatie over dit product of www.bresser.de/P14951 de beschikbare vertalingen van deze gebruiksaanwijzing. (IT) Desidera ricevere informazioni esaustive su questo prodotto in una lingua specifica? Venga a visitare il nostro sito Web al seguente link (codice QR Code) per conoscere le versioni disponibili. - Page 3 ! 1 1 1 ! 1 @ # 1...
-
Page 4: Allgemeine Warnhinweise
Allgemeine Warnhinweise • ERSTICKUNGSGEFAHR! Dieses Produkt beinhaltet Kleinteile, die von Kindern verschluckt werden können! Es besteht ERSTICKUNGSGEFAHR! • GEFAHR eines STROMSCHLAGS! Dieses Gerät beinhaltet Elektronikteile, die über eine Stromquelle (Batterien) betrieben werden. Lassen Sie Kinder beim Umgang mit dem Gerät nie unbeaufsichtigt! Die Nutzung darf nur, wie in der Anleitung beschrieben, erfolgen, andernfalls besteht GEFAHR eines STROMSCHLAGS! •... - Page 5 2. Aufbau und Standort Bevor du beginnst, wählst du einen geeigneten Standort zum Mikroskopieren aus. Zum einen ist es wichtig, dass genügend Licht da ist, zum anderen empfiehlt es sich, das Mikroskop auf eine stabile Unterlage zu stellen, da sich auf einem wackeligen Untergrund keine zufrieden stellenden Ergebnisse erzielen lassen. 3.
- Page 6 Nimm das Smartphone nach dem Gebrauch wieder von der Halterung ab! HINWEIS: Achte darauf, dass das Smartphone nicht von der Halterung rutschen kann. Bei Beschädigungen durch ein herabgefallenes Smartphone übernimmt die Bresser GmbH keine Haftung! 6. Beobachtungsobjekt – Beschaffenheit und Präparierung 6.1.
- Page 7 6.2. Herstellen dünner Präparatschnitte Wie bereits vorher ausgeführt, sind von einem Objekt möglichst dünne Scheiben herzustellen. Um zu bes- ten Ergebnissen zu kommen, benötigst du etwas Wachs oder Paraffin. Nehme z.B. eine Kerze. Das Wachs wird in einen Topf gegeben und über der Kerze erwärmt. GEFAHR! Sei äußerst vorsichtig im Umgang mit heißem Wachs, es besteht Verbrennungsgefahr! Das Objekt wird nun mehrere Male in das flüssige Wachs getaucht.
- Page 8 dadurch der Tod der ganzen Garnelen-Bevölkerung verursacht wird. Sie können 5-10 Jahre in einem „schla- fenden“ Zustand verharren. Die Eier brüten aus, wenn die richtigen Umweltbedingungen wieder hergestellt sind. Solche Eier findest Du in Deinem Mikroskop-Set. Das Ausbrüten der Salzwasser-Garnele Um die Garnele auszubrüten, ist es zuerst notwendig, eine Salz-Lösung herzustellen, die den Lebensbe- dingungen der Garnele entspricht.
-
Page 9: Hinweise Zur Reinigung
• Entfernen Sie Batterien aus dem Gerät, wenn es längere Zeit nicht benutzt wird! EG-Konformitätserklärung Eine „Konformitätserklärung“ in Übereinstimmung mit den anwendbaren Richtlinien und entspre- chenden Normen ist von der Bresser GmbH erstellt worden. Der vollständige Text der EG-Konfor- mitätserklärung ist unter der folgenden Internetadresse verfügbar: www.bresser.de/download/9119501/CE/9119501_CE.pdf Entsorgung Entsorgen Sie die Verpackungsmaterialien sortenrein. -
Page 10: Garantie
Die reguläre Garantiezeit beträgt 2 Jahre und beginnt am Tag des Kaufs. Um von einer verlängerten, freiwil- ligen Garantiezeit wie auf dem Geschenkkarton angegeben zu profitieren, ist eine Registrierung auf unserer Website erforderlich. Die vollständigen Garantiebedingungen sowie Informationen zu Garantiezeitverlängerung und Servicelei- stungen können Sie unter www.bresser.de/garantiebedingungen einsehen. -
Page 11: General Warnings
General Warnings • Choking hazard — This product contains small parts that could be swallowed by children. This poses a choking hazard. • Risk of electric shock — This device contains electronic components that operate via a power source (power supply and/or batteries). Only use the device as described in the manual, otherwise you run the risk of an electric shock. - Page 12 3. Normal observation For normal observation, place the microscope in a bright location (near a window or desk lamp, for exam- ple). Turn the focus knob (2) to the upper stop, and set the objective turret (3) to the lowest magnification. Now, turn on the light using the switch on the microscope base.
-
Page 13: Smartphone Holder
A slight shading at the edges is possible. Remove the smartphone from the holder after use! WARNING: Make sure that the smartphone can not slip out of the holder. Bresser GmbH assumes no liability for any damages caused by a dropped smartphone. 6. Condition and prepare viewed objects 6.1. - Page 14 DANGER! Be extremely careful when using the MicroCut, knife or scalpel. These instruments are very sharp and pose a risk of injury. Place the slices on a glass slide and cover them with another slide before attempting to view them with the microscope.
- Page 15 along with a few eggs to each of the four compartments of the tank. The temperature should be around 25º. At this temperature, the shrimps will hatch in about 2-3 days. If the water in the glass evaporates, add some water from the second container.
-
Page 16: Ec Declaration Of Conformity
• The batteries should be removed from the unit if it has not been used for a long time. EC Declaration of Conformity Bresser GmbH has issued a "Declaration of Conformity" in accordance with applicable guidelines and corresponding standards. The full text of the EU declaration of conformity is available at the following internet address: www.bresser.de/download/9119501/CE/9119501_CE.pdf... -
Page 17: Warranty
The regular warranty period is 2 years and begins on the day of purchase. To benefit from an extended voluntary warranty period as stated on the gift box, registration on our website is required. You can consult the full warranty terms as well as information on extending the warranty period and details of our services at www.bresser.de/warranty_terms. - Page 20 Bresser GmbH Bresser UK Ltd. Gutenbergstraße 2 Suite 3G, Eden House 46414 Rhede · Germany Enterprise Way Edenbridge, Kent TN8 6HF www.bresser.de Great Britain @BresserEurope ...


Need help?
Do you have a question about the 14951 and is the answer not in the manual?
Questions and answers