Table of Contents
Advertisement
Quick Links
Advertisement
Table of Contents

Related Manuals for Ismart AMC-G320P


Summary of Contents for Ismart AMC-G320P
- Page 1 HD PTZ Camera User Manual V1.2...
- Page 3 Copyright Information Copying, reproducing or transmitting this file is not allowed if no written permission is provided. This file can be copied as a backup only after you purchase this product. In order to keep improving products, product specifications under this manual are subject to change without prior notice.
- Page 4 Symbols Instruction Symbol Instructions To represent the supplement and explanation of the text. Explanation To remind the user of some important operations or to prevent the potential Note injury and property damage. To indicate a potential risk that, if not avoided, may result in injury Warning accidents, equipment damage or business interruption.
- Page 5 Safety Notes During the installation of this camera, please read this manual carefully and operate strictly In accordance with the installation instructions. Keep this manual for future reference. Before powering on the camera, please check the power carefully. Make sure that you are using the right power source.
-
Page 6: Table Of Contents
Contents About The Product ------------------------------------------------------------------------------- 1 Features --------------------------------------------------------------------------------- 1 List Of Parts & Accessories ------------------------------------------------------------- 1 Main Parts & Interfaces ----------------------------------------------------------------- 2 Size And Dimension ------------------------------------------------------------------------------ 3 Big Remote Controller ------------------------------------------------------------------ 3 Installation ------------------------------------------------------------------------------------------- 5 Desktop Mount Installation ------------------------------------------------------------ 5 Wall Mount Installation ----------------------------------------------------------------- 6 Ceiling Mount Installation -------------------------------------------------------------- 7 Menu Settings -------------------------------------------------------------------------------------- 8... -
Page 7: About The Product
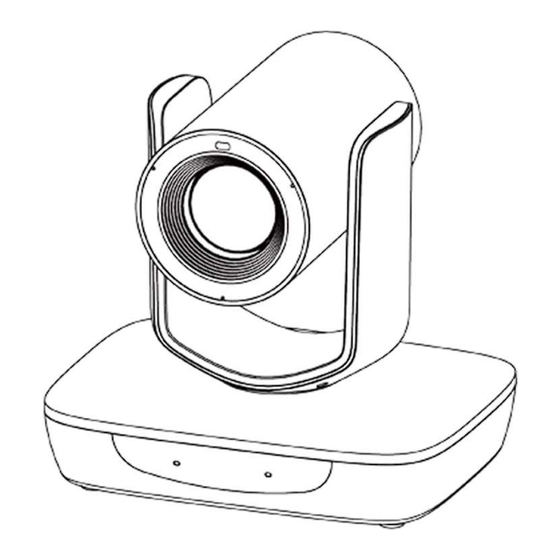
List Of Parts & Accessories About The Product When you open the box, check all accessories according to the packing list. Features Camera (1 pcs) 20x optical zoom, up to 1080P60 resolution, support 59.94/29.97 frame rate; Compact appearance design with prominent Tally light auxiliary prompt;... -
Page 8: Main Parts & Interfaces
10 RS232-IN Main Parts & Interfaces 11 RS485/422 Camera 12 DC12V Front View Bottom View 13 Mounting Hole 1 Tally Light 2 Camera Module 1/4”inch screw thread for fixing camera. 3 Power Indicator 14 Locating Hole 4 Status Indicator To define installation direction of camera. RS485/422 Connector Rear View 5 USB3.0(Type-B) -
Page 9: Size And Dimension
Size And Dimension Front Rear Side Bottom... - Page 10 IR Remote Controller 1 HOME Press “HOME” button, camera moves to initial position. 2 Camera Selection Button Used to switch among 4 cameras, press 1-4 number buttons to control cameras with 1-4 addresses respectively. For example, press button 1 to control the camera with address 1.
- Page 11 Long press remote control numeric key (0-9) In None-menu status: press this button to to set a preset, short press to call a preset. switch among pan / tilt control speeds. In Menu status: get into relative menu 8 Cancel option after it has been selected.
-
Page 12: Installation
Installation Note Take effective measures to avoid The camera has 3 installation types: desktop camera from dropping. Do not grab the camera head when installation, wall mounting (non-standard), and carrying. Do not rotate the camera head with ceiling mounting (non-standard). -
Page 13: Ceiling Mount Installation
2. Fix the mounting plate onto the ceiling or Use inch screws to fix the camera on the bracket, fix the limit screw according to cement roof with 4 screws according to your actual requirement, and make sure the own needs. camera is tightly fixed onto the bracket before your hands leave the camera. -
Page 14: Menu Settings
Menu Settings Menu Configuration Settings <IMAGE> SHARPNESS 0,1,2,3,4,5,6,7,8,9,10,11 BRIGHTNESS 0,1,2,3,4,5,6,7,8,9,10,11,12,13,14 CONTRAST 0,1,2,3,4,5,6,7,8,9,10,11,12,13,14 GAMMA 0,1,2,3,4 2DNR 0,1,2,3,4,5,6,7 3DNR 0,1,2,3,4,5,6,7 0,1,2,3,4,5 MIRROR ON,OFF FLIP ON,OFF... - Page 15 <EXPOSURE> AUTO ANIT FLICKER OFF, 50HZ, 60HZ ON, OFF EXCOMP -7~+7 0,1,2,3,4,5,6,7,8,9, MANUAL GAIN 10,11,12,13,14 1/60,1/90,1/100,1/125,1/180, SPEED 1/250,1/350,1/500,1/725, 1/1000,1/1500,1/2000,1/3000, 1/4000,1/6000,1/10000 F14,F11,F9.6,F8,F6.8,F5.6, LEVEL F4.8,F4,F3.4,F2.8,F2.4,F2, F1.6,CLOSE 1/60,1/90,1/100,1/125,1/180, SHUTTER SPEED 1/250,1/350,1/500,1/725, 1/1000,1/1500,1/2000,1/3000, 1/4000,1/6000,1/10000 F14,F11,F9.6,F8,F6.8,F5.6, IRIS LEVEL F4.8,F4,F3.4,F2.8,F2.4,F2, F1.6,CLOSE 0,1,2,3,4,5,6,7,8,9, BRIGHT BRIGHTNESS 10,11,12,13,14,15,16,17, 18,19,20,21,22,23,24,25, 26,27 ANTI FLICKER OFF,...
- Page 16 <COLORTONE> AUTO R-GAIN -7~+7 G-GAIN -7~+7 WB-SENSI MIDDLE HIGH MANUAL R-GAIN 0~16 B-GAIN 0~16 OPWB ONE PUSH Press[OK]Key 2800~6500 STATIC COLOR TEMP. SATURA 0,1,2,3,4,5,6,7,8,9,10,11,12,13,14 0,1,2,3,4,5,6,7,8,9,10,11,12,13,14 <CAMERA> RUN SCENE INDOOR ×1,×2,×3,×4,× DIGITAL ZOOM 5,×6,×7,×8,× 9, ×10,×11,×12, ×13,×14,×15,× 16...
- Page 17 <SYSTEM> PROTOCOL ADDR 1,2,3,4,5,6,7 IR ADDR 1,2,3,4 MOUNT MODE STAND,CEILING PROTOCOL VISCA,PELCO-P,PELCO-D BAUDRATE 2400, 4800,9600,38400 1080P60, 1080P59.94,1080P50, 1080P30, VIDEO FORMAT 1080P29.97,1080P25, 720P60, 720P59.94,720P50 COM MODE RS485IN,RS422IN LANGUAGE ENGLISH,中文 DISPLAY INFO ON,OFF DEFAULTS CONFIRM NETWORK NET MODE DHCP IP ADDRESS 10.0.7.169 NET MASK 255.255.255.0 GATEWAY...
-
Page 18: Camera Web
<DEVICE INFO> VIDEO FORMAT FIRM VERSION ISP VERSION AF VERSION Camera Web Connect camera to network through an Ethernet cable, power on the camera. LAN Connection As shown in the above diagram, user1 and user 2 are in the same router, which means in the same LAN. -
Page 19: Wan Connection
WAN Connection As shown in the above diagram, user and the camera are in different routers, which means in a WAN. In this case, the software cannot automatically search for the camera as it does on a LAN. However, if the following three conditions are satisfied, the software can still search for the camera through the following network configurations: Condition1: Set camera’s IP address as static IP address Set camera’s IP address in LAN: Connect user PC to the LAN (Router 1) where the camera is... - Page 20 internal port (all cameras are fixed to this value). "Protocol" and "image line" can be selected by default. Descriptions such as "port mapping of camera 1" can be filled in the description. Condition3: Router of the LAN where camera is connected has fixed public IP address Access from external network: For example, if the external IP address of router 1 is 115.200.31.100, the WAN user under router 2 can access camera 1 through IP address 115.200.31.100 and port 10200 through steps 1 and 2 above.
-
Page 21: Main Interface
Main Interface Default IP:192.168.1.180. UserName: admin, PassWord: admin123. Live View Pan/Tilt... - Page 22 Preset Set preset: Enter the number and click Set; Recall preset: Enter the number and click Recall; Effective range of preset:0~255; Repeated saving of the same preset will be overwritten. Menu Menu: Display the menu interface; Enter: View or adjust menu configuration, Exit: Exit the menu interface; Panorama: Call 0 preset.
- Page 23 noise reduction, the less noise the image has and the less jitter it feels. The lower the level of image noise reduction, the more noise there is in the image, and the greater the jitter feeling. CONTRAST: Refers to the ratio between the lightest and darkest areas of the image. The image with the higher ratio providing richer color and crisper lineation.
- Page 24 Exposure AUTO Mode: Gain, Shutter Speed and Iris value are adjusted automatically accordingly to working environment; Manual Mode: Manually adjust Gain, Shutter Speed and Iris; Shutter Priority: Gain and Iris value are adjusted automatically according to working environment;...
-
Page 25: Audio Config
Audio Config Audio Input: Support Line-In; Sample Rate: Number of Audio Signal Collections per Unit Time, Current support 48KHz; Audio Volume: 0-100. Video Config Stream type: set the parameters of main stream and sub stream. Different devices support different streams; ... -
Page 26: Media Config
Video Frame rate: Represent the number of frames per second of the video; Encoding Type: choose H264 or H265; Encode Level: choose from Base, Main, and High; I-Frame Interval: 1-255. Media Config Media Protocol Config: Support RTSP, RTMP, RTMPS, NDI, SRT Protocols. Control Protocol Config ... -
Page 27: System Config
System Config User Manage Click Chanage Password to change the password for logging in to the Web terminal; Click Add User add new users, choose to be Operation or User. Enter Config Physical Adapter: After turn off DHCP, users can set the values; ... - Page 28 Firmware Update Click to search and load the updating firmware, then click Confirm to start upgrading. Do not power off the camera during upgrading. After upgrading is completed, camera will reboot.
-
Page 29: Technical Specifications
Technical specifications Items 1/2.8'' CMOS, 214MP Image Sensor Focal Lens f=4.7mm~94mm Iris F1.6~F3.5 Field Of View 59.5°~2.9° Optical Zoom Digital Zoom Focus System Auto, Manual, PTZ Trigger, One Push Trigger Exposure Auto, Manual, Shutter Priority, Iris Priority, Bright Priority Control Min. - Page 30 Video Output 1080P60/P50/P30/P25; 720P60/P50/P30/P25; 360P60/P50/P30/P25 Format Support Multiple Dual streams Support NDI | HX3 1×USB 3.0 Type-B, UAC Audio Format PCM, USB3.0 Compatible with USB2.0: 1. Support UVC1.1. 2. UVC Video Format Support; H.264/H.265/MJPEG,Video resolution: 1080P60/P50/P30/P25,720P60/P50/P30/P25,480P60/P50/P30/P25 360P60/P50/P30/P25; YUY2/NV12、Video resolution: USB3.0: 1080P30/P25,720P30/P25,480P30/P25, 360P30/P25; USB2.0: 480P30/P25,360P30/P25;...
-
Page 31: After-Sales Service
After-sales service Dear users, in order to ensure that you fully enjoy our quality service, please read the following product service articles carefully. Limited warranty and lifetime maintenance services are provided. 1. Limited warranty period is 12 months from the date products leaving factory. During the limited warranty period, you will enjoy free service of repair service expect caused by man-made malfunction. - Page 32 The user manual is only for a reference, if there are any changes or differences, please ask for the latest version from your supplier Y06020706111...
Need help?
Do you have a question about the AMC-G320P and is the answer not in the manual?
Questions and answers