Table of Contents
Advertisement
Quick Links
Advertisement
Table of Contents

Related Manuals for Ismart AMC-E200T


Summary of Contents for Ismart AMC-E200T
- Page 1 HD IP TRACKING PTZ Color Video Camera User Manual V1.0...
- Page 3 SAFETY NOTICE-IMPORTANT!!! The following important notes must be followed carefully to run the camera and respective accessories in total safety. The camera and relative accessories are called video system in this section. Before installing the camera, please read this manual carefully. Please follow installation instructions indicated in this manual during installation.
- Page 4 Do not move the camera head manually. In doing so would result in malfunction of the camera. Do not hold the camera head when carrying the video camera. This camera is for indoor use only. It is not designed for outdoor use. ...
- Page 5 Attention If you need to extend the power cable, please extend the power cable from the part 1 on below picture (220V/110V), do not extend from part 2 on below picture (DC12V), otherwise it will cause unexpected damage to the device.
-
Page 6: Table Of Contents
CONTENTS ABOUT THE PRODUCT -------------------------------------------------------- 1 ------------------------------------------------------------------------------ 1 QUICK UIDE -------------------------------------------------------------------------------- 2 FEATURES ----------------------------------------------------------- 2 & CHARACTERISTICS FUNCTIONS ------------------------------------------------------------ 2 & LIST F PARTS ACCESSORIES ---------------------------------------------------------------- 3 & I MAIN PARTS INTERFACES --------------------------------------------------------------------- 4 REMOTE CONTROLLER INSTALLATION ---------------------------------------------------------------- 6 ------------------------------------------------------------ 6 DESKTOP MOUNT INSTALLATION ---------------------------------------------------------------- 6 WALL MOUNT INSTALLATION... -
Page 7: About The Product
4.The IP and port number can be checked with ABOUT THE PRODUCT Room Tracker software. Internet Explorer Quick Guide 1.Make sure PC and AMC in the same LAN; AMC can be accessed and controlled via the 2.Open Internet Explorer and Enter Internet following ways: Options for Security Setting;... -
Page 8: Features
http://IP:88, such as Max 1080p60 output; http://192.168.18.229:88; Support SDI, DVI-D, RJ45 and USB 3.0 4.Install plugin; outputs; 5.Name: admin Password: NULL. H.264 video compression; Support Main/Sub dual stream; IR remote and RS-232/RS-485 control; User-friendly interface and easy setup. ... -
Page 9: Main Parts Interfaces
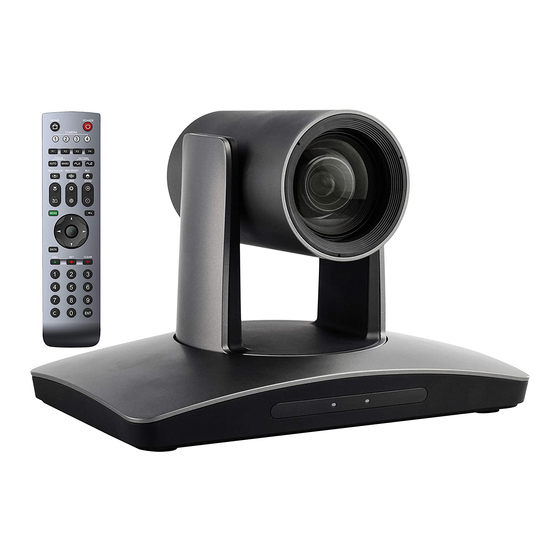
USB Cable x 1 6 Audio 7 TF Card Slot 8 RJ45 (Network) 9 DVI Video Output 10 3G-SDI Main Parts & Interfaces 11 RS-232 / RS-485 12 USB Camera 13 Power(DC12V) Front View Bottom View 1 Camera Module 14 Mounting Hole 2 Remote Controller Indicator 1/4”inch screw thread for fixing camera. -
Page 10: Remote Controller
Remote Controller 2 Camera Selection Button Used to switch among 4 cameras, press 1-4 number buttons to control cameras with 1-4 addresses respectively. For example, press button 1 to control the camera with address 3 Focus Press “AUTO” button to switch to Auto Focus, press “MANU”... - Page 11 8 Cancel 16 Direction / Menu Operation To cancel numbers input In None-menu status, press these four buttons to pan left/right and tilt up/down. 9 Power In Menu status: or button to select After the camera has been connected to among menu options, to change power source, in none-menu status, press...
-
Page 12: Installation
Wall Mount Installation INSTALLATION The camera has 2 installation types: desktop, wall (optional) installations. Note Before installing, make sure there is enough space to install the According to diameter and position of the camera and its parts. Make sure the installed place is 4 installation holes (As shown below) on strong and safe enough to hold the the bracket, drill 4 holes on the wall and fix... -
Page 13: Connections
CONNECTIONS Note If preset 0 has been saved, after powered on, camera moves to preset 0 automatically; if preset 0 has not been saved, after powered on, camera moves to Home position, where both pan and tilt angle is zero and zooming time is 1x. -
Page 14: Room Tracker
System: set camera name, Change password ROOM TRACKER (Update PWD), set the main and sub video streams (RTSP), and reboot the camera (REBOOT); Software Connection SD Card: set the recording parameters, such Setup Room Tracker from the disc in the as FPS, RES, BPS etc. - Page 15 make sure the paper is pointing directly to the camera. 2.Adjust the camera’s Pan / Tilt / Zoom until the paper is able to cover the whole image without finger or other objects. 3.Choose one push WB option, after waiting for ten seconds when the image has been adjusted, move away the paper.
-
Page 16: Parameters
PARAMETERS SETTING Setting Process Preset 0 and Preset 1 are set as presets of full view generally, or as presets of any zoom or location. When there is no target, it can set for the camera to preset 0 or preset 1. Please refer to Basic Setting. - Page 17 shall be according to the shoulder of the Warning nearest sitting target. Left and right limit shall The position has been adjusted to cover the possible moving area. Setting as the best value before leaving the factory, do not change it until it is follows: necessary.
- Page 18 Tracking Sens: Set sensitivity of tracking based on speed of movement. High sensitivity will track at small movement. Zoom Sens: Set sensitivity of zoom during tracking. High sensitivity will cause zoom in or out during tracking with small movement. Zoom Limit: Higher value enables higher zoom times.
-
Page 19: Menu Settings
MENU SETTINGS Menu Configuration <VIDEO> SHARPNESS 0, 1, 2, 3, 4, 5, 6, 7, 8, 9, 10, 11, 12, 13, 14, 15 Refer to Page17 2DNR LEVEL ON, OFF 3DNR LEVEL AUTO,1,2,3,4,OFF WIDE DYNAMIC ON, OFF... - Page 20 <EXPOSURE> MODE FULL AUTO Refer to MANUAL GAIN -0, +2, +4, +6, +8, +10, Page 18 +12, +14, +16, +18, +20, +22, +24, +26, +28,+30 SPEED 1/1, 1/2, 1/3, 1/6, 1/12, 1/25, 1/50, 1/75, 1/100, 1/120, 1/150, 1/215, 1/300, 1/425, 1/600, 1/1000, 1/1250, 1/1750, 1/2500, 1/3500, 1/6000, 1/10000...
- Page 21 <WHITE BALANCE> MODE AUTO Refer to Page19 ONE PUSH INDOOR OUTDOOR MANUAL R.GAIN 0~255 B.GAIN 0~255 SODIUM LAMP FLUO LAMP <PAN TILT ZOOM> PAN/TILT SPEED 1, 2, 3, 4, 5, 6, 7, 8 Refer to Page19 PAN/TILT LIMIT ON, OFF -30°~+90°...
- Page 22 <SYSTEM> DISPLAY INFO ON, OFF Refer to RATIO SPEED ON, OFF Page 20 PRESET FREEZE ON, OFF MOUNT STAND, CEILING <STATUS> ADDRESS Refer to Page PROTOCOL VISCA BAUDRATE 9600 VIDEO FORMAT 1080P25 MOUNT MODE STAND IMAGE VER V6629 FIRMWARE VER V1.0.0 <RESTORE DEFAULTS>...
-
Page 23: Menu Explanation
❶ Menu Hint Menu Explanation It displays currently selected menu option. Main Menu ❷ Menu Options Press MENU button to enter / exit menu. It displays options under current menu hint. ❶ <MENU> Press button to select among VIDEO EXPOSURE menu options, once font of options turned WHITE BALANCE ❷... -
Page 24: Exposure
performance, but more video trails will be IRIS: F14, F11, F9.6, F8, F6.8, F5.6, F4.8, generated. F4, F3.4, F2.8, F2.4, F2, F1.6, CLOSE. 3DNR LEVEL: AUTO, 1, 2, 3, 4, OFF. SHUTTER PRI: Gain and Iris value are adjusted automatically according to working WIDE DYNAMIC: ON, OFF. -
Page 25: White Balance
“MANUAL” mode: R.GAIN and B. GAIN EXP-COMP: Once EXP-COMP is set as On, below level options become available -7, -6, value can be chosen from 0~255. -5, -4, -3, -2, -1, 0, +1, +2, +3, +4, +5, +6, +7 +7 is the maximum compensation value for Pan/Tilt/Zoom bright, -7 is the maximum compensation value PAN/TILT/ZOOM is used to change... -
Page 26: System
STATUS POWER UP ACTION: PRESET 1, PRESET 2, PRESET 3, PRESET 4, PRESET 5, PRESET < STATUS> 6, PRESET 7, PRESET 8, PRESET 9, ADDRESS HOME. PROTOCOL VISCA BAUD RATE 9600 FORMAT 1080P50 System MOUNT STAND IMAGE VER V7232 <SYSTEM> DISPLAY INFO FIRMWARE VER V1.1.0... -
Page 27: Annex 1 Technical Specifications
ANNEX 1 TECHNICAL SPECIFICATIONS Tracking Camera Image Sensor 1/2.8" CMOS, 2.14 megapixel Focal Lens f=3.9mm-46.8mm Iris F1.6-F2.8 Optical Zoom Digital Zoom Horizontal Viewing Angle 72.5° -6.3° Focus System Auto, Manual, PTZ Trigger, One Push Trigger Exposure Control Auto, Manual, Shutter Priority, Iris Priority Min. - Page 28 Dual Stream Support General Power DC12V Power Consumption <20W Operating Temperature 0° C~+40° C Storage Temperature -20° C~+60° C Dimensions (W×H×D) 243mm×145mm×163mm Body color White...
-
Page 29: Annex 2 Size And Dimension
ANNEX 2 SIZE AND DIMENSION Front Rear Side Bottom... -
Page 30: Troubleshooting
TROUBLESHOOTING Problem Possible Cause Solution Power supply failure Check power supply No action or image Power adapter damaged Replace power adapter after powered on Power cable connection got loosen Check & reconnect Power cable is too long Use a shorter cable No self-testing after powered on, or with Power adapter damaged... - Page 32 CA/YF-AMCE200T-ZD-013 Y06020701046...
Need help?
Do you have a question about the AMC-E200T and is the answer not in the manual?
Questions and answers