Advertisement
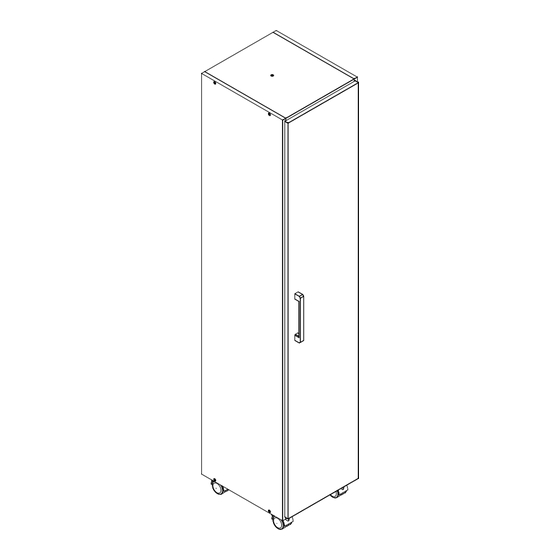
CABINET 01 DOOR WITH CASTERS AH0301
ASSEMBLY INSTRUCTIONS
IMPORTANT
FOR DOMESTC USE ONLY
PLEASE READ BEFORE YOU CONTINUE FURTHER
CARE AND MAINTENANCE
After unpacking this product please keep the original packaging in case it needs to be returned for any reason.
• Please ensure all fitting and parts are present before commencing with assembly.
• Never drag or push products as this could cause damage to the joints making it inferior.
• We strongly recommend that you keep children away from your work area.
• We recommend that you lay a blanket or sheet on the floor to avoid damage to both your floor and the product.
• Assemle this product as close to its fnal position as possible.
• Do not place this product next to a radiator or in direct sunlight.
• Do not drag or push items across your hihg glosss furniture as this may cause the surface to acratch.
• Wood is a natural product and may expand if subjected to damp and may shrink or crack if subjected to heat.
Therefore it recommended that room temperature is maintained, with no sudden temperature fluctuations.
• Make sure any spillage is wiped off immediately.
• Do not place hot or chilled items directly on to the surface, use a place mat or marking will occur.
• For general cleaning use a soft cotton or micro fibre cloth, and do not use detergents of any kind.
• From time to time it may be necessary to tighten fittings, regular inspections should be carried out.
• Do not place on a wet or damp floor as staining may occur to your floor.
PAGE 01
Advertisement
Table of Contents

Related Manuals for Seconique Furniture AH0301


Summary of Contents for Seconique Furniture AH0301
- Page 1 CABINET 01 DOOR WITH CASTERS AH0301 ASSEMBLY INSTRUCTIONS IMPORTANT FOR DOMESTC USE ONLY PLEASE READ BEFORE YOU CONTINUE FURTHER CARE AND MAINTENANCE After unpacking this product please keep the original packaging in case it needs to be returned for any reason.
-
Page 2: Parts List
PARTS LIST Please Note: The below parts have all been stamped with the part number to help identify them during assembly. Codig Part Number Part Description Quantity Carton ---- Back Panel Left External Side 9974 Right External Side 9975 9976 Door Division 9977... -
Page 3: Fittings List
FITTINGS LIST Flat head screw Flan head screw Flat head screw Dowel Ø4,0 X 50 mm (15x) Ø3,5 X 30 mm (2x) Ø4,0 X 14 mm (14x) Ø6,0 X 25 mm (18x) Flan head screw Ø3,5 X 14 mm (16x) Hinge 26MM High Lap (3x) Hinge Plate 26MM (3x) Nail 10X10 Ringed-1,5x23mm (44x) - Page 4 STEP 1 PARTS REQUIRED 2 - LEFT EXTERNAL SIDE HARDWARE REQUIRED Ø4,0 X 14 mm Hooks TOOLS REQUIRED Detail 1 STEP 2 PARTS REQUIRED 5 - DIVISION HARDWARE REQUIRED Ø6 X 25 mm TOOLS REQUIRED Detail 3 PAGE 04...
- Page 5 STEP 3 PARTS REQUIRED 7 - GABINET’S BASE HARDWARE REQUIRED Ø6 X 25 mm Ø3,5 X 14 mm TOOLS REQUIRED Detail 3 Detail 10 STEP 4 PARTS REQUIRED 8 - SHELF HARDWARE REQUIRED Ø6 X 25 mm TOOLS REQUIRED Detail 3 PAGE 05...
- Page 6 STEP 5 PARTS REQUIRED 5 - DIVISION 6 - GABINET’S TOP HARDWARE REQUIRED Ø4,0 X 50 mm TOOLS REQUIRED Detail 3 Detail 4 STEP 6 PARTS REQUIRED 10 - SHELF HARDWARE REQUIRED Ø4,0 X 50 mm TOOLS REQUIRED Detail 3 Detail 4 PAGE 06...
- Page 7 STEP 7 PARTS REQUIRED 3 - RIGHT EXTERNAL SIDE 7 - GABINET’S BASE HARDWARE REQUIRED Ø4,0 X 50 mm TOOLS REQUIRED Detail 3 Detail 4 STEP 8 PARTS REQUIRED 2 - LEFT EXTERNAL SIDE HARDWARE REQUIRED Ø4,0 X 50 mm TOOLS REQUIRED Detail 3 Detail 4...
- Page 8 IMPORTANT PLEASE FOLLOW! STEP 9 PLEASE MAKE SURE PART 1 IS LINED UP CORRECTLY AT THE TOP BEFORE PLACING FITTING F INTO THE PANEL AS THIS CAN AFFECT THA ALIGNMENT OF THE DOORS ONCE ASSEMBLED. PARTS REQUIRED 01 - BACK PANEL HARDWARE REQUIRED 10x10 TOOLS REQUIRED...
-
Page 9: Parts Required
STEP 11 PARTS REQUIRED 04 - DOOR HARDWARE REQUIRED Ø4,0 X 14 mm TOOLS REQUIRED Detail 7 STEP 12 PARTS REQUIRED 04 - DOOR TOOLS REQUIRED Detail 8 PAGE 09... - Page 10 STEP 13 PARTS REQUIRED HARDWARE REQUIRED Ø3,5 X 30 mm TOOLS REQUIRED Detail 9 STEP 14 PAGE 10...
Need help?
Do you have a question about the AH0301 and is the answer not in the manual?
Questions and answers