
Related Manuals for Miele W 3240


Summary of Contents for Miele W 3240
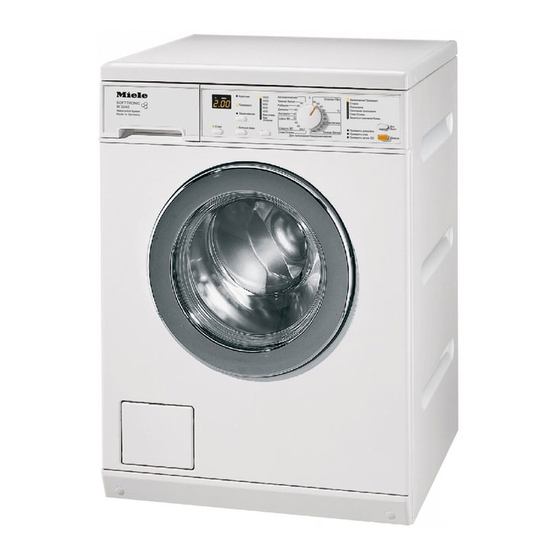
- Page 1 Operating instructions for Washing machine W 3240 To avoid the risk of accidents or damage to the machine it is essential to read these instructions before it is installed and used for the first time. M.-Nr. 06 622 890...
-
Page 2: Caring For Our Environment
They are, however, bags etc. are disposed of safely and essential for the correct functioning of kept out of the reach of babies and your appliance or machine. Please do young children. Danger of suffocation! not therefore dispose of your old... -
Page 3: Table Of Contents
Disposal of the packing material ........2 Disposal of your old appliance or machine ....... 2 Warning and safety instructions . - Page 4 Fabric conditioners and liquid starch ........29...
- Page 5 Screwing out and adjusting the feet ....... . . 47...
-
Page 6: Warning And Safety Instructions
Before connecting the machine, – it is switched off at the wall socket ensure that the connection data on and the plug is withdrawn, or the data plate match the mains electricity supply. If in any doubt, –... - Page 7 Frozen hoses may burst or split. regularly for signs of wear and tear. The reliability of the electronic control Change in good time to avoid the risk of unit may be impaired at temperatures leaks and subsequent damage. below freezing point.
-
Page 8: Disposal Of Your Old Machine
If, however, the risk of injury do not allow you do wish to descale the machine children to play on or near it or to play only use proprietary non-corrosive with the controls. Supervise its use by... -
Page 9: Description Of The Machine
Use the top button to select either h Check lights the Short , Pre-wash , or Soak option. Use the lower button to select the i I-On/0-Off button Water plus option. For switching the machine on or off Indicator light on = option selected or interrupting a programme. - Page 10 – the programmable functions show the function selected. Programme duration After the start of a programme, the estimated programme duration will appear in the display in hours and minutes. During the first 10 minutes the washing...
-
Page 11: Before Using For The First Time
For safety reasons spinning is not possible until the machine has been prepared for using for the first time. To activate the spinning function you must run a wash programme without laundry and without detergent. -
Page 12: Washing Environmentally And Economically
Washing environmentally and economically Energy and water consumption Detergent – Water consumption and energy – Do not exceed the amounts of usage are determined by the size of detergent recommended by the the load. manufacturer on the packaging. To make the most out of your –... -
Page 13: How To Wash Correctly
How to wash correctly Brief instructions If you use a solvent-based clean- The headings numbered A, B, C, . . . ing agent (e.g. one containing ben- show the operating sequence and can zene) to pre-treat a stain, make sure be used as brief instructions. - Page 14 How to wash correctly B Switch on the washing machine D Select a programme C Load the drum ^ Press the Door button to open the drum door. ^ Unfold the laundry and load loosely in the drum. Mixing both large and...
- Page 15 How to wash correctly E Select additional option(s) F Select a spin speed Each press of the top button selects the additional options in the following order: Short , Pre-wash , Soak , no selection. Use the lower button to select the Water plus option.
- Page 16 G Add detergent It is important to dispense the correct amount, because ..too little detergent results in: – Laundry not getting properly clean and with time it may become grey and hard to the touch.
- Page 17 I Remove the laundry ^ Check the folds in the door seal for Only remove laundry from the any small articles, e.g. buttons which machine once the drum has might be lodged there.
-
Page 18: Additional Options
See "Programmable functions - Water plus system". For light to nomal soiling with no The machine is set at the factory so that visible staining. the water level in the main wash and The duration of the main wash is rinses will be increased if the Water reduced. -
Page 19: Spinning
To omit rinse and interim spin and Rinse and interim spin the final spin There is a spin after the main wash and ^ Select the Without spin setting. The between the rinses. A reduction in the laundry is not spun after the final final spin speed will also reduce the interim spin speed. -
Page 20: Programme Chart
Additional option Short or Pre-wash or Soak Notes – Dust in curtains usually makes using a programme with Pre-wash advisable. – For curtains which crease easily, reduce the spin speed or select Without spin. Automatic 40°C 72 Max. - Page 21 Additional option Short or Pre-wash or Soak Notes – Wash denim inside out. – Denim often contains excess dye and will run during the first few washes. Wash light and dark coloured items separately. Express 40°C 72 Max. load 3.0 kg...
-
Page 22: Programme Sequence
– – Starch d = Low water level a= Normal wash rhythm ( = Medium water level b= Gentle action e = High water level c= Woollens d= Silks See the following page for more information about the programme sequences. - Page 23 This means that programme cycles and durations programme, the drum continues to turn can vary. at intervals for up to 30 minutes to help prevent creasing. The door can be The programme sequences outlined in opened and laundry removed at any the chart are based on the basic time during the anti-crease phase.
-
Page 24: Garment Care Label Symbols
Garment care label symbols Washing Ironing The figure quoted in the bucket is the The number of dots indicates the maximum temperature the garment ironing temperature can be washed at. The number of Hot iron (max sole plate temp. bars under the symbol indicates the approx. -
Page 25: Changing The Programme Sequence
Changing the programme sequence Cancelling a programme Changing a programme You can cancel a programme at any After the start of a programme it is no time after it has started. longer possible to select a different programme. If the programme selector... -
Page 26: Adding Or Removing Laundry After A Programme Has Started
Changing the programme sequence Adding or removing laundry after a programme has started ^ Press the Door button in until the drum door springs open. ^ Add or remove items. ^ Close the door. The programme will continue automatically. Please note:... -
Page 27: Detergent
Use dispensing aids, e.g. balls, if these are supplied with the detergent. Tablets are suitable for full loads but note that it may be impractical to reduce tablets for smaller loads. Some tablets do not dissolve as rapidly as others and may not be suitable for programmes with short durations. -
Page 28: Water Softeners
Detergent Water softeners The right amount to dispense will depend on the following: A water softener can be used to cut down on the use of detergents in hard – The quantity of laundry. water areas. Dispense according to the –... -
Page 29: Fabric Conditioners And Liquid Starch
Do not add powder starch bed linen. formulations or viscous liquid starch to the § compartment as it will clog Automatic dispensing of fabric up. See below. conditioner or liquid starch to laundry at the end of a programme... -
Page 30: Cleaning And Care
Cleaning and care Extra cleaning Disconnect the machine from the Carry out a hot wash (70°C or above) mains electricity supply and with powder detergent approx. every 6 withdraw the plug from the socket weeks to help prevent deposits building before cleaning the machine. - Page 31 ^ Clean the siphon. 1. Remove the siphon from compartment § and rinse under ^ Use a bottle brush to remove warm running water. Clean the detergent residues and limescale siphon tube in the same way. from the jets inside the detergent dispenser drawer housing.
-
Page 32: Cleaning The Water Inlet Filters
These filters should be checked every and unscrew. six months or so, or more often if there are frequent interruptions to the water supply. To clean the filter in the union in the open end of the inlet hose: ^ First turn off the stopcock. -
Page 33: Problem Solving Guide
Problem solving guide With the help of the following notes minor faults in the performance of the machine, some of which may result from incorrect operation, can be put right without contacting the Service Department. Repair work to electrical appliances should only be carried out by a suitably qualified person in strict accordance with local and national safety regulations. -
Page 34: Troubleshooting
If the fault indicators occur flashing. "– – –" appears again, contact the Service in the display. Department. A To switch off the fault indicator: switch the washing machine off with the I-On/0-Off button and turn the programme selector to Finish . -
Page 35: A Fault Indicator Light Comes On But The Wash Programme Continues As Normal
Turn the programme indicator light is flashing. selector back to the programme previously chosen. A To switch off the fault indicator: switch the washing machine off with the I-On/0-Off button and turn the programme selector to Finish . -
Page 36: General Problems
"Installation"). The pump makes This is not a fault! These noises occur at the end of strange noises. a pump sequence as a normal part of the operation. Large amounts of The water pressure is –... -
Page 37: An Unsatisfactory Wash Result
White residues The detergent – Try and brush off the residues which look like contained compounds with a soft brush once the powder detergent (zeolites) to aid water laundry is dry. -
Page 38: The Drum Door Does Not Open When You Press The Door Button
There is still water in the Clean the drain filter and the drain pump as described in the next section. drum and the machine is unable to drain. For safety reasons the drum door cannot be opened if the suds temperature is higher than 55°C. -
Page 39: Failure
If the drain outlet is blocked, up to and/or power failure 25 litres of water will be retained in the machine. ^ Switch the washing machine off. There is a lever behind the detergent Caution: if laundry has been drawer fascia panel. -
Page 40: Opening Drum Door
^ Remove any foreign objects (e.g. buttons, coins, etc.) and fluff from the filter housing. Turn the impeller by hand to check that it rotates freely. Any foreign object causing an obstruction should be removed. ^ Put the drain filter back in place and secure. -
Page 41: After Sales Service
After sales service In the event of any faults which you Future updates (PC) cannot remedy yourself, please The indicator light marked PC is the contact: interface used by Miele service – your Miele Dealer or technicians during servicing work for testing purposes and for updating the –... -
Page 42: Installation And Connection
Detergent dispenser drawer pressure of at least 7,000 kPa) i Drum door b Electricity supply cable j Access to drain filter, drain pump c - f Flexible drain hose (with and emergency release detachable swivel elbow) k Handle recesses for moving the... -
Page 43: Rear View
Rear view a Protruding lid for holding when e Transit bar covers moving the machine f Restraining clip for inlet hose and b Electricity supply cable drain hose c Inlet hose (tested to withstand g Restraining clips for transit bars... -
Page 44: Installation Surface
washing... - Page 45 Installation and connection ^ Using the spanner supplied turn the ^ Turn the right-hand transit bar 90°, left-hand transit bar 90°, then then ^ withdraw the transit bar. ^ withdraw the transit bar.
-
Page 46: Re-Fitting The Transit Bars
(e.g.when moving house). Re-fitting the transit bars Re-fitting is carried out by reversing the ^ Fit the covers on to the two holes. procedure. Then plug the holes as shown with the caps. ^ Secure the transit bars to the back of the washing machine. -
Page 47: Levelling The Machine
Installation and connection Levelling the machine The machine must stand perfectly level on all four feet to ensure safe and proper operation. ^ Using the spanner supplied turn counter nut 2 in a clockwise direction. Then turn counter nut 2 together with foot 1 to unscrew. -
Page 48: Building Under A Continuous Worktop/In A Kitchen Run
Building under a continuous worktop/in a kitchen run If you wish to push your machine under a worktop and there is space to do this without removing the lid, the conversion kit is not necessary. Otherwise the conversion kit is essential. -
Page 49: The Miele Water Protection System
The Miele water protection – Overflow protection system This prevents the washing machine taking in too much water. If the water The Miele water protection system level exceeds a certain level, the protects the washing machine from drain pump switches in and pumps water damage. -
Page 50: Connection To The Water Supply
Installation and connection Connection to the water supply In order to protect the water inlet valve, the two dirt filters - one in the The machine should be connected to a open end of the inlet hose, one at mains water supply in accordance with local and national safety regulations. -
Page 51: Connection To The Drainage System
The swivel elbow – Make sure that the water can drain at the end of the hose can be turned in away freely without hindrance. either direction, or can be detached if Otherwise there is a risk of water required, with a sharp twist and pull. -
Page 52: Electrical Connection U.k
The regulations (BS 7671 in the UK). -
Page 53: Consumption Data
Short programme for test institutes; the Short additional option must be selected. Consumption data can vary from the nominal values given depending on water pressure, water hardness, water inlet temperature, room temperature, type and volume of load, fluctuations in the electricity supply and any additional options... -
Page 54: Technical Data
595 mm Depth 580 mm Depth with door open 975 mm Weight 93 kg Maximum floor load 1,600 Newton (approx. 160 kg) Capacity 6 kg dry laundry Voltage see data plate Connected load see data plate Fuse rating (UK) see data plate / plug Consumption data see "Consumption data"... - Page 55 Programmable functions for changing default settings The programmable functions can be used to tailor washing programmes to suit your individual requirements.
-
Page 56: Programmable Functions
This is used to select the water intake light comes on . . . setting for the Water plus additional option. D . . . and then release the Start button. There are four different options: E Turn the programme selector to the Setting 1: Cottons 60°C position:... -
Page 57: Gentle Action
Follow steps A to G to programme and store in memory. F Press the Start button to change the display from 0 to 1 or from 1 to 0. Before you begin, first ensure that: G Switch the machine off with the –... -
Page 58: Top-Up Rinse For Cottons
Top-up rinse for Cottons F Press the Start button to change the deactivated. display from 0 to 1 or from 1 to 0. G Switch the machine off with the Follow steps A to G to programme I-On/0-Off button. -
Page 59: Memory Function
– The washing machine is switched off. F Press the Start button to change the – The machine is properly closed. display from 0 to 1 or from 1 to 0. – The programme selector is at Finish . G Switch the machine off with the I-On/0-Off button. -
Page 60: Soak
– The programme selector is at Finish . 1 = the soak time is 2 hours (default setting) 2 = the soak time is 1 hour 30 minutes 3 = the soak time is 1 hour 4 = the soak time is 30 minutes G Switch the machine off with the I-On/0-Off button. - Page 64 Alteration rights reserved/2606/W 3240 M.-Nr. 06 622 890 / 02 en - GB...
Need help?
Do you have a question about the W 3240 and is the answer not in the manual?
Questions and answers