Onkyo TX-NR3009 Instruction Manual
Owner manual
Hide thumbs
Also See for TX-NR3009:
- Code list (16 pages) ,
- Quick start manual (4 pages) ,
- Manuel d'instructions (108 pages)
Table of Contents
Advertisement
Quick Links
AV Receiver
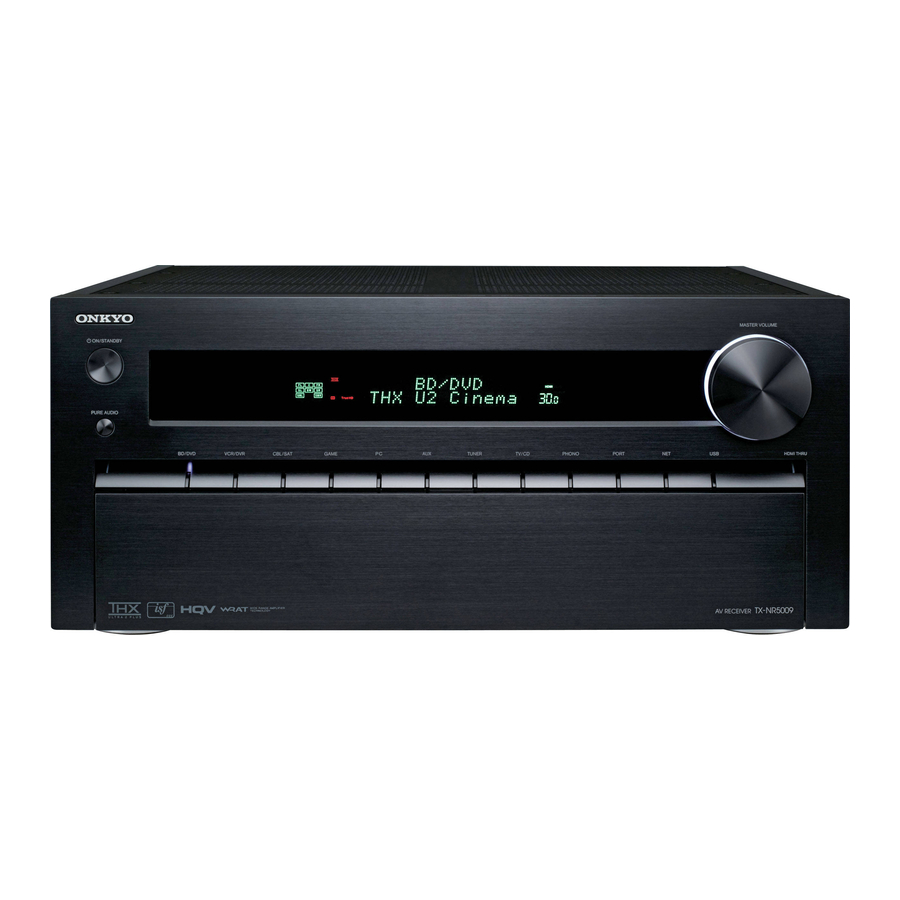
TX-NR5009
TX-NR3009
Instruction Manual
Thank you for purchasing an Onkyo AV Receiver.
Please read this manual thoroughly before making
connections and plugging in the unit.
Following the instructions in this manual will enable
you to obtain optimum performance and listening
enjoyment from your new AV Receiver.
Please retain this manual for future reference.
Contents
Introduction.......................................2
Connections ....................................12
Turning On & Basic Operations ....24
Advanced Operations.....................47
Controlling Other Components ......76
Appendix .........................................85
E
n
Advertisement
Table of Contents

Related Manuals for Onkyo TX-NR3009


Summary of Contents for Onkyo TX-NR3009
- Page 1 Instruction Manual Advanced Operations.....47 Controlling Other Components ..76 Appendix .........85 Thank you for purchasing an Onkyo AV Receiver. Please read this manual thoroughly before making connections and plugging in the unit. Following the instructions in this manual will enable you to obtain optimum performance and listening enjoyment from your new AV Receiver.
-
Page 2: Introduction
Servicing is required when the apparatus has been Leave 20 cm (8") of free space at the top and sides and damaged in any way, such as power-supply cord or 10 cm (4") at the rear. The rear edge of the shelf or plug is damaged, liquid has been spilled or objects board above the apparatus shall be set 10 cm (4") -
Page 3: Precautions
This is normal. the permission of the copyright holder. • If you do not use this unit for a long time, it may not 2. AC Fuse—The AC fuse inside the unit is not user- work properly the next time you turn it on, so be serviceable. -
Page 4: Supplied Accessories
In catalogs and on packaging, the letter at the end of the product name indicates the color. Specifications and operations are the The wire which is coloured blue must be connected to the same regardless of color. -
Page 5: Table Of Contents
Specifications (TX-NR3009)......... 105 Displaying Source Information ........44 Changing the Input Display .......... 44 To reset the AV receiver to its factory defaults, turn Using the Whole House Mode........44 it on and, while holding down VCR/DVR, press Selecting Speaker Layout ..........45 Muting the AV Receiver.......... -
Page 6: Features
• Powered Zone 2/3 • (TX-NR5009) Massive Toroidal Transformer • Bi-Amping Capability • (TX-NR3009) Massive Transformer • Speaker A/B Terminals • Analog RGB Video Input (D-sub 15) for PC Processing • Internet Radio Connectivity (SiriusXM Internet • THX Ultra2 Plus Certified Radio/vTuner/Last.fm/Pandora/Rhapsody/Slacker/... - Page 7 THX Ultra2 Plus requirements define hundreds of with safety and regulatory standards. parameters, including power amplifier performance, and Please note that the use of this accessory with iPod or iPhone may affect wireless performance. pre-amplifier performance and operation for both digital and analog domains.
-
Page 8: Front & Rear Panels
Front & Rear Panels Front Panel (North American models) (European and Asian models) -
Page 9: Display
Input selector buttons and indicators (25) o DIMMER button (North American models) (44) h Front flap p MEMORY button (31) Gently push on the lower end of the front panel to open the flap. q TUNING MODE button (30) r LISTENING MODE buttons (36) -
Page 10: Rear Panel
Rear Panel Illustration based on TX-NR5009. a UNIVERSAL PORT jack p ZONE 2 and ZONE 3 12V TRIGGER OUT jacks b IR IN and OUT jacks q Composite, S-Video and analog audio jacks (BD/DVD IN, VCR/DVR IN and OUT, CBL/SAT IN,... -
Page 11: Remote Controller
DISPLAY button d CH +/– button (31) e Number buttons (31) When you want to change the remote controller mode (target component) without changing the current input source, press MODE and within about 8 seconds, press REMOTE MODE. Then, using the same AV receiver’s remote controller, you can control the component corresponding to the button you pressed. -
Page 12: Connections
Connecting the Speaker Cables ■ 9.2-channel Playback The following illustration shows how to connect the speakers to each pair of terminals. If you’re using only one surround back speaker, connect it to the SURR BACK/ZONE 3 L terminals. Front high... - Page 13 • Disconnect the power cord from the wall outlet before speakers making any connections. Front speakers ✔ ✔ ✔ ✔ ✔ ✔ ✔ ✔ ✔ ✔ ✔ ✔ ✔ ✔ ✔ • Read the instructions supplied with your speakers. ✔...
- Page 14 DVD movie with 7.2-channels surround sound and use Speakers B for serious music listening with a pair of stereo speakers (2-channels). Speakers A and Speakers B can be wired normally or bi-amped, but cannot be bi-amped at the same time. For example, if Speakers B are bi-amped, Speakers A can only be wired normally.
- Page 15 The following illustration shows how to connect the speakers for up to 7.2-channel playback with Speakers A or Speakers B. If you’re using only one surround back speaker, connect it to the SURR BACK/ZONE 3 L terminals. Front B right...
- Page 16 If you’re using only one subwoofer, connect it to SW1 PRE OUT. Powered subwoofer • If your subwoofer is unpowered and you’re using an external amplifier, connect the subwoofer pre out jack to an input on the amplifier. Corner position...
- Page 17 Connecting a Power Amplifier If you want to use a more powerful power amplifier, you Power amplifier can use the AV receiver as a preamp. Connect all speaker outputs to the power amplifier. See the manuals supplied with your amplifier for details.
-
Page 18: About Av Connections
Note • The AV receiver does not support SCART plugs. • The AV receiver’s optical digital jacks have shutter-type covers that open when an optical plug is inserted and close when it’s removed. Push plugs in all the way. Caution... -
Page 19: Connecting Components With Hdmi
• When listening to an HDMI component through the AV receiver, set the HDMI component so that its video can be seen on the TV screen (on the TV, select the input of the HDMI component connected to the AV receiver). If the TV power is off or the TV is set to another input source, this may result in no sound from the AV receiver or the sound may be cut off. -
Page 20: Connecting Your Components
Connecting Your Components The on-screen menus appear only on a TV that is connected to the HDMI OUT MAIN. If your TV is connected to other video outputs, use the AV receiver’s display when changing settings. Front Rear Connect your components to the appropriate jacks. The default input assignments are shown below. See “Connection Tips and Video Signal Path”... - Page 21 Note TX-NR5009 only. Do not connect the AV receiver’s USB port to a USB port on your computer. Music on your computer cannot be played through the AV receiver in this way. Connect a turntable (MM) that has a built-in phono preamp to TV/CD IN, or connect it to PHONO IN with the phono preamp turned off.
-
Page 22: Connecting Onkyo U Components
You the manuals supplied with your Onkyo components. must enter the appropriate remote control code first • While Zone 2/3 is on, the System Off, Auto Power On and Direct (➔ page 81). -
Page 23: Connecting The Antennas
AM loop antenna (supplied) Note • Once your AV receiver is ready for use, you’ll need to tune into a radio station and position the antenna to achieve the best possible reception. • Keep the AM loop antenna as far away as possible from your AV receiver, TV, speaker cables, and power cords. -
Page 24: Turning On & Basic Operations
Press 8ON/STANDBY on the front panel. Press RECEIVER followed by 8RECEIVER on the remote controller. The AV receiver will enter standby mode. To prevent any loud surprises when you turn on the AV receiver, always turn down the volume before you turn it off. -
Page 25: Playback
• “Listening to AM/FM Radio” TOP MENU • “iPod/iPhone Playback via Onkyo Dock” (➔ page This button displays the top menu for each media or service. • “Controlling Other Components” (➔ page q/w and ENTER These buttons navigate through the menus. -
Page 26: Understanding Icons On The Display
USB port at the front of the AV receiver, while the message “Connecting...” appears on the display. Album • If you connect an iPod or iPhone to the USB port on this device, no sound will be output from the headphones jack. Repeat One Track... -
Page 27: Playing A Usb Device
Note Listening to vTuner Internet Radio • To view the video contents of your iPod/iPhone, connect it to the USB port and AUX INPUT VIDEO jack on the AV receiver’s This unit includes the full vTuner Internet Radio Service front panel, using the official Apple Composite AV Cable. - Page 28 67). • If you’re using DHCP, your router may not always allocate the same IP address to the AV receiver, so if you find that you can’t connect to the AV receiver, recheck the AV receiver’s IP address on the “Network” screen.
-
Page 29: Playing Music Files On A Server
Playing Music Files on a Server This section explains how to configure Windows Media Player 11 so that the AV receiver can play the music files You need to connect the AV receiver to your home stored on your computer. -
Page 30: Listening To Am/Fm Radio
• Tuning into weak FM stereo stations If the signal from a stereo FM station is weak, it may be impossible to get good reception. In this case, switch to manual tuning mode and listen to the station in mono. - Page 31 Selecting Presets characters are received. This is not a malfunction. • If the signal from an RDS station is weak, RDS data may be To select a preset, use PRESET e/r on the AV displayed intermittently or not at all.
- Page 32 • The message “Waiting” may appear while the AV receiver Information Info waits for the RT information. Sport Sport • If the message “No Text Data” appears on the display, no Education Educate RT information is available. Drama Drama Culture...
-
Page 33: Using Basic Functions
Turn off the cell phone (even if it is not in use) or place it away from all audio electronics. Audyssey MultEQ XT32 offers two ways of measuring: •... - Page 34 ENTER to proceed Cancel Audyssey MultEQ XT32 Room to the next step. • If you set the subwoofer’s volume control to its maximum Correction and Speaker Setup. and the level displayed is lower than 75 dB, leave the subwoofer’s volume control at its maximum and press...
- Page 35 See also: Audyssey MultEQ XT32 Room Correction and Speaker Setup. • “Speaker Configuration” (➔ page • If the AV receiver is muted, it will be unmuted automatically • “Speaker Distance” (➔ page when Audyssey MultEQ XT32 Room Correction and Speaker Setup starts.
-
Page 36: Using The Listening Modes
THX button This button selects the THX listening modes. • The Dolby Digital and DTS listening modes can only be selected if your Blu-ray Disc/DVD player is connected to the AV receiver with a digital audio connection (coaxial, optical, or HDMI). - Page 37 Note that these layouts can only be selected when “Front High + Front Wide” is set to “No” (➔ page 51). This layout cannot be selected with SP LAYOUT. To use this layout, set “Front High + Front Wide” to “No” (➔ page 51) and enable “Surround Back”...
- Page 38 Studio-Mix Suitable for rock or pop music, listening to music in this mode creates a lively sound field with a powerful acoustic image, like being at a club or rock S t u – M i x concert.
- Page 39 Height program material when height channel speaker outputs are present. Dolby Pro Logic IIz Height can be used to upmix a variety of sources from movies H e i g h t and music, but are particularly well-suited to upmix game content.
- Page 40 360- degree sound localization, perfect for sounds that pan across the surround channels. Use it with DVDs that bear the DTS-ES logo, especially those with a DTS-ES Discrete soundtrack. DTS-ES Matrix This mode is for use with DTS-ES Matrix soundtracks, which use a matrix- encoded back-channel for 6.1/7.1-channel playback.
- Page 41 • THX Games THX Games mode is meant for spatially accurate playback of game audio, which is often mixed similarly to movies but in a smaller environment. THX Loudness Plus is configured for game audio levels, with Timbre Matching active.
- Page 42 For the Blu-ray Discs, Dolby Digital is used in a 3.1/5.1-channel speaker system. AV receiver can input the DSD signal from HDMI IN. Setting the output setting on the player side to PCM might obtain a better sound according to the player. In that case, set the output setting on the player side to PCM.
-
Page 43: Using The Home Menu
You can change the following settings: “Sound to select the required sleep time. Program”, “Bass (Front)”, “Treble (Front)”, The sleep time can be set from 90 to 10 minutes in 10 “Bass (Front Wide)”, “Treble (Front Wide)”, minute steps. “Bass (Front High)”, “Treble (Front High)”, The SLEEP indicator lights on the display when the “Bass (Center)”, “Treble (Center)”, “Bass... -
Page 44: Setting The Display Brightness
• Alternatively, you can use the AV receiver’s DISPLAY. extra background music to your home party; this allows you to enjoy the same stereo music as the main room in The following information can typically be displayed. separate rooms (Multi Zone: Powered Zone 2/3). -
Page 45: Selecting Speaker Layout
Stereo, unless it’s already set to Stereo, Mono, priority. Direct, or Pure Audio. • If you connect an iPod or iPhone to the USB port on the Speaker Layout:FW: AV receiver, no sound will be output from the headphones The sound from front wide speakers is output jack. -
Page 46: Using Easy Macros
To change the related source component, see “Changing the Source Components” shown later in Examples: this chapter. If you wished to use MY MOVIE to start the playback component assigned to VCR/DVR of REMOTE MODE, ■ MY MOVIE you would press and hold down MY MOVIE for about 3... -
Page 47: Advanced Operations
6. Network 7. Firmware Update Note c Audio Adjust h Remote Controller • This procedure can also be performed on the AV receiver by (➔ page (➔ page Setup using SETUP, the arrow buttons, and ENTER. • During Audyssey MultEQ ®... -
Page 48: Input/Output Assign
Note component video HDMI • If not connected to the same output you have selected in the “Monitor Out” setting, the “Monitor Out” setting will be automatically switched to “Analog”. • When using the DeepColor function, if the “Monitor Out”... -
Page 49: Hdmi Input
Control(RIHD)” is set to “On” appropriate CEC (Consumer Electronics Control) operation will not be guaranteed. • If you assign “- - - - -” to an input selector that is currently selected in “HDMI Through” (➔ page 66), the “HDMI Through”... - Page 50 49), the same HDMI IN will be set as a priority ■ in this assignment. In this case, if you want to use the coaxial or BD/DVD, VCR/DVR, CBL/SAT, GAME, PC, AUX, optical audio input, make the selection in the “Audio Selector”...
-
Page 51: Speaker Setup
• This setting only affects signals connected to the AV receiver’s Bi-Amp: multichannel input subwoofer jack. Select this if you’ve bi-amped your front speakers A. • If you find that your subwoofer is too loud, try the 10 dB or ■ Speakers Type(Front B) 15 dB setting. - Page 52 Note 40Hz, 45Hz, 50Hz, 55Hz, 60Hz, 70Hz, 80Hz(THX), • This function can be set only if the “Subwoofer” setting is set to 90Hz, 100Hz, 110Hz, 120Hz, 130Hz, 150Hz, 200Hz “1ch” or “2ch”, or the “Front” setting is set to “Full Band”.
- Page 53 33). For Speakers B, Speaker Setup function you need to change the settings manually. • If the “Subwoofer” setting is set to “No”, this setting cannot be selected. Here you can specify the distance from each speaker to the ■...
- Page 54 52). (➔ page 52). • The test tone is output at the standard level for THX, which is 0 dB (absolute volume setting 82). If you normally listen at Off: volume settings below this, be careful because the test tone will Tone off, response flat.
-
Page 55: Audio Adjust
• If the “Center” setting is set to “None” (➔ page 52), this setting cannot be selected. • This setting is fixed to “Yes” if “Loudness Plus” is set to “On”. Dolby THX Loudness Plus THX Loudness Plus is a new volume control ■... - Page 56 “Dynamic EQ” and “Dynamic Volume” will be set to “Off”. center speaker, the center channel sound is output from • If you would like to use Dolby Volume in THX listening modes, set the “Loudness Plus” and “Preserve THX Settings” settings only the center speaker.
- Page 57 Center Image –QdB, –20dB, –10dB, or 0dB 0 to 2 to 5 With these settings, you can set the level of the LFE (Low The DTS Neo:X Music listening mode creates 9-channel Frequency Effects) channel individually for each input surround sound from 2-channel stereo sources. With this sources.
-
Page 58: Source Setup
Sound Program matches the setting of “Sound Program”. Stereo Source 1, Stereo Source 2, Stereo Source 3, • You cannot select the “Subwoofer” setting if you set to “No” in Multich Source 1, Multich Source 2, Multich the “Speaker Configuration”. - Page 59 0 dB position. At that level you can movies. Dynamic Volume looks at the preferred volume hear the mix as the mixers heard it.
-
Page 60: Name Edit
Repeat this step to enter up to 10 characters. To store a name when you’re done, be sure to • To name a radio preset, use TUNER to select AM or FM, and select “OK” by using q/w/e/r, and then press then select the preset (➔... - Page 61 Picture Adjust With “Picture Mode”, you can change the following settings to be suitable for the movie or game screen by one Using Picture Adjust, you can adjust the picture quality operation: “Game Mode”, “Film Mode”, “Edge and reduce any noise appearing on the screen.
- Page 62 –50 to 0 to +50 shimmering or haziness that sometimes appears around With this setting you can adjust contrast. “–50” is the objects in the picture. Mosquito noise can be an issue with least. “+50” is the greatest. overly compressed MPEG content.
- Page 63 • The setting is stored individually for each input selector. COAXIAL: • The setting will be reset to “Off” when you change the setting in This can be selected when COAXIAL IN has been “Audio Selector”.
-
Page 64: Listening Mode Preset
(Dolby Digital, DTS, etc.) is Note selected. • If the absolute value is set to 82, “82Ref” will appear on the Note display and the THX indicator will flash. • If you connect an input component (such as UP-A1 series ■... -
Page 65: Hardware Setup
Note ■ AM Frequency Step (European and Asian • If you do change the AV receiver’s remote ID, be sure to change models) the remote controller to the same ID (see below), otherwise, you won’t be able to control it with the remote controller. - Page 66 • Set it to when a connected piece of equipment is not • If “On” is selected and the audio can be output from the TV, the compatible or it is unclear whether the equipment is compatible AV receiver will output no sound through its speakers. In this or not.
- Page 67 • Set to “ , the Auto Standby function may activate itself during playback with some sources. ■ DNS Server • The Auto Standby function does not work when Zone 2/3 is on. Enter the DNS server address provided by your ISP.
-
Page 68: Remote Controller Setup
With this setting, you can specify whether or not to turn on • Perform the firmware update only when such an announcement your TV. is posted on the Onkyo web site. Visit the Onkyo web site for the ■ latest information. -
Page 69: Lock Setup
• This setting is not available when the multichannel analog input Note is selected. • These settings are not available in either of the following cases: Speaker Levels – the “Audio TV Out” setting is set to “On” (➔ page 66). - Page 70 Dolby Digital, Dolby Digital Plus, or Dolby TrueHD. • These technologies can be used when all the following • The Late Night function is set to “Off” when the AV receiver is conditions are met: set to standby. For Dolby TrueHD sources, it will be set to –...
- Page 71 THX Cinema, THX Surround EX, and THX Ultra2 Cinema. Note • Settings for the Re-EQ function are kept in each listening mode. In THX listening mode however, the setting will return to “On” when the AV receiver is turned off.
-
Page 72: Multi Zone
Multi Zone In addition to the main listening room, you can also enjoy playback in the other room, or as we call Multi Zone. And, you can select a different source for each room. Making Multi Zone Connections Note • With this setup, the volume of Zone 2/3 is controlled by the AV There are two ways you can connect Zone speakers: receiver. -
Page 73: Controlling Zone 2/3 Components
Controlling Zone 2/3 Components The AV receiver features a composite video output for ■ Operating on the AV receiver connection to a TV in Zone 2, so you can enjoy both audio and video in that zone. Input selector buttons MASTER VOLUME Hookup •... - Page 74 To turn off Zone 2/3, press ZONE repeatedly, • You can adjust the balance from 0 in the center to followed by 8RECEIVER. +10 dB to the right or +10 dB to the left in 2 dB steps. • The corresponding trigger output goes low (0 volts).
-
Page 75: Using The Remote Controller In Zone And Multiroom Control Kits
Zone, you’ll need a commercially available multiroom remote control kit for each zone. • Multiroom kits are made by Niles and Xantech. These kits can also be used when there isn’t a clear line of Connecting receiver block sight to the AV receiver’s remote sensor, such as when it’s... -
Page 76: Controlling Other Components
AV receiver and enjoy great sound. iPod/iPhone in the UP-A1 Dock while it is playing. • When Zone 2/3 is turned on, you can’t use Auto Power On and You can use the AV receiver’s remote controller to Direct Change functions. -
Page 77: Controlling Your Ipod/Iphone
• If you do adjust the volume control on your iPod/iPhone while Note it’s inserted in the RI Dock, be careful that it’s not set too loud • The AV receiver displays the message “UP-A1” for several before you reconnect your headphones. - Page 78 • For detailed operation of iPod/iPhone, please refer to the instruction manual of the RI Dock. This button does not turn the Onkyo DS-A2 or DS-A2X RI Dock on or off. Also, your iPod/iPhone may not respond the first time you press this button, in which case you should press it again.
-
Page 79: Controlling Other Components
(➔ page 84). connect to database.” will appear. Press ENTER to return to the previous step. • If the brand name is not found, use r to select “Not Preprogrammed Remote Control Listed”, and then press ENTER. Codes Use q/w to select “Search by model number (via The following REMOTE MODE buttons are network)”, and then press ENTER. -
Page 80: Entering Remote Control Codes
TV, etc.). While holding down the REMOTE MODE to • The numbers in [ / ] mean the order of the candidate code and the total number of codes for the brand. which you want to assign a code, press and hold down DISPLAY (about 3 seconds). -
Page 81: Remote Control Codes For Onkyo Components Connected Via U
AV preprogrammed code is restored. receiver, not the component. This allows you to control components that are out of view, in a rack, for example. Note • The learning command is also reset. - Page 82 AV receiver is the CEC system control function of the HDMI standard. 3 (Pause) functions as reverse playback. These buttons function as colored buttons or A, B, C, D buttons. Note • See the “Controlling Your iPod/iPhone” about the operation of iPod/iPhone (➔...
-
Page 83: Learning Commands
• Only commands from infrared remote controllers can be acquire. MODE • When the remote controller runs out of batteries, all commands acquired will be lost and will have to be learned all over again. Therefore, do not discard your other remote controllers. ■... -
Page 84: Using Normal Macros
• MODE cannot be operated during the macro-making process. • Once you assign new macro commands, the previously registered macro will no longer work. If you wish to retrieve it, you will have to reassign the commands with the macro-making. -
Page 85: Appendix
Appendix Troubleshooting ■ If you have any trouble using the AV receiver, look for a The AV receiver turns off and after restoring the solution in this section. If you can’t resolve the issue power, it turns off again yourself, contact your Onkyo dealer. - Page 86 ■ ■ Only the center speaker produces sound Can’t select the Pure Audio listening mode If you use the Dolby Pro Logic IIx Movie, Dolby Pro — The Pure Audio listening mode cannot be selected — Logic IIx Music, or Dolby Pro Logic IIx Game while Zone 2/3 is on.
- Page 87 “Monitor Out” setting other than “Analog”, and ■ Reception is noisy, FM stereo reception is select “- - - - -” in the “HDMI Input” to watch composite video, S-Video, and component video noisy, or the FM STEREO indicator doesn’t light sources.
- Page 88 Make sure your iPod/iPhone is properly inserted in — If it’s an Onkyo component, make sure that the u the Dock. If your iPod/iPhone is in a case, it may not cable and analog audio cable are connected properly. connect properly to the Dock. Always remove your Connecting only an u cable won’t be enough.
- Page 89 The functions System Off/Auto Power On and If you’re using DHCP, your router may not always allocate the same IP address to the AV receiver, so if Direct Change don’t work for components you find that you can’t connect to a server or Internet connected via u radio station, recheck the AV receiver’s IP address...
- Page 90 The following settings can be made for the Important Note Regarding Video Playback S-Video and composite video inputs You must use the buttons on the unit to make these The AV receiver can upconvert component video, S- settings. Video, and composite video sources for display on a TV On the AV receiver, press the input selector for the connected to the HDMI output(s).
-
Page 91: Firmware Update
Update via USB storage (➔ page update process. • Do not attempt to access the AV receiver from your PC while it Please prepare a USB storage device such as a USB is being updated. flash memory stick. You need at least 32 MB of •... - Page 92 • Never unplug or turn off the AV receiver during the update installed on your Onkyo AV receiver. process. • Never plug or unplug an HDMI cable or a USB device during the update process. Troubleshooting • Never unplug the USB storage device containing the firmware file or the AC power cord during the update process.
- Page 93 Liegnitzerstrasse 6, 82194 Groebenzell, GERMANY Tel: +49-8142-4401-0 Fax: +49-8142-4401-555 http://www.eu.onkyo.com/ China, Hong Kong Unit 1033, 10/F, Star House, No 3, Salisbury Road, Tsim Sha Tsui Kowloon, Hong Kong. Tel: 852-2429-3118 Fax: 852-2428-9039 http://www.onkyochina.com/ Asia, Oceania, Middle East, Africa Please contact an Onkyo distributor referring to Onkyo SUPPORT site.
-
Page 94: Connection Tips And Video Signal Path
Use the following sections as a guide. The on-screen menus appear only on a TV that is connected to the HDMI OUT MAIN. If your TV is connected to other video outputs, use the AV receiver’s display when changing settings. - Page 95 VCR/DVR OUT. AV receiver If signals are present at more than one input, the inputs will be selected automatically in the following order of priority: Analog HDMI HDMI, digital, analog.
- Page 96 ✔ PC IN (Analog RGB) Available resolutions: [640 × 480 60 Hz], [800 × 600 60 Hz], [1024 × 768 60 Hz], [1280 × 1024 60 Hz] Available resolutions: [3840 × 2160 24/25/30 Hz] The output is limited to 480p/576p for an effective signal in the effect of copy protect.
-
Page 97: Using An Rihd-Compatible Tv, Player, Or Recorder
Using an RIHD-compatible TV, Player, or Recorder p, which stands for Remote Interactive over HDMI, is the name of the system control function found on Onkyo components. The AV receiver can be used with CEC (Consumer Electronics Control), which allows system control over HDMI and is part of the HDMI standard. - Page 98 DVD player to 2ch PCM. (It may not be possible depending on the player models.) • HDMI Control(RIHD): On • Even if you set to output audio on the TV speakers, audio • Audio Return Channel (ARC): Auto will be output from the speakers connected to the AV...
-
Page 99: About Hdmi
Note • The HDMI video stream is compatible with DVI (Digital Visual Interface), so TVs and displays with a DVI input can be connected by using an HDMI-to-DVI adapter cable. (Note that DVI connections only carry video, so you’ll need to make a separate connection for audio.) However, reliable operation with such an adapter is not guaranteed. -
Page 100: Network/Usb Features
(➔ page 67). see “Network” • The AV receiver does not support PPPoE settings, so if you have a PPPoE-type Internet connection, you must use a PPPoE- compatible router. • Depending on your ISP, you may need to specify a proxy server to use Internet radio. - Page 101 Storage” will appear on the display. downloaded for free from the Microsoft web site. • If you connect a USB hard disk drive to the AV receiver’s USB • The computer or media server must be on the same port, we recommend that you use its AC adapter to power it.
- Page 102 LPCM (Linear PCM) Supported Audio File Formats • Sampling rates of 8 kHz, 11.025 kHz, 12 kHz, 16 kHz, For server playback and playback from a USB device, the 22.05 kHz, 24 kHz, 32 kHz, 44.1 kHz, 48 kHz, 64 kHz, AV receiver supports the following music file formats.
-
Page 103: Specifications (Tx-Nr5009)
1 V/470 Ω (PRE OUT) HDMI Maximum RCA Output Level and Impedance 5.5 V/470 Ω (PRE OUT) Input IN 1, IN 2, IN 3, IN 4, IN 5, IN 6, IN 7, AUX INPUT Phono Overload 70 mV (MM 1 kHz 0.5%) Output... - Page 104 VCR/DVR, PRE OUT, ZONE2 PRE/LINE OUT, ZONE3 PRE/LINE OUT Analog Multichannel Pre Outputs Subwoofer Pre Outputs Speaker Outputs Main (L, R, C, SL, SR, SBL/Z3L, SBR/Z3R) + Front Wide/ZONE2 (L, R) + Front High (L, R) Phones 1 (6.3 ø) ■...
-
Page 105: Specifications (Tx-Nr3009)
HDMI 2.5 mV/47 kΩ (PHONO MM) Rated RCA Output Level and Impedance Input IN 1, IN 2, IN 3, IN 4, IN 5, IN 6, IN 7, 1 V/470 Ω (PRE OUT) AUX INPUT Maximum RCA Output Level and Impedance... - Page 106 VCR/DVR, PRE OUT, ZONE2 PRE/LINE OUT, ZONE3 PRE/LINE OUT Analog Multichannel Pre Outputs Subwoofer Pre Outputs Speaker Outputs Main (L, R, C, SL, SR, SBL/Z3L, SBR/Z3R) + Front Wide/ZONE2 (L, R) + Front High (L, R) Phones 1 (6.3 ø) ■...
- Page 107 Memo...
- Page 108 The Coach House 81A High Street, Marlow, Buckinghamshire, SL7 1AB, UK Tel: +44-(0)1628-473-350 Fax: +44-(0)1628-401-700 Unit 1033, 10/F, Star House, No 3, Salisbury Road, Tsim Sha Tsui Kowloon, Hong Kong. Tel: 852-2429-3118 Fax: 852-2428-9039 http://www.ch.onkyo.com/ 1301, 555 Tower, No.555 West NanJin Road, Jin an, Shanghai,...
Need help?
Do you have a question about the TX-NR3009 and is the answer not in the manual?
Questions and answers