Table of Contents
Advertisement
TX-SR705_En.book Page 1 Monday, May 28, 2007 2:13 PM
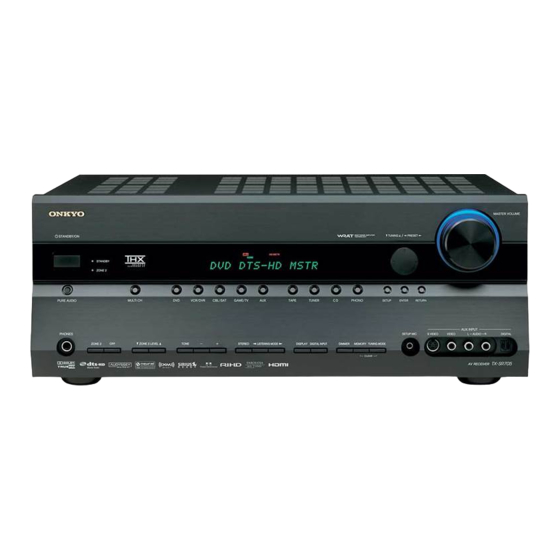
AV Receiver
TX-SR705
AV Amplifier
TX-SA705
Instruction Manual
Thank you for purchasing an Onkyo AV Receiver/
AV Amplifier. Please read this manual thoroughly
before making connections and plugging in the unit.
Following the instructions in this manual will enable
you to obtain optimum performance and listening
enjoyment from your new AV Receiver/
AV Amplifier.
Please retain this manual for future reference.
Contents
Introduction......................................2
Connections...................................21
First Time Setup ............................45
Basic Operations ...........................59
Advanced Operations....................75
Advanced Setup.............................76
Zone 2 .............................................99
Specifications ..............................109
Troubleshooting...........................110
E
n
Advertisement
Table of Contents

Related Manuals for Onkyo SR705 - TX AV Receiver


Summary of Contents for Onkyo SR705 - TX AV Receiver
-
Page 1: Table Of Contents
TX-SR705_En.book Page 1 Monday, May 28, 2007 2:13 PM Contents Introduction........2 AV Receiver TX-SR705 Connections........21 First Time Setup ......45 AV Amplifier TX-SA705 Basic Operations ......59 Advanced Operations....75 Instruction Manual Advanced Setup......76 Zone 2 ..........99 Controlling Other Components ..104 Thank you for purchasing an Onkyo AV Receiver/ AV Amplifier. -
Page 2: Introduction Important Safety Instructions
Leave 20 cm (8") of free space at the top and sides 14. Refer all servicing to qualified service personnel. and 10 cm (4") at the rear. The rear edge of the shelf Servicing is required when the apparatus has been or board above the apparatus shall be set 10 cm (4") -
Page 3: Precautions
This is normal. ATTENTION: POUR ÉVITER LES CHOCS ÉLEC- • If you do not use this unit for a long time, it may TRIQUES, INTRODUIRE LA LAME LA PLUS not work properly the next time you turn it on, so LARGE DE LA FICHE DANS LA BORNE CORRE- be sure to use it occasionally. - Page 4 ASTA or BSI to BS1362 and have the same ampere rating as that indicated on the plug. Check for the ASTA mark or the BSI mark on the body of the fuse. If the power cord’s plug is not suitable for your socket outlets, cut it off and fit a suitable plug.
-
Page 5: Supplied Accessories
*How to mount the AC plug: Speaker setup microphone Indoor FM antenna (TX-SR705 only) * In catalogs and on packaging, the letter at the end of the product name indicates the color. Specifications and operations are the same regardless of color. -
Page 6: Connections
-HD High Resolution Audio, DTS-HD Master Neural Surround is a trademark owned by Neural Audio Cor- Audio poration, THX is a trademark of THX Ltd., which may be reg- • Faroudja DCDi Edge Enhancement istered in some jurisdictions. All rights reserved. - Page 7 TX-SR705_En.book Page 7 Monday, May 28, 2007 2:13 PM Table of Contents Introduction Basic Operations Important Safety Instructions ....2 Basic Operations ........59 Precautions ..........3 Selecting the Input Source ......59 Supplied Accessories........5 Using the Multichannel DVD Input....60 Features ............6 Adjusting the Bass & Treble ......60 Front &...
-
Page 8: Front Panel
Front & Rear Panels Front Panel TX-SR705 TX-SA705 The page numbers in parentheses show where you can find the main explanation for each item. STANDBY/ON button (44) ZONE 2 indicator (101) This button is used to set the AV receiver/AV ampli- This indicator lights up when Zone 2 is selected. - Page 9 MASTER VOLUME control (59) and indicator RETURN button This control is used to adjust the volume of the AV receiver/AV amplifier to –∞ dB, –81 dB through This button is used to return to the previously dis- played onscreen setup menu.
-
Page 10: Front & Rear Panels
TX-SR705_En.book Page 10 Monday, May 28, 2007 2:13 PM Front & Rear Panels—Continued Display The page numbers in parentheses show where you can find the main explanation for each item. SLEEP indicator (61) Tuning indicators (TX-SR705 only) This indicator lights up when the Sleep function has FM STEREO (62): This indicator lights up when been set. -
Page 11: Rear Panel
TX-SR705_En.book Page 11 Monday, May 28, 2007 2:13 PM Front & Rear Panels—Continued Rear Panel TX-SR705 North American model TX-SR705 other than North American model TX-SA705... - Page 12 TX-SR705_En.book Page 12 Monday, May 28, 2007 2:13 PM Front & Rear Panels—Continued The page numbers in parentheses show where you can find the main explanation for each item. DIGITAL OPTICAL IN 1, 2 and OUT AC INLET (not North American models) These optical digital audio inputs are for connecting The supplied power cord is connected here.
- Page 13 12V TRIGGER OUT This output can be connected to the 12-volt trigger input on a component in Zone 2. When Zone 2 is turned on on the AV receiver/AV amplifier, a 12- volt trigger signal is output. IR IN...
-
Page 14: Remote Controller
• Don’t mix new and old batteries or different types of batteries. • If you intend not to use the remote controller for a long time, remove the batteries to prevent damage from leakage or corrosion. • Expired batteries should be removed as soon as possi-... -
Page 15: Using The Remote Controller
■ DOCK Mode This mode is for controlling an Apple iPod in an Onkyo RI Dock. By default, you can control an RI Dock that has a remote control sensor such as DS-A2. When operating an RI Dock with an... - Page 16 Used to select the listening modes. The [STEREO], Starts recording. [SURR], and LISTENING MODE [ ] but- tons can be used at any time, regardless of the cur- rently selected remote controller mode. TEST TONE, CH SEL, LEVEL-, and LEVEL+ buttons (75, 81) Used to adjust the level of each speaker.
-
Page 17: Dvd Mode
TX-SR705_En.book Page 17 Monday, May 28, 2007 2:13 PM Remote Controller—Continued STANDBY button DVD Mode Sets the DVD player to Standby. To set the remote controller to DVD mode, press the ON button [DVD] REMOTE MODE button. Turns on the DVD player. Number buttons Used to enter title, chapter, and track numbers and times for locating specific points. -
Page 18: Cd/Md/Cdr Modes
Remote Controller—Continued STANDBY button CD/MD/CDR Modes Sets the component to Standby. To control an Onkyo CD player, MD recorder, or CD ON button recorder, or a CD or MD player/recorder made by Set the component to On or Standby. another manufacturer, press the [CD] REMOTE... -
Page 19: Dock Mode
TX-SR705_En.book Page 19 Thursday, May 31, 2007 4:59 PM Remote Controller—Continued STANDBY button DOCK Mode Turns off the iPod. Dock mode is for controlling an Apple iPod in an Onkyo ON button* RI Dock. Turns on the iPod. When Using an RI Dock: TOP MENU button •... -
Page 20: About Home Theater
Thanks to the AV receiver/AV amplifier’s superb capabilities, you can enjoy surround sound with a real sense of move- ment in your own home—just like being in a movie theater or concert hall. With DVDs you can enjoy DTS and Dolby Digital. -
Page 21: Connecting The Av Receiver/Av Amplifier
Left (white) The AV receiver/AV amplifier’s optical digital jacks have shutter-type covers that open when an optical plug Right (red) Right (red) is inserted and close when it’s removed. Push plugs in all Composite video the way. (Yellow) (Yellow) • Push plugs in all the way to make... -
Page 22: Connecting Your Speakers
TV/screen, while the surround Then all you need to do is to match the color of each back left and right dipole speakers should be positioned so label to the corresponding speaker terminal. - Page 23 The following illustration shows which speaker should • If you use 4 or 5 speakers, connect each of the two be connected to each pair of terminals. surround speakers to the SURR SPEAKERS termi- If you’re using only one surround back speaker, connect...
-
Page 24: Bi-Amping The Front Speakers
• When bi-amping is used, the AV receiver/AV ampli- fier is able to drive up to 5.1 speakers in the main room. • For bi-amping, the FRONT SPEAKERS L/R terminal posts connect to the front speakers’... -
Page 25: Connecting Antenna (Tx-Sr705 Only)
FM antenna, try a commercially available out- This section explains how to connect the supplied indoor door FM antenna instead (see page 26). FM antenna and AM loop antenna, and how to connect commercially available outdoor FM and AM antennas. Connecting the AM Loop Antenna The AV receiver won’t pick up any radio signals without... - Page 26 ■ Using a TV/FM Antenna Splitter It’s best not to use the same antenna for both FM and TV reception, as this can cause interference problems. If cir- cumstances demand it, use a TV/FM antenna splitter, as shown.
-
Page 27: Connecting Both Audio & Video
Connecting Both Audio & Video By connecting both the audio and video outputs of your DVD player and other AV components to the AV receiver/AV amplifier, you can select both the audio and video simultaneously simply by selecting the appropriate input source on the AV receiver/AV amplifier. - Page 28 TX-SR705_En.book Page 28 Monday, May 28, 2007 2:13 PM Connecting the AV Receiver/AV Amplifier—Continued ■ HDMI Monitor Setting Set to No With the HDMI Monitor setting set to No (see DVD player, etc. Video Signal Flow Chart page 47), video input signals flow through the...
-
Page 29: Connecting A Tv Or Projector
(see page 51) etc. If your TV has no audio outputs, connect an audio output from your VCR or cable or satellite receiver Hint! to the AV receiver/AV amplifier and use its tuner to listen to TV programs through the AV receiver/AV... -
Page 30: Connecting A Dvd Player
• To enjoy Dolby Digital and DTS, use connection . (For recording, use , or • If your DVD player has main left and right outputs and multichannel left and right outputs, be sure to use the main left and right outputs for connection Connection... - Page 31 FRONT L/R, CENTER, SURR L/R, SURR BACK L/R, and SUBWOOFER jacks to the 7.1-channel analog audio output on your DVD player. If your DVD player has a 5.1-channel analog audio output, don’t connect anything to the AV receiver/AV amplifier’s SURR BACK L/R jacks.
-
Page 32: Connecting A Vcr Or Dvd Recorder For Playback
Connecting the AV Receiver/AV Amplifier—Continued Connecting a VCR or DVD Recorder for Playback With this hookup, you can use your VCR’s tuner to listen to your favorite TV programs via the AV Hint! receiver/AV amplifier, useful if your TV has no audio outputs. -
Page 33: Connecting A Vcr Or Dvd Recorder For Recording
• The AV receiver/AV amplifier must be turned on for recording. Recording is not possible while it’s in Standby mode. • If you want to record directly from your TV or playback VCR to the recording VCR without going through the AV receiver/AV amplifier, connect the TV/VCR’s audio and video outputs directly to the recording VCR’s audio and... -
Page 34: Connecting A Satellite, Cable, Set-Top Box, Or Other Video Source
Connecting the AV Receiver/AV Amplifier—Continued Connecting a Satellite, Cable, Set-top box, or Other Video Source With this hookup, you can use your satellite or cable receiver to listen to your favorite TV programs Hint! via the AV receiver/AV amplifier, useful if your TV has no audio outputs. -
Page 35: Connecting A Game Console
, or , and then make the connection. If you use connection , you must connect the AV receiver/AV amplifier to your TV with the same type of connec- tion. Step 2: Audio Connection Choose an audio connection that matches the game console ( ), and then make the connection. -
Page 36: Connecting A Camcorder Or Other Device
TX-SR705_En.book Page 36 Monday, May 28, 2007 2:13 PM Connecting the AV Receiver/AV Amplifier—Continued Connecting a Camcorder or Other Device Step 1: Video Connection Choose a video connection that matches the camcorder ( ), and then make the connection. Step 2: Audio Connection Choose an audio connection that matches the camcorder ( ), and then make the connection. -
Page 37: Connecting Components With Hdmi
The HDMI video stream (i.e., video signal) is compatible with DVI (Digital Visual Interface) , so TVs and displays with a DVI input can be connected by using an HDMI-to-DVI adapter cable. (This may not work with some TVs and displays, resulting in no picture.) -
Page 38: Audio Signals
TV screen (on the TV, select the input of the HDMI component connected to the AV receiver/AV amplifier). If the TV power is off or the TV is set to another input source, this may result in no sound from the AV receiver/AV amplifier or the sound may be cut off. -
Page 39: Connecting A Cd Player Or Turntable
CD player built-in phono preamp • With connection , you can listen to and record audio from the CD player and listen in Zone 2. • To connect the CD player digitally, use connection . (For recording, use , or... -
Page 40: Connecting A Cassette, Cdr, Minidisc, Or Dat Recorder
OPTICAL AUDIO AUDIO • With connection , you can play and record and listen in Zone 2. • To connect the recorder digitally for playback, use connections , or • To connect the recorder digitally for recording, use connection Connection... -
Page 41: Connecting A Power Amplifier
5. Surround left speaker 8. Surround back right speaker Power amplifier Connecting a Tuner (TX-SA705 only) Audio Connection Connect your tuner's analog audio output jacks to the AV amplifier's TUNER L/R IN jacks with an audio cable. AUDIO OUTPUT Tuner TUNER... -
Page 42: Connecting An Ri Dock
■ If you have an Onkyo DS-A1 RI Dock • Connect its video output jack to the AV receiver/AV amplifier’s GAME/TV IN S jack. • Enter the appropriate remote control code before using the AV receiver/AV amplifier’s remote controllers for the first time (see page 104). -
Page 43: Connecting Onkyo Components
AV receiver/AV amplifier into a only selects the DVD FRONT L/R jacks. different branch circuit. • Do not use a power cord other than the one supplied ■ Remote Control with the AV receiver/AV amplifier. The supplied You can use the AV receiver/AV amplifier’s remote... -
Page 44: Turning On The Av Receiver/Av Amplifier
Smooth Operation in a Few Easy Steps To ensure smooth operation, here’s a few easy steps to help you configure the AV receiver/AV amplifier before you use it for the very first time. These settings only need to be made once. -
Page 45: First Time Setup
TX-SR705_En.book Page 45 Friday, June 1, 2007 2:38 PM First Time Setup This section explains the settings that you need to make before using the AV receiver/AV amplifier for the very first time. ■ Menus for First Time Setup Submenus p. -
Page 46: Speaker Settings
(see page 54). ENTER select: If the impedance of any speaker is 4 ohms or more but 4 ohms: Select if the impedance of any less than 6, set the minimum speaker impedance to 4 speaker is 4 ohms or more but ohms (not North American models). -
Page 47: Hdmi Monitor Setup
4. Digital Input HDMI Monitor Setup If you connect your TV to the COMPONENT VIDEO OUT, set the HDMI Monitor setting to No so that the Use the Up and Down [ onscreen setup menus are displayed and composite buttons to select “1. Monitor video and S-Video sources are upconverted* and output Out,”... -
Page 48: Video Input Setup
Yes (see page 47), and the HDMI 2. HDMI Input 3. Component Video Input Input setting must be set to “- - -”. See page 27 for ENTER 4. Digital Input more information on video signal flow and upconver- sion. - Page 49 • For composite video and S-Video upconversion for the COMPONENT VIDEO OUT, the HDMI Monitor setting must be set to No (see page 47), and the Com- Use the Up and Down [ ponent Video Input setting must be set to “- - -”. See buttons to select “1.
-
Page 50: Changing The Input Display
This setting can only be changed on the AV receiver/AV amplifier. 1, 2 1, 2 iPod photo: If you’re using an iPod photo with the RI Dock, connect the RI Dock to the GAME/TV IN jacks. Press the [TAPE] or [GAME/TV] input selector button so that “TAPE”... -
Page 51: Digital Input Setup
“OPT 1.” If you want to listen to audio from the When HDMI IN 1, 2 or 3 is assigned to an input selector component connected to the OPTICAL in the “HDMI Input Setup” on page 48, the input selec-... -
Page 52: Tv Format Setup (Not North American Models)
When you’ve finished, press the (not North American models) [SETUP] button. The setup menu closes. You must specify the TV system used in your area. Press the [RECEIVER] button fol- lowed by the [SETUP] button. The main menu appears onscreen. -
Page 53: Am Frequency Step Setup (On Some Models)
TX-SR705_En.book Page 53 Monday, May 28, 2007 2:13 PM First Time Setup—Continued Note: AM Frequency Step Setup • This procedure can also be performed on the AV (on some models) receiver/AV amplifier by using its [SETUP] button, arrow buttons, and [ENTER] button. -
Page 54: Automatic Speaker Setup (Audyssey Multeq Xt)
Notes: • If any of your speakers is 4 ohms, change the Speaker Impedance setting before running the automatic speaker setup (see page 46). • If the AV receiver/AV amplifier is muted, it will be unmuted automatically when the automatic speaker setup starts. - Page 55 (page 54), and connect it to the Auto Speaker Setup AUDYSSEY SETUP MIC jack. - - - - - SP Detect Result - - - - - Auto Speaker Setup : Yes : Yes AUDYSSEY : Yes...
- Page 56 Review SP Level Cancel • When the automatic speaker setup is complete, the Equalizer Settings (page 82) will be set to “Audyssey.” • You can cancel the automatic speaker setup at any point in this procedure simply by disconnecting the setup microphone.
-
Page 57: Error Messages
Error Messages Auto Speaker Setup AUDYSSEY While the automatic speaker setup is in progress, one of - - - - - Speaker Detect Error - - - - - the following error messages may appear: : Yes : Yes ❏ Ambient noise is too high. - Page 58 Auto Speaker Setup AUDYSSEY Note that if the volume is set too high and the sound dis- Review SP Distance torts, it may not be detected, so use an appropriate vol- Left 15.0ft...
-
Page 59: Basic Operations
TX-SR705_En.book Page 59 Monday, May 28, 2007 2:13 PM Basic Operations Selecting the Input Source This section explains how to select the input source (i.e., the AV component that you want to listen to or watch). MULTI CH MULTI CH Use the AV receiver/AV amplifier’s input selector buttons to select... -
Page 60: Using The Multichannel Dvd Input
–10 dB to +10 dB in 2 dB steps. ■ Treble You can boost or cut high-frequency sounds output by the front speakers from –10 dB to +10 dB in 2 dB steps. Note: The Bass & Treble settings do not apply to the THX lis-... -
Page 61: Setting The Display Brightness
Setting the Display Brightness the previous display reappears. You can adjust the brightness of the display. If you need to cancel the sleep timer, press the [SLEEP] Press the [RECEIVER] button, button repeatedly until the SLEEP indicator disappears. and then press the [DIMMER]... -
Page 62: Listening To The Radio (Tx-Sr705 Only)
Tuning into weak FM stereo stations Tuning into Radio Stations If the signal from a stereo FM station is weak, it may be impossible to get good reception. In this case, switch to Manual Tuning mode and listen to the station in mono. -
Page 63: Presetting Am/Fm Stations
Selecting Presets Presetting AM/FM Stations PRESET 2, 4 You can store a combination of up to 40 of your favorite AM/FM radio stations as presets. Tune into the AM/FM station that you want to store as a preset. CH +/- Press the [MEMORY] button. -
Page 64: Using Rds (European Models Only)
Also, unexpected characters may be dis- played when unsupported characters are received. This is not a malfunction. • If the signal from an RDS station is weak, RDS data may be displayed intermittently or not at all. - Page 65 Notes: • The message “Waiting” may appear while the AV receiver waits for the RT information. • If the message “No Text Data” appears on the display, no RT information is available. Finding Stations by Type (PTY) You can search for stations that broadcast traffic news.
-
Page 66: Using The Listening Modes
■ LISTENING MODE [ ] buttons Pressing these buttons repeatedly cycles through all of the listening modes that can be used with the cur- rent input source. ■ [PURE A] button LISTENING MODE This button selects the Pure Audio listening mode. -
Page 67: Listening Modes Available For Each Source Format
*2. If there are no surround back speakers, or Powered Zone 2 is being used, Dolby Pro Logic II is used. *3. Available only when using surround speakers. *4. For T-D, Mono Movie, Orchestra, Unplugged, Studio-Mix, and TV Logic, PCM of 64 kHz, 88.2 kHz, and 96 kHz are processed at 32 kHz, 44.1 kHz, and 48 kHz respectively. - Page 68 *2. If there are no surround back speakers, depending on the input signal, Dolby Digital may be used. *3. If there are no surround back speakers, or Powered Zone 2 is being used, Dolby Pro Logic II is used. *4. Available only when using surround speakers.
- Page 69 Full Mono *1. For 96 kHz TrueHD sources, only the Tone audio adjust function is available. 192 kHz TrueHD sources are not supported. *2. If there are no surround back speakers, or Powered Zone 2 is being used, DTS is used.
- Page 70 All Ch Stereo Full Mono *1. For 96 kHz DTS-HD Master Audio sources, only the Tone audio adjust function is available. 192 kHz DTS-HD Master Audio sources are processed at 96 kHz. *2. If there are no surround back speakers, or Powered Zone 2 is being used, Dolby Pro Logic II is used.
-
Page 71: About The Listening Modes
It uses seven full-bandwidth channels of common digital surround-sound format, and it’ll put you matrix decoding for matrix-encoded material, providing right in the middle of the action, just like being in a a very natural and seamless surround sound experience movie theater or concert hall. - Page 72 Developed for use with HDTV, including the new video optimizing the ambient and directional sounds to pro- disc formats Blu-ray and HD DVD, this is the latest mul- duce the surround back channel output. tichannel audio format from DTS. It supports up to 7.1 This is a new and improved mode especially for home channels with 96 kHz sampling rate.
- Page 73 Mono Movie This mode is suitable for old movies and other mono sources. The center speaker outputs the sound as it is, while reverb is applied to the sound output by the other speakers, giving presence to even mono material. Orchestra...
-
Page 74: Recording
In the following example, audio from the CD player con- input. nected to the CD IN, and video from the camcorder con- nected to the AUX INPUT VIDEO jack are recorded by • Various restrictions apply to digital recording. Refer the VCR connected to the VCR/DVR OUT jacks. -
Page 75: Advanced Operations
Late Night mode is operating. AV amplifier is muted. • The Late Night function resets to the default when the • Speakers that are set to No or None in the Speaker AV receiver/AV amplifier is set to Standby. Configuration cannot be adjusted. -
Page 76: Advanced Setup
TX-SR705_En.book Page 76 Monday, May 28, 2007 2:13 PM Advanced Setup About the Onscreen Setup Menus The onscreen setup menus are displayed on the connected TV and provide a convenient way to change the AV receiver/ AV amplifier’s settings. Submenus Submenus p. -
Page 77: Speaker Setup
The following crossover frequencies can be specified: Full Band, 40 Hz, 50 Hz, 60 Hz, 70 Hz, 80 Hz (THX), Use the Up and Down [ 90 Hz, 100 Hz, 120 Hz, 150 Hz, or 200 Hz. - Page 78 None. the LFE channel’s low-pass filter (LPF), which can be Note: used to filter out unwanted hum. The LPF only applies to If the Front setting in step 5 is set to sources that use the LFE channel. anything other than Full Band, Full *If you’re using THX-certified speakers, select 80 Hz...
- Page 79 This function can be set only if the Subwoofer setting in step 4 is set to Yes, and the Front setting in step 5 is set to Full Band.
- Page 80 Surr Back R, and Surr Back L distances can be set up ENTER 2–3. Speaker Distance to 5 ft. (1.5 m) more or 15 ft. (4.5 m) less than the Unit feet Front distance. For example, if the Front distance is set Left 12.0ft...
- Page 81 Here you can adjust the level of each speaker with the and the pink noise test tone is output by built-in test tone so that the volume of each speaker is the the front left speaker. same at the listening position.
- Page 82 Settings,” and then press Speaker Setup function (see page 54). [ENTER]. ENTER The Equalizer Settings menu appears. Here you can adjust the EQ of individual speakers. To set 2–5. Equalizer Settings the volume of individual speakers see page 81. Equalizer ENTER...
- Page 83 2–6. THX Audio Setup Notes: Surr Back Sp Spacing <1ft • When the listening mode is set to Direct or Pure Audio, no effect will be produced. • Depending on the input source or listening mode, the ENTER Equalizer settings may not produce the desired effect.
-
Page 84: Multichannel Dvd Input Settings
The Hardware Setup menu appears. speakers: ENTER 7. Hardware Setup < 1 ft (< 0.3 m) (Default): Select this if your surround back speakers are 1. Remote Control 2. Zone2 between 0 and 1 foot (0–30 cm) apart. -
Page 85: Audio Adjust Functions
You can boost or cut high-frequency sounds output by 6. LFE Level ENTER the front speakers from –10 dB to +10 dB in 2 dB steps. Note: The tone control settings do not apply to the THX listen- ing modes. - Page 86 Ideally, the front left and right If the stereo image feels too wide, or there is too much speakers should be equidistant from the listening position surround sound, move the sound field forward to and at an angle close to one of the two available settings.
-
Page 87: Assigning Listening Modes To Input Sources
Sources buttons to select the signal for- mat that you want to set, and You can assign a default listening mode to each input then use the Left and Right [ source that will be selected automatically when you ENTER ] buttons to select a listening select each input source. -
Page 88: Source Setup
IntelliVolume use the Left [ ] button to adjust You can set the input level for each input source. This is the level. If it’s too quiet, use the useful if some of your AV components are louder or qui- Right [ ] button. -
Page 89: Correcting Sound And Picture Sync
“2. A/V Sync,” When using progressive scanning on your DVD player, and then press [ENTER]. you may find that the picture and sound are out of sync. With this setting, you can correct this by delaying the The A/V Sync menu appears. - Page 90 6_Advnced_En.fm Page 90 Monday, June 4, 2007 2:56 PM Advanced Setup—Continued Name Edit Use the Up and Down [ You can enter a custom name for each individual input buttons to select “Display,” and selector and radio preset for easy identification. When use the Left and Right [ selected, the custom name will appear on the display.
- Page 91 Press the [SETUP] button. Setup closes. Notes: • To store a name, you must select “OK” and press [ENTER] in step 8, otherwise it will not be saved. • You cannot enter a custom name for XM or SIRIUS radio presets.
-
Page 92: Volume Setup/Osd Setup
This setting determines how much the This section explains the items on the Miscellaneous output is muted when the Muting func- menu. tion is used (see page 61). It can be set ∞ to – dB (fully muted) or from –50 dB Volume Setup to –10 dB in 10 dB steps. - Page 93 TV so that the operation details are displayed prop- erly. Use the Up and Down [ 4 : 3: Select if your TV is 4 : 3 buttons to select “2. OSD Setup,” (default). and then press [ENTER].
-
Page 94: Changing The Av Receiver/Av Amplifier's
TX-SR705_En.book Page 94 Monday, May 28, 2007 2:13 PM Advanced Setup—Continued Note: Changing the AV Receiver/AV This procedure can also be performed on the AV Amplifier’s ID receiver/AV amplifier by using its [SETUP] button, arrow buttons, and [ENTER] button. Press the [RECEIVER] button fol- lowed by the [SETUP] button. -
Page 95: Hdmi Setup
Off: HDMI audio is not output (default). On: HDMI audio is output. Notes: • If On is selected and the signal can be output by the Use the Up and Down [ ]/[ ] TV, the AV receiver/AV amplifier will output no buttons to select “7. - Page 96 Disable: HDMI Control disabled. nected pieces of equipment. Enable: HDMI Control enabled. • When HDMI Audio Out is set to “On” or the TV Notes: Control is set to “Enable” and the audio is playing • Set to Disable when a connected piece of equipment is...
-
Page 97: Lock Setup
PCM or DTS material, you can manually set the signal format to PCM or DTS: • If the beginnings of tracks from a PCM source are cut off, try setting the format to PCM. Use the Up and Down [ ]/[ ] •... -
Page 98: Changing The Remote Controller's Id
ID to another number. Note: If you change the remote controller’s ID, be sure to set the same ID on both the remote controller and AV receiver/AV amplifier (see “Changing the AV Receiver/ AV Amplifier’s ID”... -
Page 99: Zone
Connecting this jack to a 12-volt trigger input on a component in Zone 2 will make that compo- Zone 2 nent turn on or off as and when Zone 2 is turned on or off on the AV receiver/AV amplifier. Receiver/... -
Page 100: Setting The Powered Zone 2
Setting the Powered Zone 2 Press the [SETUP] button. The setup menu closes. To use Zone 2, you must make this setting. It enables the speakers connected to the ZONE 2 SPEAKERS termi- nals so that they produce sound when Zone 2 is used. -
Page 101: Zone 2
Controlling Zone 2 with the Remote Using Zone 2 Controller This section explains how to turn Zone 2 on and off, how to select an input source for Zone 2, and how to adjust the volume for Zone 2. Controlling Zone 2 from the AV receiver/AV... - Page 102 • You can’t select different radio stations for Zone 2 and the main room. For example, if you have an FM sta- tion for the main room, that station will also be used in Zone 2.
-
Page 103: Using The Remote Controller In Zone 2 And Multiroom Control Kits
IR IN Using a Multiroom Kit with Zone 2 In this setup, the IR receiver in Zone 2 picks up the infra- red signals from the remote controller and feeds them Inside... -
Page 104: Controlling Other Components
[STANDBY] button. This section explains how to: The Remote indicator lights up. • Enter the remote control code for a component that you want to control: DVD, TV, VCR, etc. • Learn commands directly from another component’s remote controller (see page 107). -
Page 105: Remote Control Codes For Onkyo Components Connected Via
AV While holding down the REMOTE receiver/AV amplifier, not the component. This allows MODE button that you want to you to control components that are out of view, in a rack, reset, press the TV [ ] button. for example. - Page 106 TX-SR705_En.book Page 106 Monday, May 28, 2007 2:13 PM Controlling Other Components—Continued To control another component, point the remote controller at it and use the buttons explained below. (You must select the appropriate remote control mode first.) With some AV components, certain buttons may not work as expected, and some may not work at all.
-
Page 107: Learning Commands
• Only commands from infrared remote controllers can be learned. • When the remote controller’s batteries expire, all learned commands will be lost and will have to be learned all over again, so don’t discard your other Press the button you want to remote controllers. -
Page 108: Using Macros
] button to start playback on the Notes: CD player. • If any of the buttons you used to make a macro are You can program a MACRO button so that all five taught new commands, the macro will no longer work actions are performed with just one button press. -
Page 109: Specifications
200 mV/470 Ω (REC OUT) Coaxial: 3 Analog Inputs DVD (MULTICHANNEL), VCR/DVR, Frequency Response 5 Hz - 100 kHz/+1 dB - 3 dB (Direct mode) CBL/SAT, GAME/TV, AUX, TAPE, CD, Tone Control ±10 dB, 50 Hz (BASS) PHONO ±10 dB, 20 kHz (TREBLE) -
Page 110: Troubleshooting
AV receiver/AV amplifier with its power cord discon- still connected. nected for 1 hour. After that, reconnect the power cord • The input signal format is set to PCM or DTS. Set it to and set the volume to maximum. If the AV receiver/AV Auto (page 97). - Page 111 (pages 67-70). onds, and then resume playback. Can’t select the DTS-ES Discrete/Matrix listen- • With some CD and LD players, you won’t be able to ing modes playback DTS material properly even though your • These modes cannot be selected when no surround...
- Page 112 • Make sure that the video settings are correct (page 48 code. and 49). • Make sure to set the same ID on both the AV receiver/ • On your TV, make sure that the video input to which AV amplifier and remote controller (pages 94 and 98).
- Page 113 The following settings can be made for the S-Video and composite video inputs the appropriate remote control code first (page 104). You must use the buttons on the unit to make these set- Recording tings. 1. While holding down the input selector button for the Can’t record...
- Page 114 TX-SR705_En.book Page 114 Monday, May 28, 2007 2:13 PM Memo...
- Page 115 7_Appendix_En.fm Page 115 Tuesday, May 29, 2007 4:29 PM Memo...
- Page 116 Suite 1, Gregories Court, Gregories Road, Beaconsfield, Buckinghamshire, HP9 1HQ UNITED KINGDOM Tel: +44-(0)1494-681515 Fax: +44(0)-1494-680452 HOMEPAGE http://www.onkyo.com/ ONKYO CHINA LIMITED Unit 1 & 12, 9/F, Ever Gain PlazaTower 1, 88, Container Port Road, Kwai Chung, N.T., Hong Kong Tel: 852-2429-3118 Fax: 852-2428-9039 http://www.ch.onkyo.com/ Y0705-1 SN 29344476 (C) Copyright 2007 ONKYO CORPORATION Japan.
Need help?
Do you have a question about the SR705 - TX AV Receiver and is the answer not in the manual?
Questions and answers