Table of Contents
Advertisement
Quick Links
Advertisement
Chapters
Table of Contents

Related Manuals for German pool GP13-P1-LG


Summary of Contents for German pool GP13-P1-LG
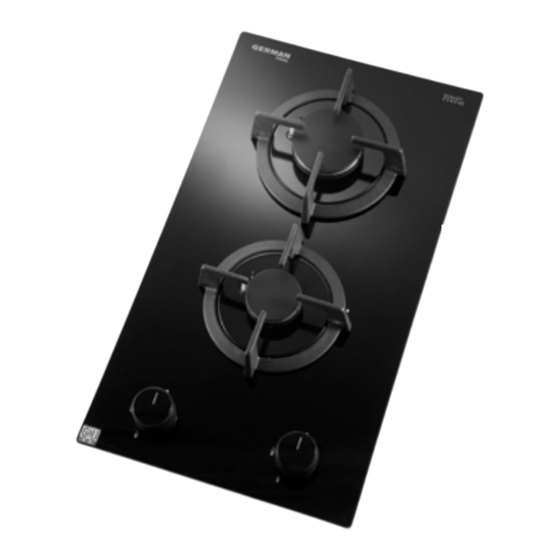
- Page 1 GP13-P1-LG/TG Built-in Gas Cooking Range 360° Multi-Oscillation Fan RHS-126 GP13-P2-LG/TG Online Warranty Registration Please read these instructions and warranty information carefully before use and keep them handy for future reference. U S E R M A N U A L...
-
Page 2: Table Of Contents
Table of Contents Warnings & Safety Precautions Product Structure Installation Instructions Operation Instructions Cleaning & Maintenance Troubleshooting Technical Specification Warranty Terms & Conditions... -
Page 3: Warnings & Safety Precautions
” position and the gas cooker has completely cooled down before cleaning and maintenance. • Contact German Pool authorized service technician for repair or maintenance of this product. Notice Before Use Important For safety purposes, you should read the instructions carefully before using the appliance for the first time. - Page 4 14. Contact German Pool Customer Service and Repair Centre for repair and parts replacement. During guarantee period, German Pool resrves the right to charge for spare parts and service fees if the damage is caused by misuse or improper installation.
-
Page 5: Product Structure
Product Structure GP13-P1-TG/GP13-P1-LG Gas Inlet Joint Flame Sensor Glass Panel Burner Head Sparker Flame Cap (Small) Flame Cap (Large) Drip Pan Burner Rack Turn Knob Main Unit Battery Box (bottom of unit) GP13-P2-TG/GP13-P2-LG Gas Inlet Joint Glass Panel Flane Sensor... -
Page 6: Installation Instructions
Installation Instructions WARNING! The gas cooking range must be installed by registered gas installers (RGI). Otherwise, German Pool will not be held responsible for any damages. Attention: • The use of a gas-cooking appliance produces heat and moisture. Please ensure that the kitchen is well ventilated. - Page 7 (eg. EMSD APPROVAL GTXXXX), or other appropriate methods accepted by EMSD, for connecting from ½ inch B.S.P. thread at the back of the unit to the gas supply point. III. Cut-out Dimensions Model No. W(mm) D(mm) GP13-P1-TG GP13-P1-LG GP13-P2-TG GP13-P2-LG Counter Top Venting Grille...
- Page 8 (Fig.3). If either is incorrectly placed, using the cooking range may cause the burner head to deform, or the glass may break, or increase the risk of releasing carbon monoxide (CO). Burner Ring Burner Cap Burner Cap Burner Cap Burner Head Burner Head Burner Head GP13-P1-TG/GP13-P1-LG GP13-P2-TG/GP13-P2-LG (Fig.2) (Fig.3)...
-
Page 9: Operation Instructions
Operation Instructions WARNING! All cooking ranges must be installed, tuned and connected by registered gas installers. DO NOT install or repair the cooking range yourself. DO NOT use additional fitting, such as aluminium foil. DO NOT clean the top of the sensor with a hard brush or sharp object, as they may damage the sensor. While pushing the control knob, turn it to the left (towards the “... -
Page 10: Cleaning & Maintenance
Operation Instructions Flame Failure Safety Device • If the flame extinguishes during use, the automatic flame failure safety device will shut off gas ● supply to the cooking range. When this happens, turn the knob to “ ” position. • The safety sensor is very delicate –DO NOT use hard brushes or rough cleaning pads when cleaning it. -
Page 11: Troubleshooting
WARNING! If the cooking range still fails to ignite after following the above suggested solutions, DO NOT attempt to ignite by other means. Please contact German Pool Customer Service & Repair Centre. P.11... -
Page 12: Technical Specification
Technical Specification Model GP13-P1-TG GP13-P1-LG GP13-P2-TG GP13-P2-LG Gas Type H.K. Towngas H.K. LP Gas H.K. Towngas H.K. LP Gas Gas Working Pressure 1500 Pa 2900 Pa 1500 Pa 2900 Pa Power 6.0kW 5.0kW 2.5/1.3kW 1.8/1.1kW Ignition Method Instant Ignition Delay Technology... - Page 13 目錄 警告及注意事項 產品結構 安裝說明 使用說明 清潔與保養 故障檢修 技術規格 保用條款 P.13...
-
Page 14: 警告及注意事項
警告及注意事項 警告! • 使用本產品前,請仔細閱讀所有說明。 • 請勿讓兒童或身體有殘障、精神不健全及對本產品缺乏經驗或知識的人士單獨使用本產品;如 需使用,必須要在負責任的成年人監管下方可使用。 • 應照顧好兒童,確保他們不會玩耍本產品。 • 無成年人監管下,勿讓兒童清潔及維護本產品。 • 使用前,請先檢查家居的「氣體類別」及「操作壓力」及「額定熱負荷」是否與本產品標籤上 的規格相符。 • 本產品只宜在家居室內使用。 • 如果氣體接駁喉管損壞,為免發生意外,喉管必須由廠方、廠方指定的維修中心或同等合格的 技術人員進行更換。 ● • 清潔或維護本產品前,必須先確保爐掣已轉回至「 」關機位置,並確保爐具已完全涼卻後方 可進行。 • 請聯繫德國寶授權的技術人員進行維修或保養本產品。 注意事項 重要說明 為安全起見,初次使用產品前請先細閱本說明書,並保存說明書,以便作參考之用。 本產品只供家居使用。請必須依照本說明書內的指示安裝及操作。 1. 必須由註冊氣體裝置技工安裝此爐具。 2. 請確保爐具使用範圍內通風良好,避免室內缺氧。 3. 此爐具只適用於烹飪,不可用於烘乾衣物、毛巾等。 4. 長時間使用時,請打開窗戶或開啟抽風設備,確保室內空氣流通。 ● 5. 使用爐具後請檢查所有控制鍵有否扭回「 」位置。... -
Page 15: 產品結構
產品結構 GP13-P1-TG/GP13-P1-LG 燃氣接頭 安全感應器 玻璃面板 爐頭 點火針 火蓋(小) 火蓋(大) 爐碟 爐架 旋鈕 機身 電池盒(爐底部) GP13-P2-TG/GP13-P2-LG 燃氣接頭 玻璃面板 安全感應器 上爐頭 爐頭蓋 爐頭 爐碟 下爐頭 爐架 旋鈕(上爐頭) 點火針 旋鈕(下爐頭) 機身 電池盒(爐底部) P.15... -
Page 16: 安裝說明
安裝說明 警告! 所有爐具必須由註冊氣體裝置技工安裝,切勿自行安裝,否則一切後果本公司概不負責。 注意: • 使用氣體煮食爐時會產生熱氣及濕氣,廚房必須保持空氣流通。可開啟自然風窗口或安裝抽氣 或排氣裝置。長時間不斷使用氣體煮食爐,必須提供額外的通風設備,如打開窗戶或使用有效 的通風裝置。 • 爐具須安裝在空氣流通房間內,附近不可放置易燃物品如紙張、油類等。 • 爐具須放置在穩固之平面上。 • 如要安裝爐具於易燃物料附近(如木牆、木架),兩側須距離15厘米(6英吋)以上,此爐具的安 裝位置應與周圍易燃物料距離15厘米以上。 • 爐的底部距離下面檯面不少於25毫米(1英吋)。 • 不需安裝外置氣體穩壓器。 I. 房間內通風 保持正常氣體燃燒及有關房間通風所需之空氣量,體積必須不少於20m³。空氣應自然流經房間內的 固定窗戶或通風口。窗戶或通風口面積最少為100c㎡,並確保不被阻塞。通風系統須符合有關法 例,亦可接受從隔鄰房間抽取空氣的間接通風系統。 II.氣體接駁 注意: • 根據香港氣體安全條例,任何氣體裝置工程,包括爐具和接駁喉管的安裝,必須由註冊氣體裝 置技工執行,而該技工已於相關的氣體工程類別註冊及受聘於註冊氣體工程承辦商。 • 安裝前先查看爐具底部標貼列出的規格是否與安裝地點的氣體及電力供應系統互相符合。爐具 標貼列明氣體類別及操作壓力。氣體接駁必須符合有關法例。入氣咀的直徑為½吋。 A. 石油氣接駁 • 使用全橡膠材料軟喉接駁:請使用合格印有機電工程署批准標記(例如:機電工程署批准EMSD APPROVAL GTXXXX字樣)之全橡膠材料軟喉、配件及氣掣,或使用機電工程署接納的其他恰當 方法進行接駁,由爐後面喉咀接駁至供氣點。 • 使用不銹鋼網喉接駁:請使用合格印有機電工程署批准標記(例如:機電工程署批准EMSD APPROVAL GTXXXX字樣)之不銹鋼網喉、配件及氣掣,或使用機電工程署接納的其他恰當方法... - Page 17 安裝說明 III .櫃面開孔尺寸 型號 闊(毫米) 長(毫米) GP13-P1-TG GP13-P1-LG GP13-P2-TG GP13-P2-LG 闊 長 檯面 百葉窗 P.17...
- Page 18 安裝說明 IV. 爐架及爐頭之正確位置 使用前請先確定以下配件已置於正確位置。 A.爐架 爐架正確地安放在爐碟上(圖1)。放置時,請勿傾斜,否則會影響爐火不正常。 爐架 爐架 爐碟 爐碟 玻璃面板 玻璃面板 (圖1) B.爐頭 爐頭蓋及爐頭圈分別放置在爐頭上(圖2),放置時請勿傾斜及不要留有空隙 (圖3)。若兩者不正確地 放置,使用爐具會導致爐頭變形、玻璃破裂和增加釋放一氧化碳之危險。 爐頭圈 爐頭蓋 爐頭蓋 爐頭蓋 爐頭 爐頭 爐頭 GP13-P1-TG/GP13-P1-LG GP13-P2-TG/GP13-P2-LG (圖2) (圖3) P.18...
-
Page 19: 使用說明
使用說明 警告! 所有爐具須由合格註冊氣體裝置技工進行安裝、內部調試及接駁喉管。嚴禁用戶自行安裝或維修。 切勿使用並非由製造商供應的配件,例如錫紙碟,使用錫紙可能導致爐火不正常。 請勿用鋼刷或利器摩擦熄火安全感應頭。 請一邊按住爐具開關掣一邊向左 ( 的方向) 慢慢地旋轉,隨著「啪啪」的響聲,火花將點燃 燃燒器。在確認燃燒器被點燃後即可放手,此爐具帶有自動連續點火功能,點火後無須繼續按 壓開關,6至8秒後出現「啪啪」聲響及火花會自動停止。 將手放開爐具開關掣而爐火仍未點著時,請用同樣的方法再次操作,將手慢慢地放開。 轉動爐掣,調節爐火至所需火力。 ● 緩慢轉動旋鈕調節爐火大小,於「 」及“ ”位置調節。 (圖4)。 ● 如爐火熄滅,防漏熄火安全裝置會自動切斷燃氣供應。如有此情況,請將爐掣轉至「 」的位 置。 ● 將爐掣轉回至「 」的位置,爐火便會熄滅。(圖5) 點火 熄火 (圖4) (圖5) 注意: • 使用小火時,不應急速打開爐具下方的廚櫃門,以免氣流弄熄爐火。 . 從最大火力調低至近中火時,若發現外環火焰不穩定(微弱或熄滅),請立即調大火力,直至 外環火焰穩定,才繼續使用;或調小火力,只使用芯火。 . 於爐具運作約30分鐘後,爐具玻璃面板及旋鈕部分會因爐火熱力而變熱,如需使用旋鈕,方以 濕布降溫後使用。 . 關閉爐頭時,有機會因殘留在爐頭內的氣體瞬間燃燒而出現響聲,此屬正常現象。 防漏熄火安全裝置... -
Page 20: 清潔與保養
清潔與保養 警告! 當爐具尚有餘熱時,切勿進行清洗。必須在爐具完全冷卻後方可進行清潔。 清潔爐面 • 用柔軟的濕布及中性洗潔精輕抹面板部分。 • 用暖水及洗潔精清理爐頭。 警告! • 經常清潔爐頭組件以保持爐頭蓋上的火焰孔暢通,如滾瀉食物及汁液,應在爐頭組件冷卻後盡快作 • 妥善清理。 • 更換電池 • 電池盒在爐身的底部(直流1.5伏特)。請將盒蓋打開更換電池。 • 請小心別把乾電池的正、負極倒轉。 P.20... -
Page 21: 故障檢修
故障檢修 問題 原因 解決方法 氣閥沒打開或燃氣用完 打開氣閥,更換氣源 氣體接駁喉中有較多空氣 延長點火時間,直至氣體接駁喉管內空氣完全 排出 氣體接駁喉管彎折或壓扁 矯直氣體接駁喉管 噴嘴堵塞 聯絡客戶服務及維修中心或註冊氣體裝置技工 點不著火 清除堵塞 點火針髒或位置偏離 聯絡客戶服務及維修中心或註冊氣體裝置技工 清潔並調整位置 爐頭蓋積水或污物 清潔及抹乾爐頭蓋 氣體接駁喉管老化 聯絡客戶服務及維修中心或註冊氣體裝置技工 更換氣體接駁喉管 爐頭主火未點燃 待氣體消散後再重新點火 有氣體氣味 閥體漏氣 聯絡客戶服務及維修中心或註冊氣體裝置技工 更換閥體 聯絡客戶服務及維修中心或註冊氣體裝置技工 燃氣壓力太低 檢查供氣或看減壓閥是否堵塞 爐頭蓋堵塞 清潔爐頭蓋 空氣調節不當 聯絡客戶服務及維修中心或註冊氣體裝置技工 弱火 調節風門,讓適量空氣流通 警告! 如無法順利排除故障,請與客戶服務及維修中心聯絡。嚴禁非專業人員對本機拆卸維修。 P.21... -
Page 22: 技術規格
技術規格 GP13-P1-TG GP13-P1-LG GP13-P2-TG GP13-P2-LG 型號 氣體類型 香港煤氣 香港石油氣 香港煤氣 香港石油氣 1500 Pa 2900 Pa 1500 Pa 2900 Pa 氣體壓力 6.0kW 5.0kW 2.5/1.3kW 1.8/1.1kW 功率 點火方式 瞬燃技術 安全裝置 有 125高 x 290闊 x 515深 115高 x 290闊 x 515深 機身尺寸 (毫米) 5.8 kg... -
Page 23: Warranty Terms & Conditions
- the serial number is modified, damaged or removed from the product. - 機身編號被擅自塗改、破壞或刪除。 4. German Pool will, at its discretion, repair or replace any 4. 總代理有權選擇維修或更換配件或其損壞部份。 defective part. 5. This warranty will be void if there is any transfer of 5. - Page 24 German Pool (Hong Kong) Limited HONG K ONG TOP BRAND TEN YEAR ACHIEVEMENT AWARD © All rights reserved. Copying, reproducing or using the contents of this manual is not allowed without prior authorization from German Pool, violators will be prosecuted. www.germanpool.com GP13-P1_P2_M_24(2)
Need help?
Do you have a question about the GP13-P1-LG and is the answer not in the manual?
Questions and answers