
Related Manuals for Winterwarm Boxer 80


Summary of Contents for Winterwarm Boxer 80
- Page 1 TECHNICAL INFORMATION ASSEMBLY INSTRUCTIONS USE AND MAINTENANCE Warm air heater BOXER 80...
-
Page 2: Pin Number
Dear Customer Thank you for choosing a BOXER 80 AIR HEATER, an innovative and modern, quality and high performance product which will assure safe and silent operation for a long time. This is particularly the case if the BOXER is mentioned by the Manufactorer’s Technical Assistance Department which is specially trained and equipped to keep it working at maximum efficiency with low running costs, and has a large number of original spares in stock. - Page 3 INDEX GENERAL Compliance Pag. Pin number “ Guarantee “ Disposal Instuctions Index “ General warnings “ Basic safety rules “ Identification of the equipment “ Description of the equipment “ Structure “ Technical data “ Accessory “ Electrical panel components “...
-
Page 4: General Warnings
GENERAL WARNINGS After removing the packaging check that all the equipment is present and intact. If there is any failure to correspond with order contact the manufactorer agent who sold the equipment.. The equipment must be installed by an accredited company; at the end of work it has to issue to the owner’s machine the Conformity Declaration that the installation has done in accordance with locally and nationally applicable regulations and the instructions given by the manufactorer in this manual. -
Page 5: Basic Safety Rules
The manufactorer shall not be held liable for any failures to observe the instructions contained in this booklet, for the consequences of any handling or usage not specifically provided for or for any translations which may be subject to erroneous interpretation. The equipments have to be equipped only with original accessories. - Page 6 IDENTIFICTION OF THE EQUIPMENT The equipment is identifiable by the Technical Plate bearing its main technical and performance details. If the plate is lost or damaged ask for a duplicate from manufactorer’s technical assistance dept. IDENTIFICATION DATA OF MANUFACTURER 0694 WARM AIR HEATER Model Registration n°...
-
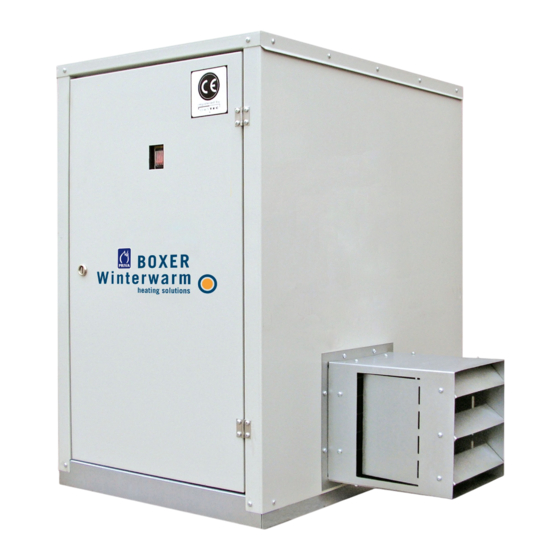
Page 7: Description Of The Equipment
DESCRIPTION OF THE EQUIPMENT This equipment is a device which provides with a room air heating using the thermic power produced by the gas combustion. The air to be heated is aspirated from the equipment through a centrifugal fan, then is mixed with combustion products, originated by a sofisticated burner, absorbing the heat. - Page 8 Burner assembly Consisting of: • Gas injector • Cast iron Multigas burner • Ignition electrodes • Flame detection electrode Control and protection equipment This is electronic with ionisation flame detection circuits and capacitive discharge ignition. The equipment controls and monitors the working of the BOXER, taking care of the following tasks: •...
- Page 9 STRUCTURE The heater consists of: Multigas burner Automatic safety thermostat Flame detection electrode Flow switch Ignition electrodes Manual safety thermostat Gas injector Hot air delivery duct Gas solenoid valve Casing Centrifugal fan Hoisting eyebolts Electric board Fan motor Red light button Device mixer air-gas...
-
Page 10: Technical Data
TECHNICAL DATA Destination country: Great Britain (GB) Portugal (PT) Greece (GR) Czech Republic (CZ) Ireland (IE) Spain (ES) Iceland (IS) Switzerland (CH) Italy (IT) DESCRIPTION UNIT OF MEAS. DATA Nominal thermal capacity 80,0 kcal/h 68.800 Air flow M 3 /h 2.000 Thermal haed °K... - Page 11 TECHNICAL DATA Destination country: Austria (AT) Denmark (DK) Sweden (SE) Finland (FI) DESCRIPTION UNIT OF MEAS. DATA Nominal thermal capacity 80,0 kcal/h 68.800 Air flow m 3 /h 2.000 Thermal head °K 145 Throw distance Sound pressure level dB(A) Category II 2H 3B/P Type Electrical supply...
- Page 12 TECHNICAL DATA Destination country: Belgum (BE) DESCRIPTION UNIT OF MEAS. DATA Nominal thermal capacity 80,0 kcal/h 68.800 Air flow m 3 /h 2.000 Thermal head °K 145 Throw distance Sound pressure level dB(A) Category I 2E(S)B I 3+ Type Electrical supply 230V 50Hz ...
- Page 13 TECHNICAL DATA Destination country: France (FR) DESCRIPTION UNIT OF MEAS. DATA Nominal thermal capacity 80,0 kcal/h 68.800 Air flow m 3 /h 2.000 Thermal head °K 145 Throw distance Sound pressure level dB(A) Category II 2Esi3+ Type Electrical supply 230V 50Hz Power of centrifugal fan motor 0,373 Centrifugal fan motor absorption...
- Page 14 TECHNICAL DATA Destination country: Germany (DE) DESCRIPTION UNIT OF MEAS. DATA Nominal thermal capacity 80,0 kcal/h 68.800 Air flow m 3 /h 2.000 Thermal head °K 145 Throw distance Sound pressure level dB(A) Category II 2ELL3B/P Type Electrical supply 230V 50Hz Power of centrifugal fan motor 0,373 Centrifugal fan motor absorption...
- Page 15 TECHNICAL DATA Destination country: Holland (NL) DESCRIPTION UNIT OF MEAS. DATA Nominal thermal capacity 80,0 kcal/h 68.800 Air flow m 3 /h 2.000 Thermal head °K 145 Throw distance Sound pressure level dB(A) Category II 2L3B/P Type Electrical supply 230V 50Hz Power of centrifugal fan motor 0,373 Centrifugal fan motor absorption...
- Page 16 TECHNICAL DATA Destination country: Hungary (HU) DESCRIPTION UNIT OF MEAS DATA Nominal thermal capacity 80,0 kcal/h 68.800 Air flow m 3 /h 2.000 Thermal head °K 145 Throw distance Sound pressure level dB(A) Category II 2H3P Type Electrical supply 230V 50Hz Power of centrifugal fan motor 0,373 Centrifugal fan motor absorption...
- Page 17 TECHNICAL DATA Destination country: Luxembourg (LU) DESCRIZIONE UNIT OF MEAS DATA Nominal thermal capacity 80,0 kcal/h 68.800 Air flow m 3 /h 2.000 Thermal head °K 145 Throw distance Sound pressure level dB(A) Category II 2E3P Type Electrical supply 230V 50Hz Power of centrifugal fan motor 0,373 Centrifugal fan motor absorption...
- Page 18 TECHNICAL DATA Destination country: Norway (NO) DESCRIPTION UNIT OF MEAS DATA Nominal thermal capacity 80,0 kcal/h 68.800 Air flow m 3 /h 2.000 Thermal head °K 145 Throw distance Sound pressure level dB(A) Category I 3B/P Type Electrical supply 230V 50Hz Power of centrifugal fan motor 0,373 Centrifugal fan motor absorption...
-
Page 19: Electrical Panel Components
ACCESSORY The following accessories are available on request: • Supporting brackets • Sealed electronic room thermostat • Air recirculating unit with air camper • Outlet air duct with small overpressure air shutter ELECTRICAL PANEL COMPONENTS Il The BOX comes complete with the electrical panel which consists of the following components: Box housing Cable gripping glands Terminal block... - Page 20 WIRING DIAGRAM WITHOUT CHANGEOVER SWITCH VERSION Electrical diagram for electrical supply single phase, phase-neutral (10010895-TC). Electrical terminal block Safety fuse 6,3 A (5 x 20) delayed for motors ignition Luminous release button Manual reset limit thermostat Electronic control and checking unit Relay centrifugal power fan motor Hot surface ignition electrode Flame detection electrode...
- Page 21 WIRING DIAGRAM WITH CHANGEOVER SWITCH VERSION Electrical diagram for electrical supply single phase, phase-neutral (10011784-TC). Electrical terminal block Safety fuse 6,3 A (5 x 20) delayed for motors ignition Luminous release button Manual reset limit thermostat Electronic control and checking unit Centrifugal fan power control relay Auxiliary relay Changeover switch (HEAT –...
- Page 22 Table for version with changeover switch. CMT in position AUTO → IV open (NO ventilation) → The heater is stopped TA open (NO heat request) IV open (NO ventilation) → The heater starts in heating TA closed (YES heat request) ...
- Page 23 SETTING UP The heater after the first setting up, carried out by the Technical After-sales Service or authorized personnel, is pre-set for the running and no other intervention are needed. The end-user has to carry out only the start and stop operations according to these points: START •...
-
Page 24: Receipt Of Product
Date Work done Date Work done RECEIPT OF PRODUCT The heater is delivered with: • Instruction manual • Warranty certificate • Output air duct Kit • Gas conversion Kit (natural gas or LPG to work with its predisposition) and 4 hoisting eyebolts, which are enclosed in a transparent plastic bag inside the heater. - Page 25 LOCATION The location of the air heater must be determined by the plant engineer or by a competent person and must take both the technical and current legislative requirements into account, which may entail the obtaining of specific authorisations (e.g. fire prevention, urban planning, architectural, environmental pollution rules etc.). It is therefore advisable to obtain all necessary authorisation before carrying out the installation work.
-
Page 26: Installation
INSTALLATION Example of installation inside the room to be heated with complete air recirculation. Suspended heater with chains or steel wire Air heater Hot air intake Hoisting eyebolt Suspension chains – wires (*) (*) not included Heater installed on support brackets 1. - Page 27 Example of installation inside the room to be heated with complete or partial inlet of outside air: Air inlet completely outside Partial air inlet (inside and outside) Air inlet completely inside 1. Air heater 2. Support brackets (*) 3. Hot air intake 4.
- Page 28 Example of installation outside room to be heated, only with fresh air : Shutter position with no working fan Shutter position with working fan 1. Air heater 2. Support brackets (*) 3. Final air diffuser 4: Output air duct with overpressure air shutter (*) (*) Not included...
- Page 29 Example of installation outside the room, with total or partial internal recirculating: Air inlet completely outside Air inlet partial (inside and outside) Air inlet completely inside 1. Air heater 2. Support brackets (*) 3. Final air diffuser 4. Output air duct with overpressure air shutter (*) 5.
- Page 30 FINAL AIR DIFFUSER The equipment is always supplied with a hot air delivery and distribution duct. Also supplied are horizontal and vertical louvers, which can be adjusted to the needs of specific installation. Because the air duct needs space during transport, it needs to be assembled as shown below: Air duct assembly diagram Assemby instructions a.
- Page 31 OUTPUT AIR DUCT WITH OVERPRESSURE AIR SHUTTER (ACCESSORY ON REQUEST) If the heater will be installed outside the room to be heated, it will be necessary to install an air duct through the wall. This air duct is supplied with an air shutter working by gravity which closes the outlet of warm air when the heater is not working.
- Page 32 Suitable length output air duct The outlet air duct may be shortened when necessary. Follow the instructions shown below: a. Cut with suitable equipment the output air duct with overpressure air shutter (pos. 2) to the desired length b. Discard the unwanted piece (pos. 3) c.
- Page 33 AIR RECIRCULATING UNIT WITH AIR DAMPER (ACCESSORY ON REQUEST) If the heater is to be installed outside of room, to be heated, but it is preferred to recycle the internal air it will be convenient to install the air recirculating unit with damper It has a damper to mix the inside-outside air quantity, that can be set in several steps.
- Page 34 Execution hole for output air duct installation, air recirculating unit and supporting brackets View holes from the outside of the wall where the heater is installed Execution hole for supporting brackets installation on the bottom of the heater and output air duct View holes from the outside of the wall where the heater is installed...
-
Page 35: Gas Line Connection
GAS LINE CONNECTION Preregulating. The heater is tested and regulated in the factory, so to work with the gas type as indicated on the label, which is positioned near the gas junction. A conversion kit, is also enclosed to change to other gas types present in the Country of destination. -
Page 36: Electrical Connection
Notes for connecting liquid gas (propane G31, butane G30): When a propane or butane supply is used it is advisable to install a primary pressure reducer close to the liquid gas tank to reduce the pressure to 1.5 bars and a secondary pressure reducer near to the equipment, but outside its body, to bring the pressure down from 1.5 bars to 40 mbars. - Page 37 Electrical connection To connect up the mains supply, :do as follows: • Open the burner door • Remove electrical panel cover • Pass the cables through the cable channels and cable gummed • Connect up as shown in the diagram •...
- Page 38 There must be an effective earth connection. The manufacturer may not be held liable for any damage caused by the equipment not being properly earthed. When placed, electrical cables must not touch warm and/or cold surfaces, or with cutting edge For cable section see the table ELECTRICAL CHARACTERISTICS.
- Page 39 Here below are tables which explain the configuration, as carried out by the Factory and the operation for changing the gas type. DESTINATION COUNTRY AUSTRIA (AT) Preregulation in the factory Propane gas G31 (gas supply pressure 50 mbar) Gas conversion kit Natural gas G20 ...
- Page 40 DESTINATION COUNTRY BELGIUM (BE) Preregulation in the factory Propane gas G31 (Gas supply pressure gas 37 mbar) Gas conversion kit The conversion kit is not included with the heater, it should be requested to the authorized importer Instructions for gas conversion: From Propane gas G31 to Butane gas Check the supply pressure of Butane gas G30 either 30 ...
- Page 41 DESTINATION COUNTRY DENMARK (DK) Pre-regulation in the factory - Propane gas G31 (gas supply pressure 30 mbar) Gas conversion kit - Natural gas G20 Butane gas G30 Instruction for gas conversion: From Propane gas G31 to Butane gas Check the supply pressure of Butane gas G30 either ...
- Page 42 DESTINATION COUNTRY FRANCE (FR) Pre-regulation in the factory Propane gas G31 (gas supply pressure 37 mbar) Gas conversion kit Natural gas G20 Natural gas G25 Butane gas G30 Instruction for gas conversion: From Propane gas G31 to Butane gas Check the supply pressure of Butane gas G30 either 30 ...
- Page 43 DESTINATION COUNTRY GERMANY (DE) Pre-regulation in the factory Propane gas G31 (Supply gas pressure 50 mbar) Kit Trasformazione di gas Natural gas G20 Natural gas G25 Butane gas G30 Instruction for gas conversion: From Propane gas G31 to Butane gas ...
- Page 44 DESTINATION COUNTRY GREAT BRITAIN (GB) Pre-regulation in the factory Propane gas G31 (supply gas pressure 37 mbar) Gas conversion kit Natural gas G20 Butane gas G30 Instruction for gas conversion: Propane gas G31 to Butane gas G30 Check the supply pressure of Butane gas G30 either 30 ...
- Page 45 DESTINATION COUNTRY HUNGARY (HU) Pre-regulation in the factory Propane gas G31 (supply gas pressure 37 mbar) Gas conversion kit Natural gas G20 Butane gas G30 Instruction for gas conversion: From Propane gas G31 to Butane gas Check the supply pressure of Butane gas G30 either 28 mbar. ...
- Page 46 DESTINATION COUNTRY IRELAND (IE) Pre-regulation in the factory Propane gas G31 (supply gas pressure 37 mbar) Gas conversion kit Natural gas G20 Butane gas G30 Instruction for gas conversion: From Propane gas G31 to Butane gas Check the supply pressure of Butane gas G30 either 30 mbar ...
- Page 47 DESTINATION COUNTRY LUXEMBOURG (LU) Pre-regulation in the factory Propane gas G31 (supply gas pressure 37 mbar) Gas conversion kit Natural gas G20 Natural gas G25 Instruction for gas conversion: From Propane gas G31 to Natural gas Replace the excluding reducer of pressure of electro-valve ...
- Page 48 DESTINATION COUNTRY OLANDA (NL) Pre-regulation in the factory Propane gas G31 (supply gas pressure 30 mbar) Gas conversion kit Natural gas G25 Butane gas G30 Instruction for gas conversion: From Propane gas G31 to Butane gas Regulate and seal the reducer of pressure of gas electro- ...
- Page 49 DESTINATION COUNTRY PORTUGAL (PT) Pre-regulation in the factory Propane gas G31 (supply gas pressure 37 mbar) Gas conversion kit Natural gas G20 Butane gas G30 Instruction for gas conversion: From Propane gas G31 to Butane gas Check the supply pressure of Butane gas G30 either 30 mbar. ...
- Page 50 DESTINATION COUNTRY SWEDEN (SE) Pre-regulation in the factory Propane gas G31 (supply gas pressure 30 mbar) Gas conversion kit Natural gas G20 Butane gas G30 Instruction for gas conversion: From Propane gas G31 to Butane gas Check the supply pressure of Butane gas G30 either 30 mbar. ...
- Page 51 INJECTOR AND GAS PRESSURE TABLE Warm ai heater destined to: Greece (GR) Italy (IT) Great Britain (GB) Portugal (PT) Ireland (IE) Spain (ES) Iceland (IS) Gas type Injector diameter Gas pressure Gas supply pressure on the injector (mm) (mbar) (mbar) Natural gas G20 7,25 12,5...
- Page 52 Warm air heater destined for: France (FR) Gas type Injector diameter Gas pressure Gas supplying On the injector pressure (mm) (mbar) (mbar) Natural gas G20 7,25 12,5 Natural gas G25 8,00 12,5 Propane gas G31 4,30 * Butane gas G30 4,30 * Warm air heater destined for: Germany (DE)
- Page 53 GAS INJECTOR REPLACEMENT To replace the injector proceed as follows: Cut off any forms of energy (gas and Remove the injector with the gasket electricity) to the equipment. Mount the new injector with its new gasket Detach the connectors to the ignition and Reassemble reversing the above steps and ionisation attach the sticker supplied for the new gas in...
- Page 54 SOLENOID VALVE ADJUSTMENT Setting the pressure regulator of the gas control valve The gas control valve is supplied with a pressure regulator with a working range of 0-30 mbar, to set the correct pressure at the gas injector. It is Inlet pressure measuring point before the pressure used to work with Natural gas G20-25 (supply regulator...
-
Page 55: Ordinary Maintenance
FIRST SETTING UP The commissioning must be carried out by THE TECHNICAL ASSISTANCE DEPT. OF THE MANUFACTURER OR BY A QUALIFIED TECHNICIAN. Once the equipment has been installed, and before it is started up, check the following: • All the safety conditions have been observed •... -
Page 56: Periodic Maintenance
PERIODIC MAINTENANCE With interval that must be reduced in case of installation in heavy conditions, but at the end of each cycle, following maintenance and checks have to be done: • Clean accurately, but with compressed air only all the internal walls of the air heater, ignition electrodes and flame detection electrodes, burner, safety flow switch and fan motor. -
Page 57: Faults And Solutions
FAULTS AND SOLUTIONS FAULT CAUSE SOLUTION The equipment shows no signs No electrical supply Check main switch of life Check fuses No signs Check electrical line Check electrical connections Flow switch vane locked Check the free movement of ... - Page 58 FAULT CAUSE SOLUTION The burner stops abnormally Excessive resistance of outlet Check the hot air outlet for and casual air duct obstructions of flow switch Defective flow switch Replace flow switch Room thermostat positioned Change its position ...
- Page 59 NOTES...
- Page 60 Winterwarm Agri UK Ltd Unit 3, Taylor Business Park Warrington Road Risley, Warrington, Cheshire WA3 6BL Tel. +44 (0) 1925 762200 Fax +44 (0) 1925 762252 equiries@winterwarmuk.com www.winterwarmuk.com Since the company is constantly seeking to improve all of its products’ aesthetic appearance, dimensions, technical details, equipment...
Need help?
Do you have a question about the Boxer 80 and is the answer not in the manual?
Questions and answers