Table of Contents
Advertisement
https://tehnoteka.rs
Uputstvo za upotrebu (EN)
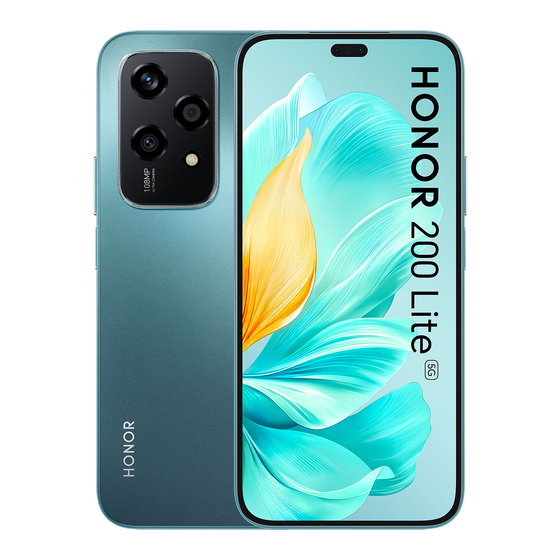
HONOR 200 Lite 5G 8/256GB Cyan Lake
Tehnoteka je online destinacija za upoređivanje cena i karakteristika bele tehnike,
potrošačke elektronike i IT uređaja kod trgovinskih lanaca i internet prodavnica u Srbiji.
Naša stranica vam omogućava da istražite najnovije informacije, detaljne karakteristike
i konkurentne cene proizvoda.
Posetite nas i uživajte u ekskluzivnom iskustvu pametne kupovine klikom na link:
https://tehnoteka.rs/p/honor-200-lite-5g-8256gb-cyan-lake-akcija-cena/
Advertisement
Table of Contents

Related Manuals for honor 200 Lite


Summary of Contents for honor 200 Lite
- Page 1 Uputstvo za upotrebu (EN) HONOR 200 Lite 5G 8/256GB Cyan Lake Tehnoteka je online destinacija za upoređivanje cena i karakteristika bele tehnike, potrošačke elektronike i IT uređaja kod trgovinskih lanaca i internet prodavnica u Srbiji. Naša stranica vam omogućava da istražite najnovije informacije, detaljne karakteristike i konkurentne cene proizvoda.
- Page 2 User Guide...
-
Page 3: Table Of Contents
View and Disable Notifications Adjust the Volume Power On/Off and Restart Charge Your Phone HONOR Connect Easy Projection HONOR Share Log in to HONOR ID Video Creation Photography Basics Take Photos Shoot Videos Edit Images View Images and Videos Tips... - Page 4 Contents System Manager Device Clone Tips Settings Wi-Fi Bluetooth Mobile Network More Connections Home Screen & Wallpaper Display and Brightness Sounds Notifications Biometrics & Password Battery Storage Security Privacy Accessibility System & Updates About Phone...
-
Page 5: Get Familiar
Get Familiar Change Navigation Method Change the System Navigation Mode Use gesture navigation Go to Settings > System & updates > System navigation and select Gestures. You can: Return to the parent menu: Swipe inward from the left or right edge of the screen. •... -
Page 6: Learn About Lock Screen And Unlock
Get Familiar Use Device Clone to Move Data to Your New Device Device Clone lets you quickly and seamlessly move all the basic data (including contacts, calendar, images, and videos) from your old phone to your new phone. Migrate Data from a Device On your new phone, open the Device Clone app. -
Page 7: Connect To The Mobile Network
Get Familiar Display Your Signature on the Lock Screen Go to Settings > Home screen & style, touch Lock screen signature, then type text to display on the lock screen. To remove the signature, touch Lock screen signature and delete the text. Launch apps from the lock screen You can launch common apps, such as Camera, Calculator, and Timer from the lock screen. - Page 8 Get Familiar Share Your Network Connection with Other Devices Once Personal hotspot has been enabled, you can share your mobile data or the Wi-Fi network your phone is currently connected to with other devices. Share Your Network via Personal Hotspot Some Wi-Fi networks that require authentication cannot be shared.
-
Page 9: Connect To The Wi-Fi Network
Transfer Data Using Wi-Fi Direct You can use Wi-Fi Direct to transfer data between HONOR devices. Wi-Fi Direct allows you to transfer large files to a nearby device more quickly than Bluetooth and without having to pair the devices. -
Page 10: Learn About The Home Screen
Get Familiar Go to More settings > Wi-Fi Direct to start searching for nearby devices that have enabled Wi-Fi Direct. On the sending device, touch and hold to select the files you want to share, touch and select Wi-Fi Direct. These steps may be different if you are sharing files directly from an app. - Page 11 Get Familiar Service cards Keeping informed with important information and one touch to access frequently used features without opening apps. The multi-style cards distinguish your home screen from others. Apps supporting service cards have an indicator bar by default at the bottom (go to Settings >...
- Page 12 Get Familiar Big folders Store your apps in a big folder. You can access them without having to open the folder, making the home screen more efficient to interact with. Switch to Large Folder Press and hold a small folder and tap Enlarge. If there are more than 8 apps in the folder, a cascaded icon will be displayed at the lower right corner.
-
Page 13: View And Disable Notifications
Get Familiar Stop the app from being recommended You can remove the app that you do not want to be recommended by AI Suggestions in the following two ways. Take Settings as an example: Go to the AI Suggestions card on the home screen, long press the Settings app until the dialog box appears, and tap Not interested >... -
Page 14: Adjust The Volume
Get Familiar Count • List • Do not show • Adjust the Volume Adjust Sound Settings Press a Volume Button to Adjust the Volume Press the Volume up or down button to adjust the volume. Switch Sound Mode Via Control Center Swipe down from the top right of the screen to open the Control Center. -
Page 15: Power On/Off And Restart
Get Familiar Before using this feature, go to Settings > Accessibility features > Shortcuts & gestures > Mute ringtone and make sure Flip to mute ringtone is turned on. Pick up the phone to lower the volume When you receive a call, pick up the phone to reduce the ring. Before using this feature, go to Settings >... -
Page 16: Charge Your Phone
Batteries have a limited number of charge cycles. When the battery life becomes • noticeably shorter, go to an authorized HONOR Customer Service Center to replace the battery. Do not cover your phone or charger during charging. - Page 17 Get Familiar Use the Charger that Came with Your Device Use the USB cable that came with your phone to connect your phone and the adapter. Plug the adapter into a power socket. Charging Your Phone with a PC Connect your phone to a PC or other device using a USB cable. When the Use USB to dialog box is displayed on your phone, touch Charge only.
-
Page 18: Honor Connect
HONOR Share HONOR Share HONOR Share is a wireless sharing technology that allows you to quickly transfer images, videos, documents, and other types of files between devices. This technology uses Bluetooth to discover nearby devices that supports HONOR Share and Wi-Fi Direct to transfer files without using mobile data. - Page 19 On the receiving device, tap ACCEPT to accept the transfer. On the receiving device, go to Files, tap Phone > HONOR Share under the Browse tab to view the received file.
-
Page 20: Log In To Honor Id
Log in to HONOR ID Log in to HONOR ID Fast On the new device, go to Settings > Log in to HONOR ID, you can log in by: Account login: Enter the account name, and log in by password or SMS verification code •... -
Page 21: Video Creation
Video Creation Photography Basics Launch Camera There are multiple ways to open the Camera app. From the Home Screen From the home screen, open Camera. From the Lock Screen When the screen is locked, turn on the screen, then swipe up on the camera icon in the lower right corner to open the camera. -
Page 22: Take Photos
Video Creation Capture Smiles Tap Camera > > Smart capture to enable Capture smiles. The camera will take a photo automatically when it detects a smile in the viewfinder. Use the Horizontal Level for Better Compositions Enable Horizontal level to display a horizontal guiding line on the viewfinder. When the dotted line overlaps with the solid line, it indicates that the camera is parallel with the horizontal level. - Page 23 Video Creation Go to Camera > and enable Floating shutter. When turned on, the floating shutter button will appear on the side of the viewfinder frame. Long press the floating shutter button and drag to move it to the position you want.
- Page 24 Video Creation Disable beauty effect: When you shoot with the rear camera, set the parameter to the lowest value. When you shoot with the front camera, tap , and tap again in the beauty effect settings. Adjust bokeh effect: Tap to blur the background.
- Page 25 Video Creation To disable the recommended mode, turn off Take Photos from Far Away Open Camera and select PHOTO mode. Aim the camera at a distant object you want to take a photo of. Drag the zoom slider or pinch in or out to adjust the zoom level. In the viewfinder, touch where you want to focus.
- Page 26 Video Creation Photography with the High-res mode When you want to take high quality HD photos for viewing on a large screen or for developing or printing, you can use the High-res mode. Go to Camera > MORE, and select HIGH-RES. Aim the lens at the object and tap the screen where you want to highlight to focus.
-
Page 27: Shoot Videos
Video Creation Focus Mode Applicable Scenarios MF (Manual Tap the area you want to focus on (such as the face of a person). focus) · Adjust the color tone: Tap WB and select white balance. • When shooting in bright sunlight, you can select . - Page 28 Video Creation With this switch is on, the phone will use a more efficient video format to help you save storage space. However, other devices may not be able to play this format, so please choose according to your actual needs. Not all products support the above features, please refer to your product for details.
-
Page 29: Edit Images
Video Creation Go to Gallery and select a recorded slow-mo video. Tap Share. Method 2: • Go to Gallery to select a recorded slow-mo video. Tap More > Convert format to save the slow-mo video you shoot. Tap Share. Use Time-Lapse to Create a Short Video You can use Time-lapse to capture images slowly over several minutes or even hours, then condense them into a short video. - Page 30 Video Creation Add Watermarks to Photos In Gallery, touch a photo, then tap > Stickers to edit. Select the type of watermark you want to add, such as Time, Weather, Mood. Select a watermark and drag it to change its position. You can also edit the text of some types of watermarks.
-
Page 31: View Images And Videos
Video Creation You can view the collages in Albums > Collages. View Images and Videos View Photos In Gallery, you can view, edit, and share your photos. You can also browse vlogs that are automatically generated by the Gallery. View by Shooting Time Go to Gallery, tap Photos tab. - Page 32 Video Creation Check the message on the top left of the sharing screen. If privacy protection is not enabled, tap Remove private info, Privacy options window will appear. You can follow the on-screen prompts to enable this feature to share photos safely. Organize Albums Organize photos and videos into albums to easily sift through them.
- Page 33 Video Creation Once the items are moved, they will no longer be in their original album. The All photos and Videos albums show all photos and videos stored on your device. Moving items across albums will not remove them from these albums. Delete Photos and Videos Touch and hold to select the photo, video or album you want to delete, then touch Delete >...
-
Page 34: Tips
Tips Enable Frequently Used Features of the App Fast Access Frequently Used App Features from the Home Screen You can access frequently used features of certain apps from app icons on the home screen, and even add shortcuts for these features to the home screen. Quickly Access Frequently Used App Features Touch and hold an app icon until a pop-up menu is displayed, then touch a frequently used feature to access it. - Page 35 Tips Share and Edit a Screenshot or Switch to Scrollshot After you take a screenshot, a thumbnail will be displayed in the lower left corner of the screen. You can then: Swipe down on the thumbnail to take a scrolling screenshot. •...
-
Page 36: Process Tasks In Multi-Window Simultaneously
Tips Record screen You can record operations on the screen as a video and share it with your friends and family. Use a Key Combination to Start Screen Recording Press and hold the Power and Volume up buttons simultaneously to start screen recording. To stop recording, press and hold both buttons again. - Page 37 Tips Dual-window: You can use two of the same app at the same time in a split screen. • Apps that support Multi-Window may vary by device model and version. • Floating Windows Make Switching Tasks Easier Use communication apps without leaving the game? All it requires is to enable floating windows.
- Page 38 Tips Close a floating window: Tap on the floating window to close it. • Mini window As the minimum presentation form of floating windows, mini windows save space and boost efficiency with multi-tasking. You can activate a mini window from either full-screen or floating window mode: From full-screen mode: While using an app in full screen, swipe up from the bottom edge to the...
- Page 39 Tips Drag and drop a document: When writing an email, open Files, select the document you • want to attach, and drag it into the email editor. Not all apps fully support drag-and-drop with Multi-Window. Add, Move, or Remove an App from the Multi-Window Dock Add an app: In the Multi-Window dock, touch >...
- Page 40 Tips Disable Multi-Window dock Multi-Window dock is enabled by default. To disable it, go to Settings > Accessibility features > Multi-Window, then disable Multi-Window dock.
-
Page 41: Apps
Apps Apps App Basics Uninstall an App You can uninstall an app using any of the following methods: When using the Standard style home screen, touch and hold the app icon on the home • screen, then touch Uninstall and follow the instructions. When using the Drawer style home screen, touch and hold the app icon in the drawer, •... -
Page 42: Contacts
Apps Contacts Add and manage contacts You can open Contacts on the home screen (or open Phone and go to the Contacts interface) and add, share, or delete contacts. Manually create contacts On the Contacts screen, tap , go to the New contact interface, enter name, phone number, and other information, and tap to save. - Page 43 Apps To restore contacts deleted by accident, open the Contacts interface, go to > Settings > Organize contacts > Recently deleted, long press to select the contacts to restore, and tap Restore. Manage contact groups You can manage a large number of contacts by grouping them according to your preference, making it easier to send group emails or messages.
-
Page 44: Phone
Apps Tap More > Erase history, then tap ERASE, and delete all call logs, call recordings for the contact. Phone Make a Call Dial a Number or Select a Contact to Make a Call Use either of the following methods to make a call: Open Phone, enter part of a phone number, the first letter of a contact's name, or a •... - Page 45 Apps Manage Incoming Calls You can use the call waiting feature to answer incoming calls when you are already engaged in a previous call. If you cannot answer a call because your phone is faulty or the network signal is poor, you can also set call forwarding to forward calls to another number or device.
- Page 46 Apps Disable Call Forwarding Open Phone, go to > Settings, and touch Call forwarding. Select the forwarding mode and disable it. Emergency SOS and Calls Use Emergency SOS If you are in an emergency situation, you can quickly and secretly send an SOS message or make an SOS call to your emergency contacts.
-
Page 47: Calendar
Apps Touch to use the dialer. • During a call, you can hide the call screen and access other apps by returning to the • previous screen or home screen using the current navigation mode on your phone. To return to the call screen, touch the green icon in the status bar. Touch to end a call. -
Page 48: Clock
Apps Important Events Add priority to events and differentiate important events with a priority to highlight important events, focus on important matters, and handle them efficiently. Add Important Events Enable Calendar, tap , and tap Priority to set the event as Important in the interface of details. - Page 49 Apps Add an alarm Go to Clock > Alarm, tap to add an alarm. Follow the prompts to set the ringtone, repeating interval, etc. to save the settings. Modify or Delete an Alarm Touch an existing alarm to modify or delete it. Snooze an Alarm If you don't want to get up when an alarm rings, simply touch the snooze button or press the Power button.
-
Page 50: Notepad
Apps Notepad Create a Note To help you quickly keep a track of your thoughts and inspirations, you can create notes using the Handwrite (to write or draw content) and Scan document modes. Create Note Go to Notes, tap and select Typed note. Enter the title and content for the note. - Page 51 HONOR ID sync: Log in to your HONOR ID on your old phone and sync the notes data • from your old phone to the cloud. Log in to the same HONOR ID on your new phone to sync the Notes data.
- Page 52 Notes can be shared via As image, As text and As document. Documents in TXT or HTML format can be exported when As document and saved in Files > My files > HONOR Notes > HONOR Share by default.
-
Page 53: Email
Apps Share multiple notes: On the page of All notes list, press and hold a note to be shared, • check multiple notes to be shared, and then tap and share them by following the prompts. Print Notes In the interface of All notes list, open the note you want to print. Go to >... -
Page 54: Calculator
Apps Touch , then follow the onscreen instructions to complete configuration. The system will automatically connect to the server and check the server settings. Calculator Calculator Use the calculator on your phone to perform basic mathematical calculations and for calculating exponential, logarithmic, and trigonometric functions. Use the Basic Calculator You can open the calculator using either of the following methods: Find Calculator in the Tools folder. -
Page 55: Compass
Apps Quick widgets, tap Flashlight to add Flashlight to home screen. Then, tap Flashlight to turn on or turn off flashlight. Physical buttons: Go to Settings > Accessibility features > Shortcuts & gestures > • Quick Launch to enable Quick Launch and choose Turn on/off flashlight. When the device is off or locked and no audio is played, double-tap the volume down button to turn on or turn off flashlight. -
Page 56: App Twin
Apps Save the image: Tap the screen to pause on the current image. Tap the screen again to • resume. When the image is paused, tap to save the image. You can find the saved image in Gallery. Adjust mirror brightness: Tap at the top of the screen. -
Page 57: Device Clone
Apps Manage Data Usage Open System Manager , then touch Data usage to view data usage and manage network access. Device Clone Use Device Clone to Move Data to Your New Device Device Clone lets you quickly and seamlessly move all the basic data (including contacts, calendar, images, and videos) from your old phone to your new phone. - Page 58 Apps Try it out: Provide the Try now button for key or complicated functions. Tap to go straight • to the interface of the function. The feature availability varies by device. • If Tips is deleted by mistake, you can get it back by: Swipe down from the home screen, type •...
-
Page 59: Wi-Fi
Transfer Data Using Wi-Fi Direct You can use Wi-Fi Direct to transfer data between HONOR devices. Wi-Fi Direct allows you to transfer large files to a nearby device more quickly than Bluetooth and without having to pair the devices. -
Page 60: Bluetooth
Settings On the sending device, touch and hold to select the files you want to share, touch and select Wi-Fi Direct. These steps may be different if you are sharing files directly from an app. Touch the icon of the receiving device to establish a connection, then share the files. On the receiving device, accept the Wi-Fi Direct transfer request. -
Page 61: Mobile Network
Settings Unpair a Bluetooth Device On the Bluetooth settings screen, enable the Bluetooth switch. In the list of Paired devices, touch next to the name of the device you wish to unpair, then touch Unpair. Mobile Network Connect to Mobile Data Make sure that mobile data is available on your SIM card. - Page 62 Settings Name Your SIM Card You can name your SIM cards for easier identification and management. For example, you could mark one SIM card as "Work" and the other as "Personal". Go to Settings > Mobile network > SIM management, and touch to edit the SIM card name.
-
Page 63: More Connections
Settings Swipe down from the top right of the screen to open the Control Center. Tap • enable or disable Airplane mode. Go to Settings > Mobile network and toggle on or off Airplane mode. • After you turn on the Airplane mode for the first time, Wi-Fi and Bluetooth on your phone will be turned off automatically. - Page 64 Swipe down from the top right of the screen to open the Control Center, then turn on or • turn off HONOR Share. You can also touch and hold HONOR Share to access its settings screen. Go to Settings > More connections > HONOR Share to enable or disable HONOR Share.
- Page 65 On the receiving device, tap ACCEPT to accept the transfer. On the receiving device, go to Files, tap Phone > HONOR Share under the Browse tab to view the received file.
-
Page 66: Home Screen & Wallpaper
• Bluetooth. On your phone, preview the file to be printed, then go to Share > HONOR Share. Once the printer has been discovered, touch its name on your phone, and adjust the settings on the preview screen. Then touch PRINT to print. - Page 67 Settings When you turn on face unlock, the phone may be unlocked when you try to turn on the screen, which causes you to miss the Always On Display. Please avoid having your face directly in front of the phone. Select GIF images or animated photos You can display a local image (such as a GIF image or animated photo) when the screen is off to make the Always On Display vivid and interesting.
-
Page 68: Display And Brightness
Settings From under Analog or Digital on the Always On Display screen, swipe left or right to browse the clock styles and select your preferred clock style. Set the related options for the selected clock style, such as Show date. Touch APPLY. - Page 69 Settings Text and icon boldness:The boldness of text and icons on the screen. • Adjust Display Size Go to Settings > Display & brightness > Display size, and you can adjust the size of pictures or other elements on the screen by dragging the controller. Automatically Adjust the Screen Brightness Your phone will automatically adjust the screen brightness according to the ambient lighting conditions.
- Page 70 Settings Set a Schedule for Eye Comfort Mode Go to Settings > Display & brightness > Eye Comfort & Sleep, enable Scheduled, then set Start and End according to your preferences. Dark mode Soften screen brightness to bring you an immersive visual experience, and can turn on and off automatically with sunset and sunrise, saving power and trouble.
-
Page 71: Sounds
Settings Smart screen resolution adjustment Go to Settings > Display & brightness > Screen resolution and turn on Smart Resolution. The system will adjust the screen resolution up or down according to the apps being run. Manually adjust the screen resolution Go to Settings >... - Page 72 Settings Notifications • Alarms • Music, Videos, Games • Calls • Press the Power Button to Mute Your Device When It Rings When your phone rings for an incoming call or alarm, you can press the Power button to mute it. Flip to mute When you receive a call, flip the phone to mute it.
-
Page 73: Notifications
Settings Set up More settings Go to Settings > Sounds & vibration > More settings and explore more ways to alert. Such as Screen lock, Screenshot. Enable or disable Do Not Disturb You can enable or disable Do Not Disturb using any of the the following methods: Swipe down from the top right of the screen to open the Control Center, turn on or off Do •... - Page 74 Settings Turn Off App Badges Go to Settings > Notifications & status bar, and touch App icon badges. Turn off the switch for some or all apps. Change the Badge Display Mode On the App icon badges screen, touch Badge display mode, and select Numbers or Dots according to your preference.
-
Page 75: Biometrics & Password
Settings The notification method supported by each app may be different. Notifications Turn on Screen Go to Settings > Notifications & status bar, and enable Wake screen for notifications. Your phone will then automatically turn on the lock screen when it receives a notification. Show Notification Icons in the Status Bar Go to Settings >... - Page 76 Settings Use Your Fingerprint to Access Your Safe Go to Settings > Biometrics & password > Fingerprint ID and enter your lock screen password. Turn on the switch for Access Safe and follow the onscreen instructions to link your fingerprint with the Safe. Now you can go to Files >...
-
Page 77: App
Settings Go to Settings > Biometrics & password > Face Recognition, fill in the lock screen password to enter Face Recognition, and toggle on the Show notifications. Tap Unlock device and select unlock method of Slide to unlock. To delete facial data, toggle off Show notifications. After ensuring that the lock screen password has been enrolled, refer to "Hide Content of Notifications on the Lock Screen"... - Page 78 Settings to 10%, stricter power saving measures are taken to ensure the longest standby time. It is recommended that you enable Power Saving mode when the battery level is lower than or equal to 20%. To do so, go to Settings > Battery (or System Manager > Battery), and enable Power Saving mode .
-
Page 79: Storage
Settings Battery Settings You can also set whether or not to display the battery percentage in the status bar, and whether to maintain a network connection when the phone screen is turned off. Display Battery Percentage in the Status Bar Go to Settings >... -
Page 80: Privacy
Settings Enable App Lock Go to Settings > Security & privacy > Device & data protection > App Lock > ENABLE, then follow the onscreen instructions to set the App Lock password and select the apps to lock. If you have enabled face or fingerprint unlock, you can link App Lock with a face ID or fingerprint ID as prompted. - Page 81 Settings Enable Color Correction to Customize the Screen Color Color correction helps people with poor eyesight see the screen content more easily. Go to Settings > Accessibility features > Accessibility > Color correction and enable Color correction. Magnification gestures You can zoom in on the screen using magnification gestures. Go to Settings >...
-
Page 82: System & Updates
Settings TalkBack Go to Settings > Accessibility features > Accessibility > TalkBack, enable TalkBack, and tap OK. Adjust Speech Rate Go to Settings > Accessibility features > Accessibility > Text-to-speech, and drag the slider of Speech rate. If ScreenReader has been enabled, you need to drag the slider with two fingers. - Page 83 Settings The system support many languages, but not all. You might not find the language you • want. You can also swipe up the screen to the bottom of the language list and tap Update list • there to update the languages supported by the system. Tap Region to select your country/region.
- Page 84 If Stay in sync is enabled, and the Data Sync switch is turned on, the Wi-Fi setting data stored locally or on the cloud of the phone and other HONOR devices (logged in to the same HONOR ID) will be restored at the same time.
-
Page 85: About Phone
35%. Connect your phone to a charger if necessary. To disable automatic updates, touch > Device settings on the Software update screen, then disable Auto-download over Wi-Fi. About Phone Legal Notice Copyright © Honor Device Co., Ltd. 2024. All rights reserved. - Page 86 This guide is for your reference only. The actual product, including but not limited to the colour, size, and screen layout, may vary. All statements, information, and recommendations in this guide do not constitute a warranty of any kind, express or implied. Model: LLY-NX1 LLY-NX3...
- Page 87 Ovaj dokument je originalno proizveden i objavljen od strane proizvođača, brenda Honor, i preuzet je sa njihove zvanične stranice. S obzirom na ovu činjenicu, Tehnoteka ističe da ne preuzima odgovornost za tačnost, celovitost ili pouzdanost informacija, podataka, mišljenja, saveta ili izjava sadržanih u ovom dokumentu.
Need help?
Do you have a question about the 200 Lite and is the answer not in the manual?
Questions and answers