Advertisement
Advertisement
Table of Contents

Subscribe to Our Youtube Channel
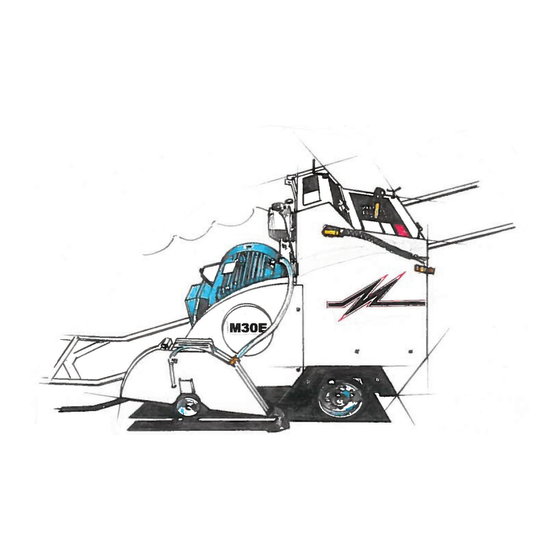
Summary of Contents for MORLEY M30E Electric
- Page 1 ORLEY EQUIPMENT CO M30E Electric OWNERS SERIAL #: MANUAL ENGINE #:...
- Page 2 WARNING If operated improperly, this machine may cause serious injury or death. • Do not wear loose clothing when operating this machine, as it may become • entangled in the equipment. Stay clear of all moving parts when the machine is running. •...
-
Page 3: Limited Warranty
WARRANTY ADJUSTMENTS: Morley Equipment Company agrees to repair or furnish any faulty component within 30- days from date of purchase, provided the machine is operated and maintained in accordance with Morley Equipment Company owner's and engine manuals and operating instructions. -
Page 4: Optional Equipment
M30 ELECTRIC SAW INFORMATION This Manual provides the basic instructions for the operation and maintenance of the M30E electric concrete saw. To comply with codes in your area of operation, you will need to install the appropriate 3-phase plug. M30 ELECTRIC:... -
Page 5: Speed Control
To adjust or replace the belts, loosen the 1/2” “pinch” bolts, one on either side at the front of the motor base plate, and the two 5/8” bolts that run vertical at the front of the motor plate. This allows the motor to be raised or lowered, loosening the belts for replacement or tensioning. Then raise the motor and tighten the bolts after belt replacement or to adjust tension. - Page 6 QUESTIONS AND CONCERNS: Should you have any questions relative to the operation or servicing of your equipment, do not hesitate to contact Morley Equipment Company at (951) 894-5558; or Email us at morleyequipco@gmail.com. A Parts List for the saw is also available online at www.morleysaws.com.
- Page 7 RAISE/LOWER VALVE ADJUSTMENT From time to time your Raise/Lower Assembly may need some minor adjustments. If your saw creeps down when the R/L Lever is returned to its “neutral” position after being raised, the needle valve is not closing completely. Needle valves wear over time.
- Page 8 M.E.C. ELECTRIC FLATSAWS GENERATOR AND CABLE/CORD REQUIREMENTS MINIMUM 100’ 100’ TO 200’ 25’ TO 50’ GENERATOR HP RATING PHASE VOLTS WIRE WIRE WIRE LOAD 230V 230V 460V 230V 18.8 230V 460V 230V 230V 460V 38.4 230V 19.2 460V 230V 24.5 460V 36.3 460V...
-
Page 9: Front Axle Assembly
M30 ELECTRIC PARTS LIST SPINDLESHAFT ASSEMBLY PARTS# REQUIRED DESCRIPTION 1100-30E Spindleshaft 1101-30E Pillow-blocking Bearing 1115-30E 4 1/2" Inner Blade Collar 1116-30E 4 1/2" Outer Blade Collar 1104-30E Left-hand Nut 1105-30E Right-hand Nut 1106-30E Sheave / 7 Groove Pulley 1107-30E Bushing 1120-30E Key - 3/8”... -
Page 10: Pointer Assembly
HYDROSTATIC DRIVE ASSEMBLY PART# REQUIRED DESCRIPTION 4100-30E Pump 4101-30E Wheel Motor 4102-30E Positraction Manifold 4103-30E Wheel Hub 3001-30E Rear Wheel - 10" x 3” 4105-30E Filter Assembly 4106-30E Filter - Hydrostatic Oil 4107-30E Reservoir - Plastic 4201-30E Forward/Reverse Lever Assembly 4109-30E Drive Cable - 26"... -
Page 11: Bladeguard Assembly
MOTOR/MOTOR CONTROLS PART# REQUIRED DESCRIPTION 8000-30E WEG W22 Premium 286TS – 3-Phase (30hp) 8001-30E Current Transformer 8002-30E Control Transformer 8003-30E Magnetic Starter 8004-30E Overload Relay 8005-30E 6” Sheave CHARGING PART# REQUIRED DESCRIPTION 3023-30E MF-51 Battery Genius 3113-30E Battery Charger BLADEGUARD ASSEMBLY PART# REQUIRED DESCRIPTION... - Page 12 M-30E Electric Tank Information Hydraulic Raise Pump Tank Located underneath the right handle bar, behind the front cover plate. Use standard automatic transmission fluid. Gear Box Vent Tank Located lower right. DO NOT FILL THIS TANK. Hydrostatic Drive Oil Tank Located on the top left side of the machine.


Need help?
Do you have a question about the M30E Electric and is the answer not in the manual?
Questions and answers