Table of Contents
Advertisement
Quick Links
User Manual
使用产品前请仔细阅读本使用说明书,并妥善保管。如果说明书丢失,您可以发送邮件至 overseas@robam.com,
获取电子版说明书。
Before operating this unit, please read the user manual completely and keep it. If the manual is lost, you can
send e-mail to overseas@robam.com, request for an electronic manual.
KQWS-2350-R315S
Electric Oven
Cod:0040306776
Advertisement
Chapters
Table of Contents

Related Manuals for Robam KQWS-2350-R315S


Summary of Contents for Robam KQWS-2350-R315S
- Page 1 User Manual 使用产品前请仔细阅读本使用说明书,并妥善保管。如果说明书丢失,您可以发送邮件至 overseas@robam.com, 获取电子版说明书。 Before operating this unit, please read the user manual completely and keep it. If the manual is lost, you can send e-mail to overseas@robam.com, request for an electronic manual. KQWS-2350-R315S Electric Oven Cod:0040306776...
-
Page 2: Table Of Contents
目 录 ..................安全注意事项... -
Page 3: 安全注意事项
电烤箱 安全注意事项 为了避免给使用者及其他人员造成危害或者财产损害,特作如下区分及标志。 均为有关安全的重要事项,敬请严格遵守,并在充分理解内容的基础上正确使用。 根 据危 害、 损害 程度 进行 的内 容区 分 危 险 若忽视这一标志,并进行错误操作,极有可能导致人员危险、重伤或引起火灾。 警告 若忽视这一标志,并进行错误操作,有可能导致人员危险、重伤或引起火灾。 注 意 若忽视这一标志,并进行错误操作,有可能导致人员受伤或造成物品的损害。 注 意 、 禁止 内容 的图标 禁 止 禁止明火 禁止触摸 禁止拆卸 严格执行 需要接地 当心触电 小心烫伤 请严格按照本说明书规定使用,由于本产品使用不当造成的任何财产损失、人身损害,本 警告 公司不承担责任。 危险 拔出插座上的插头时,必须手握插头... - Page 4 电烤箱 警 告 单独使用16A或以上的插座,请勿与 如果电源软线损坏,为避免危险, 必须由我公司或我公司维修部或类 几 个 电 器 同 时 使 用 同 一 个 电 源 插 严格执行 需要接地 似的专职人员来更换。 座,并确保插座安全有效接地。 若器具出现故障请立即断开电源停 不得损伤电源线。使用电源线时不 止使用,并且不要触摸器具,请专 得弯曲、拉伸、扭转、打结。不得 严格执行 严格执行 业人员维修。 用重物扣压、夹击电源线。 移开风扇保护装置前必须将电烤箱 为防止火警,器具必须保持清洁, 断电。清洁后,必须按使用说明把 风道必须畅通无阻。 严格执行 严格执行 用好后立即关闭器具,否则残余的 工作结束后,打开器具门时会有热 脂...
-
Page 5: 产品简介
电烤箱 产 品 简介 亲爱的用户: 让我们借此机会,对于您购买了老板牌电烤箱系列产品表示衷心的感谢。我们特别建议您在着手 安装和使用本产品前,有必要仔细阅读此说明书,并请将其妥善保存,以备今后查阅。 本公司是国内生产吸油烟机、电烤箱、燃气灶具、消毒柜等家用电器和厨具的专业企业。老板牌 电烤箱采用先进的设计理念,优化造型,注重整体设计与橱柜搭配;本产品经国家各级检测机构测评 合格;使用独有的电码防伪标志,保证用户购买正牌产品,维护自身利益。 重要信息 电烤箱的包装 请以环保的态度处置这些包装材料,以保持一个良好的环境。 请勿让儿童玩耍塑料薄膜、纸箱等包装材料,这可能会产生窒息事故,所以请让包装材料远离儿童。 产品特点 本烤箱是通过电加热管通电变热,使腔体内的空气加热升温,继而对腔体内的食物进行烘烤至熟。 此过程是通过热传递的方式对食物由外而内加热,这种加热方式不会破坏食物原有的美味,更可保 留食物中所含有的水分和营养成分。烹制的食物外酥内嫩,适合东方人的口味。 内膛及烤盘采用搪瓷处理,工作过程中不产生有害物质。 产品技术参数 KQWS-2350-R315S 型 号 220-240V~ 额定电压 50-60Hz 额定频率 2350W 额定功率 容 积 27kg 净 重 外形尺寸 595×595×531 宽 ×高×深(mm) -
Page 6: 安装说明
电烤箱 安 装 说明 在橱柜的设定位置上,按下面安装图示设定方孔,将电烤箱平稳嵌入该方孔,注意不得倾斜安置, 具体开孔尺寸(mm)见下表: 序号 名称 全嵌开孔尺寸(宽×高×深) 半嵌开孔尺寸(宽×高×深) (图片仅供参考,以实物为准) 整机尺寸示意图 半嵌开孔示意图 全嵌开孔示意图 安装 要求 : 安装电烤箱平面必须平整,柜内尽量使电烤箱周围空气流通,建议夹板和固定板采用不可燃绝热材 料。 电源线接插方便,单独使用16A或以上的插座,请勿与几个电器同时使用同一个电源插座,并确保 插座安全有效接地。周边若有其他电器,请确保安装距离大于100mm。... -
Page 7: 使用说明
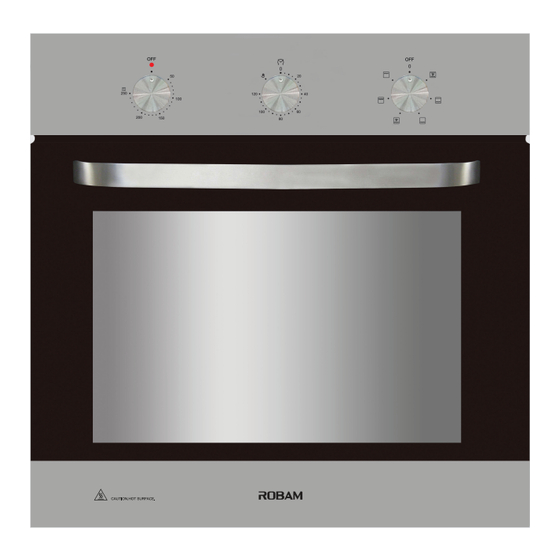
电烤箱 使 用 说 明 控制面板介绍 温度指示灯 机械定时器旋钮 温度控制旋钮 功能选择旋钮 使用前说明 首次使用烤箱时都会有异味发出,是由于储存期间电烤箱加热元件有涂层保护,加热后涂层蒸发所 致,所以先使房间保持通风,选择风扇烤功能,设定最高温度及最长工作时间,在没有食物的情况 下进行加热蒸发涂层异味,工作结束后打开烤箱门冷却,确保后续烘烤的美味度。 关机后如产品内部元件温度过高,风机会延迟一段时间后停止运转,有利于延长机器寿命。 温馨提示: 电烤箱在使用时,建议您打开吸油烟机。 使用方法 选择功能: 旋转功能选择旋钮到所需功能对应的位置,此机型为6功能烤箱。 选择烘烤温度: 烤箱功能设定完毕后,顺时针旋转温度控制旋钮到所需的温度。设定完毕后,红色指示灯亮起。 选择烘烤时间: 顺时针旋转定时器旋钮至需要烤箱工作的时间。时间设置范围为:0-120分钟。下图为定时器处 于不同位置时的功能。 零位 设置定时 不设置定时,烤箱持续工作... - Page 8 电烤箱 照明灯功能 将功能选择开关旋转到任一功能,温度、定时器均不设置,此时仅照明灯工作。 旋钮的位置如下图。 注:在正常烘烤过程中,照明灯将一直亮。 腔体冷却功能 将功能选择开关旋转到任一带对流风扇的功能,温度、定时器均不设置,此时仅照明灯 与对流风机工作,可实现腔体冷却。旋钮的位置如下图。 由于制造过程中残留的油脂以及其他保护物质的存在,烤箱初次使用时,可能会有异味, 请选择 功能,设定温度250℃持续工作1h,然后打开烤箱门通风使异味溢出。 本指南列举了食物烹饪的温度范围和大致时间,也可以通过调节来满足您的个人爱好。 为了获得最佳效果,请先将烤箱预热,待温度指示灯灭(全机械控制烤箱)或设定闹钟 倒计时完成,蜂鸣器响起表示预热完成后,再将食物放入。 使用带有风扇的功能时,建议将温度设置调低约10℃-20℃,或将时间减少约10分钟。 具体的烹饪效果请根据个人喜好调整。 食用前请确保食物已经充分烹调。 表格中的数值仅供参考,具体请根据您的经验和喜好进行调整。 部分菜品以及功能仅限特定机型。 注: 烘烤过程中需要开门时,请不要直接面对内腔,以免烫伤! 开门取物时,请佩戴高温手套或使用烤盘夹,切勿直接接触高温部件。 功能说明 图示 用 途(烤箱最底层为第一层) 能 功 上部外电热管+下部电热管 顶部和底部同时加热,后部对流风机使烤箱内部温 +对流风机 度更加均匀。适用于在烤箱第二、三层大面积烘焙。 顶部和底部同时加热,烤箱内部上下热量分布均匀。 上部外电热管+下部电热管 适用于在烤箱第三层单层烘焙。 底部加热,烤箱内部下层温度高。适用于在烤箱第 下部电热管 一、二层烘焙。 底部加热,后部对流风机使烤箱内部温度更加均匀。 下部电热管+对流风机 适用于在烤箱第一、二层烘焙。...
- Page 9 电烤箱 烘烤参考表 甜品 重量 放置层数 预热时间 温度 食物 功能 烹饪时间/min ( 由下向上) / min / ℃ 0.5Kg 150-170 10-15 饼干 0.5Kg 140-160 15-20 瑞士蛋卷 0.5Kg 170-190 10-15 180-200 20-30 松糕 180-200 20-25 0.5Kg 190-210 60-65 葡萄干 糕饼 0.5Kg 180-200 50-55 0.5Kg 180-200 25-30...
- Page 10 电烤箱 常见问题及建议 烹饪 问题 建议 蛋糕皮太硬或干 将温度调高10度,缩短烘烤时间 蛋糕皮脱落 少加水或将温度调低10度 将其放到下面的搁架,调低温 蛋糕皮烤黑 度,延长烘焙时间 烤蛋糕 少加水,调低温度,延长烘焙 蛋糕里面烤的很好外面很粘 时间 涂油在盘底,在盘底撒上面粉 蛋糕粘在盘子上 或垫上不透油的纸 面包皮掉落 减少加水量 使用颜色较深的烤盘或将烤 面包底部颜色太轻 架位置降低 烤面包 夹生 降低烘烤温度、增加烘烤时间 表格中的烘烤参数只是参考,具体应根据您的经验和喜好进行调整 肉类 预热时间 温度 重量 放置层数 食物 功能 烹饪时间/min / min (由下向上) /℃ 12-15(一面)...
- Page 11 电烤箱 鱼类 温度 重量 放置层数 食物 功能 烹饪时间/min ℃ (由下向上) 210-230 50-60 烤鱼 190-210 60-70 10-15 鱼片 三文鱼 210-230 20-25 1.5Kg 180-200 30-35 真鲷 1.5Kg 170-190 25-30 170-190 15-20 鳎鱼 160-180 10-15 1.5Kg 190-210 25-30 鳕鱼 1.5Kg 180-200 20-25 肉类、鱼类烘烤说明 在烘烤家禽和鱼类的时候,将温度设置在180度到250度之间.
-
Page 12: 常见故障及处理方法
电烤箱 常 见 故 障及 处 理 方 法 故 障 描 述 可 能 导 致 故 障 的 原 因 解 决 办 法 没 有 电 源 供 应 。 检 查 电 源 连 接 状 况 。 烤... - Page 13 电烤箱 清洁门体 按如下步骤将门体拆下。 1)将门体打开至90度。 2)将烤箱左右两铰链的压舌打开至最大角度,如图1。 3)轻轻关上门,待铰链转动一个合适角度后,将门体向上稍稍提起,然后向外拉即可 将门体拆下,如图2。 4)拆除门体上部两角处的塑料固定件,将内玻璃取下,如图3。 用抹布或者海绵蘸取带有洗涤液的温水擦拭玻璃。 按反顺序将门体装好。 注:1)装回门体时,应确保铰链下部的凹槽正确的装到门框上的孔中。 2)安装门体时,门体铰链上的压舌应用力压紧。 图1 图2 图3 停止工作,待机器冷却后,再进行清洁保 养工作。 不得使用汽油,酒精,及其他有机溶解剂,去污粉等。 以免机器 去 汽油 污 粉 酒 变色,表面漆裂。应使用专用中性清洁剂对烤箱进行清 洁养护。 精 应定期清洗烤箱,最好每次使用后都及时清洗,以免下次使用时出 现油烟或 异味。清洁时打开灯以便于看清烤箱表面。烤箱内膛谨记要用少量 洗涤液加 温水稀释后用来清洗,清洗完烤箱后立即用柔软的 布擦干。 警示 不要用尖锐的工具清洗门体以及内胆,以免造成玻璃碎裂或划伤内胆。 更换灯泡前确保烤箱断开电源。请确定使用耐高温灯泡或与 售后服务 电 烤 箱 中心联系。...
-
Page 14: 电气原理图
电烤箱 电 气原 理 图 指示灯 烤箱灯 后部风机 上部加热 过温保护器 下部加热 220-240V 烧烤加热 50-60Hz 冷却风扇 冷却风扇温控器 机械定时器... - Page 16 Contents ..................Safety Precautions .
-
Page 17: Safety Precautions
Electric Oven Safety Precautions In order to avoid any harm or property damage to the users and other persons, following distinctions and signs are specially given. All these are the important notices concerned with safety, so please abide by these notices strictly. And, please use this product correctly on the premise that all the contents herein are understood fully. - Page 18 Electric Oven Warning If the supply cord is damaged, it must be replaced by the manufacturer, its service agent or similarly qualified persons in order to avoid a hazard. Abide by strictly Use a separate 16A or higher socket, and be sure not to connect several appliances to the same power socket at the same time, and make sure To be that the socket is grounded safely and effectively.
- Page 19 Electric Oven Warning Never place any flammable substance (e.g. smoke agent) in or under the appliance; when using the appliance, be sure not to spray any smoke agent around it and that the appliance is always supervised. Prohibited In order to prevent a fire, the appliance should be kept clean and the air duct should be kept smooth.
-
Page 20: Product Introduction
Product Introduction Dear users: We take this opportunity to express our heartfelt thanks to you for your choosing of ROBAM brand electric oven series products. We especially recommend that you shall read this Manual carefully before installing and using this product and keep it properly for later reference. - Page 21 Electric Oven Product Structure (The picture is for reference only,specifications are subject to the physical product) temperature Mechanical timer List of Accessories Name Quantity 1 Pcs User Manual Wire Rack 1 Pcs Ovenware 1 Pcs Mounting Screw 4 Pcs...
-
Page 22: Installation Instructions
Electric Oven Installation Instructions Follow below illustration to set the square hole at the setting position of the cabinet. Insert the electric oven steadily into the square hole in place. Do not place the oven inclined. Full insertion hole diagram Installation Requirements: The oven must not be installed behind a decorative door in order to avoid overheating. - Page 23 Electric Oven Mechanical timer When using the oven,you must set food cooking time. 1.Turn mechanical timer to the time position you want. 2.Turn function knob to the function position you want. 3.Turn temperature knob to the temperature position you want. 4.After above operation,oven knob runs normally.
- Page 24 Electric Oven...
-
Page 25: Cleaning And Maintenance
Electric Oven CLEANING AND MAINTENANCE at 5 shelf position. - Page 26 Electric Oven Changing the Oven Lamp Before any maintenance is started involving electrical parts, the appliance must be disconnected from the power supply . If the oven has been in use, let the oven cavity and the heating elements cool down before attempting any maintenance. Changing the bulb Unscrew the protective cover.
-
Page 27: Operation In Case Of Emergency
Electric Oven Press the symbol “ ” and outward the plastic latch that is in the corner at the top of the door. Next take out the glass from the second blocking mechanism and remove. After cleaning, insert and block the glass panel, and insert in the blocking mechanism. -
Page 28: Backing In The Oven
Electric Oven BACKING IN THE OVEN... - Page 29 Electric Oven Pastry Baking Table Temp Baking time Guide level Type of pastry Guide level Temp (in min.) (from down (from down upwards) upwards) Sponge cake/marble 170-180 160-170 60-80 cake 160-180 Victoria sponge 65-80 170-180 20-30 Base for a layer cake 170-180 Sponge layer cake 30-40...
- Page 30 Electric Oven...
- Page 31 Electric Oven Roasting table Temp Temp Guide level Guide level Roasting Type of meat time (from (from bottom up) bottom up) (in min.) per 1 cm Beef 12-15 Roast beef or fille rare 220-230 Oven warmed up juicy 12-25 (medium) Oven warmed up 25-30 “well done”...
- Page 32 Electric Oven...
- Page 33 Electric Oven Grill table Weight Temp Grill time Guide level Type of meat for grill (from bottom (in grams) (in min.) Meat and sausages 14-16 2 beefsteaks,rare 2 beefsteaks,medium 16-20 2 beefsteaks,well done 20-23 2 veal staeks 19-22 4 lamb cutlets 15-18 4 grill sausages 9-14...
-
Page 34: Technical Information
Electric Oven TECHNICAL INFORMATION KQWS-2350-R315S 220-240V rating 50-60Hz 2350W 1100W 850W 1150W Electrical Schematic Diagram signal light lamp rear fan top heater thermal cut out bottom heater 220-240V grill heater 50-60Hz cooling fan cooling fan thermal mechanical timer... - Page 35 dition: A 0 / 2019.12.28...
Need help?
Do you have a question about the KQWS-2350-R315S and is the answer not in the manual?
Questions and answers