
Related Manuals for Haier HPH60IMB2


Summary of Contents for Haier HPH60IMB2
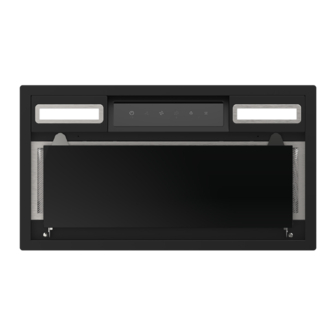
- Page 1 Built-in Integrated Rangehood Black HPH60IMB2 and HPH90IMB2 Models INSTALLATION GUIDE NZ AU...
-
Page 3: Table Of Contents
CONTENTS Safety and Warnings . . . . . . . . . . . . . . . . . . . . . . . . . . . . . . . . . . . . . . . . . . . . . . . . . . . . . . . . . . . . . . . . . . . . . . . . . . . . . . . . Components Required . -
Page 4: Safety And Warnings
SAFETY AND WARNINGS WARNING! Weight Hazard The appliance is heavy. Please ensure adequate care is taken when installing the appliance to prevent personal injury. The rangehood must be installed onto secure cabinetry. 9 kg (HPH60) Weight of the products are: 12 kg •... - Page 5 SAFETY AND WARNINGS If the supply cord of this equipment is damaged, it must only be replaced by the manufacturer, its service agent or similarly qualified person in order to avoid a hazard. Ducting accessories are not supplied. All ducting must comply with local requirements and building codes.
-
Page 6: Components Required
1x Installation instructions user guide manual Aluminium duct tape or cable ties for ducting 1x Pair v-flap (150mm diameter) Optional Recirculation Accessories 2x Black aluminium filters (HPH60IMB2) (when ducting externally not possible) 3x Black aluminium filters (HPH90IMB2) 2x Recirculation carbon filters... -
Page 7: Product Dimensions
PRODUCT DIMENSIONS Power Cord Location Ø Ducting adapter HPH60IMB2 HPH90IMB2 Overall height of product (with ducting adapter) Overall width of product Overall depth of product Thickness of flange Width of chassis Depth of chassis Height of side of chassis Width of top surface of chassis... -
Page 8: Cabinetry Cutout Dimensions
CABINETRY CUTOUT DIMENSIONS HPH90IMB2 HPH60IMB2 HPH60IMB2 HPH90IMB2 Overall width of cutout Overall depth of cutout Actual product dimensions may vary by ± 2 mm. -
Page 9: Clearances
CLEARANCES HPH60IMB2 and HPH90IMB2 MINIMUM CLEARANCE Height from top of cooktop to base of rangehood min .600 - max . recommended 750 This rangehood must be installed no lower than the minimum height indicated in the table above. Minimum installation height may be greater if required by the cooktop manufacturer or safety and warnings section on this user guide. -
Page 10: Venting Requirements
VENTING REQUIREMENTS Vent through roof and vent through exterior wall For an externally ducted installation Vent Through Roof it is recommended that 150mm diameter, rigid or semi-rigid ducting is used . Create a hole in the ceiling that's at least 160mm in diameter, ensuring precise positioning for proper installation . -
Page 11: Recirculating Venting
RECIRCULATING VENTING IMPORTANT! Venting directly into the cabinet with no ducting and louvered vent is not permitted. To recirculate your perimeter insert rangehood 1. Determine the desired location of the 150mm louvered vent on your cabinetry . The louvered vent can be placed on the side or front of your cabinet provided there is sufficient clearance from the surrounding cabinetry to enable ventilated air to recirculate back into your kitchen . -
Page 12: Carbon Filter
CARBON FILTER Carbon filters are for use in recirculating mode . They are disposable and must be replaced at least every three months to ensure the performance of the rangehood . In the event of a fire, grease-laden filters could be flammable . -
Page 13: Electrical Requirements
Before connecting the rangehood to the power supply, ensure the voltage and frequency indicated on the rating plate match that of the installation location: MODEL FREQUENCY VOLTAGE TOTAL POWER HPH60IMB2 50 Hz 220-240 V 223 W HPH90IMB2 50 Hz 220-240 V... -
Page 14: Preparing For Installation
PREPARING FOR INSTALLATION WARNING! This product is heavy and requires two persons for installation. Failure to install the screws or fixing device in accordance with these instructions may result in electrical hazards. IMPORTANT! Wear gloves to protect against sharp edges. Manufacturer is not liable for any damage caused by not following these instructions. -
Page 15: Assembling V-Flap
ASSEMBLING V-FLAP Body - outer 1. Mount the two V-flap half-parts into the body . V-flap Body - inside 2. The pins should be facing upwards . 3. Insert the axis into the holes on the body . Body - inside... -
Page 16: Installation Rangehood
INSTALLATION RANGEHOOD 1. Centre rangehood over cooktop and prepare cutout to the required specifications . Refer to 'Cabinetry Cutout Dimensions' for details . 360˚ 2. Remove the filters . 3. Remove the perimeter plate by unscrewing the screws . - Page 17 INSTALLATION RANGEHOOD 4. Lift the rangehood and fit through the opening of the cupboard till the spring loaded brackets / clips hold the product in place . 5. Secure rangehood while tightening the 4 brackets / clips . 6. Refit perimeter plate and secure using the screws removed in step 3 .
- Page 18 INSTALLATION RANGEHOOD 7. Assemble the V-flap . Refer to 'Assembling V-Flap' for details . 8. Place 150mm ducting around the rangehood outlet . Fix ducting to rangehood outlet with duct tape or cable tie . 9. Plug in the rangehood and turn on . Remove blue protective film from filters and perimeter plate .
-
Page 19: Installer Checklist
INSTALLER CHECKLIST TO BE COMPLETED BY THE INSTALLER Have all packaging been removed? Rangehood is correctly installed All connections are secure The ducting is not bent or crushed in any areas Check rangehood suction External vent is sealed appropriately All local regulations have been met Operation has been tested (refer to rangehood user guide) Check for unusual noises Complete and keep for safe reference:... - Page 20 WWW .HAIER .COM .AU WWW .HAIER .CO .NZ 432393A H0530090591 07.24...
Need help?
Do you have a question about the HPH60IMB2 and is the answer not in the manual?
Questions and answers