
Related Manuals for Haier HPH60ILX1


Summary of Contents for Haier HPH60ILX1
- Page 1 BUILT-IN INTEGRATED RANGEHOOD HPH60ILX1 and HPH90ILX1 models INSTALLATION GUIDE / USER GUIDE NZ AU...
-
Page 2: Table Of Contents
CONTENTS Safety and warnings Installation instructions Operating instructions Cleaning and maintenance Parts and accessories Service & Warranty... -
Page 3: Safety And Warnings
SAFETY AND WARNINGS WARNING! Weight Hazard The appliance is heavy. Please ensure adequate care is taken when installing the appliance to prevent personal injury. The appliance must be installed onto a solid wall, stud, beam or truss. Weight of the product is 8.5 kg (HPH60) / 9.5 kg (HPH90). - Page 4 SAFETY AND WARNINGS Before connecting any pipes, consult municipal ordinances to ensure that any ● applicable regulations concerning the discharge of exhaust air are adhered to and request permission from the person in charge of the building. Exhaust air must not be discharged into an existing flue that is used for exhausting ●...
-
Page 5: Installation Instructions
INSTALLATION INSTRUCTIONS Contents of packaging Rangehood Installation guide / 125 mm ducting adapter User guide with non return flap 13 mm screw... - Page 6 INSTALLATION INSTRUCTIONS Product and cabinetry cutout dimensions Ø HP90 HP60 Power cord location Power cord location...
- Page 7 INSTALLATION INSTRUCTIONS HP60ICSX3 HP90ICSX3 PRODUCT DIMENSIONS Overall height of product (with ducting adapter) (404) (330) Overall width of product Overall depth of product Thickness of flange Width of chassis Depth of chassis Height of side of chassis Width of top surface of chassis Length of angled surface of chassis Distance from centre of ducting outlet to back of chassis...
- Page 8 INSTALLATION INSTRUCTIONS Height of rangehood MINIMUM CLEARANCES Height top of cooktop to base of product Electric cooktop min. 600 – max. recommended 750 Gas cooktop min. 650 – max. recommended 750 This rangehood must be installed no lower than the minimum height indicated in the table above.
- Page 9 INSTALLATION INSTRUCTIONS Induction cooking considerations Induction cooktops use energy efficient technology that only heats the contents of a ● cooking pot. Unlike gas or traditional electric cooktops, the surrounding air does not get heated ● when using an induction cooktop. As a result, rangehood filters, splashbacks and surrounding cabinetry do not get warmed up, increasing the likelihood of condensation on these cooler surfaces.
- Page 10 INSTALLATION INSTRUCTIONS WARNING! This appliance is heavy and requires two persons for unpacking and installation ● Installation work and electrical wiring must be done by qualified person(s) in ● accordance with all applicable codes and standards. Failure to install the screws or fixing device in accordance with these instructions ●...
- Page 11 INSTALLATION INSTRUCTIONS Remove the filter from the rangehood. width depth Connect duct and plug rangehood in. Lift the rangehood and fit through the opening of the cupboard till the spring loaded brackets / clips hold the product in place.
- Page 12 INSTALLATION INSTRUCTIONS Secure rangehood while tightening the 2 brackets / clips.
-
Page 13: Operating Instructions
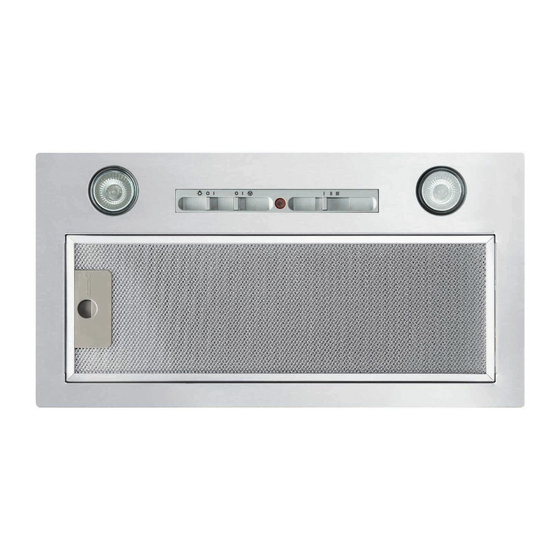
OPERATING INSTRUCTIONS Control panel CONTROL PANEL FEATURES Lights Turn the lights on or off. Turn the rangehood fan on or off. Adjust the fan speed levels from 1 – 3 with 1 being Fan speed 1 – 3 the lowest level and 3 being the highest. -
Page 14: Cleaning And Maintenance
CLEANING AND MAINTENANCE WARNING! Unplug or disconnect the appliance from the power supply before servicing ● or cleaning. When replacing the bulb, let the bulb cool, and assure that power to the ● rangehood has been turned off. Use new bulbs according to that indicated on the rangehood nameplate. - Page 15 CLEANING AND MAINTENANCE IMPORTANT! Carbon filters are disposable items and must be replaced at least every three months. ● Saturated carbon filters can become a barrier to air movement, therefore limiting ● your range hoods performance. In the event of a fire, grease laden filters could be flammable. ●...
-
Page 16: Parts And Accessories
PARTS AND ACCESSORIES ITEM REFERENCE NUMBER LED bulb 792603 Aluminium filter (HP60) 792459 Aluminium filter (HP90) 792427 Recirculation carbon filter x2 791772 150 mm ducting adapter with non return flap 792454... -
Page 17: Service & Warranty
You must produce both warranty card and proof of purchase in the event of a warranty repair being required. When you purchase any new Haier Product you automatically receive a two year Manufacturer’s Warranty covering parts and labour for servicing. - Page 18 SERVICE & WARRANTY G Pick up and delivery. H Transportation or travelling costs involved in the repair when the product is installed outside the AUTHORISED CUSTOMER SERVICE CENTRE’S normal service area. This product has been designed for use in a normal domestic environment. It is not intended for commercial use.
- Page 19 Product Detials Model ______________________ Serial Number: __________________ Date of Purchase Purchaser Dealer ______________________ Suburb______________________ Town______________________ Country______________________ Thank you for choosing Haier. We are confident that you will enjoy many years of good service from your appliance.
- Page 20 The product specifications in this document apply to the specific products and models described at the date of issue. Under our policy of continuous product improvement, these specifications may change at any time. You should therefore check with your Dealer to ensure this document correctly describes the product currently available.
Need help?
Do you have a question about the HPH60ILX1 and is the answer not in the manual?
Questions and answers