Table of Contents
Advertisement
Quick Links
Advertisement
Table of Contents

Related Manuals for NDS Radiance G2 HB 26


Summary of Contents for NDS Radiance G2 HB 26
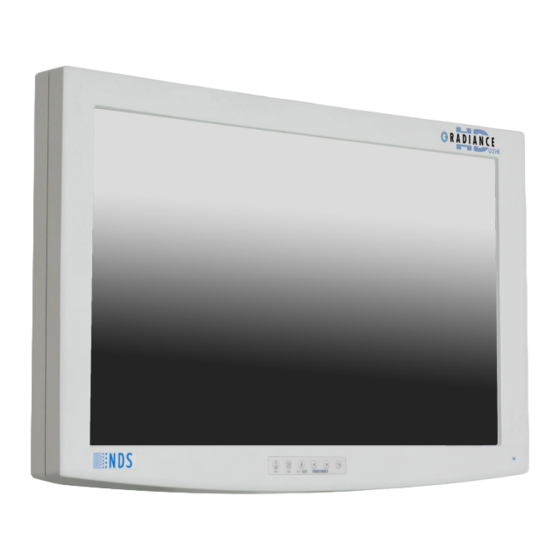
- Page 1 Radiance® G2 HB 26" USER MANUAL ENGLISH...
- Page 3 Information in this document has been carefully checked for accuracy; however, no guarantee is given to the correctness of the contents. This document is subject to change without notice. NDS provides this information as reference only. Reference to products from other vendors does not imply any recommendation or endorsement.
-
Page 4: Table Of Contents
Table of Contents Tab 1 Warnings and Cautions ----------------------------------------------------------------------------- ii Recycling ------------------------------------------------------------------------------------------------- iii Declarations of Conformity ------------------------------------------------------------------------ iv Legal Statement -------------------------------------------------------------------------------------- v Tab 2 About This Manual ------------------------------------------------------------------------------------ 1 Intended Use and Contraindications ------------------------------------------------------------ 1 Image Retention Notice ----------------------------------------------------------------------------- 1 Quick Startup ------------------------------------------------------------------------------------------- 1 Powering On The Unit ----------------------------------------------------------------------------- 1 First Time Users and Initial Test ----------------------------------------------------------------- 1... -
Page 5: Warnings And Cautions
This symbol alerts the user that important information regarding the installation and/or operation of this equipment follows. Information preceded by this symbol should be read carefully. This symbol alerts the user that the user manual and translated copies are published on the NDS website at: www.ndssi.com/user-manuals/ This symbol warns the user that un-insulated voltage within the unit may have sufficient magnitude to cause electrical shock. - Page 6 System Safety Requirements External equipment connected to the signal input/output or other connectors of this product for use in a patient environment must comply with the requirements of ISO and UL/EN/IEC 60601-1 safety standards. A person who connects such equipment to this product has by definition formed a system, and is responsible for compliance of that system to the same ISO and UL/EN/IEC 60601-1 safety standards.
-
Page 7: Declarations Of Conformity
Terms and Conditions Declarations of Conformity FCC and Council Directives of European Standards This device complies with Part 15 of FCC rules and 2017/745 Medical Device Regulation of European Union. Operation is subject to the following two conditions: (1) This device may not cause harmful interference, and (2) this device must accept any interference received, including interference that may cause undesirable results. -
Page 8: Legal Statement
NDS neither assumes nor authorizes any person to assume for it any other liabilities in conjunction with and/or related to the sale and/or use of its products. To ensure proper use, handling and care of NDS products, customers should consult the product specific literature, instruction manual, and/or labeling included with the product or otherwise available. -
Page 9: About This Manual
Connect the power supply to the display via the power plug. Plug in the AC adapter. Connect a video source to the display. Apply power to the peripheral device, then to the display. The NDS logo is displayed, followed shortly by video. -
Page 10: Connector Panels
Connector Panels Notes 1. An S-Video signal may be applied via 2 terminated cables to the Y and C labeled connectors or a DIN 4 terminated cable, but not both. 2. DVI 1 IN 1920 x 1200 maximum resolution. DVI 2 IN 1920 x 1080 maximum resolution. -
Page 11: Electrical Symbols
Electrical Symbols Equipotentiality: This symbol appears next to the display’s Potential Equalization Conductor. (ground post) Open (Off) Switch: This symbol appears on the open, or off, side of the display’s rocker switch. Closed (On) Switch: This symbol appears on the closed, or on, side of the display’s rocker switch. -
Page 12: Tab 4 Control
Control A 6 button keypad, located bottom center on the front of the display, allows the user to make adjustments to various display parameters using the On Screen Menu (OSM) system. To display the standard input menu, press the INPUT button twice. Quick Select The QUICK SELECT menu, shown below, is displayed when the keypad’s INPUT button is pressed once. -
Page 13: Image Adjustments
Image Adjustments Press this keypad button to adjust the Brightness, Contrast and / or the Backlight settings. Adjust Brightness Press the Brightness / Contrast button to display the Brightness control. Press the ◄ or ► button to adjust Primary brightness. When a PIP image is visible, press the Brightness / Contrast button again to access the Secondary brightness control. -
Page 14: Menu Systems Overview
Menu System Overview Press the MENU button once to open the On Screen Menu System (OSM). The primary and secondary inputs are shown at the top of the menu. Picture menu is displayed when the OSM is opened. Press the ◄ or ► button to select the menu you want to work with, then press the SCROLL button to select the parameter. -
Page 15: Video Source
Video Source Inputs Menu Press the INPUT button twice to open the input menu. The Input menu shows a: P for primary input in the left most column and an: S for secondary input in the column to the right of the cursor. Press the SCROLL button to highlight the desired input. -
Page 16: Pip And Swap
PIP and Swap Selecting a secondary input will display a small image of the secondary source in the upper right corner of the display. Secondary Image Size Control The size of the secondary image is controlled by pressing ◄ or ► buttons. Pressing the ► button will cycle through: Small PIP = Width of secondary image is 25% of total screen width. -
Page 17: Gpio
GPIO General Purpose Input Output (GPIO): The GPIO control allows the user to step through the Secondary image sizes as described on page 8, swap the Primary and Secondary images or display a Record indicator in the upper left corner of the display. Refer to the Input Menu shown below when setting up the Primary and Secondary inputs. -
Page 18: Display Setup
Display Setup HD-SDI Picture Menu SD-SDI, S-Video and Composite Picture Menu Horizontal Position (SD-SDI, S-Video and Composite only): This control is disabled when Overscan is set to 0. Moves the image to the left or right. Press ◄ or ► to horizontally center the image. Vertical Position (SD-SDI, S-Video and Composite only): This control is disabled when Overscan... -
Page 19: Vga,Sog, Rgbs And Ypbpr Picture Menu
Select using ◄ or ► buttons. SmartSync™ / Alternative Modes On initialization NDS’ proprietary SmartSync technology examines the incoming signal and automatically displays the video image in its proper format. To run SmartSync highlight the SmartSync / Alternative Modes parameter and press the ◄ button. -
Page 20: Dvi-Digital Picture Menu
DVI Digital Picture Menu Overscan (Video) This parameter is enabled when the input is 16:9 480P 576P or interlaced. 0 = The image is displayed at a size that fills the screen without losing any video information. The image presented to the display may include black bars top and bottom or left and right. 1, 2, 3, 4, 5 or 6 = The image is linearly enlarged, while remaining centered, in incremental steps. -
Page 21: Color Menu
Color Menu Gamma: Press ◄ or ► to select a preset Gamma (1.8, 2.0, 2.2, or 2.6), Video PACS Notes: Video is a color corrected Look Up Table (LUT). PACS is a DICOM-like LUT. Note: This product is capable of displaying Radiology (PACS) images for reference, not diagnostic, purposes only. -
Page 22: Setup Menu
Setup Menu Menu Position: Places the menu in 1 of 9 predefined screen positions. Press the ◄ or ► button to select any of the 9 screen positions. Language: Selects 1 of 8 languages: English, Deutsch, Français, Italiano, Svenska, Español, Nederlands, . -
Page 23: Defaults Menu
Defaults Menu Factory Defaults: Displays Restoring Factory Defaults message and returns all settings to their factory preset values. Press the SCROLL button to highlight Factory Defaults, then press the ► button. User Defaults: Allows up to five customized user setting profiles to be saved. Setting User Defaults 1. -
Page 24: Troubleshooting
Frequency is set correctly. Black Screen: Power the display Off and On. If the NDS logo appears then the display is working properly. Check if the power management feature (DPMS) is enabled. A “Searching” message appears in the lower right hand corner when the video source is not present. -
Page 25: Drawing And Dimensions
Drawing and Dimensions... -
Page 26: Data Connectors And Pinouts
Data Connectors and Pinouts DVI-I* Digital and Analog . 1 RED 6 GND RED 11 N. C. DVI-I Supports digital and analog (RGBS / YPbPr). 2 GREEN 7 GND GREEN 12 DDC_SDA Analog data appears on pin 8 and pins, C1 through C5. 3 BLUE 8 GND BLUE 13 HORIZ SYNC... -
Page 27: Control Connectors And Pinouts
No Connection Note: No Connection Flash Upgrade Cable part number: 35Z0047 is available from NDS. Flash Upgrade and Serial Control Rx General Purpose Input and Output (GPIO) Swap: Closing the Swap Pin to GND swaps the position and size of the Primary and Secondary images. See page 8 for details. -
Page 28: Tab 9 Specifications
Specifications Viewable Diagonal (inches) 26.0 Maximum Luminance (cd/m2, typical) Native Resolution 1920 x 1080 Dot Pitch (mm) .300 Vertical Viewing Angle 178° Horizontal Viewing Angle 178° Contrast Ratio (nominal) 1400:1 VGA Input signal level at 75 Ohms 0.7 V p-p HD-SDI Input signal level .8 to 2.0 V p-p S-Video Input signal level... -
Page 29: Video Inputs
SDI Supported Resolutions DVI Supported Resolutions Horizontal Vertical Vertical Horizontal Vertical Vertical Signal Parameter Supported Range Resolution Resolution Frequency Resolution Resolution Frequency Active Resolution 640 x 480 min to 1920 x 1200 max (pixels) (lines) (Hz) (pixels) (lines) (Hz) (Horizontal x Vertical 480i 29.97 1280... -
Page 30: Cleaning And Disinfecting Instructions
Ethanol 80 % by volume Unacceptable solvents: MEK (Methyl Ethyl Ketone) Toluene Acetone *Note: The acceptable cleaning and disinfecting materials listed above have been tested on NDS products and, when used as directed, do not harm the product’s finish and or its plastic components. -
Page 31: Electromagnetic Compatibility (Emc) Tables
Electromagnetic Compatibility Tables All medical electronic devices must conform to the requirements of IEC 60601-1-2. Precautions, adherences to the Electromagnetic Compatibility (EMC) guideline information provided in this manual and verification of all medical devices in simultaneous operation are required to ensure the electromagnetic compatibility and co- existence of all other medical devices prior to a surgical procedure. - Page 32 Electromagnetic Emissions Emissions Compliance Electromagnetic environment-- guidance RF emissions Group 1 The product uses RF energy only for its internal function. Therefore, its RF emissions are very low and are not likely to cause any interference in nearby CISPR 11 electronic equipment.
- Page 33 Electromagnetic Immunity Guidance and Manufacturer’s Declaration: Electromagnetic Emissions The product is intended for use in the electromagnetic environment specified below. The customer or the user of the product should assure that it is used in such an environment. Immunity Test Immunity Test Electrostatic discharge (ESD) IEC 61000-4-2 ±2, ±4, ±6, ±8kV contract discharge...
- Page 34 Recommended Separation Distances Recommended separation distances between portable and mobile RF communications equipment and the product The product is intended for use in an electromagnetic environment in which radiated RF disturbances are controlled. The customer or the user of the product can help prevent electromagnetic interference by maintaining a minimum distance between portable and mobile RF communications equipment (transmitters) and the product as recommended below, according to the maximum output power of the communications equipment.
- Page 36 +81 3 5753 2466 info@ndssi.com Oriental Media Center Suite 2302, Tower C No.4, Guang Hua Road Chao Yang District Beijing, 100026 China +86 10 8559 7859 info@ndssi.com NDS Quality System ISO 13485 FDA Registration #2954921 March 2021 60A0426 Rev M...
Need help?
Do you have a question about the Radiance G2 HB 26 and is the answer not in the manual?
Questions and answers