Teletype 28 Quick Start Manual
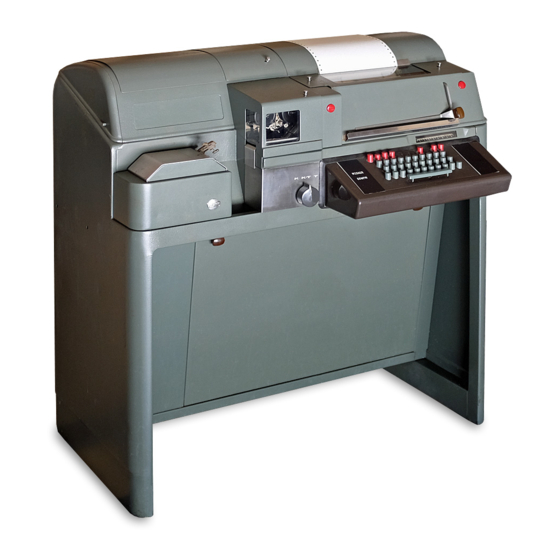
Keyboard send-receive (ksr) and receive-only (ro) teletypewriter sets
Hide thumbs
Also See for 28:
- Technical manual (733 pages) ,
- Manual (228 pages) ,
- Adjustments (170 pages)
Advertisement
Quick Links
TELETYPE CORPORATION
Skokie, Illinois, U. S. A.
CONTENTS
1.
GENERAL. . . . . . . . . . . . . . . . . . .
2.
DISASSEMBLY AND REASSEMBLY ..
SINGLE UNIT CONSOLE OR TABLE
MODEL SETS ................
SKINTIGHT OR RACK MOUNTED
SETS ......................
WALL MOUNTED SETS ..........
MULTIPLE MOUNTED KSR AND
RO SETS ....................
1.
GENERAL
1. 01
This section provides the information for
the disassembly and reassembly of com
ponent units from a 28 Keyboard Send-Receive
(KSR) or a Receive-Only (RO) Teletypewriter
Set.
1. 02
The sequence
herein should be followed when disas
sembly of a complete set is undertaken. Refer
to Section 570-005-800TC for list of tools.
CAUTION:
REMOVE ELECTRICAL POWER
FROM
SET
BEFORE
SEMBLY.
2.
DISASSEMBLY AND REASSEMBLY
2. 01
When removing a unit from the set, the
procedure followed and the location from
which mounting screws are removed should be
carefully noted so that reassembly can be done
correctly. Where no specific instructions are
given for reassembly,
used in removal of the unit.
28 KEYBOARD SEND-RECEIVE (KSR) AND
RECEIVE-ONLY (RO) TELETYPEWRITER SETS
DISASSEMBLY AND REASSEMBLY
PAGE
1
1
1
2
2
2
of procedures
outlined
STARTING
DISAS
reverse the procedure
© 1967 by Teletype Corporation
All rights reserved.
Printed in U. S. A.
SECTION 573-100-702TC
SINGLE UNIT CONSOLE OR TABLE
SETS
2. 02
Unlatch and
raise
Reach inside the cabinet and loosen the
knurled thumb screw at each end of crossbar.
Slide the crossbar toward either end and lift out.
Note:
The KSR or RO set may be tilted in
the LAC cabinet for better access to the rear
of the typing unit or to the electrical ser
vice unit. In order to tilt the units, remove
the two s crews with lockwashers and flat
washers that secure the rear cradle rail to
the right and left cradle rails. Raise the
typing unit and base up at the rear until the
rear cradle rail is latched by a latch provided
on the right side of the cabinet.
2. 03
Remove the four screws that secure the
typing unit to its base. Disconnect the
cable connector from the right side frame. Lift
the typing unit up and out of the cabinet.
2. 04
Remove th e four hexagonal studs (one at
each corner) that secure the keyboard or
base to the cradle of the cabinet. Unplug the
cable connector at left rear portion of the key
board or base. Lift keyboard or base up and out.
2. 05
Remove the mounting stud from each end
of the electrical service unit. Disengage
the switch rod from the right end of the elec
trical service unit box by pressing against the
tension of its retaining spring, and sliding the
rod several inches forward.
make sure the forward end points to the right.
Note: The electrical service unit may be
turned upside down in cabinet for servicing.
2. 06
To completely
service unit from the cabinet,
nect the remaining cables and wires from the
terminal board at the rear of the cabinet. L ift
unit out.
Issue 1, March, 1967
MODEL
the cabinet dome.
replacing the rod
In
remove
the electrical
discon
Page 1
Advertisement

Related Manuals for Teletype 28


Summary of Contents for Teletype 28
- Page 1 This section provides the information for cable connector from the right side frame. Lift the disassembly and reassembly of com the typing unit up and out of the cabinet. ponent units from a 28 Keyboard Send-Receive (KSR) or a Receive-Only (RO) Teletypewriter Set. 2. 04...
- Page 2 SECTION 573-100-702TC 2. 07 T he lower compartment door on floor 2. 14 Remove the four hexagonal studs one at models if equipped may be completely each corner that secure the keyboard or removed and used as a maintenance tray. Loosen base to its mounting.
Need help?
Do you have a question about the 28 and is the answer not in the manual?
Questions and answers