Table of Contents
Advertisement
Quick Links
Advertisement
Table of Contents

Related Manuals for Pentair STARK RS72


Summary of Contents for Pentair STARK RS72
-
Page 2: Table Of Contents
TABLE OF CONTENTS 1 Basic Principles of Operation ..………………..5 1.1 Filtration – How Your Filter Works 1.2 Backwash 1.3 Principles of Operation 1.3.1 Diaphragm Valve Operation 1.3.2 Single Tank – Normal Operation 1.3.3 Single Tank – During Backwash 1.3.4 Dual Tank – Normal Filtration 1.3.5 Dual Tank –... - Page 3 4 Maintenance …………………………………………… 57 4.1 Periodic Backwash 4.2 Periodic Inspection of Filters 4.3 Draining the Filters 4.4 Installation/Removal of Manway Cover 4.5 Removal of Sand Media 4.6 Winterizing the Filter Tanks APPENDIX APPENDIX A: Pressure Drop Curves ………………………………………. 62 APPENDIX B: Media Requirements (for sand and gravel) ………………. 73 APPENDIX C: Troubleshooting ………………………………………………...
- Page 4 ™ This guide provides installation and operation instructions for the Stark Series Filters. Consult Pentair Commercial Aquatics with any questions regarding this equipment. Attention Installer: This guide contains important information about the installation, operation and safe usage of this product. This information should be given to the owner and/or operator of this equipment after installation or left on or near the filter.
- Page 5 IMPORTANT WARNING AND SAFETY INSTRUCTIONS This filter must be installed in accordance with the all applicable local codes and ordinances. Improper installation could result in death or serious injury to users, installers, or others and may also cause damage to property. Always disconnect power to the filtration system at the circuit breaker before servicing the filter.
-
Page 6: Basic Principles Of Operation
We suggest reading this manual through once to familiarize yourself with it before proceeding with installation and operation. Again, thank you for purchasing your high rate sand filter from Pentair Commercial Aquatics. 1 Basic Principles of Operation Your high rate sand filter is designed to operate for years with a minimum amount of maintenance when installed, operated and maintained in accordance with these instructions. -
Page 7: Backwash
™ The pressure in the Stark High Rate Sand Filter will increase and the flow of water through the filter will diminish as dirt accumulates in the filter. Eventually, the filter will become obstructed enough with dirt that it will become necessary to backwash the filter. Please note that a filter removes suspended matter but it does not sanitize the pool. -
Page 8: Principles Of Operation
1.3 Principals of Operation This section will familiarize you with how the face piping kit and valves work in order to provide a ™ means of backwashing the Stark High Rate Sand Filter. It will cover how the diaphragm valves operate, the flow of water in a single tank system in normal filtration and backwash modes, a dual tank system in normal filtration and backwash modes, and a multiple tank system in normal filtration and backwash modes. -
Page 9: Dual Tank - Normal Filtration
1.3.4 Dual Tank - Normal Filtration During normal filtration in a dual tank system, water is split between the two tanks. It passes through the influent piping and then through the sand beds. It is then passed through the collection laterals at the bottom of the tanks and passed out of the effluent piping and returned to the pool. -
Page 10: Multiple Tank - Normal Filtration
1.3.6 Multiple Tank - Normal Filtration During normal filtration in a multiple tank system, water is split between the multiple tanks. It passes through the influent piping and then through the sand beds. It is then passed through the collection laterals at the bottom of the tanks and passed out of the effluent piping and returned to the pool. -
Page 11: Installation And Assembly
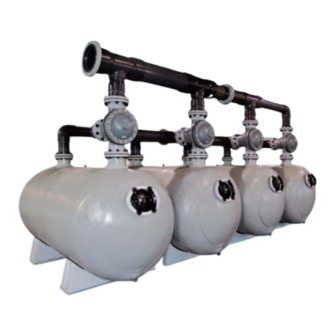
2 Installation and Assembly If you have purchased the vessel(s) with the optional face piping kit, please refer to additional documentation provided with the face piping kit. 2.1 Receiving and Inspecting • ™ Upon receipt of Stark High Rate Sand Filter(s), check the filter pallet(s) and auxiliary cartons for any evidence of damage due to rough handling in shipment. - Page 12 Figure 1 "A" "B" "C-C" Model (in.) (in.) (in.) RS60 RS72 SS48 46 1/4 SS96 SS96 5S30 5S35 5S40 5S45 5S50 • For “S” vessels, ensure that the tank(s) are level, both across each pipe connection and from the influent pipe to the effluent pipe. For two tank systems, make sure the tanks are level to each other.
- Page 13 ™ High Rate Sand Filter Installation and User’s Guide Pg. 12 of 74 STARK 06/09/14 Rev. F...
-
Page 14: Setting Anchor Bolts
2.3 Setting Anchor Bolts NOTE: Local, county, and state codes may require that the tanks be anchored in a specific way. Please verify before proceeding with anchor installation. • If the tanks are to be anchored to the slab, mark the holes when the tanks are in their desired position on the slab. - Page 15 • Flange Make up – once a flange is joined to pipe, the method of joining two flanges is as follows: • Piping runs joined to the flanges must be installed in a straight-line (flanges must be parallel) to avoid stress at the flange due to misalignment. Once installed, all piping must be fully supported with bracing and hangers (by others) to prevent damage to the system from weight and vibration.
-
Page 16: Backwash Controller Installation
2.5 Backwash Controller Installation NOTE: This section covers the installation of semi-automatic and automatic backwash controllers for single tank, dual tank and multiple tank systems. 2.5.1 Semi-automatic Controller (CM200) - Single Tank Installation The single tank semi-automatic controller kit consists of the following: (1) Controller gauge panel (2) 3/8”... - Page 17 STEP 1: Controller Support Assembly Attach controller supports to the gauge panel assembly using the ¾” isoplast nuts and bolts. Attach so the channel side of the supports is away from the gauge panel. Tighten bolts, but do not over tighten, as this may crack the face of the gauge panel.
- Page 18 STEP 2A: Attach Gauge Panel to Pipe Insert notched end of pipe clamps into the channel of the controller supports. Attach the gauge panel assembly to the waste extension (see picture). Slide remaining pipe clamps into the channels of the controller supports.
- Page 19 STEP 3: Installation of Controller Tubing Connect length of tubing from supply source (water or compressed air) to the inlet side of the regulator. Please note, the water source must be able to supply water at a pressure of 35 psi minimum. Connect length of tubing from the outlet side of the regulator to the inlet end of the check valve.
- Page 20 Drill and tap for ¼” NPT hole on the influent and effluent pipes from the filter system (see schematic diagram in Appendix B). Install quick connect fittings into pipe. Be sure to use pipe thread sealant tape on the threads. Install 3/8” OD tube from fittings to rear of the gauge panel assembly.
-
Page 21: Semi-Automatic Controller (Cm200) - Dual Tank Installation
2.5.2 Semi-Automatic Controller (CM200) – Dual Tank Installation The dual tank semi-automatic controller kit consists of the following: (1) Controller gauge panel (3) 3/8” OD tube quick connect tees (3) 3/8” OD x ¼” MNPT quick connect fittings (1) Check valve w/ fittings (1) And/Or Valve (100 ft) 3/8”... - Page 22 STEP 3: Installation of Controller Tubing Connect length of tubing from supply source (water or compressed air) to the inlet side of the regulator. Please note, the water source must be able to supply water at a pressure of 35 psi minimum. Connect length of tubing from the outlet side of the regulator to the inlet end of the check valve.
- Page 23 Drill and tap for ¼” NPT hole on the influent and effluent pipes from the filter system (see schematic diagram in Appendix B). Install quick connect fittings into pipe. Be sure to use pipe thread sealant tape on the threads. Install 3/8” OD tube from fittings to rear of the gauge panel assembly.
-
Page 24: Semi-Automatic Controller (Cm200) - Multiple Tank Installation
2.5.3 Semi-Automatic Controller (CM200) – Multiple Tank Installation The multiple tank semi-automatic controller kit consists of the following: (1) Controller gauge panel (1) 3/8” OD tube quick connect tee (3) 3/8” OD x ¼” MNPT quick connect fittings (1) Check valve w/ fittings (200 ft) 3/8”... - Page 25 STEP 3: Installation of Controller Tubing Connect length of tubing from supply source (water or compressed air) to the inlet side of the regulator. Please note, the water source must be able to supply water at a pressure of 35 psi minimum.
- Page 26 Drill and tap for ¼” NPT hole on the influent and effluent pipes from the filter system (see schematic diagram in Appendix B). Install quick connect fittings into pipe. Be sure to use pipe thread sealant tape on the threads. Install 3/8” OD tube from fittings to rear of the gauge panel assembly.
-
Page 27: Automatic Controller (Ca100) - Single Tank Installation
2.5.4 Automatic Controller (CA100) - Single Tank Installation The single tank automatic controller kit consists of the following: (1) Automatic controller enclosure (1) Multiport valve enclosure (4) 3/8” OD tube quick connect tees (3) 3/8” OD x ¼” MNPT quick connect fittings (1) Check valve w/ fittings (100 ft) 3/8”... - Page 28 STEP 1: Attach Controller/Multiport Enclosures to Piping Insert notched end of pipe clamps into the channel of the enclosure supports. Attach the enclosure assemblies to the waste extension (see picture). Slide remaining pipe clamps into the channels of the enclosure supports.
- Page 29 Connect tubes to each side of the quick connect tee. Connect one tube to the multiport pressure gauge and the other to the center fitting on the multiport valve (see picture). Drill and tap for ¼” NPT hole on the influent and effluent pipes from the filter system (see schematic diagram in Appendix B).
- Page 30 Connect a length of tube from the open end of the quick connect tee from the valves to the fitting on the back of the multiport valve enclosure as shown in the picture. Connect tube from remaining quick connect fitting and connect to drain.
-
Page 31: Automatic Controller (Ca100) - Dual Tank Installation
2.5.5 Automatic Controller (CA100) – Dual Tank Installation The dual tank automatic controller kit consists of the following: (1) Automatic controller enclosure (1) Multiport valve enclosure (5) 3/8” OD tube quick connect tees (3) 3/8” OD x ¼” MNPT quick connect fittings (1) And/Or Valve (1) Check valve w/ fittings... - Page 32 STEP 1: Attach Controller/Multiport Enclosures to Piping Insert notched end of pipe clamps into the channel of the enclosure supports. Attach the enclosure assemblies to the waste extension (see picture). Slide remaining pipe clamps into the channels of the enclosure supports.
- Page 33 Connect tubes to each side of the quick connect tee. Connect one tube to the multiport pressure gauge and the other to the center fitting on the multiport valve (see picture). Drill and tap for ¼” NPT hole on the influent and effluent pipes from the filter system (see schematic diagram in Appendix B).
- Page 34 Connect tubes into respective fittings on the back of the multiport valve enclosure. Connect a tube from remaining quick connect fitting and connect to drain. Connect the four wires from the rear of the multiport valve enclosure to the rear of the automatic controller enclosure.
-
Page 35: Automatic Controller (Ca100) - Multiple Tank Installation
2.5.6 Automatic Controller (CA100) – Multiple Tank Installation The multiple tank automatic controller kit consists of the following: (1) Automatic controller enclosure (1) Multiport valve enclosure (3) 3/8” OD tube quick connect tees (3) 3/8” OD x ¼” MNPT quick connect fittings (1) Check valve w/ fittings (200 ft) 3/8”... - Page 36 STEP 1: Attach Controller/Multiport Enclosures to Piping Insert notched end of pipe clamps into the channel of the enclosure supports. Attach the enclosure assemblies to the waste extension (see picture). Slide remaining pipe clamps into the channels of the enclosure supports.
- Page 37 Connect tubes to each side of the quick connect tee. Connect one tube to the multiport pressure gauge and the other to the center fitting on the multiport valve (see picture). Drill and tap for ¼” NPT hole on the influent and effluent pipes from the filter system (see schematic diagram in Appendix B).
- Page 38 Connect each tube from the tank valves to the respective fitting on the back of the gauge panel assembly as shown in the picture (up to 10 tanks). Connect tube from remaining quick connect fitting and connect to drain. Connect the four wires from the rear of the multiport valve enclosure to the rear of the automatic controller enclosure.
-
Page 39: Backwash Controller (Cs400) - Single Tank Installation
2.5.7 Backwash Controller (CS400) - Single Tank Installation The single tank backwash controller kit (CS400) consists of the following: (1) CS400 backwash controller enclosure (2) 3/8” OD tube quick connect tees (3) 3/8” OD x ¼” MNPT quick connect fittings (1) Check valve w/ fittings (100 ft) 3/8”... - Page 40 STEP 1: Attach Controller/Multiport Enclosures to Piping Insert notched end of pipe clamps into the channel of the backwash controller enclosure support. Attach the backwasher controller enclosure to the waste extension (see picture). Slide remaining pipe clamps into the channels of the enclosure support. Use the nuts and bolts supplied to tighten the clamps on to the pipe.
- Page 41 Connect tubes to each side of the quick connect tee. Connect one tube to the multiport pressure gauge and the other to the center fitting on the multiport valve (see picture). Drill and tap for ¼” NPT hole on the influent and effluent pipes from the filter system (see schematic diagram in Appendix B).
- Page 42 Connect a length of tube from the open end of the quick connect tee from the valves to the fitting on the back of the backwash controller enclosure as shown in the picture. Connect tube from remaining quick connect fitting and connect to drain. This completes the installation of the backwash controller (CS400) for single tank systems.
-
Page 43: Backwash Controller (Cs400) - Dual Tank Installation
2.5.8 Backwash Controller (CS400) - Dual Tank Installation The dual tank backwash controller kit (CS400) consists of the following: (1) CS400 backwash controller enclosure (3) 3/8” OD tube quick connect tees (3) 3/8” OD x ¼” MNPT quick connect fittings (1) Check valve w/ fittings (1) And/Or Valve (100 ft) 3/8”... - Page 44 STEP 1: Attach Controller/Multiport Enclosures to Piping Insert notched end of pipe clamps into the channel of the backwash controller enclosure support. Attach the backwasher controller enclosure to the waste extension (see picture). Slide remaining pipe clamps into the channels of the enclosure support. Use the nuts and bolts supplied to tighten the clamps on to the pipe.
- Page 45 Connect tubes to each side of the quick connect tee. Connect one tube to the multiport pressure gauge and the other to the center fitting on the multiport valve (see picture). Drill and tap for ¼” NPT hole on the influent and effluent pipes from the filter system (see schematic diagram in Appendix B).
- Page 46 Connect tubes into respective fittings on the back of the backwash controller enclosure. Connect a tube from remaining quick connect fitting and connect to drain. This completes the installation of the backwash controller (CS400) for dual tank systems. Please see Owner’s/Operator’s Manual for backwash controller set up and operation.
-
Page 47: Backwash Controller (Cs400) - Multiple Tank Installation
2.5.9 Backwash Controller (CS400) - Multiple Tank Installation The multiple tank backwash controller kit (CS400) consists of the following: (1) CS400 backwash controller enclosure (1) 3/8” OD tube quick connect tee (3) 3/8” OD x ¼” MNPT quick connect fittings (1) Check valve w/ fittings (200 ft) 3/8”... - Page 48 STEP 1: Attach Controller/Multiport Enclosures to Piping Insert notched end of pipe clamps into the channel of the backwash controller enclosure support. Attach the backwasher controller enclosure to the waste extension (see picture). Slide remaining pipe clamps into the channels of the enclosure support. Use the nuts and bolts supplied to tighten the clamps on to the pipe.
- Page 49 Connect tubes to each side of the quick connect tee. Connect one tube to the multiport pressure gauge and the other to the center fitting on the multiport valve (see picture). Drill and tap for ¼” NPT hole on the influent and effluent pipes from the filter system (see schematic diagram in Appendix B).
- Page 50 Connect each tube from the tank valves to the respective fitting on the back of the gauge panel assembly as shown in the picture (up to 6 tanks). Connect tube from remaining quick connect fitting and connect to drain. This completes the installation of the backwash controller (CS400) for multiple tank systems. Please see Owner’s/Operator’s Manual for backwash controller set up and operation.
-
Page 51: Operation (Semi-Autonomous Controller)
2.6 Operation (Semi-Automatic Controller) The diaphragm valve style face piping kits are designed for simple operation and maintenance. Backwashing is accomplished by turning a single knob to actuate the diaphragm valves. The automatic controller can be set up to backwash automatically dependant on certain chosen parameters, as well manually if required (refer to automatic controller manual for more information). - Page 52 The semi-automatic controller consists of a single gauge panel with gauges to measure influent and effluent pressures, water pressure supplied to the multiport valve, and the multiport valve knob, which is used to actuate the valves. The influent and effluent pressure gauges show the water pressure coming into and out of the filter system.
- Page 53 STEP 2: Verify that multiport pressure gauge returns to normal pressure. When actuating the valves the pressure to the multiport valve drops. When the valves become actuated the pressure gauge will begin to rise, and should return to its preset value (35 psi minimum).
- Page 54 Once system piping and proper valve installation is complete. Including hydraulic lines for valve activation. Hydro test system*. This must be done prior to adding media, start pump, allow system to fill with water to (bleed out all air). Run system for several minutes while doing this inspect for leaks and any unnecessary vibrations that can be reduced by additional support.
-
Page 55: Inspection Of Components
2.7 Inspection of Components Before performing the initial start up of the filter system, inspect the tanks and components to ensure that no damage has occurred during the shipment of the vessel. • Check for loose, damaged, and missing laterals. If they are loose, tighten them to hand tight, making sure that the slots are facing down. -
Page 56: Pressure Test System
2.8 Pressure Test System WARNING : Filters should never be tested or subjected to air or gas under pressure. All gases are compressible, and under pressure create a danger. Severe bodily injury or property damage could occur if the filter is subjected to air or gas pressure. -
Page 57: Start-Up And Operation
3 Start-up and Operation The following steps should be followed in the order shown for initial start up of the filter system. Each section will be explained in more detail in the following pages. 1. Start system in backwash mode 2. - Page 58 4 Maintenance ™ Although a Stark High Rate Sand Filter vessel is designed to operate for many years with little maintenance, there are some items that should be periodically inspected. In certain situations, periodic maintenance may be necessary. The following is a list of items that should be checked periodically, as well as some maintenance items, which may need to be performed.
- Page 59 4.2 Periodic Inspection of filters Part of the maintenance schedule that is suggested for these tanks is to check certain areas of the filter tanks for signs of possible problems. Below are some key areas, which should be inspected regularly. •...
- Page 60 4.3 Draining the Filters ™ Some maintenance may require the Stark High Rate Sand Filters to be drained of all water. To accomplish this you must: • Make sure that the system is shut down. Isolate all water sources from the filter(s). •...
- Page 61 • Install yokes, bolts, and washers. Make sure the yokes are in the proper locations. See picture at right. • Snug yoke bolts. Tighten bolts one full turn past hand tight. If manway leaks during refilling of system, tighten bolts in quarter turn increments until leak stops. After filter is at operating pressure, yokes will be loose due to internal pressure.
- Page 62 • When the water is drained from the system, drain all of the water in the backwash line. • Loosen any flanges in low-lying sections of piping to completely drain the system of water. • Store any plugs/caps removed near the filter and mark all flanges that have been loosened so that they may be reinstalled and tightened at time of start up.
- Page 63 ™ STARK High Rate Sand Filter Installation and User’s Guide Pg. 62 of 74 06/09/14 Rev. F...
- Page 64 APPENDIX A R Model Filter Pressure Drop Curves ™ STARK High Rate Sand Filter Installation and User’s Guide Pg. 63 of 74 06/09/14 Rev. F...
- Page 65 S Model Filter Pressure Drop Curves ™ STARK High Rate Sand Filter Installation and User’s Guide Pg. 64 of 74 06/09/14 Rev. F...
- Page 66 4X Model Filter Pressure Drop Curves 4X Clean Filter Pressure Drop (#20 Sand) 100F gpm per sq.ft. 4X Clean Filter Pressure Drop (#20 Sand) 60F 4 X 6 4 X 8 4 X 10 4 X 12 4 X 14 1000 1200 ™...
- Page 67 5x Model Filter Pressure Drop Curves 5X Clean Filter Pressure Drop (#20 Sand) 100F gpm per sq.ft. 5X Clean Filter Pressure Drop (#20 Sand) 60F 5 X 8 5 X 10 5 X 12 5 X 14 5 X 16 1200 1600 ™...
- Page 68 5S Model Filter Pressure Drop Curves (Sand) 5X Clean Filter Pressure Drop (#20 Sand) 100F gpm per sq.ft. 5S Clean Filter Pressure Drop (#20 Sand, 60°F) 5S30 5S35 5S40 5S45 5S50 1000 1200 ™ STARK High Rate Sand Filter Installation and User’s Guide Pg.
- Page 69 APPENDIX B (For Sand and Gravel) Media Requirements: Sand (**and Gravel) Media Filter Media Sand Gravel Gravel Filter Freeboard Area Required Required Required Depth Model Height (in) Depth (in) (in) 13.5 R-60 15.5 12.5 10.0 12.5 17.2 R-72 19.0 15.5 10.0 12.5 12.8...
- Page 70 APPENDIX C Problem Possible Cause Solution Maintain pool chemistry. Consult pool service technician 1. Water chemistry not in balance Verify media size with media vendor. Consult Appendix B of this manual for proper media sizing. If the media is the incorrect size, replace with proper media. 2.
- Page 71 APPENDIX D Pressures for Pressures for ∆ P Dirty Filter ∆ P Clean Filter Dirty Filter Backwashed Filter =(Influent - Effluent) =(Influent - Effluent) (Psi) (Psi) (Psi) (Psi) Date Time Influent Effluent Influent Effluent Start-up Start-up 1. After performing the backwash for the initial start up, and returning the filter to normal operation, record the clean filter influent and effluent pressures into the first line of the chart and calculate ∆...
- Page 72 APPENDIX E ™ STARK High Rate Sand Filter Installation and User’s Guide Pg. 71 of 74 06/09/14 Rev. F...
- Page 73 APPENDIX F ™ High Rate Sand Filter Installation and User’s Guide Pg. 72 of 74 STARK 06/09/14 Rev. F...
- Page 74 APPENDIX G ™ High Rate Sand Filter Installation and User’s Guide Pg. 73 of 74 STARK 06/09/14 Rev. F...
-
Page 75: High Rate Sand Filter Installation And User's Guide
APPENDIX H ™ STARK High Rate Sand Filter Installation and User’s Guide Pg. 74 of 74 06/09/14 Rev. F... - Page 76 Unless expressly noted, names and brands of third parties that may be used in this document are not used to indicate an affiliation or endorsement between the owners of these names and brands and Pentair Water Pool and Spa, Inc. Those names and brands may be the trademarks or registered trademarks of those third parties.
Need help?
Do you have a question about the STARK RS72 and is the answer not in the manual?
Questions and answers