Table of Contents
Advertisement
Quick Links
Advertisement
Table of Contents
Troubleshooting

Related Manuals for TAIKO Audio Olympus

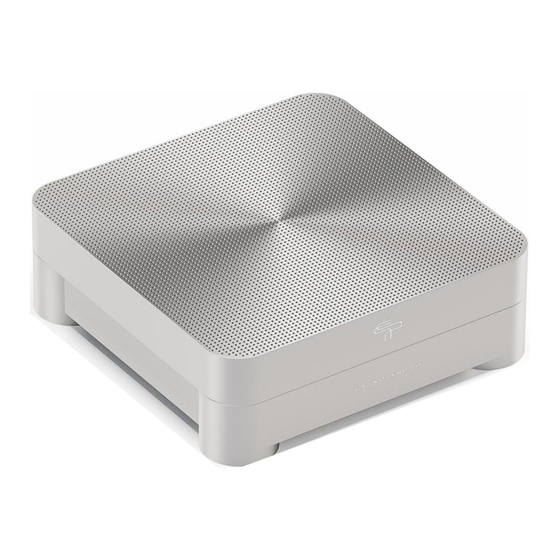
Summary of Contents for TAIKO Audio Olympus
- Page 1 Olympus & Olympus I/O Manual P a g e...
-
Page 2: Preface
This manual will help you with installing and using the server. Enjoy your new Olympus Server and/or Olympus I/O and the improvement of audio quality that it brings! Your Taiko Audio Team. -
Page 3: Table Of Contents
2.7 Battery Management System (BMS) App ..................2.8 PCI Slots – Olympus Server ......................2.9 PCI Slots – Olympus I/O ........................ 2.10 Olympus-specific Network Card and USB Card ................2.11 XDMS and Roon ..........................2.12 Contents ............................2.13 Back Panel Diagram – Olympus Server .................. - Page 4 5.9 Changing the XDMI Daughter Board in the Olympus Server ............. 5.10 Changing the XDMI Daughter Board in the Olympus I/O ............Olympus Server Bottom Panel Screws Diagram ................Olympus I/O Bottom Panel Screws Diagram ..................Digital setup............................ 6.1 Connecting with the app ......................
-
Page 5: About This Document
Server + Olympus I/O. Olympus I/O moves both XDMI and the network card from the server to its own chassis. The Olympus I/O can also be ordered separately to add to an Olympus server at a later time, or to an Extreme server. -
Page 6: Introduction
"signal path". Introduction With Olympus, we are introducing the culmination of close to 4 years of research and development. Taiko's relentless pursuit of audio realism and the harnessing of the most modern technologies has led to the creation of our popular Extreme music server 5 years ago, which we have been steadily improving and updating with new technologies over the course of its life cycle. -
Page 7: Battery Power Supply (Bps)
XDMI output module at a time and has no USB option. Olympus I/O moves both XDMI and the network card from the server to its own chassis. This means the network signal will be connected to Olympus I/O first and then pass through to Extreme Server or Olympus Server by QSFP. -
Page 8: Battery Management System (Bms) App
PCI Slots – Olympus Server The Olympus Server has 5 vertical PCIe slots, one of which is for the Music Storage Drive, one for the Network Card, and one for the XDMI Output Card. Slot 4 is free but blocked when the AES/EBU module or MSB Pro ISL module are fitted. -
Page 9: Olympus-Specific Network Card And Usb Card
2.10 Olympus-specific Network Card and USB Card The Extreme and the Olympus are very different designs. As a result, the USB and network cards used in the Extreme Server cannot be used with the Olympus. Instead, we have developed versions especially for this purpose. - Page 10 To install the server, you also need the following parts (not included): iPad, iPhone, smartphone, or desktop When using XDMI Analog: an Analog preamplifier or Integrated Amplifier. When using XDMI Digital: a DAC with AES/EBU or S/PDIF input. When using XDMI native external DAC connection (Lampizator, MSB, dCS, or potential other): a brand-specific XDMI interface, to be supplied by the DAC vendor.
-
Page 11: Back Panel Diagram - Olympus Server
2.13 Back Panel Diagram – Olympus Server Above: Olympus back panels with Analog Output XDMI board mounted Above: Olympus back panels with Digital AES/SPDIF Output XDMI board mounted Above: Olympus back panels with Lampizator XDMI board mounted P a g e... - Page 12 Above: Olympus back panels with MSB Pro ISL Output XDMI board mounted P a g e...
-
Page 13: Technical Specifications
2.14 Technical specifications Dimensions P a g e... - Page 14 1x Charger Power Supply Storage Info The Olympus Server can house a single u.3 drive, which is available in sizes from 4 to 60 TB. Internal Storage is particular to the Olympus, and existing Extreme server storage, which is a m.2 type, cannot be moved physically.
- Page 15 With a very short window to charge the battery packs all at once, this can be up to 150 watts for the Olympus Server and up to 100 watts for the Olympus I/O.
-
Page 16: Conformity
Cleaning and removing user installed software may incur service charges. 2.15 Conformity The Taiko Audio Olympus server and Olympus I/O are designed and tested according to the following regulations and directives: EMC directive 2014/30/EU NEN-EN 55032:2015... -
Page 17: Safety
For detailed instructions, please refer to our separate “Migrate Storage Guide” that can be found in the Downloads section on the Taiko Audio website. •... -
Page 18: Transport And Storage
3.2.4 Children and vulnerable users Caution! • This server can be used by children aged from 8 years and above and persons with reduced physical, sensory or mental capabilities or lack of experience and knowledge if they have been given supervision or instruction concerning use of the server in a safe way and understand the hazards involved. -
Page 19: Installation
To achieve the best audio quality possible with this server, we recommend following these tips: • The Olympus server and I/O are not particularly sensitive to the influence of power cables, although cables still modulate the current draw sound signature effect on a power distributor, resulting in certain audible effects. -
Page 20: Powering The Server And I/O
The server is now connected to all necessary equipment. Powering the Server and I/O Both the Olympus server and I/O are equipped with a main power switch at the rear. The Olympus server additionally has an on/standby button on the underside of the front panel. See the Olympus Server Front Panel and Bottom Panel Diagram below. - Page 21 Olympus Server Front Panel and Bottom Panel Diagram – Location of the On/Standby button P a g e...
- Page 22 5.4.1 Switching on the server To switch on the server for the first time, do the following: 1. Press the front panel button. The Operating System will start up. After approximately 20 seconds, the middle LED comes on, indicating that the Operating System is booted. The server will need approximately 10 more seconds to become fully operational.
-
Page 23: Shipping Mode
When purchased as a bundle, the Server and I/O will be supplied with the QSFP Interface Expander cards and XDMI Output Card of your choice pre-mounted. Next, simply connect the two XDMI Interface cards in the Olympus Server with those in the Olympus I/O using the supplied 2 QSFP DD cables. - Page 24 Above: Location of Drive, Network Card, and XDMI Output Board in the Olympus Server P a g e...
-
Page 25: Adding Olympus I/O To Extreme Server
Adding Olympus I/O to Extreme Server The Olympus I/O will be supplied with 2 external QSFP Interface Expander Cards that need to be mounted in the Olympus Server. One Interface Expander card goes in place of the Extreme’s Network Card and the other goes in place of the Extreme’s USB Card. -
Page 26: Changing The Xdmi Daughter Board In The Olympus Server
12. Locate the two 2-mm HEX (inbus) screws that hold the PCI card in place. Note that the XDMI Card is secured from the rear side of the unit, not on top of the bracket. See the Olympus Server XDMI Card Diagram below. - Page 27 26. The server is now ready for use. Above: a photo of the DAC/Analog Daughter Board showing the locations of the 4 screws that secure the Daughter Module to the XDMI board. P a g e...
-
Page 28: Changing The Xdmi Daughter Board In The Olympus I/O
10. Unscrew the screws that secure the XDMI card in the PCI slot. Note that the XDMI card is secured from the rear side of the unit, not on top of their bracket. See the Olympus I/O XDMI Card Diagram below. -
Page 29: Olympus Server Bottom Panel Screws Diagram
Olympus Server Bottom Panel Screws Diagram Location of the four 4-mm Hex (inbus) screws that secure the server’s top and bottom sections. Olympus I/O Bottom Panel Screws Diagram Location of the four 4-mm Hex (inbus) screws that secure the I/O’s top and bottom sections. - Page 30 Olympus Server XDMI Card Diagram Location of the two 2-mm Hex (inbus) screws that secure the XDMI Card. Olympus I/O XDMI Card Diagram Location of the two 2-mm Hex (inbus) screws that secure the XDMI Card. To Be Added P a g e...
-
Page 31: Digital Setup
2. Open the Roon app on your control device (usually an iPad). Make sure the device that runs the app is connected to the same network as the server. The app starts looking for devices. OLYMPUS••••• appears in the app (for example: OLYMPUS21100). - Page 32 4. Click on Login 5. Click Continue P a g e...
-
Page 33: Music Source And Output Setting
When you want to use the server’s internal storage drive, your music will need to be transferred. When you upgraded from Extreme to Olympus, your data will need to be migrated because the drives are not compatible. For detailed instructions, please see our separate “Migrate Storage Guide”... - Page 34 Disable the Music Folder by clicking on Disable. b. Click on Add Folder to select music stored on the server. c. Enter the internal Olympus Music Drive D: d. Optionally, click on Add Network Folder to add a NAS.
- Page 35 • If you have an account for the streaming service, or want to try it out, click the get started button for the selected service. The initial setup is now complete. Next, the app starts setting up your music library. You can already listen to music when the app is still setting up your music library.
- Page 36 1. Click the settings “Gear Wheel” button at the top. 2. Click Audio. The audio settings screen opens and shows all available output zones. You will find your DAC under Connected to Roon Server. P a g e...
- Page 37 Additional steps can be taken to achieve the best possible sound from Roon. For this, please refer to our separate “Recommended Roon Settings” document which can be found in the Downloads section of the Taiko Audio website. P a g e...
-
Page 38: Accessing The File Structure Of The Server
You need the name and IP address of the server. You can find this information in the General section of the Roon app’s settings menu, under the Olympus name. The name should be the same as the name in §6.2 (OLYMPUS•••••). -
Page 39: Accessing The Desktop Of The Server
Operating System. Whereas the Extreme Server featured four USB Profiles that could be loaded from the desktop, this is no longer required for the Olympus. Any changes or updates, if required, can be done externally, or with assistance from our Support Team. -
Page 40: Maintenance
Maintenance Caution! Never use water to clean the server. Water can cause unrepairable damage to the server. Try to keep the room where the server is installed as dust-free as possible. Wipe the server with a clean and soft cloth when it gets dusty. Updating the software The server is supplied with all the required software and drivers. -
Page 41: Troubleshooting
After 15 seconds, switch on your DAC. When the DAC is ready for use, press the front panel button (1) to switch on the server. You can contact the Taiko Audio Team anytime via support@taikoaudio.com for help. P a g e... -
Page 42: Disposal
Disposal If your server is defective, contact Taiko Audio. We can possibly repair it or give it a second life. If you have to dispose of the server, dispose of it according to the locally applicable guidelines. Caution! When you sell the server to a new owner, make sure to add this manual or a copy of this manual.
Need help?
Do you have a question about the Olympus and is the answer not in the manual?
Questions and answers