Table of Contents
Advertisement
Quick Links
INSTALLATION MANUAL, USE AND CARE AND WARRANTY FOR
CUISINE
SEALED
TOWER BURNERS
(Model Numbers
on page 15)
CUISINE
ARR-305DF
DESIGN
BEFORE USING YOUR APPLIANCE, PLEASE READ THIS MANUAL, PAYING SPECIAL ATTENTION TO THE
IMPORTANT SAFETY INSTRUCTIONS LOCATED IN THE NEXT SEVERAL PAGES
This manual is divided into several sections: (Model numbers for Cuisine Burner Ranges page 12 and Performer Burner Ranges page 13)
Important Safety Instructions informs you about significant safety precautions when installing and operating your new appliance.
2
THIS IS A MUST READ SECTION OF THE MANUAL.
Installation Section describes how to unpack the unit, what to save and what to discard, installation dimensions, gas and electrical
7
connections and how to identify the primary parts of the product so you can better understand what's going on "under the hood. "
How to Operate Your Range Section shows you how to light the burners, set the range for broil or bake and how to
26
use convection to speed cooking times and improve the quality of your baked and roasted dishes.
Care and Cleaning discusses how to keep your product in good operating condition, how to identify what might be going wrong
32
with the unit, and how to communicate your observations with authorized field service technicians.
32
Troubleshooting describes how to troubleshoot common issues.
33
Iconica Model and Parts Identification shows available parts for your range.
34
Warranty
WARNING
!
» Failure to follow this warning statement could result
in fire, explosion, or burn hazard that could cause
property damage, personal injury or death.
DO NOT ATTEMPT TO EXTINGUISH AN OIL/GREASE FIRE WITH WATER.
4580 N. Walnut Rd., N. Las Vegas, NV 89081 | 13592 Desmond St., Pacoima, CA 91331 | tel: 818.897.0808 | 888.753.9898 | www.AmericanRangeHome.com
ICONICA DUAL FUEL RANGES
ABOUT THIS MANUAL
RETAIN THIS MANUAL FOR FUTURE REFERENCE
NEVER OPERATE THE TOP SURFACE COOKING SECTION
OF THIS APPLIANCE UNATTENDED.
Shown with optional leg caps.
CLASS
» If a fire should occur, keep away from the
appliance and immediately call your fire
department.
PERFORMER
OPEN BURNERS
(Model Numbers
on page 16)
PERFORMER
ARROB-486GRDF
FUNCTION
Advertisement
Table of Contents

Related Manuals for American Range CUISINE ARR-305DF


Summary of Contents for American Range CUISINE ARR-305DF
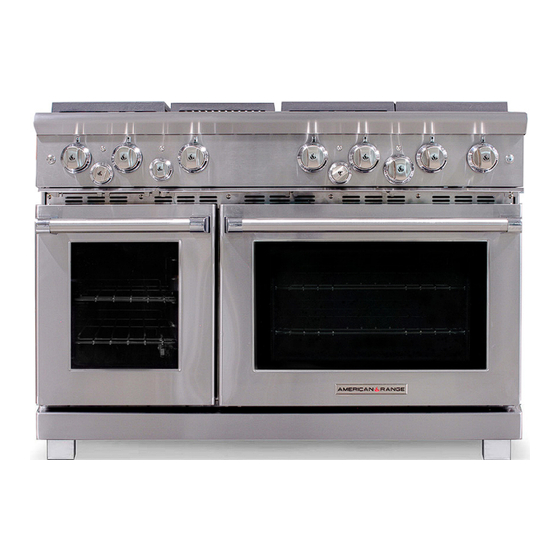
- Page 1 INSTALLATION MANUAL, USE AND CARE AND WARRANTY FOR ICONICA DUAL FUEL RANGES CUISINE PERFORMER SEALED OPEN BURNERS TOWER BURNERS (Model Numbers on page 16) (Model Numbers on page 15) CUISINE PERFORMER ARR-305DF ARROB-486GRDF Shown with optional leg caps. DESIGN CLASS FUNCTION ABOUT THIS MANUAL BEFORE USING YOUR APPLIANCE, PLEASE READ THIS MANUAL, PAYING SPECIAL ATTENTION TO THE...
-
Page 2: Important Safety Instructions
IMPORTANT SAFETY INSTRUCTIONS FOR YOUR SAFETY! Do not store or use gasoline or other flammable vapors or YOUR YOUR liquids in the vicinity of this or any other appliance. SAFETY SAFETY WARNING! Improper installation, adjustment, alteration, service or WARNING WARNING maintenance can cause property damage, injury or death. - Page 3 » The required use of a GFI is normally related to the location of the receptacle to its proximity to significant sources of water or moisture. » American Range will not warranty any problems resulting from GFI outlets which are not installed properly or do not meet the requirements below.
-
Page 4: What To Do If You Smell Gas
IMPORTANT SAFETY INSTRUCTIONS WARNING IF THE INFORMATION IN THIS MANUAL IS NOT FOLLOWED EXACTLY, A FIRE OR EXPLOSION MAY RESULT CAUSING DAMAGE, PERSONAL INJURY OR DEATH INSTALLATION AND SERVICE MUST BE PERFORMED BY A CERTIFIED / LICENSED INSTALLER, SERVICE AGENCY OR THE GAS SUPPLIER »... - Page 5 » This range can tip causing personal injury » See Installation Instructions supplied with the range and install the anti-tip device packaged with the range » If the anti-tip device cannot be located, contact American Range Customer Service by calling 818.897.0808 or by contacting us at www.AmericanRange.com 4580 N.
- Page 6 IMPORTANT SAFETY INSTRUCTIONS CAUTION Purchase a kitchen fire extinguisher for your home and store it in close proximity to your appliance. Should an uncontrolled fire occur, never use water on grease fires. Never pick up a flaming pan. The oven door interior and exterior, especially the glass can get hot during operation.
-
Page 7: Installation
INSTALLATION DIMENSIONS, SPECIFICATION, GAS and ELECTRICAL REQUIREMENTS CUISINE and PERFORMER RANGES 30" MODELS 36" MODELS 48" MODELS 60" MODELS A) Overall Depth 30" (762) 30" (762) 30" (762) 30" (762) B) Overall Width 29-7/8" (759) 35-7/8" (911) 47-7/8" (1216) 59-7/8" (1521) C) Overall Height (top of side panels) 36"... - Page 8 INSTALLATION RANGE LOCATION: The location for the range must meet the following criteria. If any of these criteria are not met, select another location. CABINET PREPARATION: 1. The range is a free standing appliance. If the range is to be adjacent to cabinets, the clearances shown below, and on the next page, are required.
-
Page 9: Installation Instructions
INSTALLATION INSTALLATION INSTRUCTIONS Use protective gloves WARNING and safety glasses. The installation of the appliance must be performed by a qualified, certified, and Keep any packaging materials away from children. licensed installer. Ask for assistance when lifting heavy objects. » Products are anchored to the wooden shipping pallet using metal straps that are Dispose of all packaging materials properly. -
Page 10: To Install Door
INSTALLATION REMOVAL AND INSTALLATION OF THE OVEN DOOR (Steps is repeated for models with 2 doors) Note that the oven door has a Slow Close feature. Incorrect door installation may result in the non-operation of this feature. Removal of the door is necessary to facilitate the moving and installation of the appliance, especially in heavier models. Push Lever Down And In Push Lever Down And In Slow Closing Lever... -
Page 11: Leveling The Appliance
INSTALLATION LEVELING THE APPLIANCE The appliance was designed to be installed in a 36" high cabinet with countertop. The appliance is equipped with legs and casters which can be adjusted up to 1" high. Measure the countertop, approximately at the 4 positions, shown below. LEVELING THE APPLIANCE Similarly, measure the appliance at the approximate positions and adjust the legs accordingly. -
Page 12: Gas Connections
INSTALLATION GAS CONNECTIONS Move appliance to the desired installation area. Locate the gas connection access cover. Remove the (2) screws and access cover. CONNECT GAS and ELECTRICAL SUPPLY GAS CONNECTIONS GAS CONNECTIONS The appliance is supplied with a regulator and (1) 1/2"NPT 90 Elbow, Move appliance to the desired installation area. -
Page 13: Connect To Gas Supply
GAS CONNECTIONS (continued) Connect to gas supply. INSTALLATION IMPORTANT: Before placing appliance into operation, always check for gas leaks. This must be performed by your dealer, a qualified licensed plumber, or the gas company. CONNECT TO GAS SUPPLY. IMPORTANT: Before placing appliance into operation, always check for gas leaks. All items below shall be supplied by the customer: This must be performed by your dealer, a qualified licensed plumber, or the gas company. -
Page 14: Electrical Connections
INSTALLATION ELECTRICAL CONNECTIONS Move appliance to desired installation area. Locate access cover and remove the (3) screws. REMOVE (3) SCREWS REMOVE ACCESS COVER Insert conduit connector into the supply cord. Insert supply cord with conduit connector through the hole on support bracket. Refer to label to connect the black, white, red, and green wires. - Page 15 INSTALLATION CUISINE BURNERS INSTALL THE BURNERS AND GRATES CUISINE: Step 1) Assemble D-Tower Burner Cap; C-Tower Burner Caps [3x] and D-Dual Burner Inner (1) and Outer (1) Heads and Beauty Ring BURNER CAP [MED] BURNER CAP [SML] INNER BURNER HEAD Step 2) Assemble Cooking Grates.
- Page 16 INSTALLATION PERFORMER BURNERS INSTALLATION INSTALL THE BURNERS AND GRATES PERFORMER: Step 1) Cut and Remove Plastic Straps Which Holds the Burners to the Burner Sup- ports. CUT AND REMOVE PLASTIC STRAPS Step 2) Assemble the (2) Cooking Grates and (1) Center Top Grate. PERFORMER BURNER CONFIGURATIONS AND MODEL NUMBERS ARROB-304DF ARROB-366DF...
- Page 17 INSTALLATION REMOVING AND REPLACING RACKS (Standard Rack) STEP 1 STEP 2 Place rack on the desired position as shown. Tilt the rack front side slightly to clear the rack stop and slide towards the rear. NOTE: To remove rack during or after cooking, use dry oven mitts or pot holders.
- Page 18 INSTALLATION STEP 1 Extend the left and right glides at the same length, and hold rack and glides, one on each side. Choose rack position and locate rear hang tabs on the left and right glides and place on the left and right rack side supports. STEP 2 Push rack assembly in until the front hang tabs hit the front rods of the side supports.
- Page 19 INSTALLATION CAUTION Before doing any maintenance, disconnect power to the appliance and wait until the oven is cool. CAUTION Handle the cover glass and halogen bulb carefully to avoid breaking. Broken glass may cause injury. Any maintenance on appliances with French doors must be performed by a qualified service technician. Improper CAUTION handling and replacement of the doors may result in improper oven operation, door breakage and personal injury.
- Page 20 INSTALLATION Follow all safety instructions in this manual. WARNING Failure to do so may result in fire, electrical shock, personal injury and death. It is recommended that electrical connections and wire sizes are adequate and in conformance with the National Electrical Code, ANSI/ NFPA 70-latest edition or C22.1 Canadian Electrical Code Part1.
-
Page 21: Anti-Tip Device Installation
INSTALLATION ANTI-TIP DEVICE INSTALLATION Installation instructions are intended for wood and/or concrete floors and walls. Any other type of surfaces may require special installation techniques necessary for the proper fastening of the anti-tip device. Installers are responsible to provide hardwares for other types of mounting situations. -
Page 22: Top View
INSTALLATION ANTI-TIP DEVICE INSTALLATION STEP 2 Position Anti-Tip device center 1-1/2” from the side cabinet and align back edge to the back wall. Mark MARK (2) HOLE center of holes for drilling on floor and back wall. CENTERS FOR DRILLING ON FLOOR 1 1 2 "... -
Page 23: Anti-Tip Bracket Installation
INSTALLATION ANTI-TIP DEVICE INSTALLATION STEP 3 ANTI-TIP BRACKET INSTALLATION 1. For wooden walls, wall studs and floors, drill 18" pilot holes. Use the hardware provided with this kit. WALL STUD ANTI-TIP BRACKET FLOOR 2. For concrete wall and floors, the drilled pilot hole size may depend on the plastic anchor or concrete anchors used. - Page 24 INSTALLATION ANTI-TIP DEVICE INSTALLATION STEP 5 Move the range slowly back to the final location, making sure the anti-tip device on the range is properly engaged with the anti-tip bracket. 4580 N. Walnut Rd., N. Las Vegas, NV 89081 13592 Desmond St., Pacoima, CA 91331 tel: 818.897.0808 888.753.9898 www.AmericanRangeHome.com...
-
Page 25: Installation Checklist
TO VALIDATE YOUR WARRANTY, YOU MUST MAIL, EMAIL OR FAX THIS FORM WITH A COPY OF YOUR RECEIPT TO: AMERICAN RANGE CUSTOMER SERVICE, 13592 DESMOND STREET, PACOIMA, CA 91331 EMAIL: info@americanrange.com FAX: 818.897.8839 This checklist has been developed to assure proper installation of your appliance. -
Page 26: Operating Your Range
OPERATING YOUR RANGE OVENS 101 COOKWARE RECOMMENDATIONS The oven is a temperature controlled cooking cavity which is highly To avoid the risk of serious injury, damage to the range or insulated to keep the kitchen cool the food hot. The oven contains cookware, please observe the following guidelines. - Page 27 OPERATING YOUR RANGE Oven Control Panel Operation 1. Oven Mode Cycle Light 2. Oven Light Push Button Switch 3. Oven Temperature Cycle Light 4. Oven Mode Select Knob 5. Temperature Select Knob Warm Use mode to keep cooked food at serving temperature. Maximum temperature is 170°F. Rotate Mode Select Knob to WARM position and the Oven Mode Cycle Light shall turn on.
- Page 28 OPERATING YOUR RANGE Convection Bake Similar to BAKE mode, except that a convection fan is used to circulate the heated air in the oven. Compared to BAKE, the temperature is lowered by 25°F, cook times may slightly decrease and multiple trays can be used. Refer to recipes or package directions for oven temperature settings, Preheat and baking times.
- Page 29 OPERATING YOUR RANGE BEFORE USING THE NEW COOKTOP If the flames look odd, (too small, too large, lazy or drifting, uneven » Before using the cooktop for the first time, wash the outside around the burner circle, etc.), check to see that the burner head area with soap and water to remove any shipping and factory is seated correctly on the burner base.
-
Page 30: Grill Chart
OPERATING YOUR RANGE GRILL OPERATION (GR Models Only) BEST COOKING RESULTS WHEN USING YOUR GRILL Make sure there is nothing on the grilling rack prior to igniting the The intense radiant heat from the grill vaporizes the surface of grill. Push the knob in and turn it counter-clockwise to the HIGH your food, locking in flavor. - Page 31 OPERATING YOUR RANGE CARE AND CLEANING SEASON THE GRIDDLE: It is always easier to clean as you go – and while some evenings 1. The griddle has a factory applied coating that must be washed you’d rather sit down with a good book instead of a Scrubby, off prior to use.
-
Page 32: Troubleshooting
CARE AND CLEANING RECOMMENDATIONS PART / MATERIAL CLEANING SUGGESTIONS BEING CAREFUL Soft Scrub may be used here. With a cool or slightly warm Since the surface is glass (it can be scratched by certain Main Top/ surface, use a damp sponge or cloth as recommended by the materials) try to rub gently in small circles to allow time and Porcelain Enamel manufacturer. - Page 33 ICONICA MODEL AND PARTS IDENTIFICATION CUISINE SEALED AND PERFORMER OPEN BURNERS Oven Racks Cuisine Sealed Burners Performer Open Burners Center Grate Burner Grates Control Knobs Griddle Backyard Grill Regist. Card Page15 Island Back Use and Care Manual Oven Racks: Each oven is supplied with two heavy duty chrome- Oven Mode Cycle Light: The indicator light shall turn ON when a plated racks.
-
Page 34: Warranty
WARRANTY American Range (hereafter AMR) hereby provides the following warranty reasons beyond the control of AMR, failures due to improper installation, to the original residential user (“Owner”) for its new RESIDENTIAL insufficient gas or electrical supply, problems due to improper ventilation, Product(s) to be free from defects in material and workmanship in normal or removed/altered serial numbers. - Page 35 NOTES 4580 N. Walnut Rd., N. Las Vegas, NV 89081 13592 Desmond St., Pacoima, CA 91331 tel: 818.897.0808 888.753.9898 www.AmericanRangeHome.com...
- Page 36 In the event the equipment requires service during the standard warranty period, the receipt proving certified installation must be made available to American Range for verification. If installation was not performed by a certified/licensed contractor, be prepared to submit a major credit card for payment for proper installation prior to service.
Need help?
Do you have a question about the CUISINE ARR-305DF and is the answer not in the manual?
Questions and answers