American Range Cuisine ARR-530 Installation Manual
Sealed/open burner gas ranges
Hide thumbs
Also See for Cuisine ARR-530:
- Use and care manual (36 pages) ,
- Use & care and installation manual (20 pages) ,
- Use and care manual (30 pages)
Table of Contents
Advertisement
PROFESSIONAL QUALITY COOKING EQUIPMENT
INSTALLATION MANUAL FOR
CUISINE SEALED BURNER GAS RANGES
MODEL NUMBERS:
ARR-530, ARR-636, ARR-436GD, ARR-436GR, ARR-848, ARR-648GD, ARR-648GR, ARR-448GDGR,
ARR-4482GD, ARR-4482GR, ARR-1060, ARR-6602GD, ARR-6602GR, ARR-660GDGR
AND
PERFORMER OPEN BURNER GAS RANGES
MODEL NUMBERS:
ARROB-430, ARROB-636, ARROB-436GD, ARROB-436GR, ARROB-848, ARROB-648GD, ARROB-648GR,
ARROB-448GDGR, ARROB-4482GD, ARROB-448GR, ARROB-6602GD, ARROB-6602GR, ARROB-660GDGR
CUISINE
PERFORMER
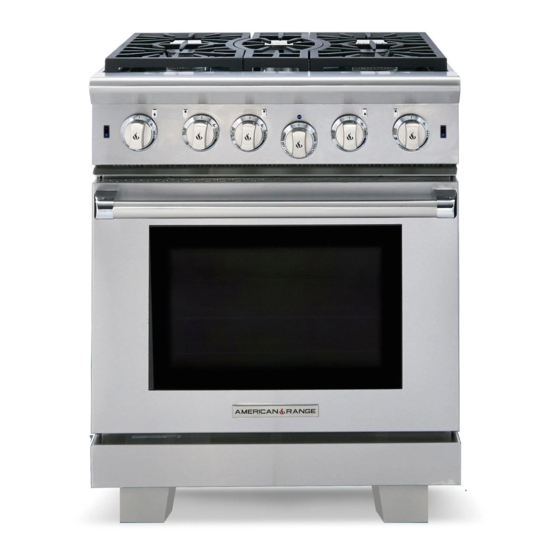
ARR-530
ARROB-430
Shown with optional 4" stub back and leg caps.
DESIGN
CLASS
FUNCTION
RETAIN THIS MANUAL FOR FUTURE REFERENCE
© 2016 American Range
All Rights Reserved
13592 Desmond St., Pacoima, CA 91331 818.897.0808 888.753.9898 tel www.americanrange.com
Advertisement
Table of Contents

Related Manuals for American Range Cuisine ARR-530


Summary of Contents for American Range Cuisine ARR-530
- Page 1 ARROB-448GDGR, ARROB-4482GD, ARROB-448GR, ARROB-6602GD, ARROB-6602GR, ARROB-660GDGR CUISINE PERFORMER ARR-530 ARROB-430 Shown with optional 4” stub back and leg caps. DESIGN CLASS FUNCTION RETAIN THIS MANUAL FOR FUTURE REFERENCE © 2016 American Range All Rights Reserved 13592 Desmond St., Pacoima, CA 91331 818.897.0808 888.753.9898 tel www.americanrange.com...
- Page 2 Cuisine & Performer Installation, Operation and Ranges Maintenance Instructions Installation Manual FOR YOUR SAFETY! Do not store or use gasoline or other flammable vapors or liquids YOUR YOUR in the vicinity of this or any other appliance. SAFETY SAFETY WARNING! Improper installation, adjustment, alteration, service WARNING WARNING...
-
Page 3: Table Of Contents
Installation Manual Cuisine & Performer Ranges Table of Contents GENERAL .....................................1-3 Warnings & Important Safety Instructions .............................1-3 SPECIFICATIONS ..................................4-7 Dimensions Sealed Burner Ranges .................................4 Specifications & Electrical Requirements ..............................5 Dimensions Open Burner Ranges .................................. 6 Specifications & Electrical Requirements ..............................7 GENERAL INSTRUCTIONS .............................. -
Page 4: General
Installation Manual Cuisine & Performer Ranges IMPORTANT - PLEASE READ AND FOLLOW! • Before beginning, please read all the instructions carefully. • DO NOT remove permanently affixed labels, warnings, or plates from product. This may void the warranty. • All local and national codes and ordinances must be observed, installation must conform with local codes. •... - Page 5 • The required use of a GFI is normally related to the location of a receptacle to ant significant sources of water or moisture. • American Range will not warranty any problems resulting from GFI outlets which are not installed properly or do not meet the requirements below.
- Page 6 Installation Manual Cuisine & Performer Ranges IMPORTANT - PLEASE READ AND FOLLOW! Do not use the handle or oven door to lift the oven, remove pull down door before installa- WARNING tion to ensure that it is not used to lift the unit. Make sure pins are inserted into hinges before removing door to prevent injury to hands and / or fingers.
-
Page 7: Specifications
Installation Manual Cuisine & Performer Ranges DIMENSIONS - SEALED BURNER GAS RANGES 3 0 " 3 5 - 2 9 - 7 / 8 3 0 " 7 / 8 " " 36-1/2" 36-1/2" 30” Range 36” Range 3 0 " 5 9 - 3 0 "... -
Page 8: Specifications & Electrical Requirements
Installation Manual Cuisine & Performer Ranges SPECIFICATIONS & ELECTRICAL REQUIREMENTS CUISINE SEALED BURNER RANGES - 30”, 36”, 48” and 60” Description 30” Models 36” Models 48” Models 60” Models Overall Width 29-7/8” 35-7/8” 47-7/8” 59-7/8” Overall Height To top of side trim 36-1/2”. To top of grate 37-3/4” Overall Depth 30”... -
Page 9: Dimensions Open Burner Ranges
Installation Manual Cuisine & Performer Ranges DIMENSIONS - OPEN BURNER GAS RANGES 36” Range 30” Range 3 0 " 5 9 - 7 / 8 " 36-1/2" 48” Range 60” Range 13592 Desmond St., Pacoima, CA 91331 818.897.0808 tel 888.753.9898 toll free www.americanrange.com... -
Page 10: Specifications & Electrical Requirements
Installation Manual Cuisine & Performer Ranges SPECIFICATIONS & ELECTRICAL REQUIREMENTS PERFORMER OPEN BURNER RANGES 30”, 36”, 48” and 60” Description 30” Models 36” Models 48” Models 60” Models Overall Width 29-7/8” 35-7/8” 47-7/8” 59-7/8” Overall Height To top of side trim 36-1/2”. To top of grate 37-3/4” Overall Depth 30”... -
Page 11: General Instructions
Installation Manual Cuisine & Performer Ranges GENERAL INSTRUCTIONS RANGE LOCATION: The location for the range must meet the following criteria. If any of these criteria are not met, select another location. CABINET PREPARATION: 1. The range is a free standing appliance. If the range is to be adjacent to cabinets, the clearances shown below are required. 2. - Page 12 Installation Manual Cuisine & Performer Ranges GENERAL INSTRUCTIONS • Do not remove protective packaging until you are ready to perform the installation. • Do not remove the protective wrapping from the product control panel until the product is installed. • Use proper equipment to move products. •...
-
Page 13: Installation
Installation Manual Cuisine & Performer Ranges CLEARANCE DIMENSIONS N - C 2 4 " M I N 1 3 " 3 0 " I B L B I N M I N T I B I A L R I A 1 8 "... - Page 14 Installation Manual Cuisine & Performer Ranges CLEARANCE DIMENSIONS Island Install 6 6 " m i n 7 2 " 3 0 " 3 0 " m i n 6 " 3 6 " 6 6 " m i n 7 2 " 2 4 "...
-
Page 15: Installation Steps
Installation Manual Cuisine & Performer Ranges INSTALLATION STEPS STEP 1 Open door to its fully opened position. Remove racks. STEP 2 CATCH Using a screwdriver, rotate the catch over the retaining arm on each hinge. RETAINING ARM CATCH RETAINING ARM 13592 Desmond St., Pacoima, CA 91331 818.897.0808 tel 888.753.9898 toll free www.americanrange.com... - Page 16 Installation Manual Cuisine & Performer Ranges INSTALLATION STEPS STEP 3 Gently close the door until catch stops the door. STEP 4 Hold the door with both hands just below the handle and pull it away form the oven while continuing to lift. 13592 Desmond St., Pacoima, CA 91331 818.897.0808 tel 888.753.9898 toll free www.americanrange.com...
- Page 17 Installation Manual Cuisine & Performer Ranges INSTALLATION STEPS STEP 5 Measure the four corners in each cutout area to verify that flooring is level. STEP 6 For uneven or sloped floors, level unit with metal shims only, as the adjustment required may exceed the thread available in the leg.
- Page 18 Installation Manual Cuisine & Performer Ranges INSTALLATION STEPS STEP 7 Move unit into opening. If possible use protection for the floor. STEP 8 3/8" (1cm) Check that unit is level side to side and front to back. Side trim of the high corner must be 3/8” above countertop.
- Page 19 Installation Manual Cuisine & Performer Ranges INSTALLATION STEPS STEP 9 Pull oven straight out. Install Anti-Tip Device according to installation instructions found inside the Anti-Tip Device kit. 13592 Desmond St., Pacoima, CA 91331 818.897.0808 tel 888.753.9898 toll free www.americanrange.com...
- Page 20 Installation Manual Cuisine & Performer Ranges INSTALLATION STEPS STEP 10 Connect gas and electrical supplies. Before placing appliance into operation, always check for gas leaks. This must be performed by your dealer, a qualified licensed plumber, or gas service company. A.
- Page 21 Installation Manual Cuisine & Performer Ranges INSTALLATION STEPS STEP 11 Replace door. STEP 12 Open door completely. Rotate the catch over the retaining arm on each hinge. CATCH RETAINING ARM CATCH RETAINING ARM 13592 Desmond St., Pacoima, CA 91331 818.897.0808 tel 888.753.9898 toll free www.americanrange.com...
- Page 22 Installation Manual Cuisine & Performer Ranges INSTALLATION STEPS FOR CUISINE RANGES STEP 13 Insert racks back into the oven. STEP 14 GRATE Burner caps are in a separate box with the grates. Place burner and caps on top of range. Place burner grate on top of grate support.
- Page 23 Installation Manual Cuisine & Performer Ranges INSTALLATION STEPS FOR PERFORMER RANGES STEP 15 Insert racks back in the oven. BURNER PAN STEP 16 Remove the burner pans. Cut and discard the shipping ties on the burner base. Confirm that burner base is flat on the burner support and that the air shutter is positioned over the gas orifice.
- Page 24 Installation Manual Cuisine & Performer Ranges INSTALLATION STEPS STEP 17 Burner heads are packed in a separate box. Replace burner heads on burner bases. Align holes in top burner with pins on base of burner for proper capacity & operation. For locations of burner heads see diagram below.
- Page 25 Installation Manual Cuisine & Performer Ranges INSTALLATION STEPS STEP 18 Grates are packed in a separate box. Inspect grates for rubber feet. Each grate must have 4 feet. Place grates on top of cooktop. BURNER CONFIGURATIONS ARROB-430 ARROB-636 ARROB-436GD ARROB-436GR grill griddle ARROB-648GD...
-
Page 26: Installation Checklist
This checklist has been developed to assure proper installation of your range. To Validate warranty, you must mail, e-mail or fax this form and acopy of your receipt to: AMERICAN RANGE CUSTOMER SERVICE, 13592 DESMOND STREET, PACOIMA, CA 91331 EMAIL: info@americanrange.com FAX: 818.897.8839... -
Page 27: Final Preparation
Installation Manual Cuisine & Performer Ranges FINAL PREPARATION 1. Some Stainless Steel parts may have a plastic protective wrap, which must be peeled off. All Stainless Steel body parts should be wiped with hot soapy water and with liquid cleaner designed for this material. If build up occurs, do not use steel wool, abrasive cloths, cleaners or powders!!! If it is necessary to scrape Stainless Steel to remove encrusted materials, first soak with hot, wet cloths to loosen the material, then use a wood or nylon scraper. - Page 28 Failure to comply will void any written or implied warranty. Should the equipment require service during the standard warranty period, the receipt proving certified installation must be made available to American Range for verification. If installation was not performed by a certified/licensed contractor be prepared to submit a major credit card for payment for proper installation prior to service.
Need help?
Do you have a question about the Cuisine ARR-530 and is the answer not in the manual?
Questions and answers