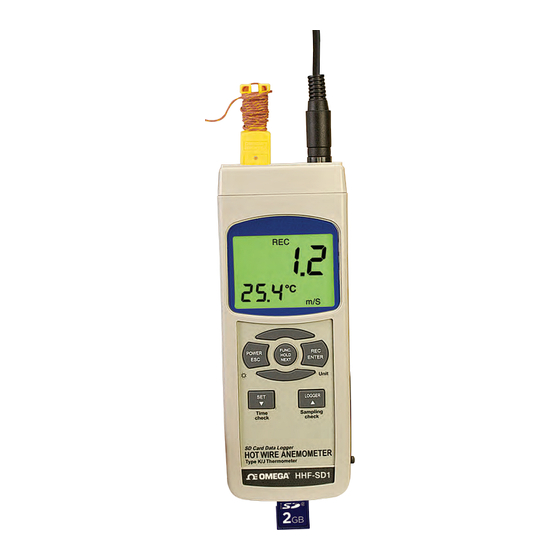
Summary of Contents for Omega HHF-SD1
- Page 1 User’ s Guide Shop online at omega.com e-mail: info@omega.com For latest product manuals: omegamanual.info MADE IN TAIWAN HHF-SD1 Hot Wire Anemometer- Thermometer with Data Logging SD Card...
- Page 2 Approach Directives. OMEGA will add the CE mark to every appropriate device upon certification. The information contained in this document is believed to be correct, but OMEGA accepts no liability for any errors it contains, and reserves the right to alter specifications without notice.
-
Page 3: Table Of Contents
TABLE OF CONTENTS Introduction ..............2 Key Features . -
Page 4: Introduction
The speed of the air flow can be calculated from the relationship between the metal’s electrical resistance and temperature. In the HHF-SD1 , the hot wire is located at the end of a telescoping probe, where it is paired with a tiny glass bead thermistor that measures air temperature. -
Page 5: Key Features
OPERATING INSTRUCTIONS WHAT’S IN THE CASE The HHF-SD1 comes fully assembled in a hard carrying case along with a telescoping air speed- temperature probe, a 2 GB SD memory card and this user’s manual. Optional accessories available from Omega include: •... - Page 6 1. The HHF-SD1 ’s controls and indicators and other physical features [CALLOUTS FOR FIGURE 1] 1-1 Liquid-crystal display 1-2 POWER/ESC button 1-3 FUNC./HOLD/NEXT button 1-4 REC/ENTER button 1-5 SET button 1-6 LOGGER button 1-7 Socket for combination air speed-temperature probe...
-
Page 7: Setup
SETUP 1. Choose the power source. Before using the HHF-SD1 , make sure it is powered by fresh batteries or an optional 9VDC AC adapter plugged into the bottom jack on its right side (callout 1-12). To remove the battery compartment cover (callout 1-13), remove the two screws holding it in place (callout 1-14). - Page 8 (“yES” for enable; “no” for disable) is displayed. Press the REC/ENTER button to store the selection. If enabled, the power off function shuts off the HHF-SD1 after a period of inactivity of ten minutes.
-
Page 9: Normal Operation
NORMAL OPERATION 1. To prepare to make measurements, power on the HHF-SD1 and make sure an SD card is firmly seated in the socket on the bottom of the instrument. The meter can make and display two kinds of measurements: •... -
Page 10: Holding And Storing Measurements
Whenever the HHF-SD1 is in either measurement mode, you also can check the current date and time by briefly pressing the SET button (which has the words “Time check” stenciled below it). Doing so causes both values to appear briefly at the lower left of the display. -
Page 11: Transferring Data From The Sd Card To A Computer
Now press the LOGGER button. This will cause the beeper to sound and the term “LOGGER” to briefly appear at the upper right of the display. As in automatic datalogging mode, in this mode the instrument is storing measurements and their time stamps on the SD card. In manual datalogging mode, however, measurements are being stored continuously (with a sampling time of zero), and their locations on the card can be changed. -
Page 12: Specifications
Fig. 3. Typical Excel graphics-only screen SPECIFICATIONS Embedded microcontroller Custom one-chip LSI device Display type Liquid-crystal with green backlight Display size 2.05 x 1.5 in. (52 x 38mm) Parameters measured Air speed, temperature Measurement range For temperature, 32 to 122 F (0 to 50 C);... -
Page 13: Maintenance & Troubleshooting Tips
MAINTENANCE & TROUBLESHOOTING TIPS Keep the telescoping probe clean and move the sensor cover at its tip to the up position when not using the probe. Store the probe in the carrying case when you are not using the anemometer. When the icon appears in the left corner of the display, it’s time to replace the six “AA”... - Page 14 NOTES:...
- Page 15 Department will issue an Authorized Return (AR) number immediately upon phone or written request. Upon examination by OMEGA, if the unit is found to be defective, it will be repaired or replaced at no charge. OMEGA’s WARRANTY does not apply to defects resulting from any action of the purchaser, including but not limited to mishandling, improper interfacing, operation outside of design limits, improper repair, or unauthorized modification.
- Page 16 Where Do I Find Everything I Need for Process Measurement and Control? OMEGA…Of Course! Shop online at omega.com TEMPERATURE Thermocouple, RTD & Thermistor Probes, Connectors, Panels & Assemblies Wire: Thermocouple, RTD & Thermistor Calibrators & Ice Point References Recorders, Controllers & Process Monitors...


Need help?
Do you have a question about the HHF-SD1 and is the answer not in the manual?
Questions and answers