Advertisement
Available languages
Available languages
Table of Contents
9988356COM
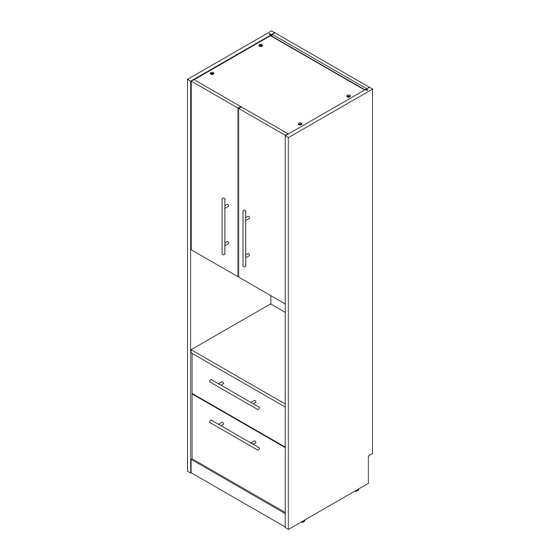
Side Cabinet
Date of Purchase ___ / ___ / ___
Lot Number:
THIS INSTRUCTION BOOKLET CONTAINS IMPORTANT SAFETY INFORMATION. PLEASE READ AND KEEP FOR FUTURE REFERENCE.
Do Not Return This Product!
Contact our customer service team for help first.
Call: 1-800-489-3351 (toll free)
Visit: www.ameriwoodhome.com
WARNING
- Unit can tip over causing severe injury or death.
- Anchor unit to stud in wall (if instructed to).
- Do Not allow children to climb on unit.
- Put heavy items on lower shelves or drawers.
Easy
Assembly Difficulty Meter
Follow Ameriwood Home
B349988356COM0
Tough
Advertisement
Table of Contents

Subscribe to Our Youtube Channel
Related Manuals for Ameriwood HOME 9988356COM


Summary of Contents for Ameriwood HOME 9988356COM
- Page 1 Easy Tough Assembly Difficulty Meter WARNING Follow Ameriwood Home - Unit can tip over causing severe injury or death. - Anchor unit to stud in wall (if instructed to). - Do Not allow children to climb on unit. - Put heavy items on lower shelves or drawers.
-
Page 2: Helpful Hints
Contact Us! Do NOT return this product! Contact our friendly customer service team first for help. Assembly Tips Call us! 1-800-489-3351 Tube Visit ameriwoodhome.com to view the limited warranty valid in the U.S. and Canada. Helpful Hints PEOPLE NEEDED FOR ASSEMBLY: 1-2 - Open your item in the area you plan to keep it to avoid excessive heavy lifting. -
Page 3: Before You Start
Before You Start Read through each step carefully and follow the proper order Separate and count all your parts and hardware Parts are labeled on the surface or edge of the part Give yourself enough room for the assembly process Have the following tools: #2 Phillips Head Screwdriver and Hammer Caution: If using a power drill or power screwdriver for screwing, please be aware to slow down and stop when screw is tight. - Page 4 Before You Start Please Note: You may need to lightly tap the wood dowels into the holes during your assembly process. ameriwoodhome.com...
-
Page 5: Board Identification
Board Identification Not actual size Upper Fixed Shelf Adj Shelf 39988356030 39988356040 39988356050 Bottom Left Panel Right Panel Lower Fixed Shelf Upper Back Panel 39988356070 39988356010 39988356020 39988356060 39988000080 Back Rail Kick Left Door Right Door Stringer (x2) 39988000100 39988356120 39988356130 39988000090 39988356110... - Page 6 Board Identification Not actual size SIDE Upper Drawer Front Lower Drawer Front Drawer Side Left (x2) 39988356140 39988356150 39991167346430L BACK SIDE Drawer Side Right (x2) Drawer False Front (x2) Drawer Back (x2) 39991167346430R 399911670516190F 399911670516190B BACK Drawer Bottom (x2) Back Panel K99835600 39991325052620D ameriwoodhome.com...
- Page 7 Board Identification Not actual size BACK SIDE BACK SIDE ameriwoodhome.com...
-
Page 8: Part List
Note: Your unit may contain extra hardware. Part List Actual Size (x28) (x28) (x18) (x2) (x28) (x4) #A22620 #A22610 #A21670 #A22760 #A12120 #A25400 cam lock cam bolt wood dowel quicklock #8 x 7/16" screw washer (x8) (x4) (x8) (x8) (x4) #A17400 #A12810 #A89370... - Page 9 Note: Your unit may contain extra hardware. Part List Not Actual Size (x4) (x4) (x2) #A65680 #A65685 #A65690 euro hinge hinge plate glissando soft close (x2) (x4) #A56541 #A50593 drawer slide handle ameriwoodhome.com...
- Page 10 Note: Your unit may contain extra hardware. Part List Not Actual Size Your unit comes with four (4) drawer slides. For each slide, extend the slide as shown and press the release lever to remove the inner slide. Set the inner slide aside for later. For Step 3 and 4, you will be attaching the slide to the panels at the rear of the slide.
- Page 11 STEP 1 (x14) ameriwoodhome.com...
- Page 12 STEP 2 (x6) (x2) ameriwoodhome.com...
- Page 13 STEP 3 (x14) ameriwoodhome.com...
- Page 14 STEP 4 (x6) (x2) ameriwoodhome.com...
- Page 15 STEP 5 Quick Assembly Proper orientation of CAM LOCK (x12) (x6) ameriwoodhome.com...
- Page 16 STEP 6 Quick Assembly Proper orientation of CAM LOCK (x2) (x4) (x2) ameriwoodhome.com...
- Page 17 STEP 7 unfinished side Turn clockwise to lock in place. ameriwoodhome.com...
- Page 18 STEP 8 Quick Assembly Proper orientation of CAM LOCK (x12) (x10) ameriwoodhome.com...
- Page 19 STEP 9 finished side ameriwoodhome.com...
- Page 20 STEP 10 Holes must be on back at top. ameriwoodhome.com...
- Page 21 STEP 11 ameriwoodhome.com...
- Page 22 STEP 12 Place your unit on its front Slide Back Panel into the grooves in the Left & Right Panels (A & B). BACK Make sure the Back Panel is aligned with the holes in the Back Rail (J) ameriwoodhome.com...
- Page 23 STEP 13 (x4) (x4) BACK ameriwoodhome.com...
- Page 24 STEP 14 (x8) (x4) (x4) Slide the Wedges (13) into the groove against the back panel and secure with screw. Tap T-Nut (16) with a hammer. Screw in Glides (15) all the way. ameriwoodhome.com...
- Page 25 STEP The next steps are to assemble your unit to the wall Assembled unit MUST be square on the height, width, and depth to function properly Assembled unit MUST be placed flat against the wall Assembled unit MUST be screwed into wall studs at the top and bottom for safety You need to locate 2 studs DO NOT use wall anchors to fasten your unit to the wall...
- Page 26 STEP 15 Place your unit FLUSH against the wall There are notches provided at the back of your unit. These notches are to fit around the baseboard on your wall. If your baseboard is higher or thicker than the notches provided on the unit, you will need to remove the baseboard, cut it down to fit on both sides of your...
- Page 27 STEP 16 Assembled unit MUST be square on the height, width, and depth to function properly A ladder will be required. Do not lean against the top of the unit, it may cause sagging. If required, unscrew the Glides counter-clockwise as necessary in all 4 corners until your unit is level in all directions.
- Page 28 STEP 17 Locate the studs in the wall using a stud finder. Using a pencil, mark the stud locations at the top of the Upper Back Panel (H) and on the Back Rail (J) below the Back Panel. You need to locate 2 studs (2 marks at the top &...
- Page 29 STEP 18 A ladder will be required. Do not lean against the top of the unit, it may cause sagging. (x4) First, make sure that your unit is still level in all directions. Drill 1/8" (3mm) pilot holes through the Upper Back Panel (H) and through the Back Rail (J) at the stud locator marks.
- Page 30 STEP 19 (x4) (x12) SIDE SIDE Inner Slide Use these holes ameriwoodhome.com...
- Page 31 STEP 20 (x8) SIDE SIDE ameriwoodhome.com...
- Page 32 STEP 21 (x8) BACK SIDE SIDE ameriwoodhome.com...
- Page 33 STEP 22 (x1) (x4) (x2) ameriwoodhome.com...
- Page 34 STEP 23 (x1) (x4) (x2) ameriwoodhome.com...
- Page 35 STEP 24 Install drawers by engaging the inner slides (attached to the Drawer Sides) with the outer slides (attached to the Left and Right Panel). Push in until plastic lever snaps into the outer slide. Outer Slide Note: To adjust Drawer Fronts, loosen screws (8), make needed adjustments and retighten.
- Page 36 STEP 25 (x4) ameriwoodhome.com...
- Page 37 STEP 26 (x4) (x8) (x4) (x2) (x4) ameriwoodhome.com...
- Page 38 STEP 27 (x4) Arrow faces front of unit. ameriwoodhome.com...
- Page 39 STEP 28 Eccentric adjustment screw. Shifts the whole hinge up and down. Adjust the gaps between the door and the left and right panels (side to side) Adjust the gaps between the face of the door and the front edge of the left and right panels when in the closed position.
- Page 40 STEP 29 Eccentric adjustment screw. Shifts the whole hinge up and down. Adjust the gaps between the door and the left and right panels (side to side) Adjust the gaps between the face of the door and the front edge of the left and right panels when in the closed position.
- Page 41 STEP 30 This step is optional... Place Glissando Soft Close (19) on the lower hinge of each door (L & M). ameriwoodhome.com...
- Page 42 Maximum Loads This unit has been designed to support the maximum loads shown. Exceeding these load limits could cause sagging, instability, product collapse, and/or serious injury. 10 lbs 4.5 kg Adj Shelf 30 lbs (13.64 kg) Upper Shelf 40 lbs (18.19 kg) Lower Shelf 40 lbs (18.19 kg) Drawers...
- Page 43 Visit your local retailer's website, rate your purchased product and leave us some feedback! We would like to extend a big "Thank You" to all of our customers for taking the time to assemble this Ameriwood Home product, and to give us your valuable feedback. ameriwoodhome.com...
- Page 44 Espa ol Cubierta Delantera Este libro de instrucciones contiene informaci n IMPORTANTE de seguridad. Por favor lea y mant ngalo para referencia en el futuro. No Regrese este producto! Comuniquese con nuestro amistoso equipo de servicio al cliente para obtener ayuda.
- Page 45 Espa ol P gina 5 P gina 8 No es el tama o real Tama o real Panel izquierdo (A) Cerradura de leva (1) Panel derecho (B) Perno de leva (2) Parte superior (C) Tarugo de madera (3) Estante regulable (D) Traba f cil (4) Estante fijo superior (E) Tornillo de 8 x 7/16 (5)
- Page 46 Espa ol P gina 18 *Orientaci n correcta de la cerradura de leva P gina 19 *Lado terminado P gina 20 *En el panel superior, los agujeros deben estar atr s. P gina 22 *Coloque la unidad de frente *Deslice el panel trasero por las ranuras de los paneles izquierdo y derecho (A y B) *Aseg rese de que el panel trasero est alineado con los agujeros del soporte trasero (J) P gina 24 *Deslice las cu as (13) por la ranura contra el panel trasero y atornille.
- Page 47 Espa ol P gina 29 - Requerir de una escalera. NO se apoye contra la parte superior de la unidad; podr a provocar un hundimiento. *Primero aseg rese de que la unidad est a nivel en todas las direcciones. *Utilice un taladro para hacer agujeros gu a de 1/8" (3 mm) a trav s del panel trasero superior (H) y el soporte trasero (J) en las marcas del detector de clavos.
- Page 48 Visite el sitio web de su tienda local, califique su comprado y denos sus comentarios! Nos gustar a enviar un gran "Agradecimiento" a todos nuestros clientes por tomarse el tiempo de ensamblar este producto de Ameriwood Home, y por darnos sus valiosos comentarios. Gracias ameriwoodhome.com...
- Page 49 Fran ais Couverture Avant CE LIVRET D'INSTRUCTION CONTIENT DES INFORMATIONS IMPORTANTES SUR LA S CURIT . VEUILLEZ LIRE ET GARDER POUR UNE R F RENCE FUTURE Ne retournez pas ce produit! Contactez notre quipe de service la client le amicale d'abord pour obtenir de l'aide.
- Page 50 Fran ais Page 5 Page 8 Taille non r elle Taille r elle Panneau gauche (A) Verrou de came (1) Panneau droit (B) Boulon came (2) Dessus (C) Cheville bois (3) Tablette r glable (D) Verrouillage rapide (4) Tablette fixe sup rieure (E) Vis n 8 x 7/16 de po (5) Tablette fixe inf rieure (F) Rondelle (6)
- Page 51 Fran ais Page 18 * Orientation correcte du verrou came Page 19 * C t termin Page 20 * Les trous doivent se trouver au dos, en haut. Page 22 * Placez votre appareil sur sa face avant * Faites glisser le panneau arri re dans les rainures des panneaux gauche et droit (A et B) * Assurez-vous que le panneau arri re est align avec les trous du rail arri re (J) Page 24 * Faites glisser les cales (13) dans la rainure contre le panneau arri re et fixez-les avec la vis.
- Page 52 Fran ais Page 29 - Une chelle sera n cessaire. Ne vous appuyez pas sur la partie sup rieure de l'appareil, vous risqueriez de l'affaisser. * Assurez-vous d'abord que l'appareil est toujours de niveau dans toutes les directions. * Percez des avant-trous de 3 mm (1/8 de po) travers le panneau arri re sup rieur (H) et le rail arri re (J) au niveau des marques de rep rage des montants.
- Page 53 Visitez le site Web de votre d taillant local, valuez votre produit achet et laissez-nous quelques commentaires ! Nous tenons offrir un grand "Merci" tous nos clients pour avoir pris le temps d'assembler ce produit "Ameriwood Home", et de nous donner vos commentaires pr cieux. Merci ameriwoodhome.com...
Need help?
Do you have a question about the 9988356COM and is the answer not in the manual?
Questions and answers