Advertisement
Quick Links
Advertisement

Related Manuals for Ameriwood HOME Dakota 9354412COM


Summary of Contents for Ameriwood HOME Dakota 9354412COM
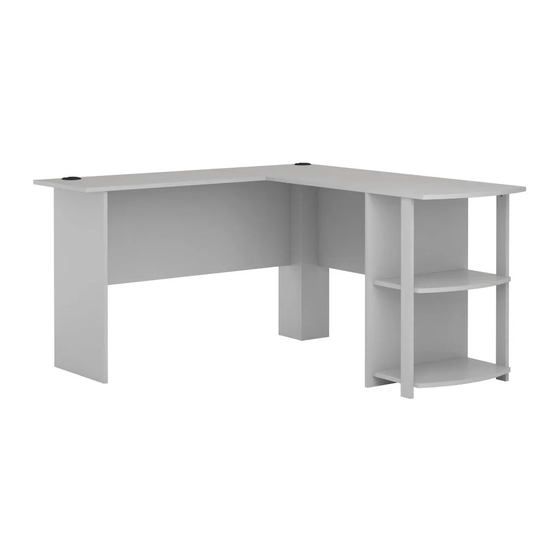
- Page 1 9354412COM Dakota L-Desk B349354412COM00HU Easy Tough Assembly Difficulty Meter...
- Page 4 Return panel Right rear panel Le� panel Le� rear panel T9354412040HU T9354412030HU T9354412010HU T9354412020HU QTY: 1 PC QTY: 1 PC QTY: 1 PC QTY: 1 PC Modesty panel Return modesty panel T9354412050HU T9354412060HU T9354412070HU QTY: 1 PC QTY: 1 PC QTY: 1 PC...
- Page 5 Return top Fixed shelf Rail T9354412090HU T9354412100HU T9354412080HU QTY: 2 PCS QTY: 2 PCS QTY: 1 PC...
-
Page 6: Actual Size
Hardware Bag Reference number: 29354412COM0HU Actual size Ø4.2x45mm Ø4.2x13mm THU1111 THU1007 1/2” pan head 1-3/4” flat head Not actual size Ø15x9.5mm M8x20mm x 26 x 26 x 30 THU0203 THU1506 THU0102 Cam cover Cam bolt Cam lock THU1403 Grommet THU2203 Connecting plate... - Page 7 STEP1 Ø15x9.5mm M8x20mm x 10 1.1 Cam bolt (2) into (A) as illustrated. 1.2 Insert (1) into (A), (I) as illustrated. Proper orientation of CAM LOCK Posición correcta de la cerradura de leva. Bonne orientation de la SERRURE DE CAME...
- Page 8 STEP2 Ø15x9.5mm M8x20mm Ø4.2x13mm x 12 2.1 Fix (7) on (G) by (6) as illustrated. 2.2 Attach cam bolt (2) into (G) and (J) as illustrated. Proper orientation of CAM LOCK Posición correcta de la cerradura de leva. Bonne orientation de la SERRURE DE CAME...
- Page 9 STEP3 Ø15x9.5mm M8x20mm 3.1 Insert (1) into (B), (C) and (E) as illustrated. 3.2 Attach cam bolt (2) into (C) as illustrated. Proper orientation of CAM LOCK Posición correcta de la cerradura de leva. Bonne orientation de la SERRURE DE CAME...
- Page 10 STEP4 4.1 Attach (B) to (C) as illustrated. 4.2 Attach (I) to (A) as illustrated. 4.3 Attach (J) with (I) as illustrated. LOCK UNLOCK APRETAR DESAPRETAR SERRER OUVRIR...
- Page 11 STEP5 5.1 Attach assembled (A), (I) and (J) to (G) as illustrated. 5.2 Attach (E) to (A) as illustrated. LOCK UNLOCK APRETAR DESAPRETAR SERRER OUVRIR...
- Page 12 STEP6 6.1 Attach assembled (B) and (C) to (G) as illustrated. 6.2 Fix assembled (B) and (C) to (E) by (4) as illustrated. Ø4.2x45mm...
- Page 13 STEP7 Ø15x9.5mm M8x20mm Ø4.2x13mm 7.1 Cam bolt (2) into (H) and (D) as illustrated. 7.2 Insert (1) into (D) as illustrated. 7.3 Attach (F) to (D) by (1) as illustrated. 7.4 Use (6) to fix (H) as illustrated. Proper orientation of CAM LOCK Posición correcta de la cerradura de leva.
- Page 14 STEP8 Ø4.2x45mm 8.1 Attach (D) to (H) as illustrated. 8.2 Fix (F) by (4) as illustrated.
- Page 15 STEP9 x 30 LOCK UNLOCK APRETAR DESAPRETAR SERRER OUVRIR 9.1 Use (3) to cover cam lock (1). 9.2 Insert (5) to the desk top. With assistance of another person, carefully lift and turn the unit upright. Con la ayuda de otra persona, cuidadosamente levante y voltee el mueble hacia arriba.
- Page 16 100 lbs. 45.4 kg. 35 lbs. 15.7 kg. 35 lbs. 15.7 kg. Bangkok, Thailand...
- Page 19 Lista de Piezas (Página 6) Iden�ficación de los Paneles (Página 4,5) Este no es el tamaño real Este no es el tamaño real Tamaño real (A) Panel izquierdo (1) Cerradura de leva (2) Perno de leva (B) Panel izquierdo de atrás (4) Cabeza plano 1-3/4"...
- Page 22 Liste des pièces (Page 6) Iden�fica�on des matériaux (Page 4,5) Pas de taille réelle Pas de taille réelle Taille réelle (A) Panneau gauche (1) Serrure de came (2) Boulon de came (B) Panneau arrière gauche (4) Tête plate 1-3/4" (3) Cache-came (C) Panneau arrière droit (6) Tête ronde (5) Rondelle...
Need help?
Do you have a question about the Dakota 9354412COM and is the answer not in the manual?
Questions and answers