Table of Contents
Advertisement
Quick Links
Advertisement
Table of Contents

Related Manuals for Haier H6 ID66C3YTB1


Summary of Contents for Haier H6 ID66C3YTB1
- Page 1 Full User Manual Haier.com CANDY HOOVER GROUP Via Comolli 16 Brugherio - Italy...
- Page 2 English Deutsch Français Italiano Español Ελληνικά Nederlands Português Slovenčina Slovenščina Српски Polski Čeština Dansk Suomi Norsk Svenska Қазақ Русский Українська Български Hrvatski Română Türkçe ةيبرعلا 中文 Magyar תירבע Lietuvių Eesti Latviešu...
- Page 3 WELCOME Thank you for choosing our product. To ensure your safety and get the best results, please read this manual carefully, including the safety in- structions, and keep it for future reference. Before installing the oven note the serial number, which you might need for repairs.
-
Page 4: Table Of Contents
SUMMARY SAFETY INFORMATION PRODUCT INTRODUCTION 2.1. Overview of the product 2.2. Accessories 2.3. Control panel 2.4. Connectivity BEFORE STARTING 3.1. Information to start 3.2. First usage 3.3. Preliminary cleaning OPERATION OF PRODUCT 4.1. How the product works 4.2. Cooking functions 4.2.1. -
Page 5: Safety Information
1.SAFETY INFORMATION GENERAL WARNINGS • Do not use a steam cleaner for cleaning operations. CAUTION: in order to avoid a hazard due to inadvertent resetting • of the thermal cut-out, this appliance must not be supplied through an external switching device, such as a timer, or connected to a cir- cuit that is regularly switched on and off by the utility •... - Page 6 WARNING: Accessible parts may become hot during use. Young • children should be kept away. INSTALLATION WARNINGS • The oven can be located high in a column or under a worktop. • Before fixing, you must ensure good ventilation in the oven space to allow proper circulation of the fresh air required for cooling and protecting the internal parts.
- Page 7 pheric agents. • This appliance is designed to be used at altitude lower than 2000m. • To remove protective films and advertisement stickers on front sur- face of the oven before first usage. ELECTRICAL WARNINGS • The socket must be suitable for the load indicated on the tag and must have ground contact connected and in operation.
- Page 8 ശ in general the use of adaptors, multiple sockets and extension cables is not recommended; ശ in case of malfunction and/or poor operation, switch off the ap- pliance and do not tamper with it. NOTE: as the oven could require maintenance work, it is advisable •...
- Page 9 inside the oven. ln any case, the condensation disappears when the oven reaches the cooking temperature. • Cook the vegetables in a container with a lid instead of an open tray. • Avoid leaving food inside the oven after cooking for more than 15/20 minutes.
- Page 10 WARNINGS for WIRELESS TEMPERATURE PROBE (only if present*) • This product is exclusive for oven appliances. It should only be used as described in this User Manual. • DO NOT TOUCH Preci Probe WITH BARE HANDS JUST AFTER COOKING. Always wear oven gloves to remove Preci Probe from the food after cooking.
-
Page 11: Product Introduction
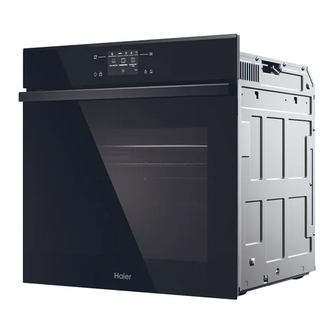
2. PRODUCT INTRODUCTION 2.1. OVERVIEW OF THE PRODUCT 1. Control panel 2. Shelf positions numbers 3. Grids 4. Trays 5. Fan cover 6. Oven door 7. Lateral wire grids (if present: only for flat cavity) 8. Serial number & QRcode Write here your serial number for future reference. - Page 12 (only if present*) Telescopic Guides Softclose/Soft open hinges (only if present*) Telescopic oven rails are shelves that can be Soft close and open hinges control the door’s extended, making it easier to place or remove motion, ensuring smooth movement and pre- items, without the need to reach deep inside a venting slamming.
- Page 13 Airfry tray (only if present*) The airfry tray ensures that hot air reaches the food evenly and tridimensionally, resulting in a crispier exterior while maintaining tenderness inside. A baking tray can be optionally placed at L1 to collect juices or breadings. EN 13...
- Page 14 2.3 CONTROL PANEL Functions and function ranking can be changed depending on the model. 1. On/Off 2. Child Lock 3. Lamp 4. Remote Control 5. Favorites 6. Start/Pause MAIN FUNCTIONS Symbol Function Description On/Off Press to turn on/off the oven. Press and hold for 3 seconds to lock the screen Child lock and prevent unwanted use by minors.
-
Page 15: Connectivity
2.4 CONNECTIVITY Wireless parameters Technology Wi-Fi Bluetooth Standard IEEE 802.11 b/g/n Bluetooth v4.2, BR/EDR, BLE Frequency Band(s) [MHz] 2401 ÷2483 2402÷2480 Maximum Power [mW] Product information for networked equipment Power consumption of the product in networked standby if all wired network ports are connected and all wireless network ports are activated: 2,0 W. - Page 16 How to deactivate wireless network port Press “Settings” on the Home Carousel, then press on “Network Settings”. Toggle Wi-Fi ON to turn off the Wi-Fi. How to reset the network Press Settings on the Home Carousel, then press Network Settings; Press “Reset Network”...
- Page 17 HOW TO INTERACT WITH THE APP Your appliance may be connected to your home wireless network and operated remotely using the app. Connect your appliance to ensure it stays up to date with the latest software and features. NOTE • Once the oven is turned on, the WIFI icons blinks for 30 minutes.
- Page 18 Step 2 • Allow your location permission. Step 3 • Select oven from the appliance category. Step 4 • Turn on your appliance; if it is already on, turn it off and on again. EN 18...
- Page 19 Step 5 • After turning on, the hOn app will start searching for your home appliance. Step 6.1-6.2 • Select your home appliance, tap on “connect” and wait a few seconds. Step 7 • Your Oven will be found and you can control it through hOn.
- Page 20 REMOTE CONTROL The Remote Control offers numerous advantages for users, enhancing convenience, efficiency, and the overall cooking experience, by giving the capability to control the product directly from both the appliance and hOn App. This function allows you, through your device, to enjoy various features, such as: instant or scheduled start of recipes or cooking programs already available in the app both with the probe and without;...
- Page 21 NOTE: If the user stops the cooking in progress from the oven, simultaneously the stopped cooking will be seen in the App. OVER THE AIR UPDATE (OTA) The oven is provided with an over the air update function that will ensure the product software maintenance and it is recommended every time to guarantee the updated oven functionality, which is enabled as soon as the product is enrolled in app.
- Page 22 2. INSTALLATION During this process, that may take around 2 hours, it is possible to use the oven to cook but hOn App will not be available. • by tapping “Proceed”, the update will be installed. • By selecting “Later”, it is possible to start the process by entering “Software Updates” in the Settings menu.
-
Page 23: Before Starting
3. BEFORE STARTING 3.1. INFORMATION TO START When you first turn on the oven, you might notice some smoke. Don’t worry, just wait for the smoke to clear before using the oven. How door works During the pyrolytic cleaning process, the oven door remains locked at all times. If it’s not locked, the oven will display error code 24 and pause the cleaning function. - Page 24 • SELECT THE LANGUAGE: A carousel menu will be shown. Scroll the carousel horizontally to select the desired language. Tap on the language of choice to go to the next step. • SET AMPERAGE: By default, the oven is set to work with higher power suitable for households with more than 3 kW (16 A).
- Page 25 After adjusting the initial settings, a pop-up message about pairing information will appear. Press to confirm and go to the Home carousel menu. ADDITIONAL SETTINGS Brightness and Sound levels can be adjusted by the user in the Settings section. • BRIGHTNESS: From the Home carousel, press “Settings”.
-
Page 26: Preliminary Cleaning
• SOUND: From the Home carousel, press “Settings”. Scroll the Settings menu horizontally and press on “Sounds”. Scroll the slider left and right to adjust the sound volume. Press confirm. 3.3. PRELIMINARY CLEANING Clean the oven before using it for the first time. Wipe over external surfaces with a damp soft cloth. Wash all accessories and wipe inside the oven with a solution of hot water and washing up liquid. -
Page 27: Operation Of Product
4. OPERATION OF PRODUCT 4.1. HOW THE PRODUCT WORKS SWITCHING ON/OFF THE OVEN To switch the oven ON/OFF, long press the ON/OFF button. SET COOKING FUNCTION To select a cooking function, press “Main Programs” from the Home carousel menu. Scroll the carou- sel horizontally until you reach the desired function. - Page 28 TIME MENU Access the Time menu by pressing Cooking Time on the carousel. The user can enter the following settings: Minute Minder This function allows the user to set a reminder for the cooking time. After pressing Cooking Time on the carousel, the Minute Minder icon is switched on by default.
- Page 29 ADDITIONAL FUNCTIONS LIGHT To switch the cavity light ON/OFF, press NOTE: The cavity light is OFF by default during general navigation processes. While a process such as cooking or cleaning is ongoing, the light will be switched ON by default. CHILD LOCK This function allows you to lock the screen to prevent any unwanted use by minors.
-
Page 30: Cooking Functions
4.2. COOKING FUNCTIONS FAST PREHEATING OPTION The fast preheat is always recommended by a message on the display and starts automatically. When the fast preheat starts the option “skip” appears. If “skip” is selected, the desired cooking function starts and the food can be inserted with cold oven. The Fast Preheat will activate a combination of fan and heating elements regardless of the chosen cooking function;... - Page 31 T°C default Suggested shelf PRECIPROBE Symbol Function Preheat Suggestions T°C range position available IDEAL FOR: big quantities of sau- sages, steaks and toast bread. The entire area below the grill L7 for thin element becomes hot. Use with **Super Grill food, L5 for L1-L5 the door closed.
-
Page 32: Special Functions
4.2.2. SPECIAL FUNCTIONS T°C default Suggested shelf PRECIPROBE Symbol Function Preheat Suggestions T°C range position available IDEAL TO: cook all pizza types, without the need of preheating. 300 °C Pizza 300 L2/L3 Use lower heating for frozen 200-300 °C pizza, and 300° for round fresh pizza. - Page 33 Save recipes as Favorites: You can save a recipe in the Favorites menu directly from the oven, at the end of any cooking pro- gram, by pressing “Save in Favorites” on the display. This button will be shown after the “Enjoy Your Plate”...
- Page 34 Jolly function (Maximum 5 recipes) Thanks to the Jolly function, this product offers a fully customizable experience, allowing you to store your personalized recipes directly on the oven. You can execute these recipes as often as you like, even without the need to log into the app. How to Set the Jolly Function: To set the Jolly function on your oven, open the app’s recipe section, select the recipe you want to use, and click ‘Use As Jolly Function’.
- Page 35 WIRELESS PRECI PROBE (available depending on the model) How to use the probe: From the Home carousel, press Press “Connect” to match the Preci Probe with the oven. The oven will start searching for the Preci Probe. At this time, make sure the Preci Probe is fully charged and close to the oven.
- Page 36 If you wish to cook your food more, press “ Cook more” on the display and set a new target temperature for the Preci Probe. Cooking tips The Probe is equipped with a single measuring point. Insert it entirely into the food with the metal tip positioned at the centre of the food.
-
Page 37: Multi Step Feature
4.2.3. MULTI STEP FEATURE The multi step feature allows to maintain previously set cooking parameters (temperature and time) while changing function during cooking. Multi-step recipes can be created on hOn App through the U-Create function and saved on the oven. The user can start the Multi-step recipe from the Favorites menu. - Page 38 Step 3. After customizing the first step, press “Add step” to add another cooking function to the rec- ipe and customize its parameters. Step 4. Save the recipe on the app to start it from hOn remotely, or save it as a “Jolly Function” to find it in the Favorites menu directly on the oven.
-
Page 39: Cooking Guidelines
5. COOKING GUIDELINES 5.1. GENERAL COOKING TABLE Cooking N°of Cooking Cooking Shelf Category Recipe T°C Preheat time after levels program accessory position preheating* (min) Conventional 175°C 20-30 Baking tray Multilevel 160°C 30-40 Small cakes Baking + /Muffins Multilevel 150°C L3+L6 30-40 Deeper trays Multilevel... - Page 40 Cooking N°of Cooking Cooking Shelf time after Category Recipe T°C Preheat levels program accessory position preheating* (min) Metal grid Convection+Fan 180°C 45-60 Salty cakes + Quiche tin / Quiches Metal grid (26 cm Ø) Multilevel 180°C L2+L5 50-70 + Quiche tin Cheese Conventional 200°C...
- Page 41 Cooking N°of Cooking Prehe- Cooking Shelf Category Recipe T°C time after levels program accessory position preheating* (min) Metal grid Rooster Grill+Fan 220°C Place baking 20-40 tray at L1 Metal grid + Roasted Grill+Fan 200°C Ovenproof 50-60 Turkey dish Metal grid + Pork ribs Conventional 200°C...
-
Page 42: Everyday Cooking Tables
5.2. EVERYDAY COOKING TABLE Food category menu allows to cook a variety of recipes, thanks to dedicated cooking programs tai- lored to each category needs. After selecting the food category and the recipe, you will be able to select the amount of trays to cook simultaneously or the food weight range (according to selected category). - Page 43 Symbol Food Category Recipe Serving range Preciprobe available Baked potatoes Vegetable au gratin Vegetables Vegetables en papillote 500-1200g Grilled vegetables Stuffed vegetables Butter biscuits 1 to 4 trays Frozen croissants 1 to 4 trays Fruit tart 1 to 2 trays Mille-Feuille 1 to 2 trays Muffins...
-
Page 44: Care & Cleaning
6. CARE & CLEANING 6.1. GENERAL RECOMMENDATIONS Regular cleaning can extend the lifecycle of your appliance. Wait for the oven to cool before carrying out manual cleaning. • After each use of the oven, a minimum of cleaning will help keep the oven perfectly clean. •... - Page 45 You can choose among the following cleaning options: PYROLYSIS (depending on the model) This process relies on the chemical process bearing the same name, which involves the decomposi- tion of complex substances through the application of heat treatment. Once initiated, it automatically locks the oven door and swiftly elevates the temperature to a searing 410°C.
- Page 46 Pyrolysis plus Cleans a heavily stained oven. Operates for a period of 120 minutes. How it works: From the Cleaning carousel, scroll until you reach Pyrolysis Plus. A pop-up message will appear. Press to proceed, or press “OK” to go back. Press to proceed.
- Page 47 NOTE: All cleaning functions can be interrupted at any time by pressing the Stop button in the top left corner. After interrupting the Pyrolysis Eco and Pyrolysis Plus functions, the door will stay locked until the appliance has cooled down. A pop-up message will appear when the door is unlocked. EN 47...
-
Page 48: Outside The Oven: Removal And Cleaning The Glass Door
6.2.2. OUTSIDE THE OVEN: removal and clean- ing the glass door Position the door at 90°. Rotate the hinge locking tabs outward from the oven. Position the door at 45°. Simultaneously press the two buttons on both the sides of the door’s lateral shoulders and pull towards yourself to remove the upper 45°... - Page 49 Insert the glass panels, making sure that the “LOW-E / PYRO ” label is correctly PYRO readable and positioned on the lower left side of the door, near the left-side hinge. This way, the printed label on the first glass will remain on the inside of the door. LOW-E Reattach the upper glasses’...
-
Page 50: Cleaning Of Accessories
6.3 CLEANING OF ACCESSORIES Ensure that you clean the accessories thoroughly after every use and dry them using a towel. For per- sistent residues, consider soaking the accessories in a mixture of water and soap for approximately 30 minutes before giving them a second wash. CLEANING OF SIDE RACKS: Remove the side racks by first pulling the front part in the direction of the arrow and detaching the rear part from the screws. -
Page 51: Maintenance
6.4 MAINTENANCE COMPONENTS REPLACEMENT Changing the bulb on top: Disconnect the oven from mains supply. Remove the lamp’s glass cover. Disassemble the bulb. Replace the bulb with a new one of the same type. Relocate the lamp’s glass cover. Reconnect the oven from mains supply. Step 1 Step 2 Step 3... - Page 52 Changing the lateral bulb: Disconnect the oven from mains supply. Use a flat-head screwdriver by positioning it to the side of the protective glass and gently apply pressure to remove it. Carefully grasp the bulb from its base. Insert the new one. Reinstall the protective glass by pressing it gently until it’s locked into position.
-
Page 53: Demo Mode
6.5 DEMO MODE From the Home Carousel, select Settings. Once in the Settings menu, long press at the same time. Scroll the numbers vertically to enter the password 1100, then press to confirm. The display will resume to the Home Carousel in Demo Mode. To exit the Demo Mode, repeat the same steps. -
Page 54: Troubleshooting
7. TROUBLESHOOTING If, during oven use, an error occurs, the display will show the code “ER” followed by two digits, which will identify the error. Proceed by turn off the oven and un-plug it, wait for a few minutes, and then reconnect it. If the error disappears, you can resume using the oven. -
Page 55: Environmental Protection & Disposal
8. ENVIRONMENTAL PROTECTION & DISPOSAL 8.1. APPLIANCE DISPOSAL This appliance is labelled in accordance with European Directive 2012/19/EU regarding electric and electronic appliances (WEEE). The WEEE contain both polluting substances (that can have a negative effect on the environment) and base elements (that can be re- used). -
Page 56: Installation
9. INSTALLATION power cord 1100 8 , 5 4 , 5 power cord 1100 Back view Side view EN 56... - Page 57 8 , 5 0 x 4 x . 5 0 x 4 8 , 5 0 x 4 EN 57...
- Page 58 x . 5 8 , 5 EN 58...
- Page 59 Bumper Bumper EN 59...
- Page 60 WILLKOMMEN Vielen Dank, dass Sie sich für unser Produkt entschieden haben. Um Ihre Sicherheit zu gewährleisten und die besten Ergebnisse zu erzielen, lesen Sie bitte dieses Handbuch, einschließlich der Sicherheitshinweise, sorgfält- ig durch und bewahren Sie es zum späteren Nachschlagen auf. Notieren Sie sich vor dem Einbau des Backofens die Seriennummer, die Sie eventuell für Reparaturen benötigen.
- Page 61 BIENVENUE Merci d’avoir choisi notre produit. Pour garantir votre sécurité et obtenir les meilleurs résultats, veuillez lire attentivement ce manuel, y compris les consignes de sécurité, et le conserver afin de pouvoir le consulter plus tard. Avant d’installer le four, prenez note du numéro de série dont vous pourriez avoir besoin pour des réparations.
- Page 62 BENVENUTI Grazie per aver scelto il nostro prodotto. Per garantire la sicurezza e otte- nere i migliori risultati, leggere attentamente questo manuale, comprese le istruzioni di sicurezza, e conservarlo per riferimenti futuri. Prima di installare il forno, prendere nota del numero di serie, in quan- to potrebbe essere necessario in caso di riparazioni.
- Page 63 70050064...
Need help?
Do you have a question about the H6 ID66C3YTB1 and is the answer not in the manual?
Questions and answers