Advertisement
Quick Links
Advertisement

Subscribe to Our Youtube Channel
Related Manuals for WLIVE ACJ029


Summary of Contents for WLIVE ACJ029
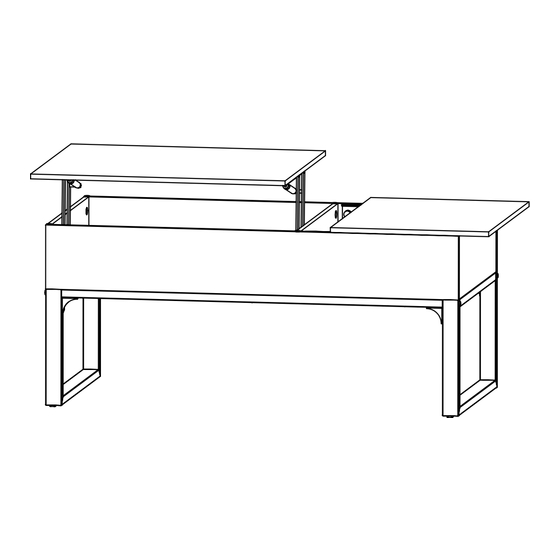
- Page 1 DEV ISE ACJ029 V3.0 SW Lift Co ee Table wlive-cs@devaise.com...
-
Page 2: General Guidelines
IMPORTANT INFORMATION READ CAREFULLY. KEEP THIS INFORMATION FOR FURTHER REFERENCE. GENERAL GUIDELINES • • Please read the following instruction carefully and use the product accordingly. • Please keep this manual and hand it over when you transfer the product. This summary may not include every detail of all variations and considered steps. Please contact us when further information and help are needed. - Page 3 If you have any further questions, please feel free to contact us wlive-cs@devaise.com by email or official website: We will reply ASAP. Before installation, please make sure you have all the hardware, the serial numbers are properly labeled corresponging to the list, and the quantity is correct.
-
Page 4: Exploded Drawing
EXPLODED DRAWING PARTS M6x10 M4x12 M6x50 M7x38 M4x11... - Page 5 REMARK MINIFIX POSITION REMARK 1. Put a blanket under the board to avoid scratch or damage. Please do not screw too deep or too shallow. ×12...
- Page 6 M4x11 REMARK 1. Please locate the holes from the back of part 2. Then please install part from the front of part Part install the rails Part install the rails Back Front...
- Page 7 ×4...
- Page 9 REMARK Please note that the hole on Part should be opposite to the hole on Part 5 6 7 Part ×6 pure colored origin wood - colored...
- Page 11 M4x11 REMARK 1. For a better installation experience, please place Part under the product as shown, and then install Part 2. Please fully tighten all screws after all the screws are in place.
- Page 12 M6x50 REMARK 1. Please fully tighten all screws after all the screws are in place. 2. Please note the hole position of Part indicated by the fingers should face inside. 3. Please note that the hole on Part should be opposite to the hole on Part ×4...
- Page 13 M6x10 REMARK Please do not fully tighten screws at this step. ×4...
- Page 14 M6x10 REMARK Please fully tighten all screws after all the screws are in place. ×8...
- Page 15 REMARK Please wait for 3 minutes until it glues completely. ×4...
- Page 16 M4x12 ×4...
- Page 17 M7x38 REMARK Please fully tighten all the screws after they are in right place, Step 9 including those in ×14...
- Page 18 M4x11 FRONT FRONT ×12...
- Page 19 M4x11 REMARK Fully tighten all the screws after all the screws are in right place. ×16...
- Page 20 ×4...
- Page 21 ×12...
Need help?
Do you have a question about the ACJ029 and is the answer not in the manual?
Questions and answers