Table of Contents
Advertisement
Quick Links
Advertisement
Table of Contents

Subscribe to Our Youtube Channel
Related Manuals for AnyTone I-ONE


Summary of Contents for AnyTone I-ONE
- Page 1 I-ONE Instruction Manual...
- Page 2 States of the European Union of permitted use...
- Page 3 THANK YOU! Thank you very much for choosing of Anytone transceiver. Anytone transceiver will provide you with reliable, clear and efficient communication service. The transceiver introduces innovative DSP baseband processing system to achieve high-fidelity voice processing and encryption. It is including best stability and great reliability as well as exterior smooth lines, novel, fashionable, nice timbre and long distance communication design.
- Page 4 Then contact local Anytone dealers. NOTE: All the above tips apply for your Anytone transceivers' accessories. If any device can not operate normally, please contact with local Anytone dealers.
-
Page 5: Table Of Contents
CONTENTS Accessories..............1 Basic Information............2 Getting Acquainted............3 Function Setup.............6 Advanced Functions by PF1/PF2........7 Background Setting...........10 Programming Software..........12 Trouble Shooting Guide..........14 Attached Chart............15 Declaration of conformity .........17... -
Page 6: Accessories
1. Accessories 1.1 Standard Accessories AC Adaptor USB Pow Cable Belt Clip Instruction Earphone Manual 1.2 Additional Accessories Programming Hand Strap Software Programming Cable... -
Page 7: Basic Information
2. Basic Information 2.1 Charging Operation The transceiver is with internal battery, please charge it before use. Charge the battery for the first time after purchase or extended storage (more than 2 months) may not bring the battery to its normal operating capacity. After repeating fully charge/ discharge cycle for two or three times, the operating capacity will reach the best performance. -
Page 8: Getting Acquainted
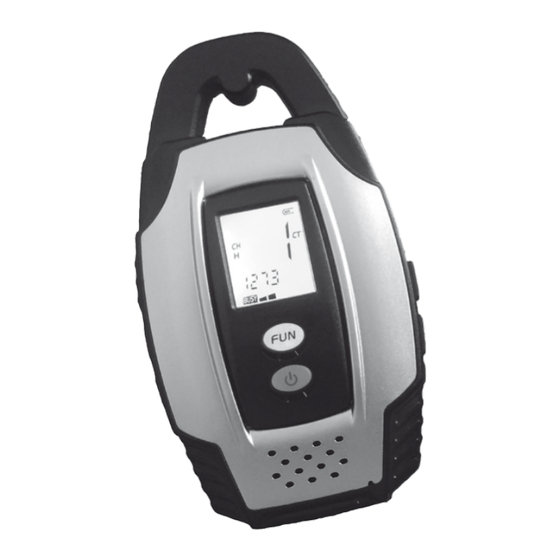
3.Getting Acquainted... - Page 9 1.Function Key / Emergency Alarm / LAMP Key: in standby mode, repeatedly press this key can choose different function; long press this key to start emergency alarm function; when receiving lighten green light; when Transmitting lighten red light. 2.Power switch / Lamp switch: in standby mode, long press this key can switch on/off the radio, short press this key can turn on/off the Lamp.
- Page 10 3.3 Switch on / off Radio until the LCD lighten then Switch on Radio: press release the power key, the LCD displays the current CH number. Switch off Radio: press until the LCD display closed. 3.4 ON/OFF Highlight Torch Under standby condition, press key and then turn on the Highlight Torch.
-
Page 11: Function Setup
squelch off level of the transceiver. If current channel has been programmed with signaling, you can only hear the call from a same signaling, other calls can not be heard. 3.8 Transmitting Before transmitting, it is recommended to monitor the channel you are using to ensure it is not busy by pressing and holding [P1/P2] side keys. -
Page 12: Advanced Functions By Pf1/Pf2
“-”stands for inverse code. Otherwise is positive code. default 017 as positive code. 4.Press [PTT] key to save and return to standby mode. 4.2 BEEP Tone setup 1.In standby mode, repeatedly press key,until the LCD display “bP” and blinking 2.Press to select open or close BEEP tone function . - Page 13 5.1 Squelch off Press the [P1]/[P2] key programmed as “Squelch off”,squelch circuit is not mute and you can hear the background noise. Press [P1]/[P2] key again, the squelch circuit becomes mute. By using this function you can monitor the weaker signal which is hard to receive. 5.2 Monitor Press they [P1]/[P2] key programmed as “Monitor”, the radio emits "DI"...
- Page 14 5.6 Talk around Press the [P1]/[P2] key programmed as “Talk around”, radio emits "DI" beep and then enable Talk Around. Under these conditions, radio will transmit by receiving frequency. Also, the setting code (CTCSS / DCS) will interchange encoding signal as decoding signal. Repeat above operation, the radio exit talk around with "DI DI"...
-
Page 15: Background Setting
It is means current power is Low power when the LCD displays "L" icon. 6.Background Setting 6.1 Wide / Narrow Band Setup According to the national conditions, users can set channel spacing as 25K (wide band), or 12.5K (narrow band) to communicate on the radio by program software. - Page 16 6.4 Signaling Relations Setup Users can set relations between CTCSS/DCS signal and DTMF signal by programming software. AND: As long as its receiving matched carrier, optional signaling and CTCSS/DCS signaling decode success, the other party calling can be heard. OR: As long as its receiving matched carrier, optional signaling or one of CTCSS/DCS signal decode success, the other party calling can be heard.
-
Page 17: Programming Software
7.Programming Software Starting (Takes Windows XP System For Example) 1.Double click "QPS I-ONE.exe", and then go on installing as computer command. 2.Click "START" menu, choose "USB To Comport" in the I_ONE 1.00 entry from "ALL PROGRAMS" and click it. - Page 18 General Frequency Range PMR446: 446.00625~446.09375 MHz 16 Channels Number Of Channels 12.5KHz (Narrow Band) Channel Spacing 5KHz, 6.25KHz Phase-locked Step 3.7V DC ±10% Operating Voltage More than 12 hours(950mAh), by 5-5-90 Battery Life working cycle ±2.5ppm Frequency Stability Operating Temperature -20℃~ +55℃ 54×100×21mm (with battery) Dimensions (mm) 57g (with battery)
-
Page 19: Trouble Shooting Guide
8.Trouble Shooting Guide Problem Corrective Action All band noisy after Turn on squelch when programmed( programmed or Non-professionals are advised not green light always rammed to adjust this function) lighten No sound after Earphone jack is broken. Please using earphone for contact local dealers to repair a while Communication... -
Page 20: Attached Chart
9.Attached Chart 9.1 CTCSS Frequency Chart 1 67.0 12 97.4 23 141.3 34 179.9 45 225.7 2 69.3 13 100.0 24 146.2 35 183.5 46 229.1 3 71.9 14 103.5 25 151.4 36 186.2 47 233.6 4 74.4 15 107.2 26 156.7 37 189.9 48 241.8 5 77.0 16 110.9 27 159.8 38 192.8 49 250.3 6 79.7 17 114.8 28 162.2 39 196.6 50 254.1 7 82.5 18 118.8 29 165.5 40 199.5... - Page 21 9.2 DCS chart 1 017 21 115 41 223 61 315 81 446 101 627 2 023 22 116 42 225 62 325 82 452 102 631 3 025 23 122 43 226 63 331 83 454 103 632 4 026 24 125 44 243 64 332 84 455 104 645 5 031 25 131 45 244 65 343 85 462 105 654 6 032 26 132 46 245 66 345 86 464 106 662 7 036 27 134 47 246 67 346 87 465 107 664...
-
Page 22: Declaration Of Conformity
Description of the product: Product: Handheld transceiver PMR-446 Brand name: AnyTone Model: I-ONE Manufacturer: Qixiang Electron Science &Technology Co., Ltd. Quanzhou. Made in: CHINA We, FALCON RADIO & A.S., S.L., declare under our exclusive responsibility that the aforementioned equipment complies with the provisions of Directive 2014/53/UE of... - Page 24 Qixiang Electron Science & Technology Co., Ltd. www.qxdz.cn...
Need help?
Do you have a question about the I-ONE and is the answer not in the manual?
Questions and answers