D-Link DCM-202 Manual
D-link system usb/ethernet broadband cable modem manual dcm-202
Hide thumbs
Also See for DCM-202:
- Quick installation manual (37 pages) ,
- User manual (33 pages) ,
- Configurations (9 pages)

Related Manuals for D-Link DCM-202


Summary of Contents for D-Link DCM-202
- Page 1 D-Link DCM-202 USB/Ethernet Broadband Cable Modem Manual Building Networks for People...
-
Page 2: Table Of Contents
Contents Package Contents ... 3 System Requirements for Configuration ... 4 Local Cable Network Service... 5 Prepare Your Workspace for the Installation ... 5 Introduction ... 7 Which Installation to Use? ... 8 Ethernet Installation... 9 Troubleshooting the Ethernet Installation ...13 USB Installation ...16 Troubleshooting the USB Installation ...26 Front and Rear Panels...29... -
Page 3: Package Contents
Printed Quick Installation Guide One 12VDC/1.0A Power adapter CAUTION! You must use the 12VDC/1.0A power adapter that comes with the D-Link DCM-202 cable modem. Using the wrong power adapter can damage the cable modem. 1 CAT 5 UTP Ethernet cable... -
Page 4: System Requirements For Configuration
System Requirements for Configuration: Verify that you have these items before beginning the installation: A cable-line splitter (not included), if you plan to have the cable modem and a television connected to the same wall cable outlet. An active two-way cable line. -
Page 5: Local Cable Network Service
To prepare your workspace: 1 Position the cable modem so that it is located near the computer and the wall cable outlet. There should be plenty of room to guide the cables away from the cable modem without crimping them. - Page 6 Installation (continued) Remove the backing paper and attach a foot to each of the corners on the cable modem; be sure to attach the feet on the surface that contains the model information stickers, as shown. 3 Do not restrict the airflow around the cable modem.
-
Page 7: Introduction
Introduction Thank you for purchasing the D-Link “Broadband Cable Modem with USB & Ethernet” DCM-202, which is an MCNS DOCSIS™ 2.0 cable modem featuring the latest DOCSIS technology. The cable modem enables your network cable operator to provide you with broadband applications such as telecommunications, IP dedication for your small office/home office (SOHO), or high-speed residential Internet access. -
Page 8: Decide Which Installation Process To Use
To do this, you might have to obtain additional IP addresses from your cable operator. Using the USB port enables you to install the cable modem more quickly and easily than connecting to the Internet using the Ethernet port, because you do not have to install a network interface card (NIC) into your computer. -
Page 9: Installing The Cable Modem Using The Ethernet Port
Installing the Cable Modem Using the Ethernet Port DCM-202... -
Page 10: Verify The Tcp/Ip Protocol Configuration
Installing the Cable Modem Using the Ethernet Port CAUTION! Be sure to read this entire User’s Manual from front to back in sequence before installing the D-Link DCM-202 USB/Ethernet Broadband Cable Modem. This chapter describes how to install the cable modem using the Ethernet port. - Page 11 2 Look for an entry named TCP/IP. If you see TCP/IP listed next to your Ethernet hardware device, you can now go to the section “Connecting the Cable Modem”. However, if TCP/IP is not listed, you must complete the following steps.
-
Page 12: Configuring Tcp/Ip On A Macintosh Computer
Cable Modem” for the instructions Configuring TCP/IP on a Macintosh Computer Before you install your cable modem, you must verify that the TCP/IP communications protocol and an Ethernet device are installed on your system. Many Macintosh computers have Ethernet devices installed at the factory. -
Page 13: Connecting The Cable Modem
Connect the coaxial cable to the cable modem’s CATV cable connector. If you plan to have the cable connected to a television as well as the cable modem, you must use a cable line splitter (not included). b Plug the cable modem’s power adapter into a wall outlet or surge protector and into the cable modem’s power jack. - Page 14 Problem: “I cannot access my e-mail or Internet service.” (continued) 3 Power cycle the cable modem by unplugging the power adapter from its electrical outlet and then plugging it back into the outlet. Then try accessing the Internet. 4 Power cycle the computer a Power off the computer.
- Page 15 You may be using the wrong power adapter. Check that the power adapter you are using is the one that came with the cable modem. CAUTION! You must use the 12VDC/1.25A power adapter that comes with the D-Link DCM-202 cable modem. Using the wrong power adapter can damage the cable modem.
-
Page 16: Installing The Cable Modem Using The Usb Port
Installing the Cable Modem Using the USB Port DCM-202... - Page 17 USB port on the computer. CAUTION! You must use the 12VDC/1.0A power adapter that comes with the D-Link DCM-202 cable modem. Using the wrong power adapter can damage the cable modem.
-
Page 18: Installing The Software Drivers
Installing the Hardware (Cable Modem and Power Adapter) continued 6 Plug the cable modem’s power adapter into the cable modem’s power jack and into a grounded electrical outlet or surge protector that is plugged into a grounded electrical outlet. 7 You must now install the software drivers provided on the Installation CD. - Page 19 ROM drive. NOTE: You can either click Browse to locate the file, or you can type D:\Drivers\ into the field next to the browse drop-down list. 3 Insert the D-Link DCM-202 Installation and Documentation CD into the CD-ROM drive. 4 Click Next to search for the necessary driver files.
- Page 20 Installing the Software Drivers (Windows 98 OS) continued CAUTION! Before proceeding to step 5, you must verify that the DCM-202 Cable Modem appears on the screen. If USB Composite Device appears, you must: (a) click Back twice, (b) Check the Specify a location check box, (c) type the letter of your CD-ROM drive followed by:\ (For example, D:\) in the Specify a location field.
- Page 21 Yes. Installing the Software Drivers (Windows 2000 OS) This section explains how to install the cable modem using the USB Connections with the Windows 2000 operating system (OS). Power on the computer. After the computer boots up: a Windows detects the cable modem.
- Page 22 Next. 3 Check the Specify a location check box and click Next to search for the necessary driver files. 4 Insert the D-Link Installation and Documentation CD into the computer’s CD-ROM drive. 5 The location of the file is: D:\Drivers\ If necessary, replace D with the letter of your computer’s CD-ROM...
- Page 23 Installing the Software Drivers (Windows 2000 OS) (continued) 7 The Found New Hardware Wizard displays the search results. 8 Click Next to install the driver files for the cable modem. If the Digital Signature Not Found screen appears, click Yes to continue the driver installation.
- Page 24 The Found New Hardware screen appears. c The Add New Hardware Wizard screen appears. 2 Insert the D-Link DCM-202 Installation and Documentation CD into the computer’s CD-ROM drive. 3 Select Specify the location of the driver (Advanced) and click Next.
- Page 25 8 Verify that the Power, Cable, Status, and USB LEDs are solid green and not blinking. If they are lit and not blinking, installation is now complete; otherwise, see “Troubleshooting the USB Installation” for help. See “Cable Modem Front and Rear Panels” for more information about thefront panel LEDs.
-
Page 26: Troubleshooting The Usb Installation
Make sure the power adapter is properly plugged into both the cable modem and a wall outlet or surge protector. 4 Power cycle the cable modem by unplugging the power adapter from its electrical outlet and then plugging it back into the outlet. Then try accessing the Internet. - Page 27 Configuration screen appears. 3 In the Ethernet Adapter Information group area, click the drop down arrow and select the D-Link cable modem. 4 Click Release. The IP address changes to 0.0.0.0. 5 Click Renew. Windows refreshes the IP address. The refreshed address may or may not be the same as the original IP address.
- Page 28 “Installing the Software Drivers (Windows 98 OS)” for step-by-step instructions. Problem: “All of the LEDs on the front of my cable modem look right, but I cannot access the Internet.” 1 If the Power, Cable, Status, and Eth LEDs are lit and not blinking the cable modem is operating properly.
-
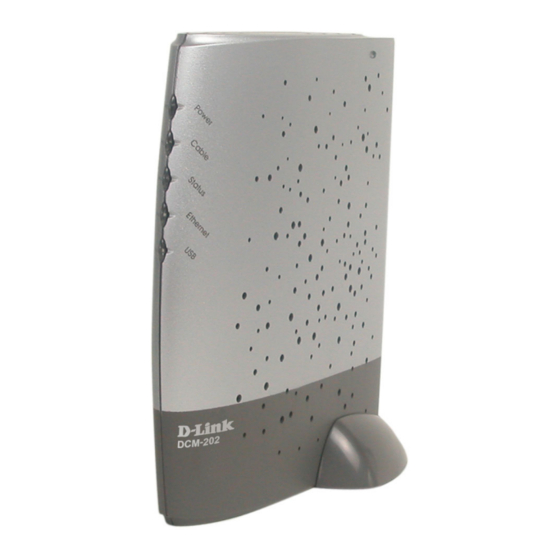
Page 29: Front And Rear Panels
Cable Modem Front and Rear Panels CAUTION! Be sure to read this entire User’s Manual from front to back in sequence before installing the D-Link DCM-202 cable modem. This chapter describes the light emitting diodes (LEDs) on the front panel and the connectors on the rear panel of the cable modem. - Page 30 Green-Blinking Green Green Green-Blinking Green Green-Blinking Description Cable modem is plugged in to an electrical outlet and is and receiving power. The modem is searching for the DOWNSTREAM frequency. Downstream frequency is locked. Searching for UPSTREAM frequency. Upstream frequency is locked.
-
Page 31: Back Panel Connectors
Jack to connect the power adapter included in the product package. Caution! You must use the 12VDC/1.0A power adapter that comes with the DCM-202 cable modem. Using the wrong power adapter can damage the cable modem. RESET Restores factory default settings. -
Page 32: Technical Specifications
Transmitter Demodulation: Max Speed: Frequency Range: Bandwidth: Signal Level: Modulation: Max Speed: Frequency Range: Bandwidth: DCM-202 DCM-202 DOCSIS 1.0 DOCSIS 1.1 DOCSIS 2.0 PC Interface 10/100BASE-T (half/full- duplex, auto-sensing) 1 port USB Device (12Mbps, full speed mode) 1 port WAN... - Page 33 Technical Specifications (continued) Max. Number of CPEs Filtering Frequency Search Number of SID Safety Power Supply Signal Level: (Output level of CM can automatically controlled by CMTS through power ranging function), Step: 1dB Output Return Loss: LLC: Frequency Cache: Channel Plan: AC-DC Adapter: Consumption: Protocol:...
- Page 34 Technical Specifications (continued) Environment Dimensions (without AC Adapter) Weight Operating temperature: Operating humidity: Storage temperature: 32°F (0°C) to 104°F (40°C) 10% to 90% (Non condensing) -4°F (-20°C) to 140°F (60°C) Power, Cable, Status, Ethernet 120mm(W) x 142mm(H) x 30mm(D); without Stand (Approximately) 0.3kg(Approximately)
-
Page 35: Technical Support
Contacting Technical Support You can find the most recent software and user documentation on the D-Link website. D-Link provides free technical support for customers within the United States for the duration of the warranty period on this product. U.S. customers can contact D-Link technical support through our web site, or by phone. -
Page 36: Warranty
D-Link’s sole obligation shall be to repair or replace the defective Hardware during the Warranty Period at no charge to the original owner or to refund at D-Link’s sole discretion. Such repair or replacement will be rendered by D-Link at an Authorized D-Link Service Office. The replacement Hardware need not be new or have an identical make, model or part. - Page 37 D-Link may reject or return any product that is not packaged and shipped in strict compliance with the foregoing requirements, or for which an RMA number is not visible from the outside of the package. The product owner agrees to pay D-Link’s reasonable handling and return shipping charges for any product...
- Page 38 D-Link Corporation/D-Link Systems, Inc., as stipulated by the United States Copyright Act of 1976. Contents are subject to change without prior notice.
-
Page 39: Registration
Registration Register your D-Link product online at http://support.dlink.com/register/ (10/07/04)
Need help?
Do you have a question about the DCM-202 and is the answer not in the manual?
Questions and answers