Welch Allyn Acuity LT Installation Manual
Wireless system
Hide thumbs
Also See for Acuity LT:
- Directions for use manual (210 pages) ,
- Directions for use manual (214 pages)

Related Manuals for Welch Allyn Acuity LT


Summary of Contents for Welch Allyn Acuity LT
- Page 1 Acuity ® Wireless System Installation Guide Software Version 6.X compatible with: Propaq CS Software Versions 3.42.01 or higher Propaq LTR Software Versions 1.X or higher Micropaq Software Versions 1.3X or higher...
- Page 2 Welch Allyn. Welch Allyn assumes no responsibility for any injury to anyone, or for any illegal or improper use of the product, that may result from failure to use this product in accordance with the instructions, cautions, warnings, or statement of intended use published in this manual.
-
Page 3: Table Of Contents
2 - Planning the Installation ........3 Understanding the Acuity LT Wireless System ......3 Plan the Location of Equipment . - Page 4 Contents Welch Allyn Acuity LT Wireless System...
-
Page 5: Introduction
In order to make sure your equipment is installed properly, be sure to read and follow all of the planning and installation steps provided in this manual. For information about how to operate the Acuity LT Wireless System, refer to the Acuity LT Wireless System Directions For Use (810-1600-XX). -
Page 6: Safety And Compliance Information
Acuity LT Installation Guide. WARNING Although the printer is optional with the Acuity LT system, be aware that there is no physical record available for Acuity events such as alarms without... -
Page 7: Planning The Installation
Planning the Installation Understanding the Acuity LT Wireless System The Acuity LT wireless system displays the vital signs from patient monitoring devices on the Acuity LT Central Station. Network components included with the system enable connections to wireless patient monitoring devices and a laser printer. The system also stores patient data through the Full Disclosure feature. - Page 8 43 to set the wireless monitor Network Name.) If a facility has more than one Acuity LT system, the CPU, AP , and wireless monitors must be configured at the factory with a different Network Name to prevent interference between networks.
-
Page 9: Plan The Location Of Equipment
Installation Guide Chapter 2 Planning the Installation Plan the Location of Equipment The following illustration shows some typical locations for installation of the Acuity LT wireless system components. Sandra “D” (SD) type antenna is mounted on the ceiling for best reception. -
Page 10: Plan The Location Of Your Access Points
Sources of radiation such as x-ray To reduce interference, keep Acuity LT AP antennas at least 7 feet away machines, microwave ovens, or other from other network antennas or other sources of radiation. -
Page 11: Installation Plan Examples
APs to your system (up to a maximum total of seven). See “Installing Additional APs” on page 49. After you have installed the Acuity LT system, it is very important to complete the Final System Operation checklist (“Step 4 - Check Final System Operation” on page 26). The... - Page 12 Chapter 2 Planning the Installation Welch Allyn Acuity LT Wireless System checklist includes confirmation of adequate wireless communication throughout all areas of your facility, and confirms that your APs are properly located and operating. Example 1 - L-Shape Floor Plan...
- Page 13 Installation Guide Chapter 2 Planning the Installation Example 2 - Single-Corridor Floor Plan Access Point 1 Acuity LT Central Station Equipment closet Access Point 2 10 feet...
- Page 14 Chapter 2 Planning the Installation Welch Allyn Acuity LT Wireless System Example 3 - Double-Corridor Floor Plan Access Point 1 Equipment closet Acuity LT Central Station Access Point 2 10 feet...
-
Page 15: Installation Worksheet For Your Facility
Installation Guide Chapter 2 Planning the Installation Installation Worksheet for Your Facility Use this worksheet to identify the locations for the equipment and APs for your facility. Be sure to consider: • All of the factors about obstructions and network coverage (“Common Obstructions”... - Page 16 Chapter 2 Planning the Installation Welch Allyn Acuity LT Wireless System...
-
Page 17: Installing The Wiring
Install Wiring for all Equipment After you have planned your installation and decided where your Acuity LT equipment will be located, you can have qualified personnel install the wiring for the Acuity LT Wireless System equipment in the appropriate locations. - Page 18 40 feet Minimum installation distance between AP/AP antennas and 2 feet high-use work areas (see the Warnings on page Table 5. Power Requirements for Acuity LT Wireless System Equipment Location Equipment Installed AC Power Outlets Required Minimum Power Requirements Central Nurses...
-
Page 19: Installing The System
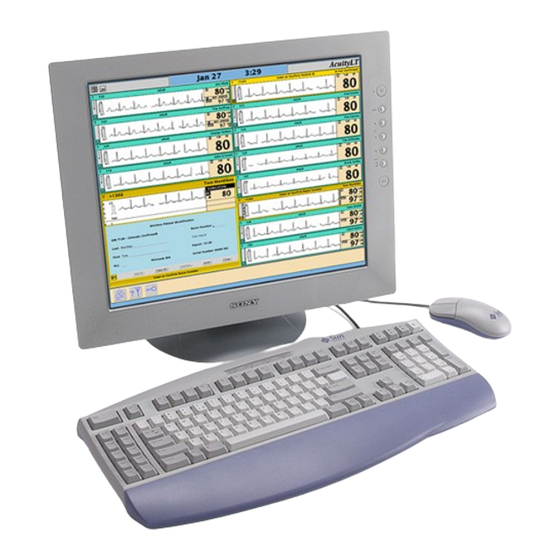
Installing the System Step 1 - Unpack Carefully unpack the Acuity LT system. 2. Locate and identify all the components. Standard components as well as the optional printer and uninterruptible power supplies are shown in the illustration and listed in Table 6 on page 16. - Page 20 Chapter 4 Installing the System Welch Allyn Acuity LT Wireless System Table 6. Equipment List for Acuity LT Wireless System Equipment Item Description Typical Installation Location Display Flat Panel Display Desk at nurses station AC power cord (not shown) Data cable for connection to CPU, HD15-HD15 (not shown) External audio cable (not shown;...
-
Page 21: Step 2 - Set Up And Check Preliminary System Operation
Before you install the equipment, it is strongly recommended that you first set up and connect all Acuity LT system components. This allows you to see how all the system components work together, and confirm that all components are working properly in your facility. - Page 22 (Ports 3-7 - APs 3-7) adapters, cords UPS 1 Port 8 - CPU Do not plug UPS 1 and cables. into ac power until Step PoE POWER PoE POWER SUPPLY SUPPLY SD ANTENNA SD ANTENNA Preliminary Wiring Connections for the Acuity LT Wireless System...
- Page 23 Installation Guide Chapter 4 Installing the System 3. After you have connected all equipment, apply power in this order: Printer Plug into ac power. Do not plug the printer into a UPS. Turn on the printer power switch (power switch may be in the rear; see printer manual for location). UPS 1 Plug the UPS 1 power cord into an ac outlet.
- Page 24 Chapter 4 Installing the System Welch Allyn Acuity LT Wireless System If Acuity displays a CHECK NETWORK message, check all of the power and data cable connections to the CPU, Switch, APs, and PoEs. If the message is still displayed, refer to “Troubleshooting &...
- Page 25 Installation Guide Chapter 4 Installing the System 11. Set the monitor to the alternate internal simulation mode to cause an alarm: Micropaq: • Press Scroll Down as needed to highlight TOGGLE DEMO MODE, then press Select (this selects DEMO 2 Mode, thereby causing an alarm condition). Propaq LTR: •...
- Page 26 Confirm that the system continues to operate without disruption. Plug both UPS units back into AC power. 17 . Apply power to all the wireless monitors that will be used with the Acuity LT system (maximum 12 active monitors at one time, or 28 active monitors for a 28-patient system).
-
Page 27: Step 3 - Set Up And Connect The Equipment
Installation Guide Chapter 4 Installing the System Step 3 - Set Up and Connect the Equipment Place all of the equipment in the locations you previously identified during the planning process. Access Points • Temporarily hang APs in the hallway in the intended location. Do not permanently mount the AP mounting brackets or SD antennas. - Page 28 Port 8 - CPU POWER POWER SUPPLY SUPPLY For systems with 4-7 APs, add as appropriate: • UPS • PoEs, power adapters, cords and cables. SD ANTENNA SD ANTENNA Final Wiring Connections for the Acuity LT Wireless System (12 Patients)
- Page 29 System Check POWER POWER SUPPLY For systems with 4- SUPPLY 7 APs, add as appropriate: • UPS (500 VA) • PoEs, power adapters, cords and cables. SD ANTENNA SD ANTENNA Final Wiring Connections for the Acuity LT Wireless System (28 Patients)
-
Page 30: Step 4 - Check Final System Operation
Welch Allyn Acuity LT Wireless System Step 4 - Check Final System Operation Perform all of the steps in this table to make sure the Acuity LT wireless system is operating properly. This system check may require 2-3 hours to complete, depending on your facility. - Page 31 Installation Guide Chapter 4 Installing the System Table 7. Final System Check for Acuity LT Wireless System (continued) Step Activity to Perform Pass/Fail Comments (Circle One) For 28-patient systems only: Pass/Fail Confirm that Acuity LT presents information on both the left and right displays with the top row information similar to the screen shown in Step 4.
- Page 32 Chapter 4 Installing the System Welch Allyn Acuity LT Wireless System Table 7. Final System Check for Acuity LT Wireless System (continued) Step Activity to Perform Pass/Fail Comments (Circle One) Click the left mouse/trackball button on the status icon Pass/Fail and confirm that the ID Not Confirmed window is displayed.
- Page 33 Installation Guide Chapter 4 Installing the System Table 7. Final System Check for Acuity LT Wireless System (continued) Step Activity to Perform Pass/Fail Comments (Circle One) Place the monitor within 10 feet of AP1. Pass/Fail At the Switch, disconnect the data cables to all APs EXCEPT for AP1;...
- Page 34 AP . 3. Make sure a single wireless monitor is powered on and connected to Acuity LT. 4. Make a sketch of your facility’s room layout in the RSSI Measurement Chart on page 5.
- Page 35 Installation Guide Chapter 4 Installing the System • From the main display, highlight SpO2 and press • Highlight Setup and press to access the Setup menu. • Highlight Service and press to access the Service menu. • Highlight Radio, then highlight Show Info and press The monitor displays the Net name (which must match the Network Name on the CPU left side panel label) and the RSSI value.
- Page 36 Chapter 4 Installing the System Welch Allyn Acuity LT Wireless System When testing, be sure to place the APs close enough together to allow overlapping coverage and prevent gaps in network coverage. The APs should at least 6 feet apart, but no more than 40 feet apart.
- Page 37 Installation Guide Chapter 4 Installing the System Example of Completed RSSI Measurement Chart Here is an example of a completed RSSI Measurement Chart (“Example 2 - Single- Corridor Floor Plan” on page 9). Room Number/ RSSI Location Room Bathrm Stairway Hall N.
- Page 38 Chapter 4 Installing the System Welch Allyn Acuity LT Wireless System Perform Final Installation of APs If the RSSI testing was satisfactory for your facility, have qualified personnel complete the final installation of the APs. The APs are typically mounted either on the wall, on the ceiling, or just above the ceiling (for suspended ceilings).
- Page 39 Installation Guide Chapter 4 Installing the System Rotate the bracket clockwise to mount onto the rail. • For mounting above suspended ceiling tiles, push back the tiles, locate a suitable place, and mount the AP . 2. Insert the AP into the mounting bracket with the keyhole slots aligned at the back, then slide the AP into place.
- Page 40 If you repositioned the APs and AP antennas but you still had areas in your facility where the RSSI is too high, your facility may have extra obstructions that will require additional APs for your Acuity LT Wireless System (up to a maximum total of 7 APs). •...
-
Page 41: Troubleshooting & Support
Troubleshooting & Support Troubleshooting If your Acuity LT wireless system does not work properly, use this table as a guide to help identify and solve problems Table 8. Acuity LT Wireless System Troubleshooting Symptom Possible Cause and Suggested Response CHECK NETWORK message at Acuity LT did not get the expected response from 1 or more APs. -
Page 42: Technical Support
Chapter 5 Troubleshooting & Support Welch Allyn Acuity LT Wireless System Technical Support For technical assistance, contact Welch Allyn Technical Support. See page ii for contact information. -
Page 43: A - Specifications
Refer to Wireless Monitor Directions For Use Modulation Frequency Hopping Spread Spectrum (FHSS) IEEE 802.11 compliant Wireless patient monitors Any combination of Welch Allyn Propaq CS, Propaq LTR, or Micropaq patient monitors • 12-Patient System 12 maximum monitors at one time • 28-Patient System... - Page 44 Appendix A Specifications Welch Allyn Acuity LT Wireless System The following table lists all of the Acuity LT Wireless System components. All components have been validated and approved for use within the Acuity LT Wireless System. Except for the Printer and UPS, all other replacement devices must be ordered from Welch Allyn to make sure they meet system performance requirements and are properly configured as required.
- Page 45 Installation Guide Appendix A Specifications Table 11. Wireless Monitors for Acuity LT Wireless System Monitor Description • 5 lead ECG and optional motion-tolerant SpO2 • Heart rate, SpO2 numerics, pulse bar • Communicates data through APs to Acuity system • Operates stand-alone with continuous monitoring and alarms when outside range of APs •...
- Page 46 Appendix A Specifications Welch Allyn Acuity LT Wireless System...
-
Page 47: B - Monitor Network Name (Essid)
Monitor Network Name (ESSID) In order for a wireless monitor to connect to the Acuity LT Wireless System network, the monitor must be set to the correct Network Name (ESSID) for the system. The system Network Name is shown on a label on the left side panel of the CPU. - Page 48 To change the Network Name, press Scroll Up or Scroll Down to highlight the desired Network Name, and press Select. The Micropaq automatically turns itself off, and then turns on and seeks to connect to the Acuity LT network with the new Network Name.
-
Page 49: Propaq Ltr Network Name (Essid)
4. Highlight Radio, then highlight Show Info and press The monitor displays the current Net name. The Net name must match the Network Name on the CPU left side panel label to connect to the Acuity LT Wireless system. 5. To exit, highlight Exit and press Change the Propaq LTR Network Name This procedure allows you to change the Net Name. -
Page 50: Wireless Propaq Cs Network Name (Essid)
Appendix B Monitor Network Name (ESSID) Welch Allyn Acuity LT Wireless System Wireless Propaq CS Network Name (ESSID) Check the Wireless Propaq CS Network Name From the Main Menu press SETUP , MORE, MORE, SERVICE, YES, MORE, MORE, RADIO STATUS. - Page 51 If you press NO, the monitor displays the Change Net Name screen again. WARNING When setting the Network Name, make sure that the monitor Network Name matches the CPU for your Acuity LT wireless system. If a different Network Name is set, the monitor could connect to a different nearby Acuity wireless system which has that Network Name resulting in confusion about patient monitoring and the location of patient data.
- Page 52 Appendix B Monitor Network Name (ESSID) Welch Allyn Acuity LT Wireless System...
-
Page 53: C - Installing Additional Aps
Too many walls between the monitor and AP To Order Additional APs Contact your Welch Allyn representative. (In the United States call 1-800-289-2501.) Note If your system will have four to seven APs, you will also need to add an additional UPS to accommodate the additional PoE Power Supplies. - Page 54 Appendix C Installing Additional APs Welch Allyn Acuity LT Wireless System You need an additional UPS for the PoE power supplies if your system has four or more APs. 4. Confirm that within 2-3 minutes of receiving power the green Link LED (3rd LED from left on the front of the AP) is continuously on.
Need help?
Do you have a question about the Acuity LT and is the answer not in the manual?
Questions and answers