Advertisement
Table of Contents
ASSEMBLY INSTRUCTIONS
We have designed our furniture with you , the customer in mind . Our clear , easy to follow ,
step by step instructions will guide you through the project from start to finish .
Feel confident that this will be a fun and rewarding project . The final product will be a quality
piece of furniture that will go together smoothly and give years of enjoyment .
Please do not return to the store
STOP
Broken or missing parts?
Need help with assembly?
If you have any questions just call 1-800-468-6447 or email us at
parts@convenience-concepts.com
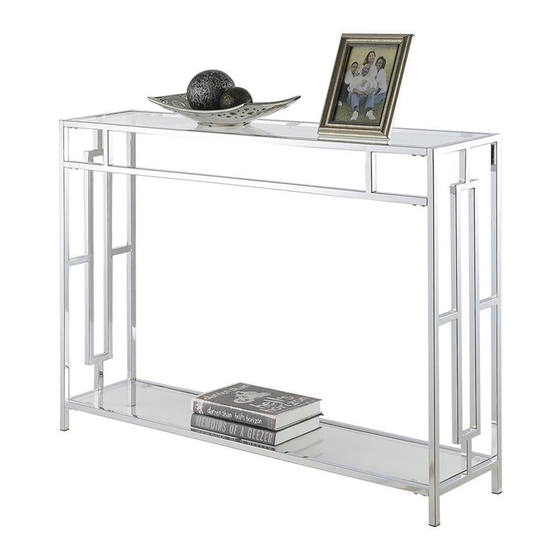
Town Square Console Table
135099
Advertisement
Table of Contents

Related Manuals for convenience concepts 135099


Summary of Contents for convenience concepts 135099
- Page 1 Town Square Console Table 135099 ASSEMBLY INSTRUCTIONS We have designed our furniture with you , the customer in mind . Our clear , easy to follow , step by step instructions will guide you through the project from start to finish .
-
Page 2: Hardware List
Hardware List Screw (20pcs) Allen Wrench (1pc) Non-slip disk (12pcs) Polishing cloth (1pc) Cable tie (2pcs) Eyelet screw (2pcs) Anchor (2pcs) Panel List (2pcs) Glass (2pcs) Frame Front Rail (1pc ) (3pcs) Rail *Please count and verify all parts before assembly .* Page 2 of 6... -
Page 3: Exploded View
Exploded View Page 3 of 6... - Page 4 Step 1 *Assemble unit on carpet or another soft surface. 1.Connect frames (2) together by sliding them into rails (4) and front rail (3) as shown. 2. Secure front rail ( 3 ) and rails ( 4) to frames ( 2 ) as shown using screws (A) and allen wrench (B) .
- Page 5 Step 2 1.Place non-slip disks (C) into assembly as shown to support glass shelf. Step 3 1. Retighten all screws. 2. Using a slight angle, carefully insert glass ( 1 ) into unit. Page 5 of 6...
- Page 6 Step 4 1.Drill holes slightly smaller than anchors (E)into drywall and gently tap anchors into holes. 2.Insert eyelet screws (G) into anchors and fasten unit to wall using cable ties (F). Page 6 of 6...
Need help?
Do you have a question about the 135099 and is the answer not in the manual?
Questions and answers