
Related Manuals for Philips WelcomeHive Pro 2


Summary of Contents for Philips WelcomeHive Pro 2
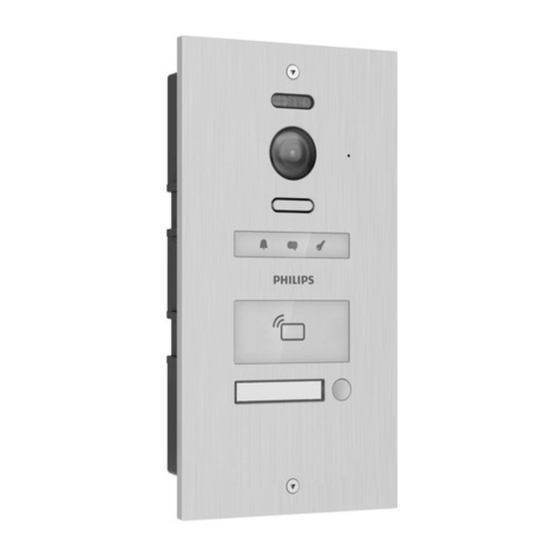
- Page 1 WelcomeHive Pro 2 Eight Buttons Doorphone Entry Panel User manual Register your product on www.philips.com/register...
-
Page 2: Table Of Contents
Contents 1. Safety instructions................. 2 2. Kit contents .................... 3 3. General information ................4 4. Component names ................4 5. Wiring ...................... 6 5.1. General wiring diagram............... 6 5.2. Entry panel settings ..............7 5.3 DIN rail power supply wiring ............9 6. Configuration before final installation...... - Page 3 8. Use......................16 8.1. Pairing user badges ............... 16 8.2. Deleting user badges ..............17 8.3. Using name holders ..............17 8.4. Operation ..................18 9. Technical features ................. 18 10. FAQ - Common problems and solutions ........19 11. Technical support - Warranty ............21 12. Safety measures ................... 22 13.
-
Page 4: Safety Instructions
• If you are installing this product for someone else, remember to leave the manual or a copy of it with the end user. • This product is designed exclusively to work with Philips WelcomeHive Pro 2 monitors, reference 531065. -
Page 5: Kit Contents
DIN rail power badge (blue) x1 (grey) x16 supply 8. Key for unscrewing 9. VIGIK module power 10. Fastening clips for the entry panel from the cable x1 both flush-mounted rear flush-mounting box boxes x2 Philips - WelcomeHive Pro 2... -
Page 6: General Information
3. General information This entry panel is designed for use with monitors in the WelcomeHive Pro 2 range. Ideal for professional installations, it features a flush-mounted design, a machined aluminium front panel and a single DIN rail power supply unit and offers top-of-the-range features such as high image resolution, visitor memory, the option of adding a second screen per home, and a digital BUS system that reduces the length of wires required for installation. - Page 7 DIN rail power supply: Mains power supply (pry to remove the cover) Removable terminal block for connecting entry panel and monitor(s). (It can be supplied Rail release with fasteners) lever Philips - WelcomeHive Pro 2...
-
Page 8: Wiring
Each button has a corresponding monitor; additional monitors are optional. Please note: the video doorphone uses digital BUS technology, so the monitors must be connected one after the other for optimum results: 230 Vac 50 Hz 230 Vac 50 Hz Philips - WelcomeHive Pro 2... - Page 9 • EXT AND GND TERMINALS: this input is for an exit button to be installed inside the property to trigger the opening of the electric strike plate. The exit button must be NO type: the contact closes when it is used to open the entry point Philips - WelcomeHive Pro 2...
- Page 10 12 Vdc power supply input for the VIGIK module: use the COM and NO outputs connector and cable supplied for the VIGIK module Refer to the VIGIK module installation instructions for information about wiring, programming and using VIGIK badges. Philips - WelcomeHive Pro 2...
-
Page 11: Din Rail Power Supply Wiring
2 shielded twisted pairs 0 to 120 m Between DIN rail power supply and the monitors Type of wires Distance 2 x 0.75 mm² 0 to 50 m 2 x 1.5 mm² 0 to 80 m 2 shielded twisted pairs 0 to 120 m Philips - WelcomeHive Pro 2... -
Page 12: Configuration Before Final Installation
• If you are using a fail-safe electric strike plate or a magnetic lock: move the jumper on the 2 left- hand pins to the NC position Entry panel confi guration DIP switches: The DIP switches are numbered from 1 to 4. • DIP switches no. 1 and 2: Set to down (OFF position): Philips - WelcomeHive Pro 2... -
Page 13: Monitor(S) (Not Supplied)
Once all settings have been confi gured, you can install the entry panel and lock the security screws on the front using the tool supplied. 6.2 Monitor(s) (not supplied) There are DIP switches at the rear of each monitor used to confi gure the monitor: Philips - WelcomeHive Pro 2... - Page 14 If there is only one monitor in the home or fl at, it must be set to ‘master’ mode. - Move to down (OFF position) to put the monitor in ‘master’ mode. - Move to up (ON position) to put the monitor in ‘slave’ mode. Philips - WelcomeHive Pro 2...
-
Page 15: Installation
- If the monitor is at the end of the line, set to up: 7. INSTALLATION 7.1 Entry panel The entry panel is designed to be fl ush-mounted: You can use the screws supplied to fi x the fl ush-mounting box inside the pillar recess. Philips - WelcomeHive Pro 2... - Page 16 You will need access to the back of the entry panel for settings and to activate the RFID badges supplied. Important: to prevent water ingress, the seal around the entry panel must be compressed when the entry panel is placed back onto its flush-mounting box. Philips - WelcomeHive Pro 2...
-
Page 17: Din Rail Power Supply
- The DIN rail power supply is not designed for outdoor installation. It must not be exposed to the elements. The DIN rail power supply can be installed either on the rail of an existing electrical box or using the rail section supplied. Philips - WelcomeHive Pro 2... -
Page 18: Monitor(S) (Not Included)
If you wave a grey badge in front of the entry panel and it beeps three times without the indicator lighting up, this means that the badge has not been registered by the entry panel. 8.2 Deleting user badges To delete all the user badges, go back to the administrator badge (blue) configuration: Philips - WelcomeHive Pro 2... -
Page 19: Using Name Holders
- If a monitor displays the entry panel image in low ambient light conditions, the night vision light at the top of the entry panel comes on while the video is being displayed. Please refer to the monitors’ user manual for more information on how they work. Philips - WelcomeHive Pro 2... -
Page 20: Technical Features
9. Technical features Model 8-Name Philips WelcomeHive Pro 2 DES 9804 VDP entry panel Power supply DIN rail transformer 100-240 Vac 50 Hz/32 Vdc 1.5 A supplied Assembly Flush-mounted in wall/pillar Video CMOS 900TVL Camera Colour night vision with ambient-light-controlled lighting Additional 12 V electric emission strike plate output, max. current 1.5 A... - Page 21 • Monitor volume too • Adjust the monitor volume in the quiet appropriate menus Refer to the monitor’s instructions for more information Philips - WelcomeHive Pro 2...
-
Page 22: Technical Support - Warranty
Do not use any tool that can conduct voltage (wire brush, sharp tool, etc.) for cleaning. The receipt or invoice is proof of purchase date. Contacts and opening hours of our technical support centres are available if necessary on the website www.philips.com. Philips - WelcomeHive Pro 2... -
Page 23: Safety Measures
- Ventilation should not be blocked by covering the ventilation opening with an object such as a newspaper, tablecloth or curtain, etc. - No open flame source such as a burning candle must be placed on the device. Philips - WelcomeHive Pro 2... -
Page 24: Fcc/Ce Warning
WITH the RED directive AVIDSEN hereby declares that the equipment designated below: Philips WelcomeHive Pro 2 DES 9804 VDP entry panel Complies with the RED 2014/53/UE directive and that its conformity has been assessed pursuant to the applicable standards in force: •... - Page 25 ES - Corriente continua PT - Corrente contínua FR - Courant alternatif GB - Alternating Current D - Wechselstrom NL - Gelijkstroom PL - Prąd zmienny IT - Corrente alternata ES - Corriente alterna PT - Corrente alterna Philips - WelcomeHive Pro 2...
- Page 28 2024©Avidsen. All rights reserved. Philips and the Philips shield emblem are registered trademarks of Koninklijke Philips N.V. and are used under licence. This product was manufactured and is sold by AVIDSEN SAS, and AVIDSEN SAS is the sole guarantor of the product.
Need help?
Do you have a question about the WelcomeHive Pro 2 and is the answer not in the manual?
Questions and answers