Table of Contents
Advertisement
WelcomeEye Link
531034
FR -Notice téléchargeable sur philips.com
GB - Downloadable instructions at philips.com
D - Anleitung kann auf philips.com heruntergeladen werden
NL - De handleiding kan gedownload worden op philips.com
PL - Instrukcja do pobrania na philips.com
IT- Il manuale è disponibile anche su www.philips.com.
ES - Manual que puede descargar en philips.com
PT - Manual de instruções disponível no site philips.com
V1
Scan me
to find out about our products
Flashez-moi
pour découvrir nos produits
Advertisement
Table of Contents

Related Manuals for Philips WelcomeEye Link 531034


Summary of Contents for Philips WelcomeEye Link 531034
- Page 1 FR -Notice téléchargeable sur philips.com GB - Downloadable instructions at philips.com D - Anleitung kann auf philips.com heruntergeladen werden NL - De handleiding kan gedownload worden op philips.com PL - Instrukcja do pobrania na philips.com IT- Il manuale è disponibile anche su www.philips.com.
- Page 2 WelcomeEye / Link / V1...
-
Page 3: Table Of Contents
CONTENTS 1 SAFETY INSTRUCTIONS............p.2 2 KIT CONTENTS...............p.3 3 PRESENTATION..............p.4 4 SETTINGS FOR WIFI USE............p.5 5 RESETTING................p.4 6 INSTALLATION AND WIRING..........p.10 7 USER MANUAL................p.13 8 ADVANCED SETTINGS............p.14 9 COMPATIBLE PRODUCTS.............p.24 10 TECHNICAL CHARACTERISTICS........p.32 11 ACCESSORIES …………………………........…….p.32 12 FAQ …………………………............…….p.33 13 TECHNICAL SUPPORT - WARRANTY........p.34 14 SAFETY MEASURES..............p.35 15 FCC/CE WARNING..............p.36 16 DECLARATION OF CONFORMITY........p.36... -
Page 4: Safety Instructions
1. SAFETY INSTRUCTIONS Important! • Please carefully read the user manual before installing or using this product. • If you are installing this product for someone else, remember to leave the manual or a copy of it with the end user. Warning: •... -
Page 5: Kit Contents
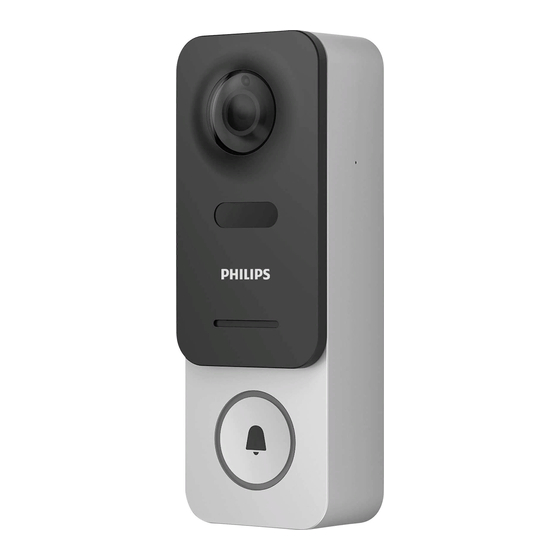
2. KIT CONTENTS 1. Intercom 2. Battery 3 • Bracket 4 • Double- panel sided tape horizontal tilting 6 • Micro SD card.(already inserted in its slot) 5 • 2 cables for the 7 • USB cable 8 • Pack of screws (3 wall gate control plugs, 3 wall screws, 3 black screws for fixing the... - Page 6 3. OVERVIEW Dawn-to-dusk cell (allows IR LED lighting at twilight) Camera lens (fixed, cannot be tilted) Intercom panel Presence front sensor Infra-red lighting (not visible), allows a visitor to be identified at 1 metre Loudspeaker Call button Microphone Reset button Micro SD card slot installation...
-
Page 7: Settings For Wifi Use
Note: Connect your phone to the 2.4 GHz WiFi which will be used for your intercom panel. F. Download and install the Philips WelcomeHome app from the App Store/Google Play. (Confirm all authorisation requests.) G. You must create an account. Click “s’inscrire” (register) at the bottom right-hand side... - Page 8 and fill in the fields requested. Don’t forget to fill in the captcha. Confirm “s’inscrire” (register). H. You will receive an email confirming that you have created an account. Confirm the link received. (Remember to check your spam or junk folder). Return to the app, and click “ok”, then “Connexion”...
- Page 9 J. If your phone cannot scan the code, you can register manually. “ajouter un appareil” (add a device), select PHILIPS, then On the home page, press PHILIPS WelcomeHome, and “par choix” (by choice). K. Click the intercom panel icon and complete the UID for your LECS intercom panel (6 numbers)-(7 letters).
- Page 10 M. If your intercom panel is no longer flashing red, start a reset. Click “Suivant” (Next). Your phone will now give a series of high-pitched signals. Place your phone next to your intercom panel (having checked that the phone’s volume is not too low) The intercom panel will flash blue, remain stable, then go out.
- Page 11 You will find a full explanation of how to use the app in paragraph 9, “Advanced settings” of the downloadable instructions onwww.philips.com. If you wish to configure another phone to the same intercom panel, there are 2 possible...
-
Page 12: Resetting
- For permanent use: download the Philips WelcomeHome app onto the new phone and log in using the email address and password of your main account. - For temporary access: we recommend that you create a new user. You will find the procedure for this in chapter 9 “Advanced settings”... - Page 13 and clean.- Or screw it straight onto the wall. - Use the horizontal tilting bracket if you need to WelcomeEye / Link / V1...
- Page 14 Note: If applicable, don’t forget to connect the motorised control (dry contact on the back) before fixing the intercom panel. Use the 2 screws provided for this purpose. Important: The control is a dry contact. You can connect it directly to the control for your motorised gate.
-
Page 15: User Manual
7. USER MANUAL A. When someone presses the button on the intercom panel button, this triggers a call or notification to the mobile device. Remember to authorise calls or notifications from Philips WelcomeHome in your mobile device settings. Note: To avoid battery overconsumption, smartphone notifications are limited to 10 calls/ day. -
Page 16: Advanced Settings
Note that you need to press only once to activate or turn off the microphone, the loudspeaker and the opening control. Microphone is on, communication with the visitor is open. Microphone is off, your visitor cannot hear you. Visitor audio is open. Visitor audio is closed. - Page 17 - The list of rooms you have created in your connected home. (you can rename a room, change the background, delete a room). - The list of devices that can be managed by Philips WelcomeHome. (you can rename a device, change the room, delete the device).
- Page 18 Select your format and name your customization. Step 2 Step 1 Step 3 Press on one of the boxes, then navigate to select the shortcut you want to associate with that box. Step 2 Step 1 Step 3 Step 4 Exit the edit mode by pressing the back button.
- Page 19 Helps you complete your installation - Add a room to your connected home. - Add a Philips WelcomeHome compatible device. - Add a group of devices (lights, etc.) - Add a scenario. - Service: not used. - Add a user.
- Page 20 reduce the image size. Back on the main display, view your new room by swiping your phone screen from left to right. B - To add a device: please refer to Chapter 9. COMPATIBLE PRODUCTS. C - To add a group, you must determine the device type, then press “Suivant” (Next). Choose the devices you want to add to the group and confirm by pressing “Suivant”...
- Page 21 D - To add a scenario, you must set: a trigger, an action and a triggered element. Up to 10 scenarios can be programmed. The example shows a Philips Hue light bulb turning on whenever a visitor rings the LINK videophone intercom.
- Page 22 Now you will programme the trigger or trigger element. Press “Ajouter une déclencheur” (Add trigger), “Appareil” (Device), and then select the room where the trigger device is located. Confirm your device. Select the trigger mode, press “Suivant” (Next), and name your scenario. Select the room WelcomeEye / Link / V1...
- Page 23 E - To add a temporary user (on another phone) you must enter a valid email address and create a password. Note: the email address must not already exist among Philips WelcomeHome users. The other user must download the Philips WelcomeHome app, and log in with the email address and password you created. Refreshes the screen.
- Page 24 Opens voice command for a device connected and configured to Philips WelcomeHome. Press the microphone and say the name of a scenario you have created to launch it. Access to our chatbot and information about the application. 7 - Detections, Alerts, Recorded Videos, Silent Mode.
- Page 25 used to: - configure motion detection activation. When a visitor approaches within about one metre of the intercom panel, an alert notification is sent to your phone. (this feature is not recommended in busy walkways). Each detection wakes up the intercom panel, and the button lights up in blue. (not adjustable) Note: If you want to receive motion detection notifications, remember to configure this setting.
-
Page 26: Compatible Products
2 - The application is compatible with PHILIPS HUE light bulbs. Pairing Philips WelcomeHome to PHILIPS HUE. Begin by making sure that your light bulb is connected to the Philips Hue app and that it is working properly. Before pairing, make sure that “Contrôlez hors de la maison” (Control outside the home) is enabled on the Philips Hue app. - Page 27 “Ajouter un appareil” (Add a device), select PHILIPS, then press “Continuer” (Continue). This takes you to a recognition page. Enter your Philips WelcomeHome account password and press “Connexion” (Login). This will take you back to your home page in web format. WelcomeEye / Link / V1...
- Page 28 “Ajouter un appareil” (Add a device), select PHILIPS, then press “Continuer” (Continue). Enter the email and password for your Philips Hue account, then press “Connexion” (Login). Confirm you trust the app by clicking “Oui” (Yes). The light bulbs configured on your Hue account will appear. Press “Validez” (Confirm).
- Page 29 3- Pairing Philips WelcomeHome to Amazon Alexa Installation In the Amazon Alexa app, select “Skills et jeux” (Skills and Games) and search for Philips WelcomeHome in the search bar. Activate the app and enter the email and password used for your Philips WelcomeHome...
- Page 30 Now all you have to do is initiate detection on your intercom panel. The intercom panel is located in the camera group. Now you can control the scenarios you created on the Philips WelcomeHome app using WelcomeEye / Link / V1...
- Page 31 Alexa speaker. In the chapter “Pairing Philips WelcomeHomeTV to an Android TV” you will find an example of a scenario where the video from the intercom panel is displayed on an Android TV after a call is made.
- Page 32 C - Using the Philips WelcomeHomeTV app - Open the Philips WelcomeHomeTV app on your Android TV - Fill in the “E-mail” and “Password” and the region of your account (Philips WelcomeHome) and click on “LOGIN” WelcomeEye / Link / V1...
- Page 33 (Example: “Doorbell is ringing”) D - Displaying the Philips WelcomeEye Link video stream on your Android TV when someone rings the bell - If you want to display the video stream of your Philips WelcomeEye Link videophone whenever someone presses the call button, you need to create a scenario on your Philips WelcomeHome smartphone app.
-
Page 34: Technical Characteristics
5 - Name your scenario and choose in which room it will appear and press “Validez” (Confirm) E - Viewing your Philips WelcomeEye Link video stream using a voice assistant Step 1 Link your Philips WelcomeHome account directly from your voice assistant app. (Google Home example shown below). -
Page 35: Accessories
11. ACCESSORIES WelcomeBell 300 MP3 - (ref: 531014 WelcomeBell Colour - (ref: 531013) WelcomeBell Basic - (ref: 531012) WelcomeBell Plugin - (ref: 531015) 12. FAQ Problem Solution - Check that the intercom panel has power. The application cannot find the - Check that the WiFi router is turned on. -
Page 36: Technical Support - Warranty
Do not use any tool that can conduct voltage (wire brush, sharp tool, etc.) for cleaning. The receipt or invoice is proof of purchase date. Contacts and opening hours of our technical support centres are available if necessary on the website www.philips.com. Assistance is also available from our Chatbot. WelcomeEye / Link / V1... -
Page 37: Safety Measures
Important : veuillez conserver précieusement cette carte de garantie, ainsi que votre preuve d’achat. Philips and the Philips Shield Emblem are registered trademarks of Koninklijke Philips N.V. and are used under license. This product was manufactured and is sold by AVIDSEN SAS, the sole guarantor of the product. -
Page 38: Fcc/Ce Warning
- Never plug in or unplug electrical devices with wet hands. - Maintain a minimum distance around the device to ensure adequate ventilation. - Ventilation should not be impeded by covering the ventilation opening with objects such as a newspaper, tablecloth, curtain, etc. - Sources of naked flame, such as a lit candle, should not be placed on the device. - Page 39 WelcomeEye / Link / V1...
Need help?
Do you have a question about the WelcomeEye Link 531034 and is the answer not in the manual?
Questions and answers