Table of Contents
Advertisement
Quick Links
Download the app
& activate product
Warning notices: Before using this product, please read this manual carefully and keep it for future reference.
The design and specifications are subject to change without prior notice for product improvement. Consult
with your dealer or manufacturer for details.
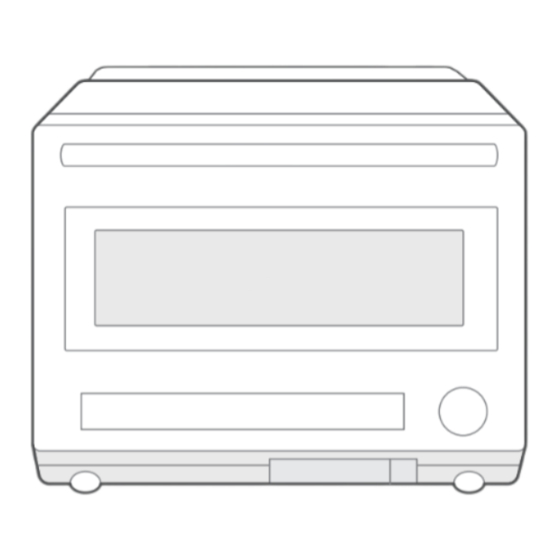
The diagram above is just for reference. Please take the appearance of the actual product as the standard.
MICROWAVE OVEN
USER MANUAL
TR923X7ZE-SS0D00
Advertisement
Table of Contents

Subscribe to Our Youtube Channel
Related Manuals for Midea TR923X7ZE-SS0D00


Summary of Contents for Midea TR923X7ZE-SS0D00
- Page 1 MICROWAVE OVEN USER MANUAL TR923X7ZE-SS0D00 Download the app & activate product Warning notices: Before using this product, please read this manual carefully and keep it for future reference. The design and specifications are subject to change without prior notice for product improvement. Consult with your dealer or manufacturer for details.
-
Page 2: Table Of Contents
THANK YOU LETTER Thank you for choosing Midea! Before using your new Midea product, please read this manual thoroughly to ensure that you know how to operate the features and functions that your new appliance o ers in a safe way. -
Page 3: Safety Instructions
SAFETY INSTRUCTIONS Intended Use The following safety guidelines are intended to prevent unforeseen risks or damage from unsafe or incorrect operation of the appliance. Please check the packaging and appliance on arrival to make sure everything is intact to ensure safe operation. If you find any damage, please contact the retailer or dealer. - Page 4 PRECAUTIONS TO AVOID POSSIBLE EXPOSURE TO EXCESSIVE MICROWAVE ENERGY a. Do not attempt to operate this oven with the door open since open door operation can result in harmful exposure to microwave energy. It is important not to defeat or tamper with the safety interlocks.
- Page 5 IMPORTANT SAFETY INSTRUCTIONS To reduce the risk of fire, electric shock, injury to persons or exposure to excessive microwave oven energy when using your appliance, follow basic precautions, including the following: WARNING • Read all instructions before using the appliance. •...
- Page 6 • This appliance should be serviced only by qualified service personnel. Contact nearest authorized service facility for examination, repair, or adjustment. • Do not cover or block any openings on the appliance. • Do not store this appliance outdoors. Do not use this product near water - for example, near a kitchen sink, in a wet basement, near a swimming pool, or similar location.
- Page 7 THIS COULD RESULT IN VERY HOT LIQUID SUDDEN- LY BOILING OVER WHEN THE CONTAINER IS DIS- TURBED OR A UTENSIL IS INSERTED INTO THE LIQUID. To reduce the risk of injury to persons: 1) Do not overheat the liquid. 2) Stir the liquid both before and halfway through heating it.
- Page 8 GROUNDING INSTALLATION This appliance must be grounded. In the event of an electrical short circuit, grounding reduces the risk of electric shock by providing an escape wire for the electric current. This appliance is equipped with a cord having a grounding wire with a grounding plug.
- Page 9 WARNING • Electric Shock Hazard: Improper use of the grounding can result in electric shock. Do not plug into an outlet until appliance is properly installed and grounded. • A short power-supply cord is provided to reduce the risks resulting from becoming entangled in or tripping over a longer cord.
- Page 10 5) Plug the microwave oven into a di erent outlet so that microwave oven and receiver are on di erent branch circuits. • Any changes or modifications not expressly approved by the party responsible for compliance could void the user's authority to operate the equipment. •...
- Page 11 This device complies with part 18 of the FCC Rules. • • This equipment complies with FCC radiation exposure limits set forth for an uncontrolled environment. This equip- ment should be installed and operated with minimum distance 20cm between the radiator & your body. •...
- Page 12 Materials you can use in microwave oven Utensils Remarks Follow manufacturer’s instructions. The bottom of browning Browning dish dish must be at least 3/16 inch (5mm) above the turntable. Incorrect usage may cause the turntable to break. Microwave-safe only. Follow manufacturer's instructions. Do Dinnerware not use cracked or chipped dishes.
-
Page 13: Specification
SPECIFICATION Model TR923X7ZE-SS0D00 Rated Voltage/Frequency 120VAC 60Hz Microwave Input 1200 W Microwave Output 900 W Combi. 1500 W Bake 1500 W Steam 1500 W Air fry 1500 W 2ADQOMWB-SWB01 Contain FCC ID Contain IC 12575A-WB01... -
Page 14: Product Overview
PRODUCT OVERVIEW NAMES OF OVEN PARTS AND ACCESSORIES In case of any di erences between the appliance and the pictures in this manual, the product shall prevail. Remove the oven and all materials from the carton and oven cavity. Your oven comes with the following accessories: Handle Control panel Knob(turn/press) -
Page 15: Cleaning And Care
CLEANING AND CARE Water Box Adding water Take Out: Hold the water box and pull straight toward you. Method 1 Method 2 Uncover the rubber lid, fill with purified Uncover the water lid to clean or remove water, cover the rubber lid and ensure the remaining water. -
Page 16: Product Installation
PRODUCT INSTALLATION Countertop Installation Remove all packing material and accessories. Examine the oven for any damage such as dents or broken door. Do not install if oven is damaged. Cabinet: Remove any protective film found on the microwave oven cabinet surface. Do not remove the Waveguide cover that is attached to the oven cavity to protect the magnetron. -
Page 17: Operation
OPERATION Control Panel Confirm/Start/ Unlock Bake Air Fry Steam +30Sec Microwave Combi. Stop/Cancel/ Auto Menu Air fry+Steam Press 3 seconds Clock 3 Sec. to connect wireless network Screen Display Guide : Indicates wireless connectivity status. PREHEAT: Illuminates when the oven is preheating. CLEAN: When lit up, indicates a reminder to run the Auto Menu 30 “Evaporating Flume Cleaning”. -
Page 18: Standby Mode
OPERATION Standby Mode (1) Upon plugging the microwave oven into an outlet, the screen will display “00:00”, accompanied by a sound signal. (2) "0" on the display indicates the appliances is in standby mode. If there is no activity within 1 minute, the screen will turn o . (3) To enter power-saving mode while in standby mode, press the “... -
Page 19: Air Fry With Preheat
OPERATION (1) In standby mode, press “ ” once to switch to microwave function. The screen will display default settings: 100% power and 30 seconds settings. (2) Turn the knob to set the power level, “10%, 30%, 50%, 80%, and 100%” are available. (3) Press “... -
Page 20: Combination With Preheat
OPERATION 6. Combination with Preheat (1) In standby mode, double-press “ ” to switch to combination cook with preheat function. The screen will display the default temperature of 425°F will display. (2) Turn the knob to set the temperature, 10 options are available, including 225°F, 250°F, 275°F, 300°F, 325°F, 350°F, 375°F, 400°F, 425°F, 450°F. -
Page 21: Bake With Preheat
OPERATION (4) Turn the knob to set the cooking time, the maximum value is 90 minutes. (5) Press “ ” to start cooking. Notes (1) After steam cooking has finished, remove any remaining water from the cavity and clean the door pane. (2) Empty the water box after each use of the steam cooking function. -
Page 22: Auto Menu
OPERATION 11. Auto Menu (1) In standby mode, press “ ” once and then the screen will display “01”. (2) Turn the knob to choose the menu you need. 32 auto menus are available. (3) Press “ ” to confirm. (4) Turn the knob to set the cooking time/the weight of the food. - Page 23 OPERATION Recommended Menu Display Settings Scenarios Preheat Combi.400°F+ Utensil: Baking tray, Grill rack 72 oz Roast Chicken 24-36 mins Combi.400°F+ Position: Lower 24-36 mins Air fry 450°F Utensil: Baking tray Steamed Garlic 10 oz 12-18 mins Steam 250°F Position: Lower Shrimp Utensil: Grill rack, Baking tray 4 oz...
-
Page 24: More Functions
OPERATION Recommended Menu Display Settings Scenarios Utensil: Loaf pan Ferment 5s-12h Bake 75-115°F Position: Cavity floor Keep Warm 5s-2h Bake 140°F Cavity Deodorization 3-10mins Fan Cavity Cleaning 10-30 mins Steam 212°F Evaporating Flume 20 mins Cleaning Deep Cleaning 15-30 mins Steam 212°F Cavity Drying 5s-90 mins Air fry 266°F 12. - Page 25 OPERATION 12-2 Ferment (1) In standby mode, press “ ” once and then the screen will display “01”. (2) Turn the knob to choose the menu 26, “26” will display. (3) Press “ ” to confirm the menu. (4) Turn the knob to set the temperature. The range of temperature is 75°F-115°F. (5) Press “...
- Page 26 OPERATION Notes (1) Before operating, wipe the residue from the cavity and keep the water box full of water. (2) Remove any remaining stains with a damp cloth or rag. 12-5 Evaporating Flume Cleaning It is recommended to clean the evaporating flume once a month for optimal performance and cleanliness.
- Page 27 OPERATION 12-6 Deep Cleaning Preparation before Deep Cleaning Uncover the rubber lid, add a proper Put all utensils on the grill rack. amount of purified water, cover the (Nipples should be removed from baby rubber lid and ensure good fitting. feeding bottles) Deep Cleaning Operation Press “...
-
Page 28: Safety Lock
OPERATION 13. Safety Lock The Safety Lock function disables the oven controls to prevent children from accidentally turning the oven on. To activate the lock: The safety lock function is enabled by default when the power is turned on. Starting a cooking process activates the door lock, and if the door is not unlocked within 30 minutes after cooking. -
Page 29: Wireless Connection
OPERATION 14. Wireless Connection Connecting to Wireless Make sure your oven is in standby mode. (The oven is on but not currently cooking.) Press and hold “ ” for 3 seconds. The screen will display "AP" and “ ” will begin flashing slowly. This indicates the oven is searching for a wireless network. -
Page 30: Trouble Shooting
TROUBLE SHOOTING Check your problem by using the chart below and try the solutions for each problem. If the microwave oven still does not work properly, contact the nearest authorized service center Trouble Possible Cause Remedy a. Electrical cord for oven is a. - Page 31 TROUBLE SHOOTING Trouble Possible Cause Remedy This is under normal circum- The cooling fan has a delayed stances, there is no need for After cooking, there blowing function, which is used any special treatment and food is still the sound of for cooling and is not a can be retrieved normally.
- Page 32 TROUBLE SHOOTING Trouble Possible Cause Remedy The machine is in power-saving Open the oven door to mode activate it. There is no respond Replace with another socket. There is a problem with the after power wire is socket plugged in The plug is not inserted properly Insert the plug firmly.
- Page 33 TROUBLE SHOOTING Trouble Possible Cause Remedy Some of the water vapor in Wipe it with a dry cloth. There are water the oven will condense on the droplets inside the inner surface of the door. door. There is white The white powder belongs to Under normal circumstances, powder around the the scale of tap water and is...
- Page 35 说明书变更点记录 1. 童锁详细步骤+图示; 2. 待机模式解释,预热描述; 3. 增加水盒加水、加柠檬酸详细指引; 4. 增加消毒杀菌、清除水垢、腔体清洁贴心功能的详细操作示意; 5. 增加自动菜单推荐附件及层级; 6. 增加常见故障指引; 7. 增加了面板介绍、屏幕内symbol介绍。 2023.11.13 P13型号页电频电压更改前:120 V ~60Hz 变更后:120 VAC ~60Hz 2. P16安装图地面到放置的高度变更前:91.6cm 变更后:>36 in(91.4cm) 3.P05 警告语第7条变更为:HOT CONTENTS CAN CAUSE SEVERE BURNS. DO NOT ALLOW CHILDREN TO USE THE MICROWAVE. Use caution when removing hot items.
- Page 36 2024.6.3 1.P17控制面板丝印变更,对应的操作部分丝印也变更; 2.P17显示屏取消单位kg,g; 3.P18微波功能单位显示改成%,对应的操作显示也变更 4. P18取消按确认键快速启动功能。 5. 全文语句优化; 6. P14 加水,纯净水温度变更为104 °F...
Need help?
Do you have a question about the TR923X7ZE-SS0D00 and is the answer not in the manual?
Questions and answers